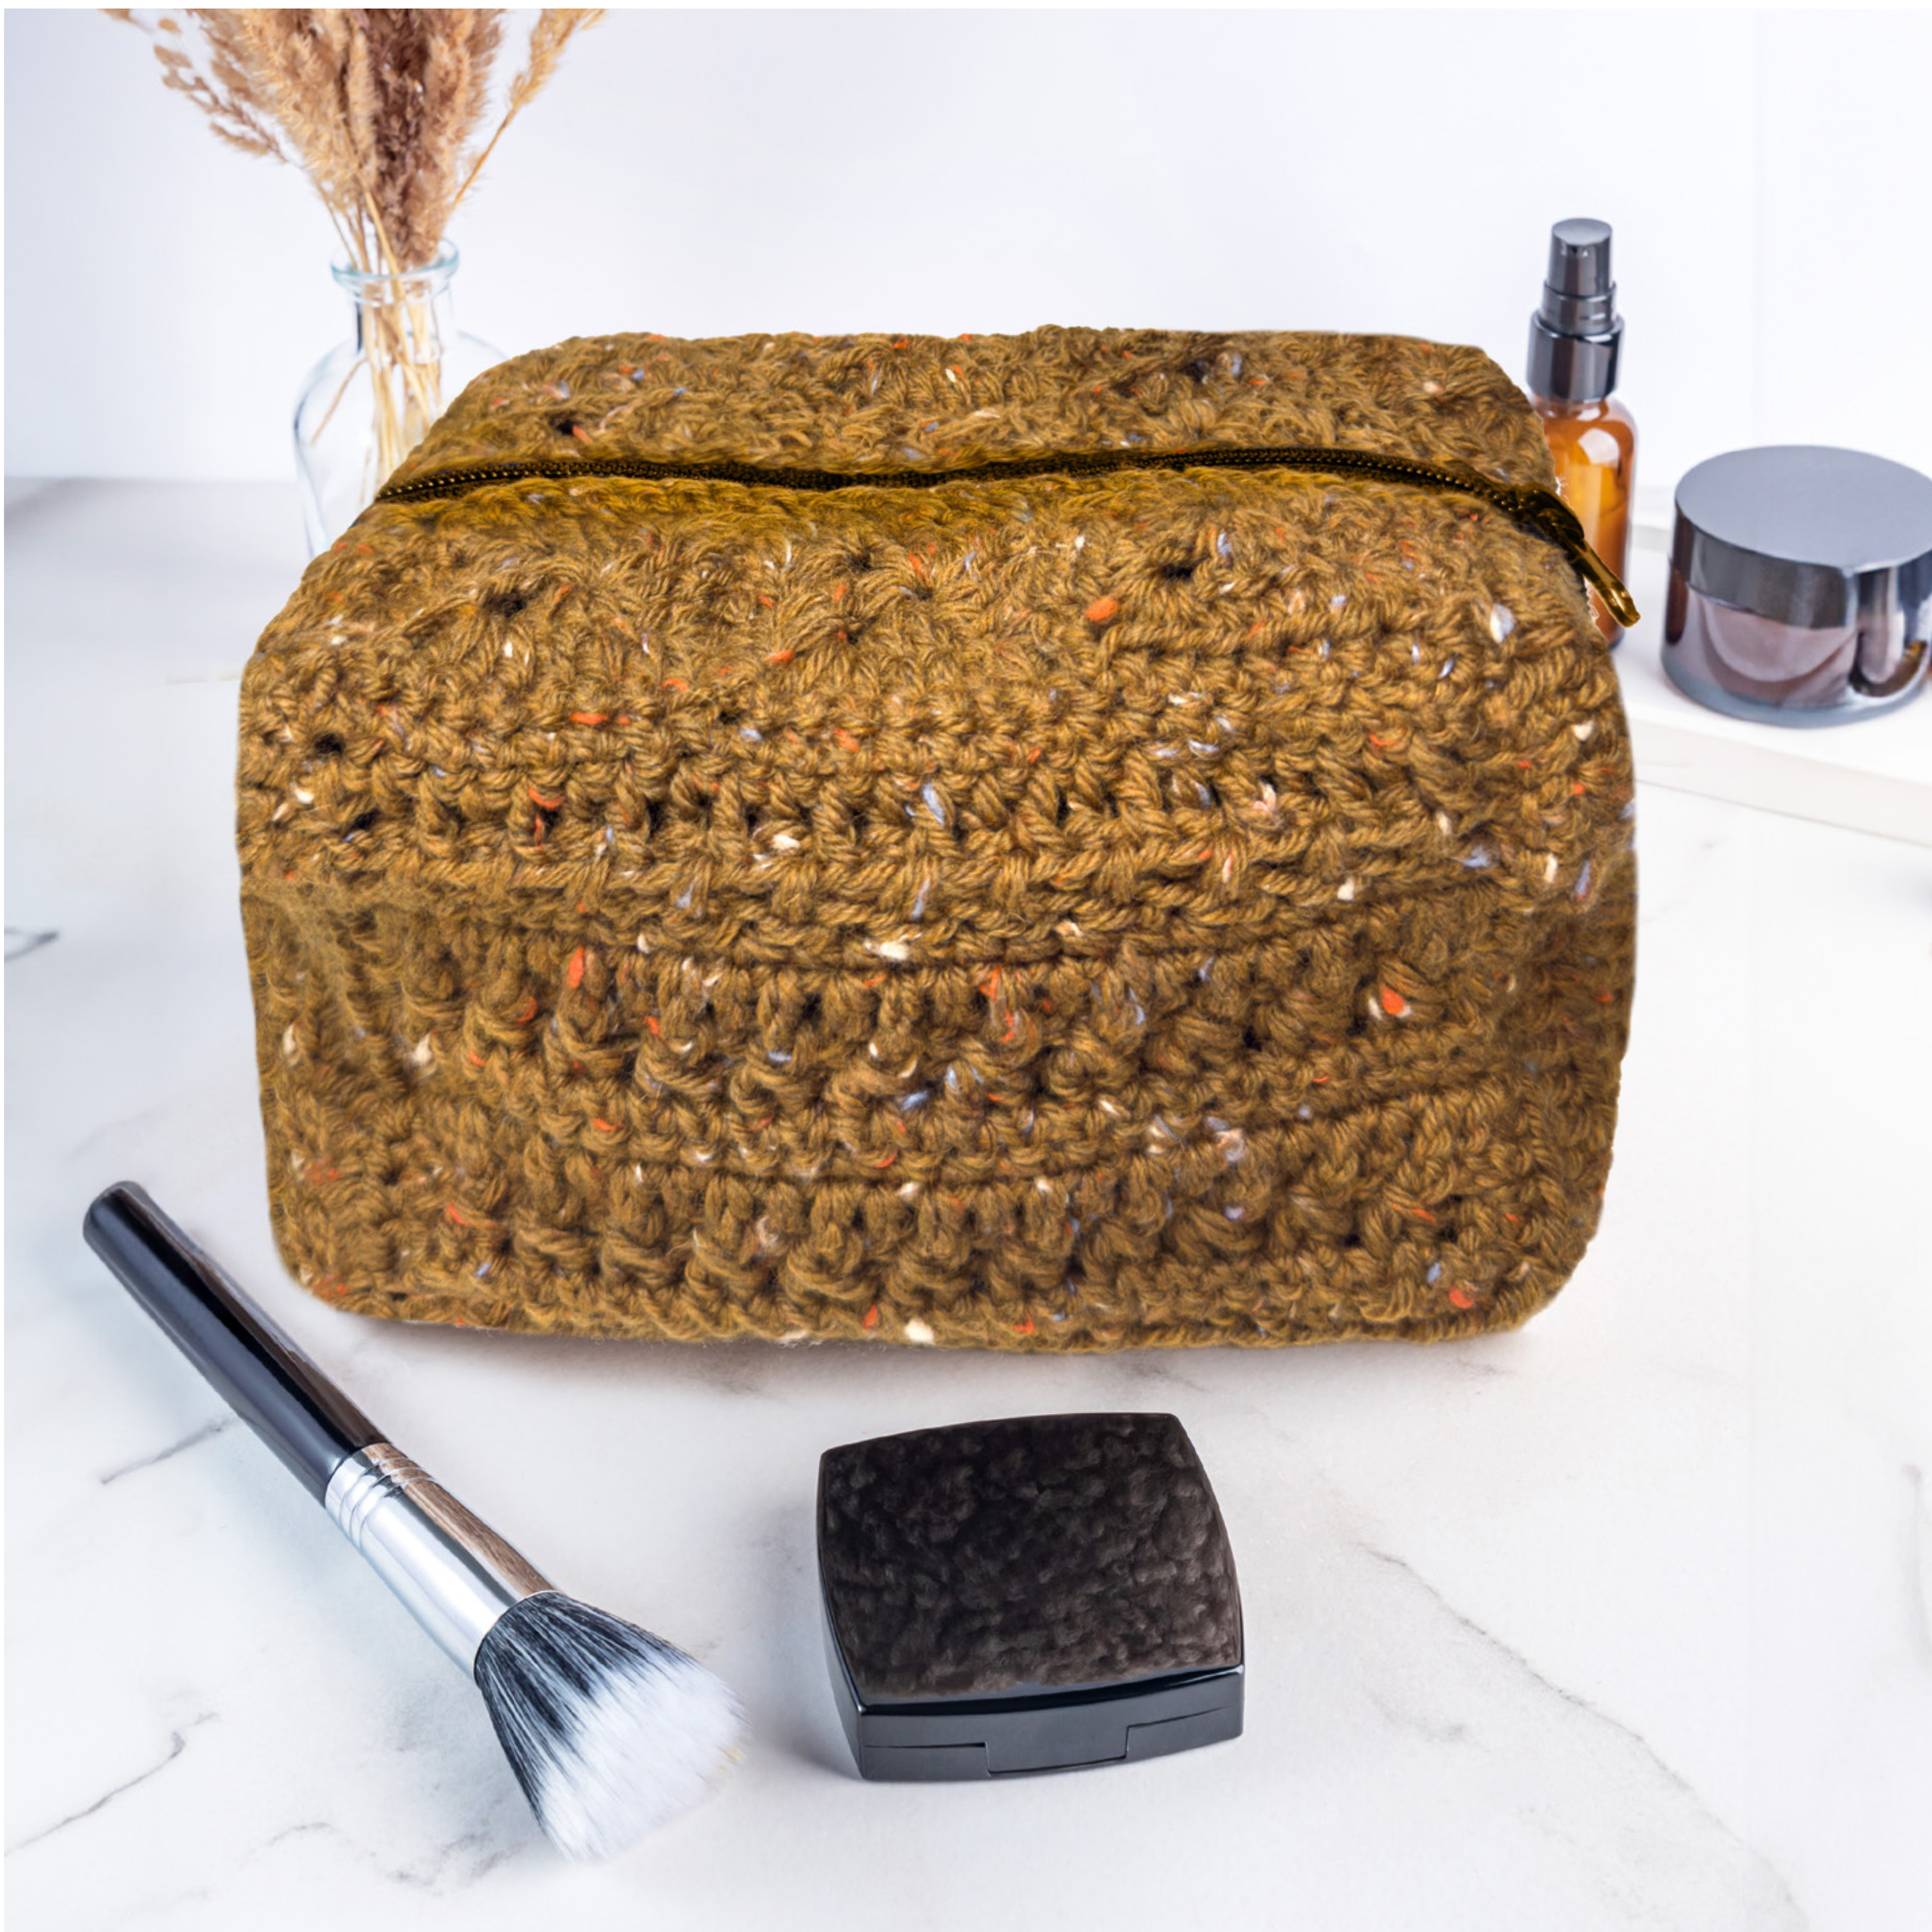
Project #3:
Please note that the yarn color shown in the instructional photos may vary from the color included in your box.
Materials:
- Two skeins of Woodland Whisper
- US size 8 (5mm) crochet hook
- Sewing needle
- Ruler
- Scissors
- Zipper
Stitches uses / abbreviations:
- Magic circle
- Ch – chain
- St(s) – stitch(s)
- Sc – single crochet
- Dc – double crochet
- Sl – slip stitch
- Fpdc - front post double crochet
In this project, we will make several parts separately and sew them together in the end.
Part 1 – little squares
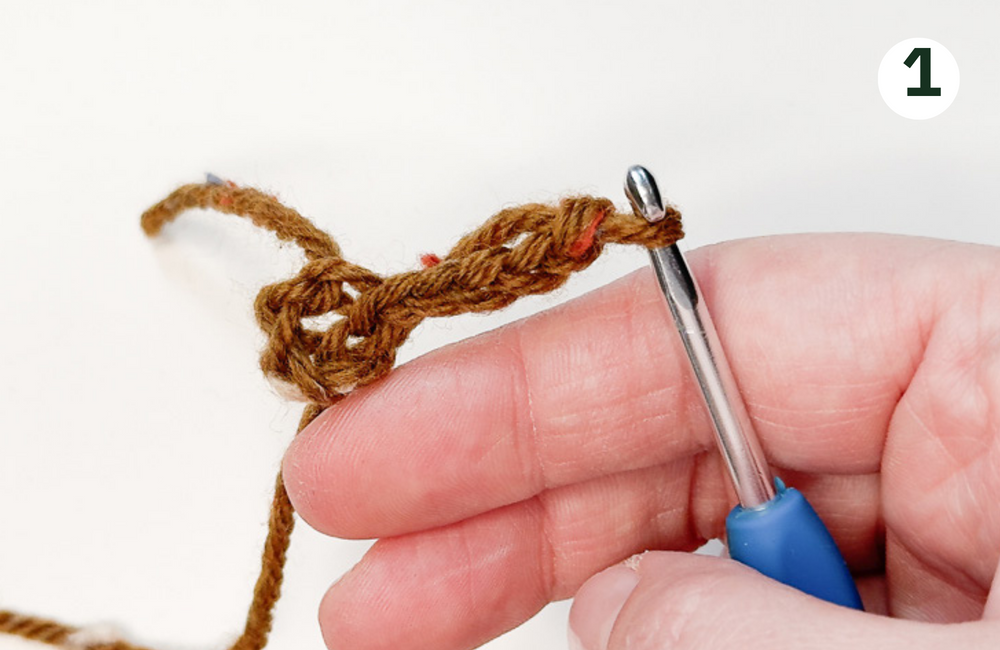
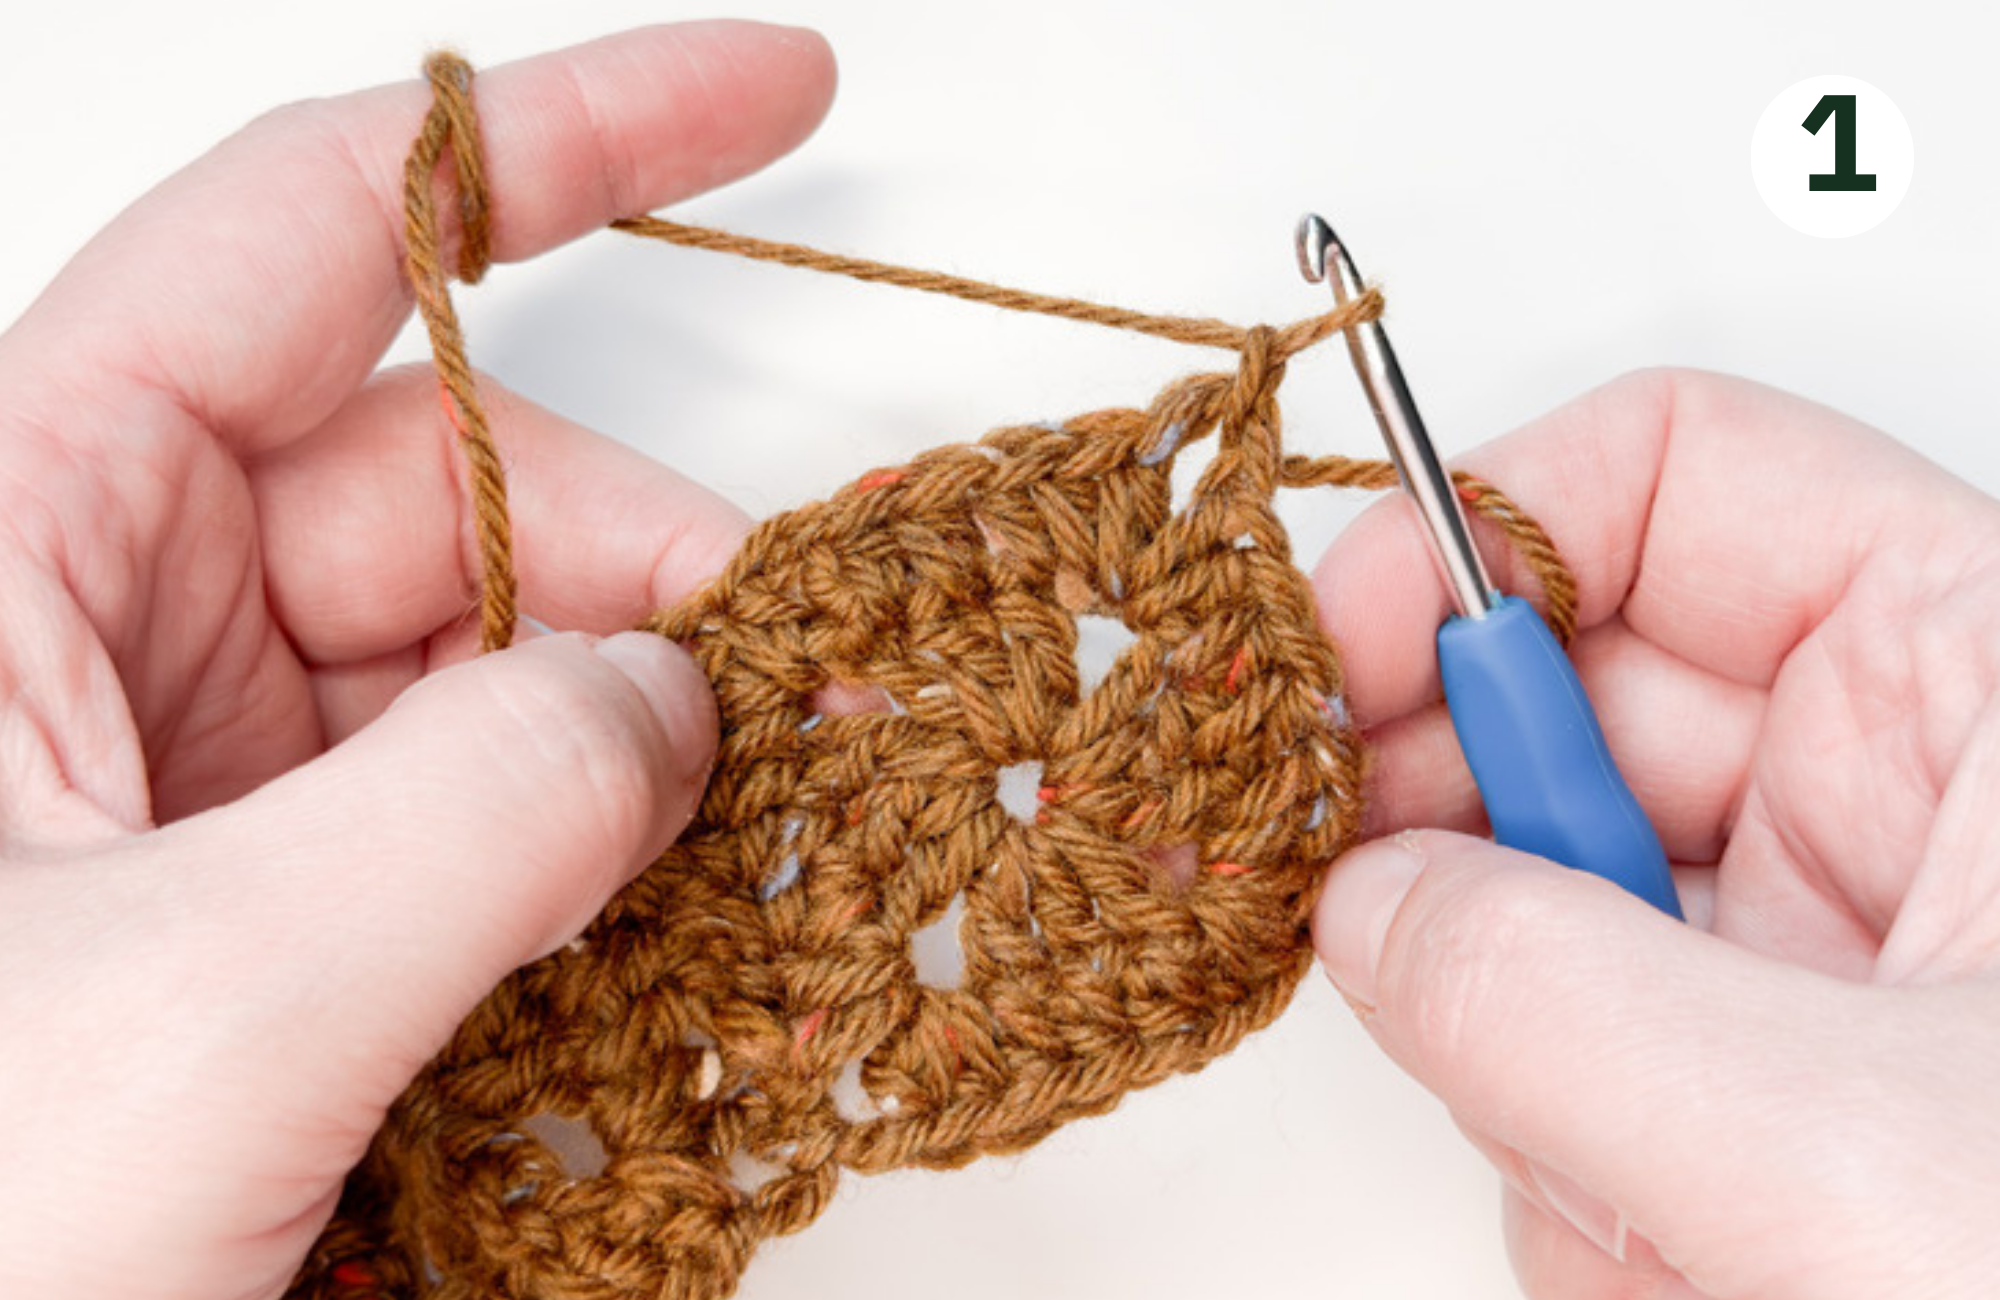
Make a loop and ch 4. Sl into the 1st st.
Round 1
Ch 5.
Dc 3, ch 2.
Dc 3, ch 2.
Dc 3, ch 2.
Dc 2 sl in the 3rd st on the initial chain. This chain counts as one of the dc’s of this round. By the end of this round, you will have 4 sets of dc columns.
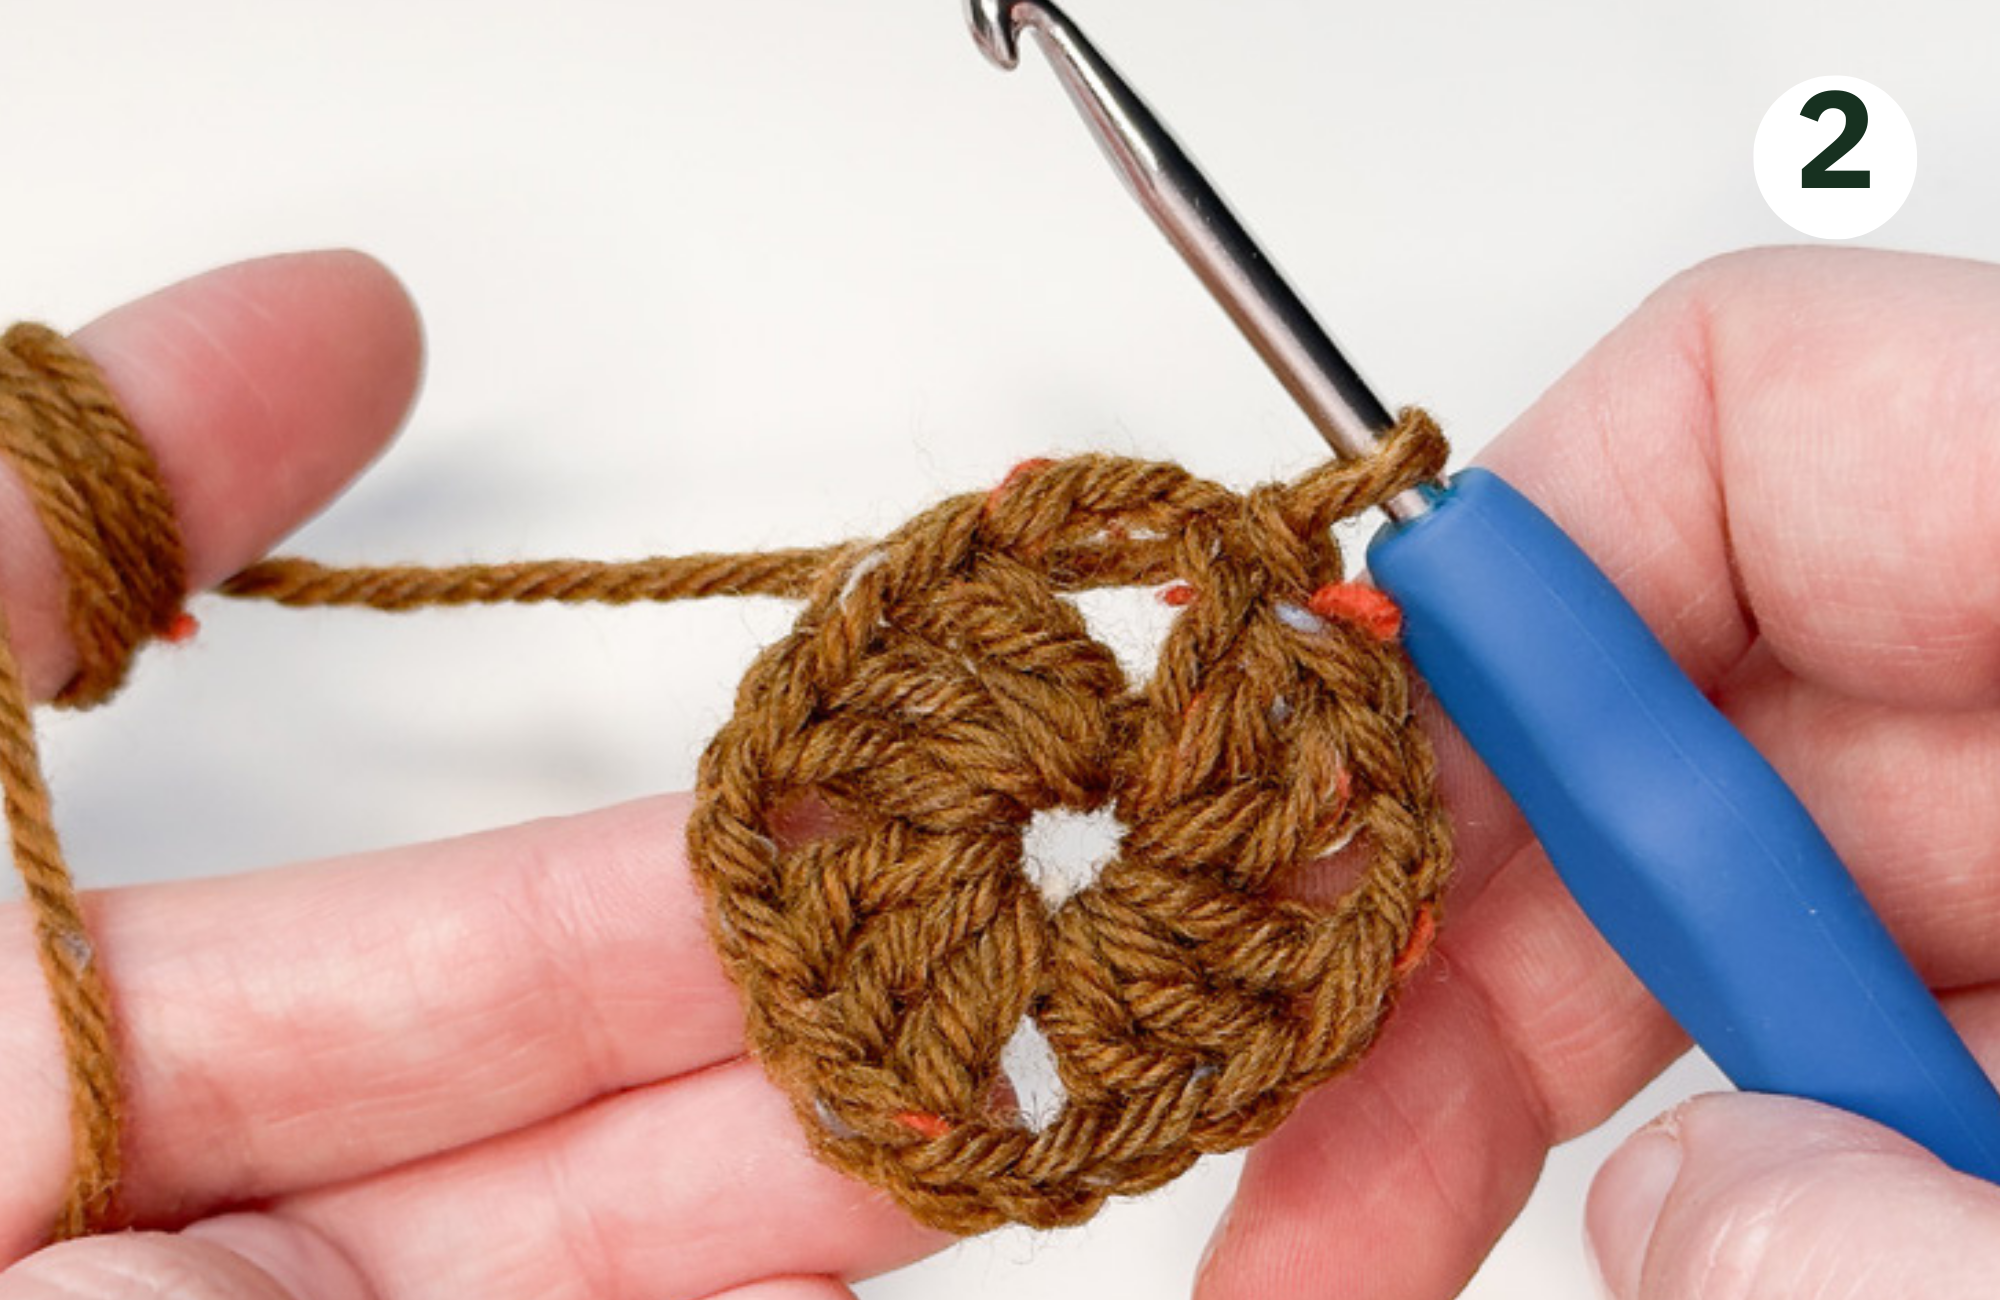
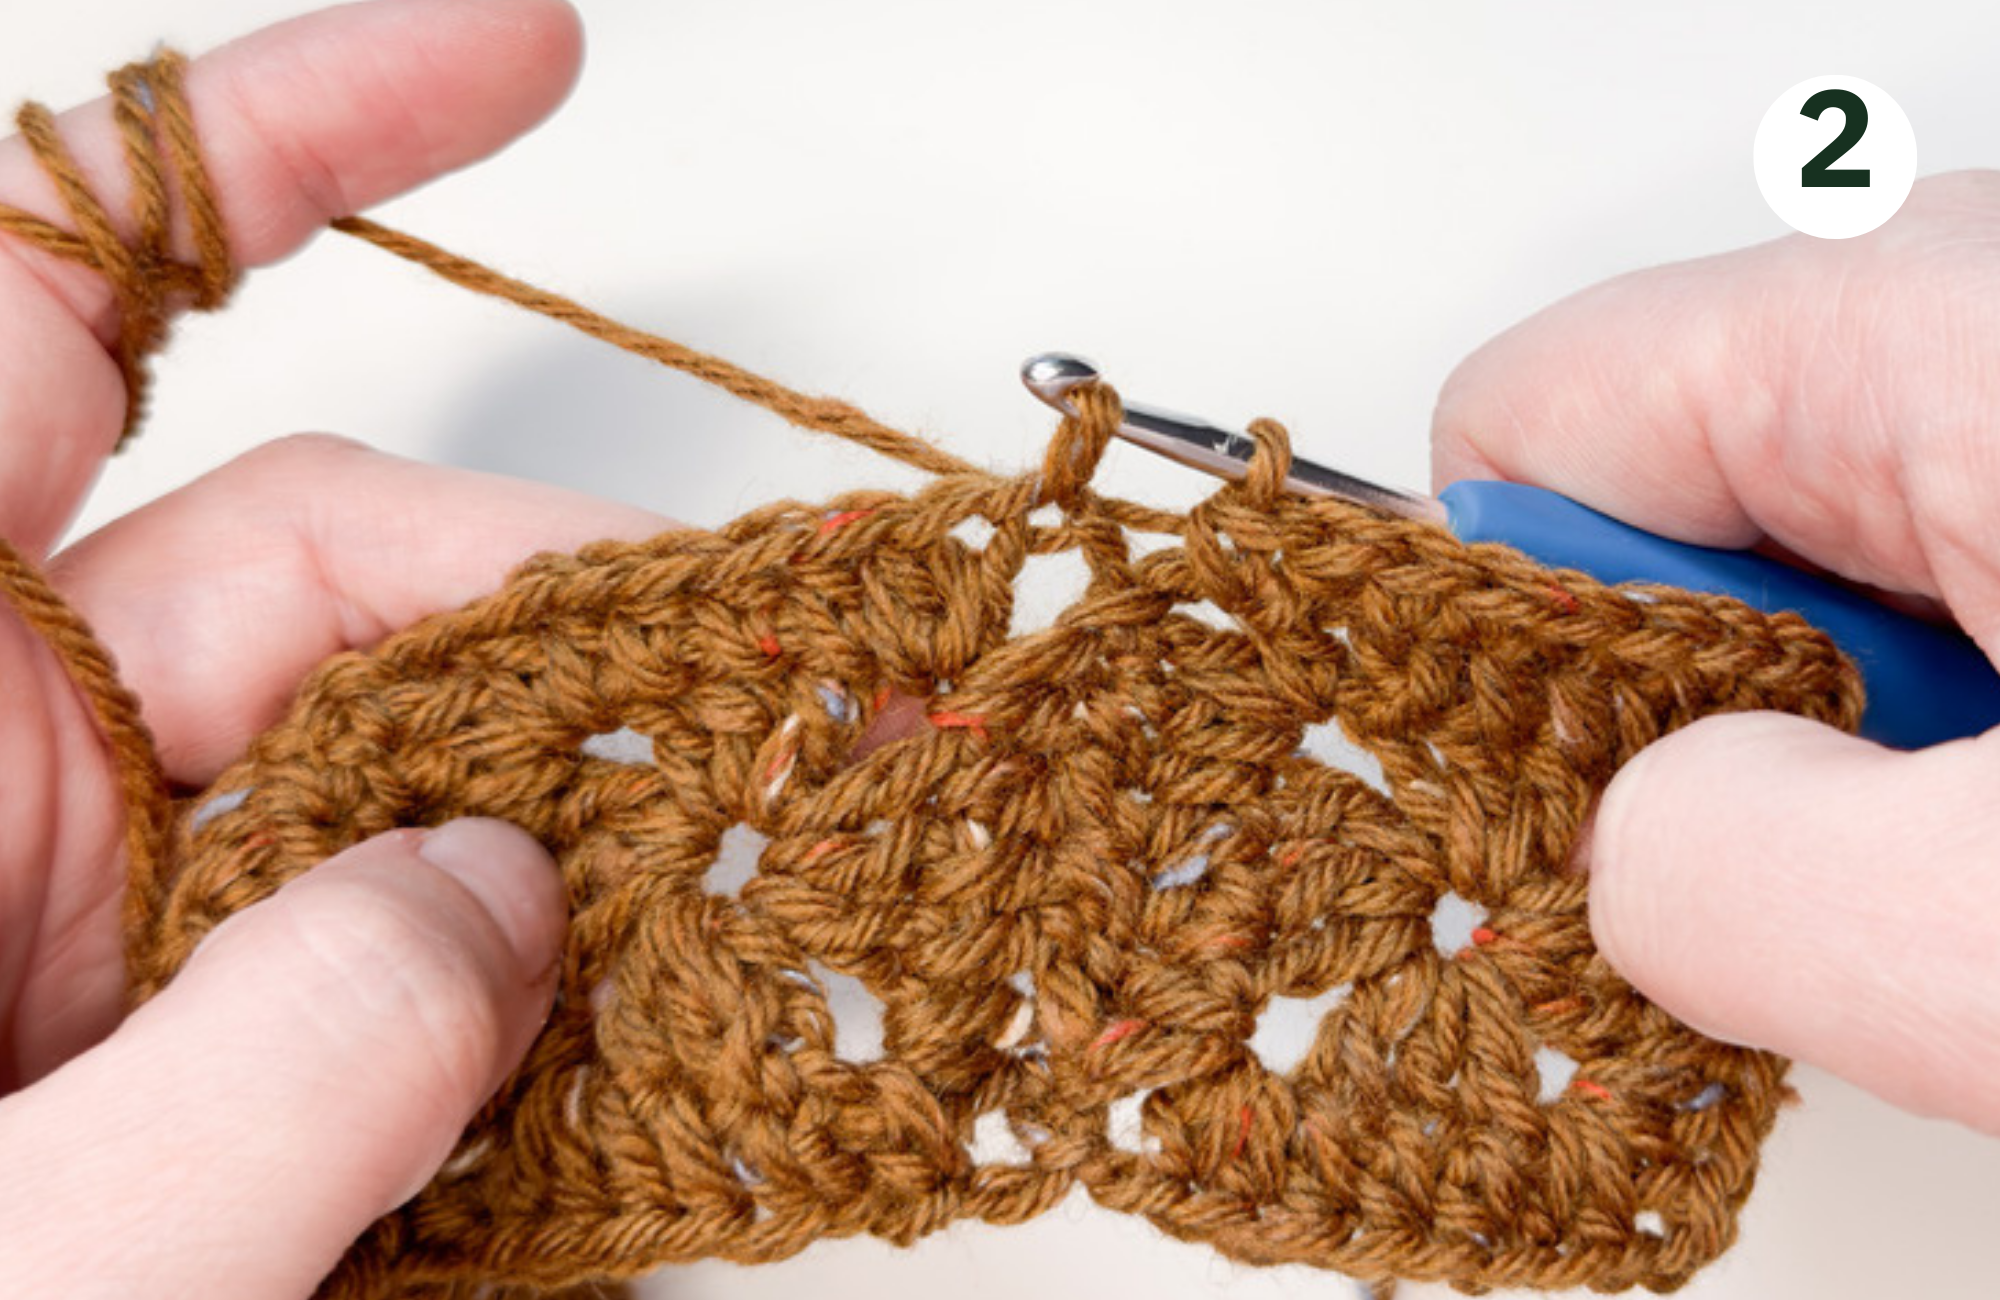
Round 2
Ch 2, hdc 1, ch 2, hdc 2 in the same hole to make a corner.
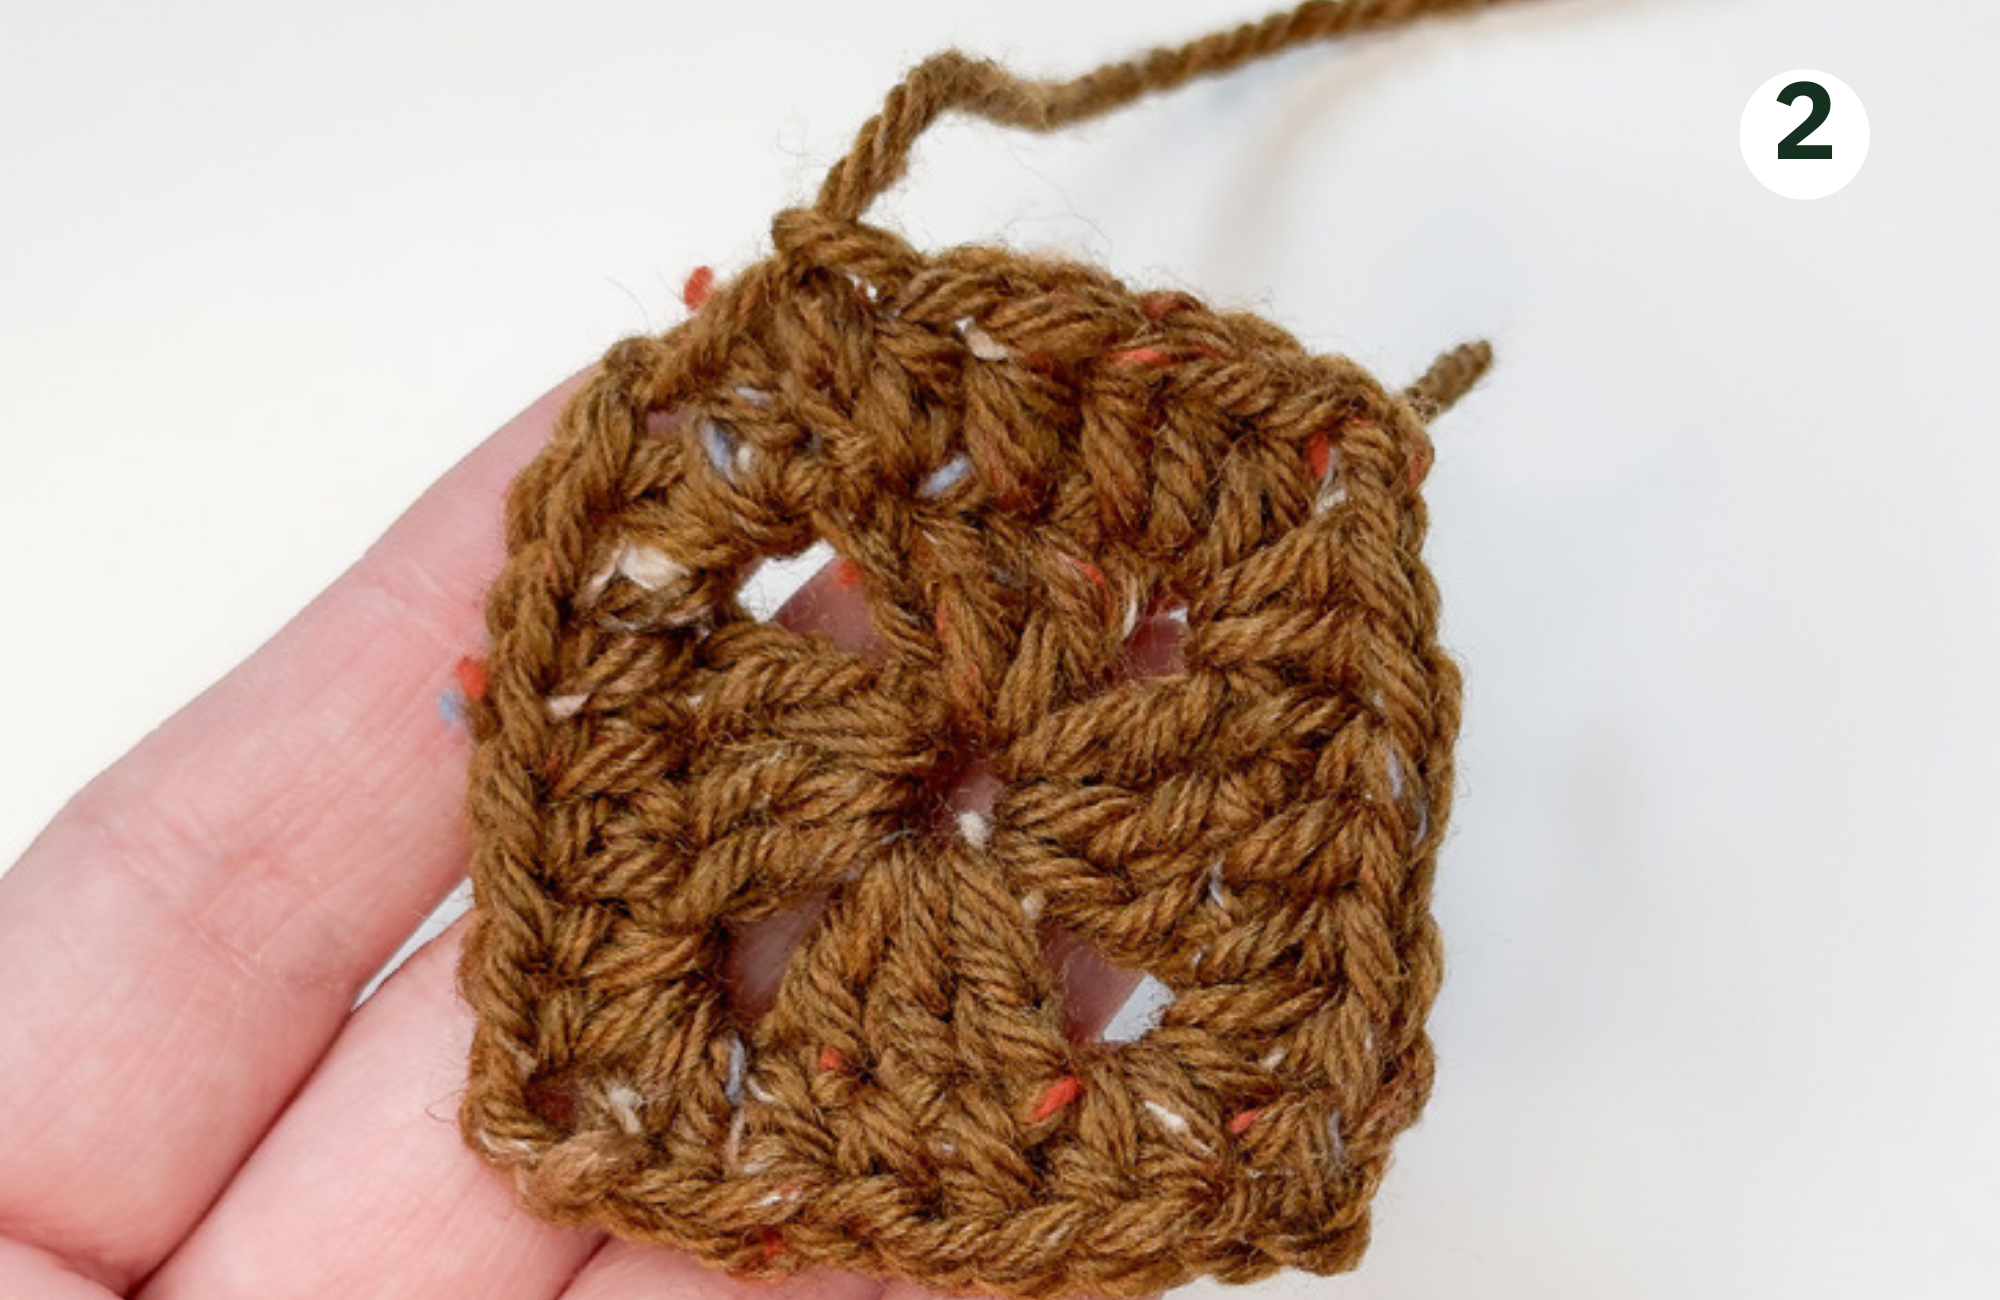
Hdc 3 in the next 3 st.
Hdc 2, ch 2, hdc 2 in the same hole to make a corner.
Hdc 3 in the next 3 sts.
Hdc 2, ch 2, hdc 2 in the same hole to make a corner.
Hdc 3 in the next 3 st.
Hdc 2, ch 2, hdc 2 in the same hole to make a corner.
Hdc 3 in the next 3 sts, sl in the 3rd st of the initial chain to complete this round.
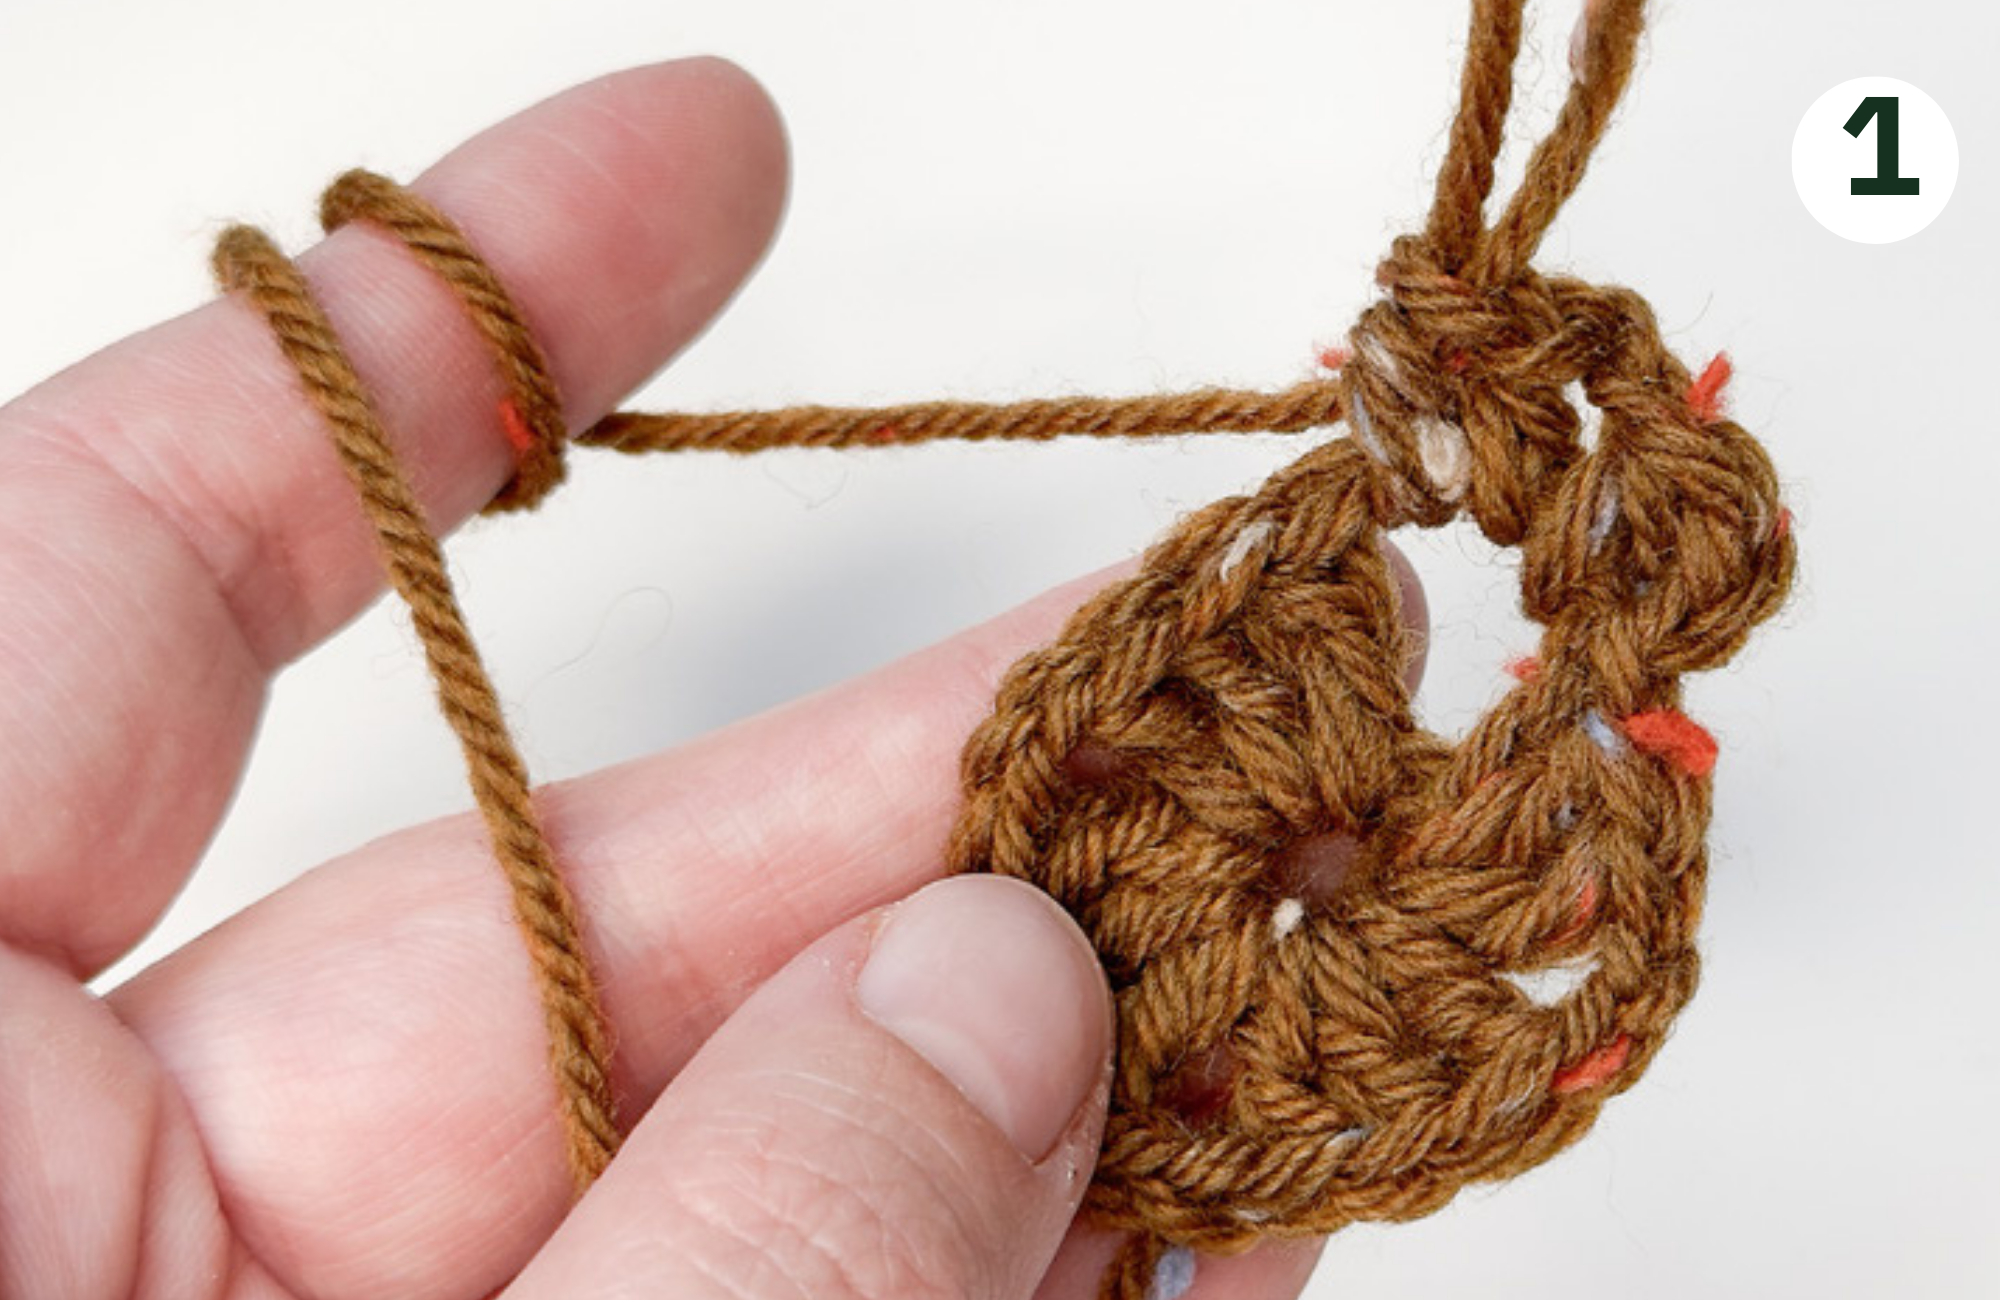
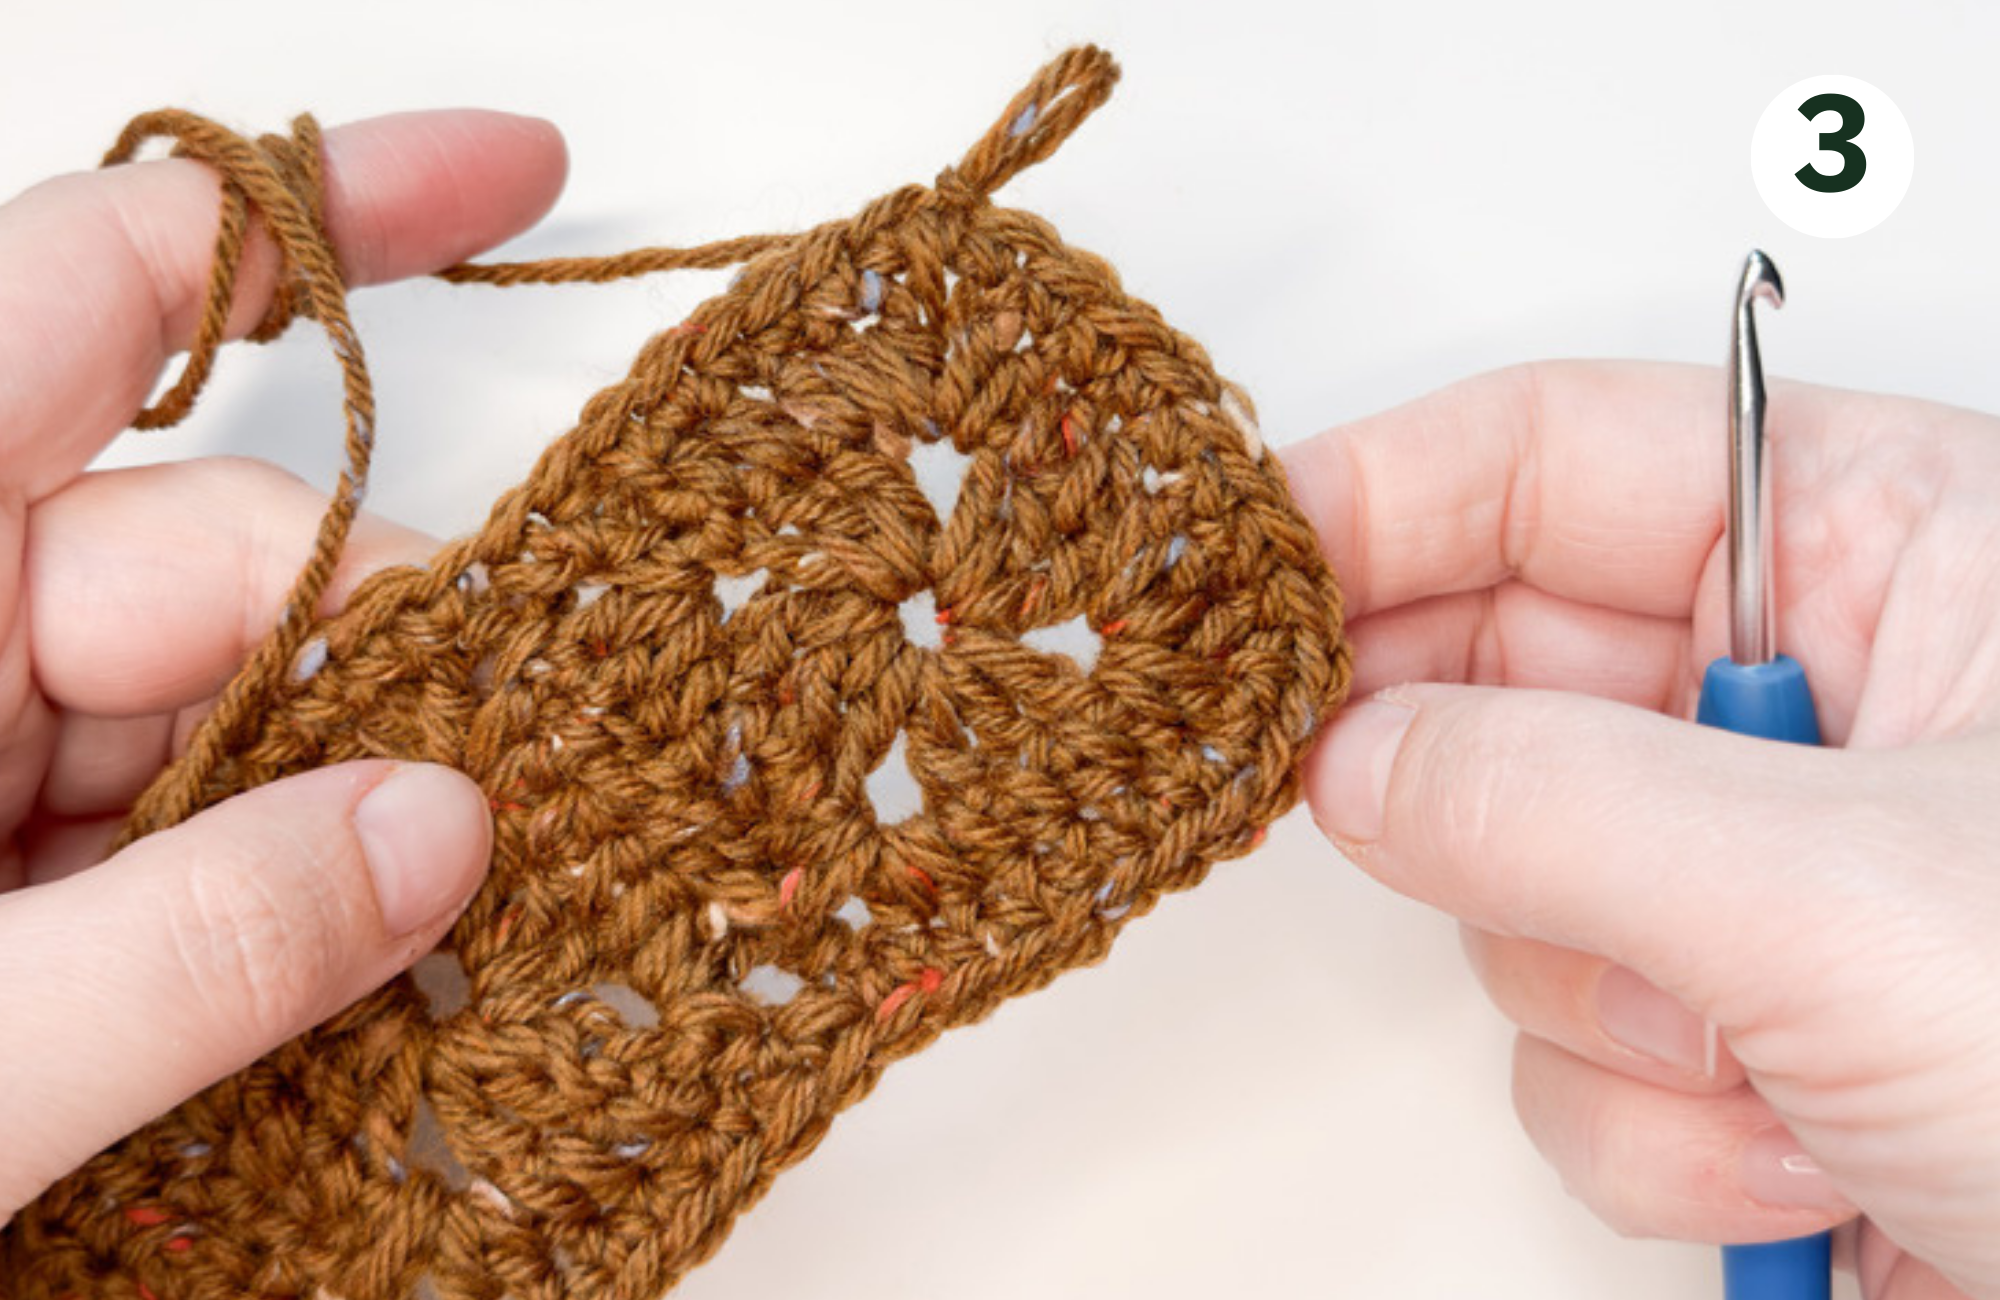
Cut the yarn, leave 10 inches of the yarn to secure it. Use needle and weave the thread in and out the stitches in different directions.
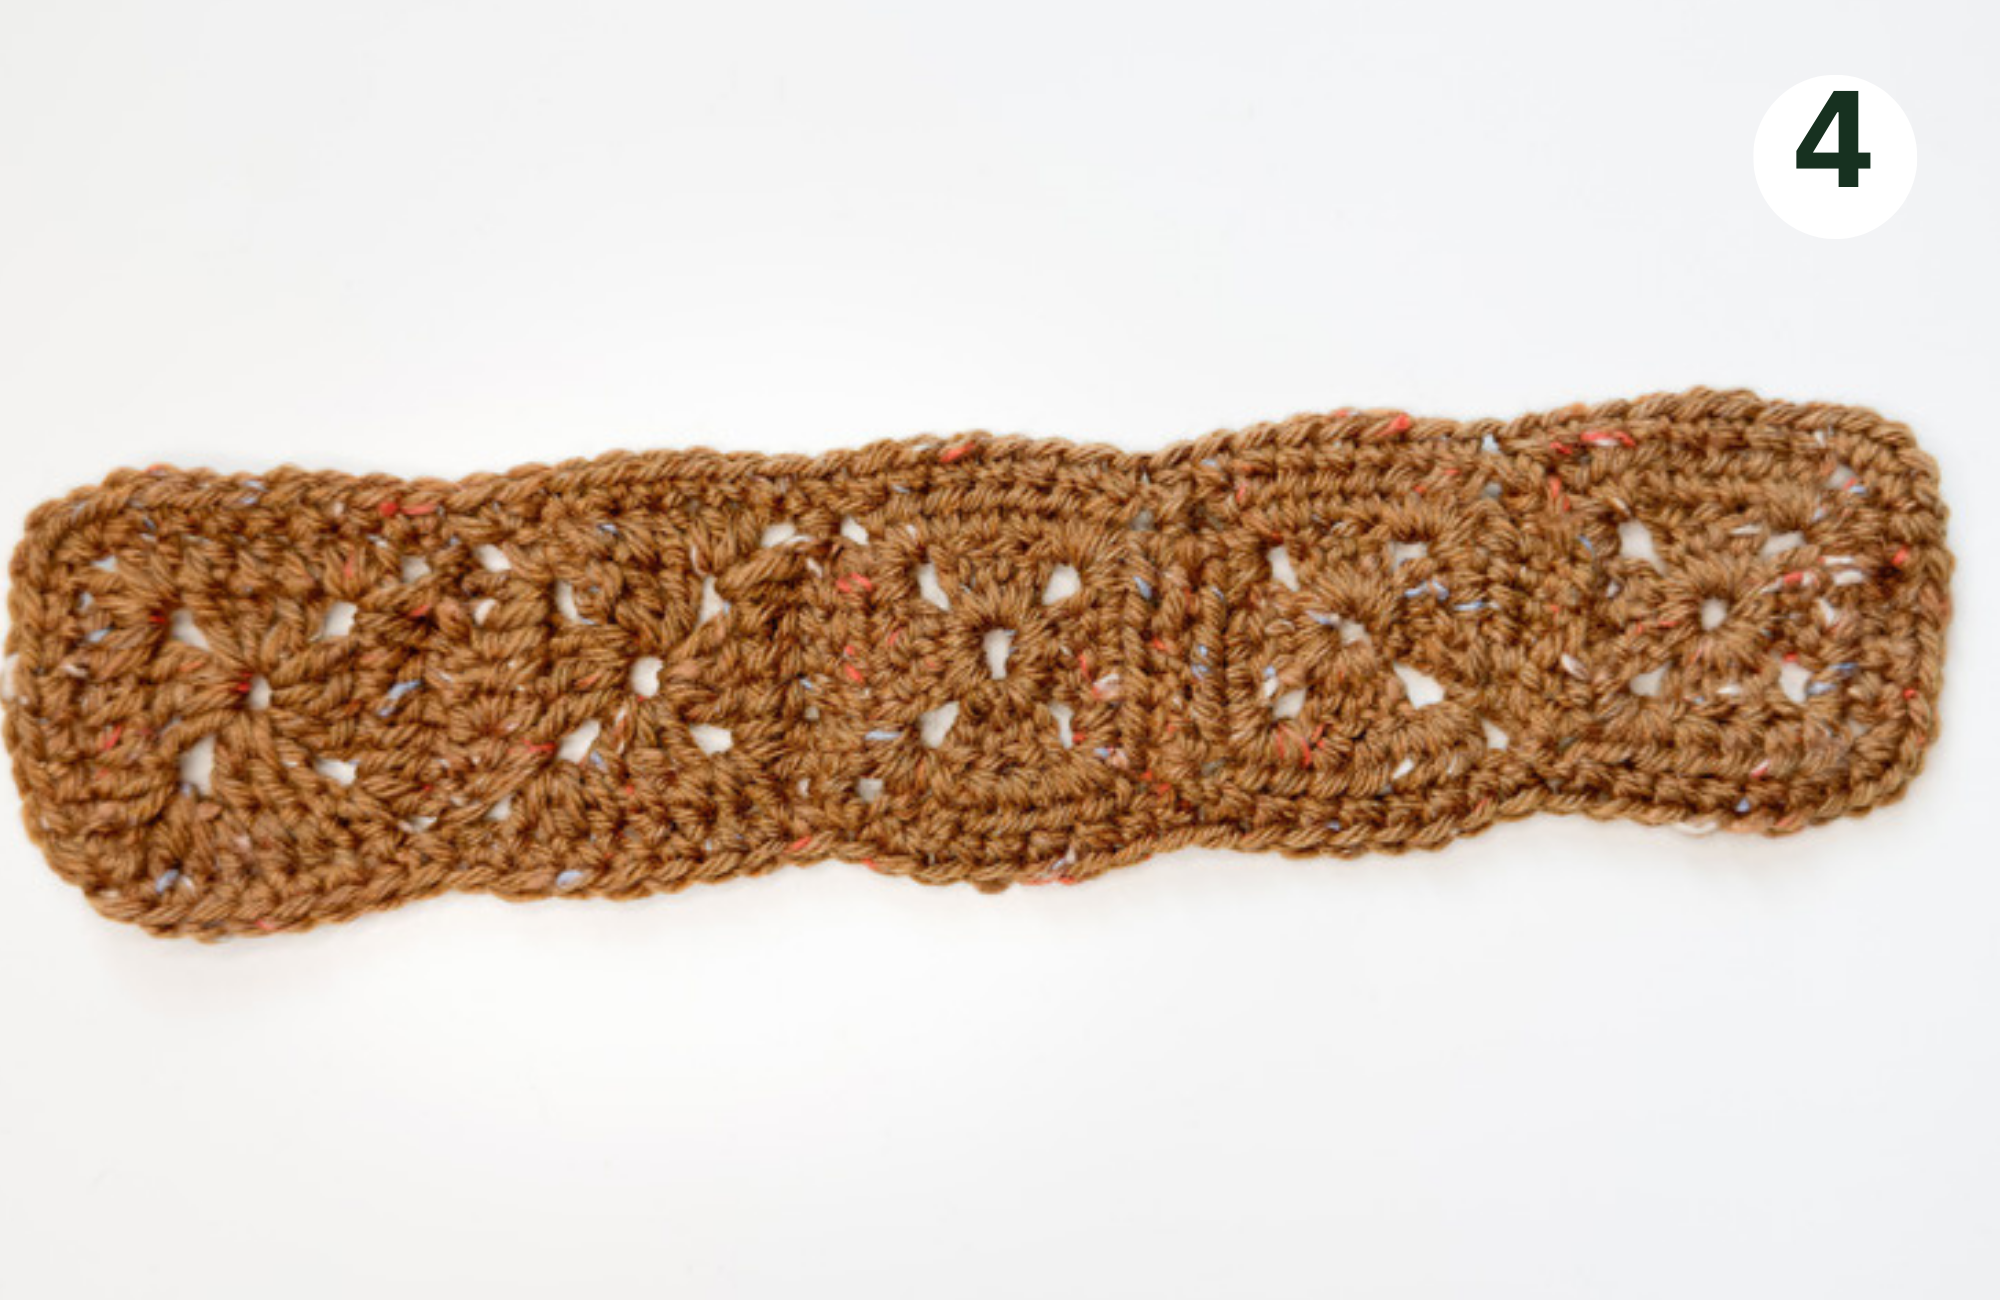
You have completed the small square. You need 10 small squares for this project. Use the same instructions and crochet 9 more little squares.
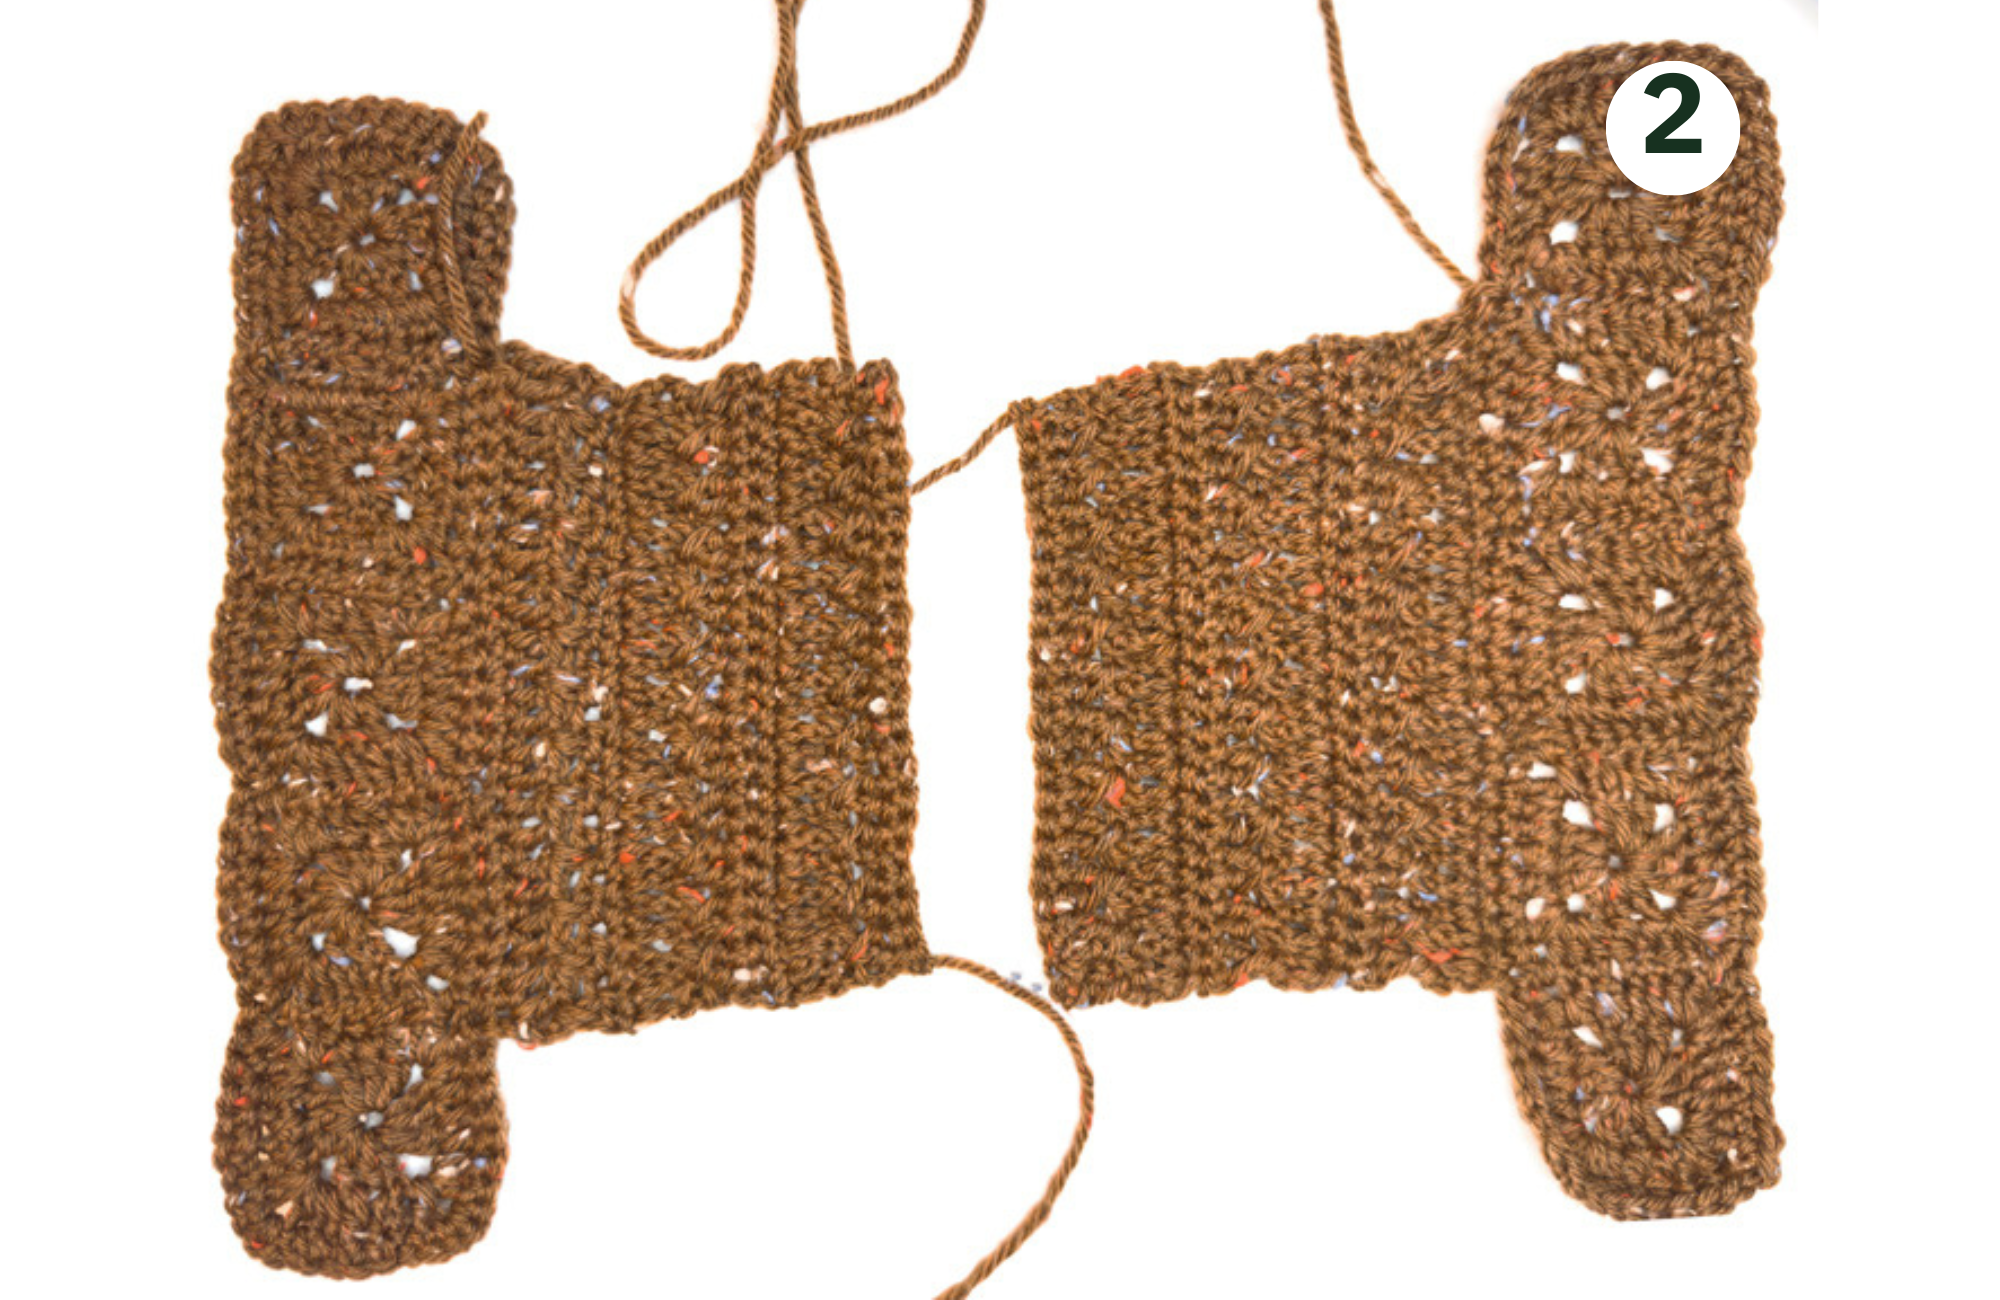
Part 2 – assembling little squares
You will need 5 little squares for one side of the project. Choose the back and front sides of the squares.
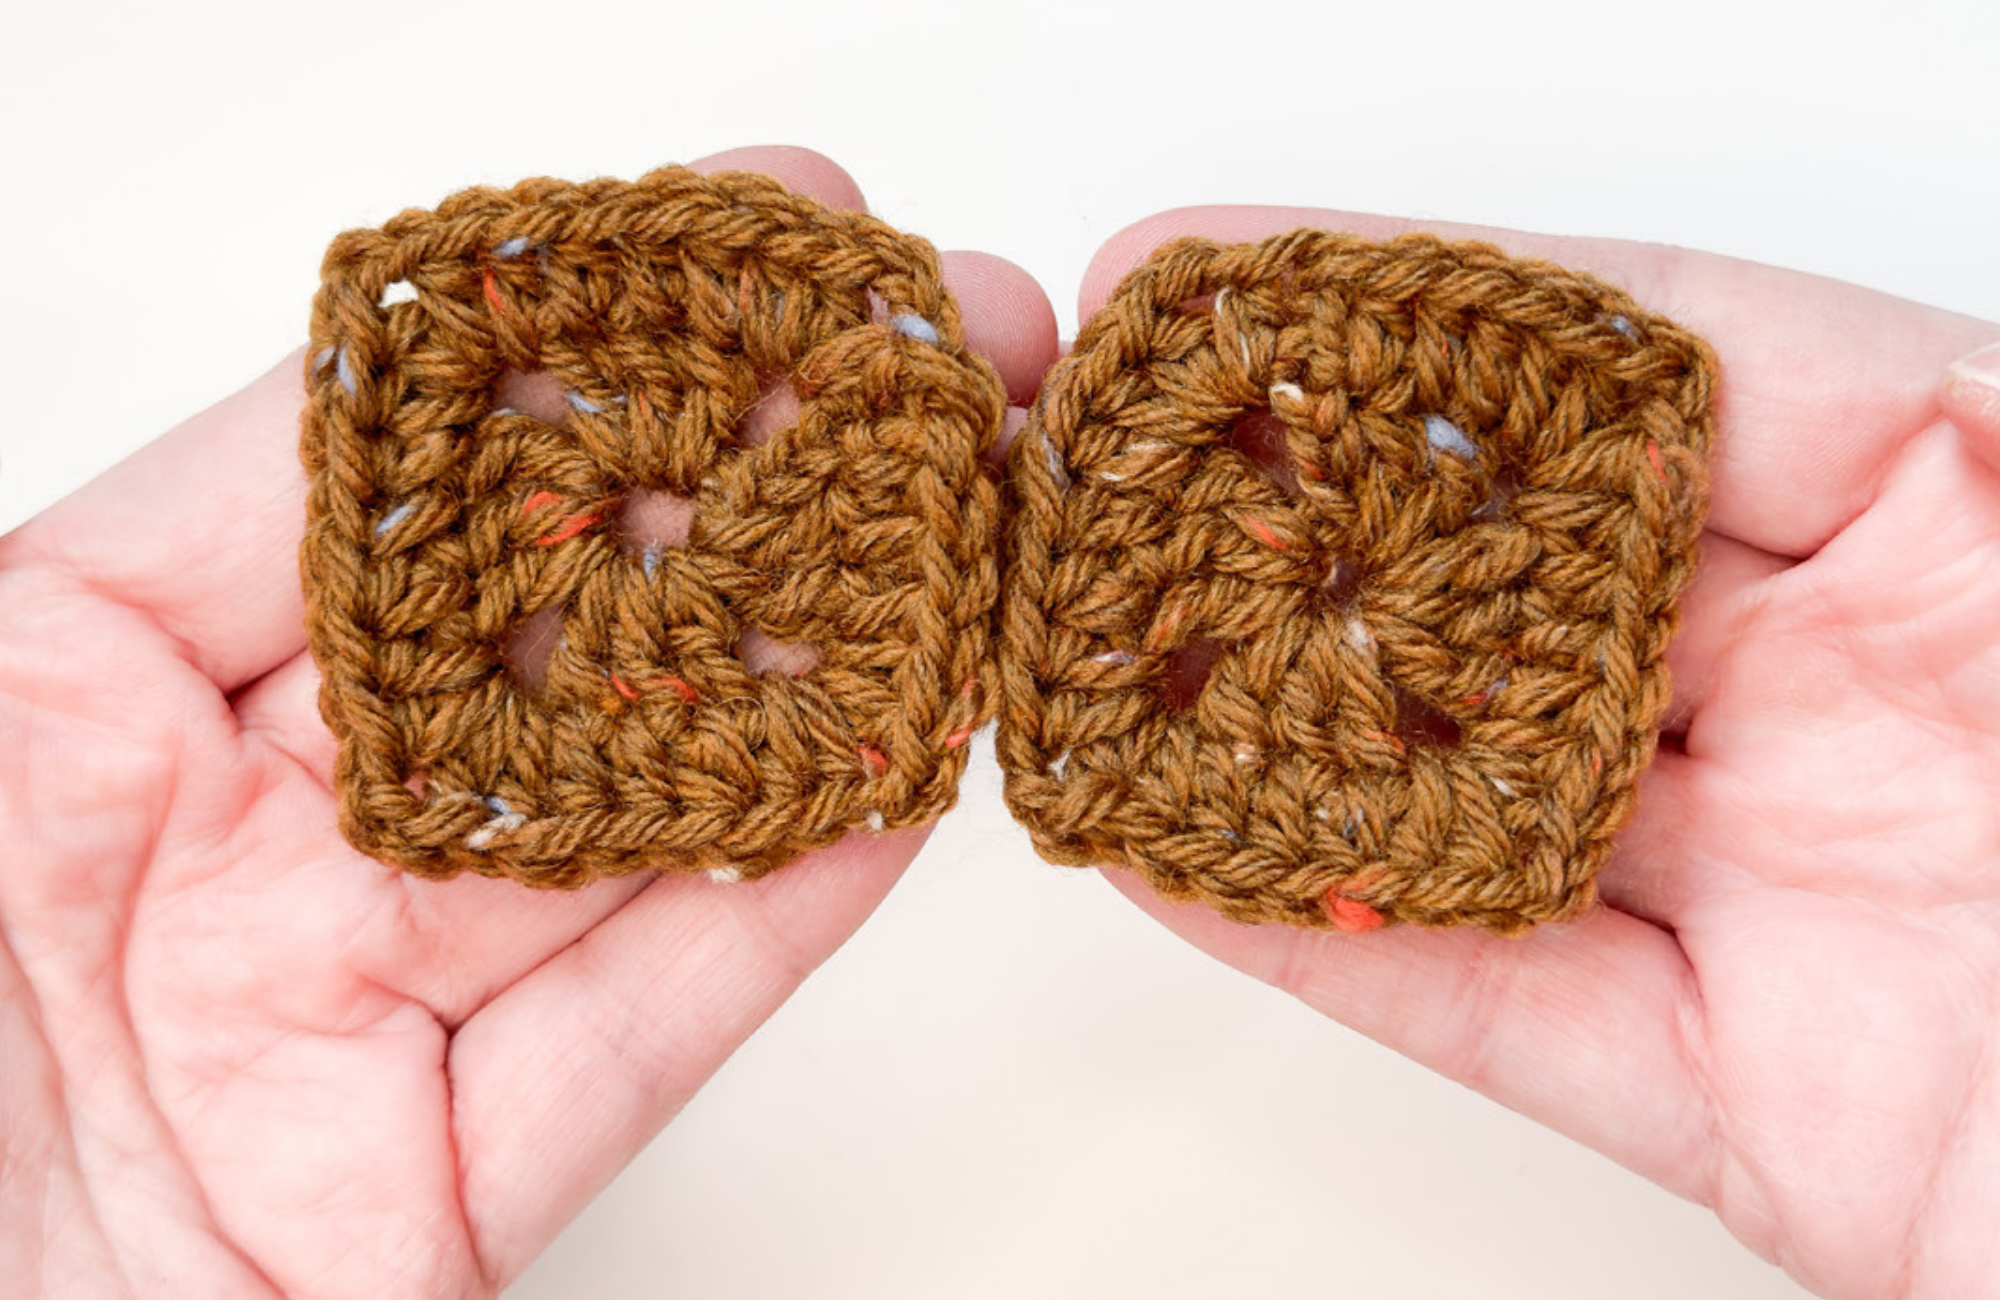
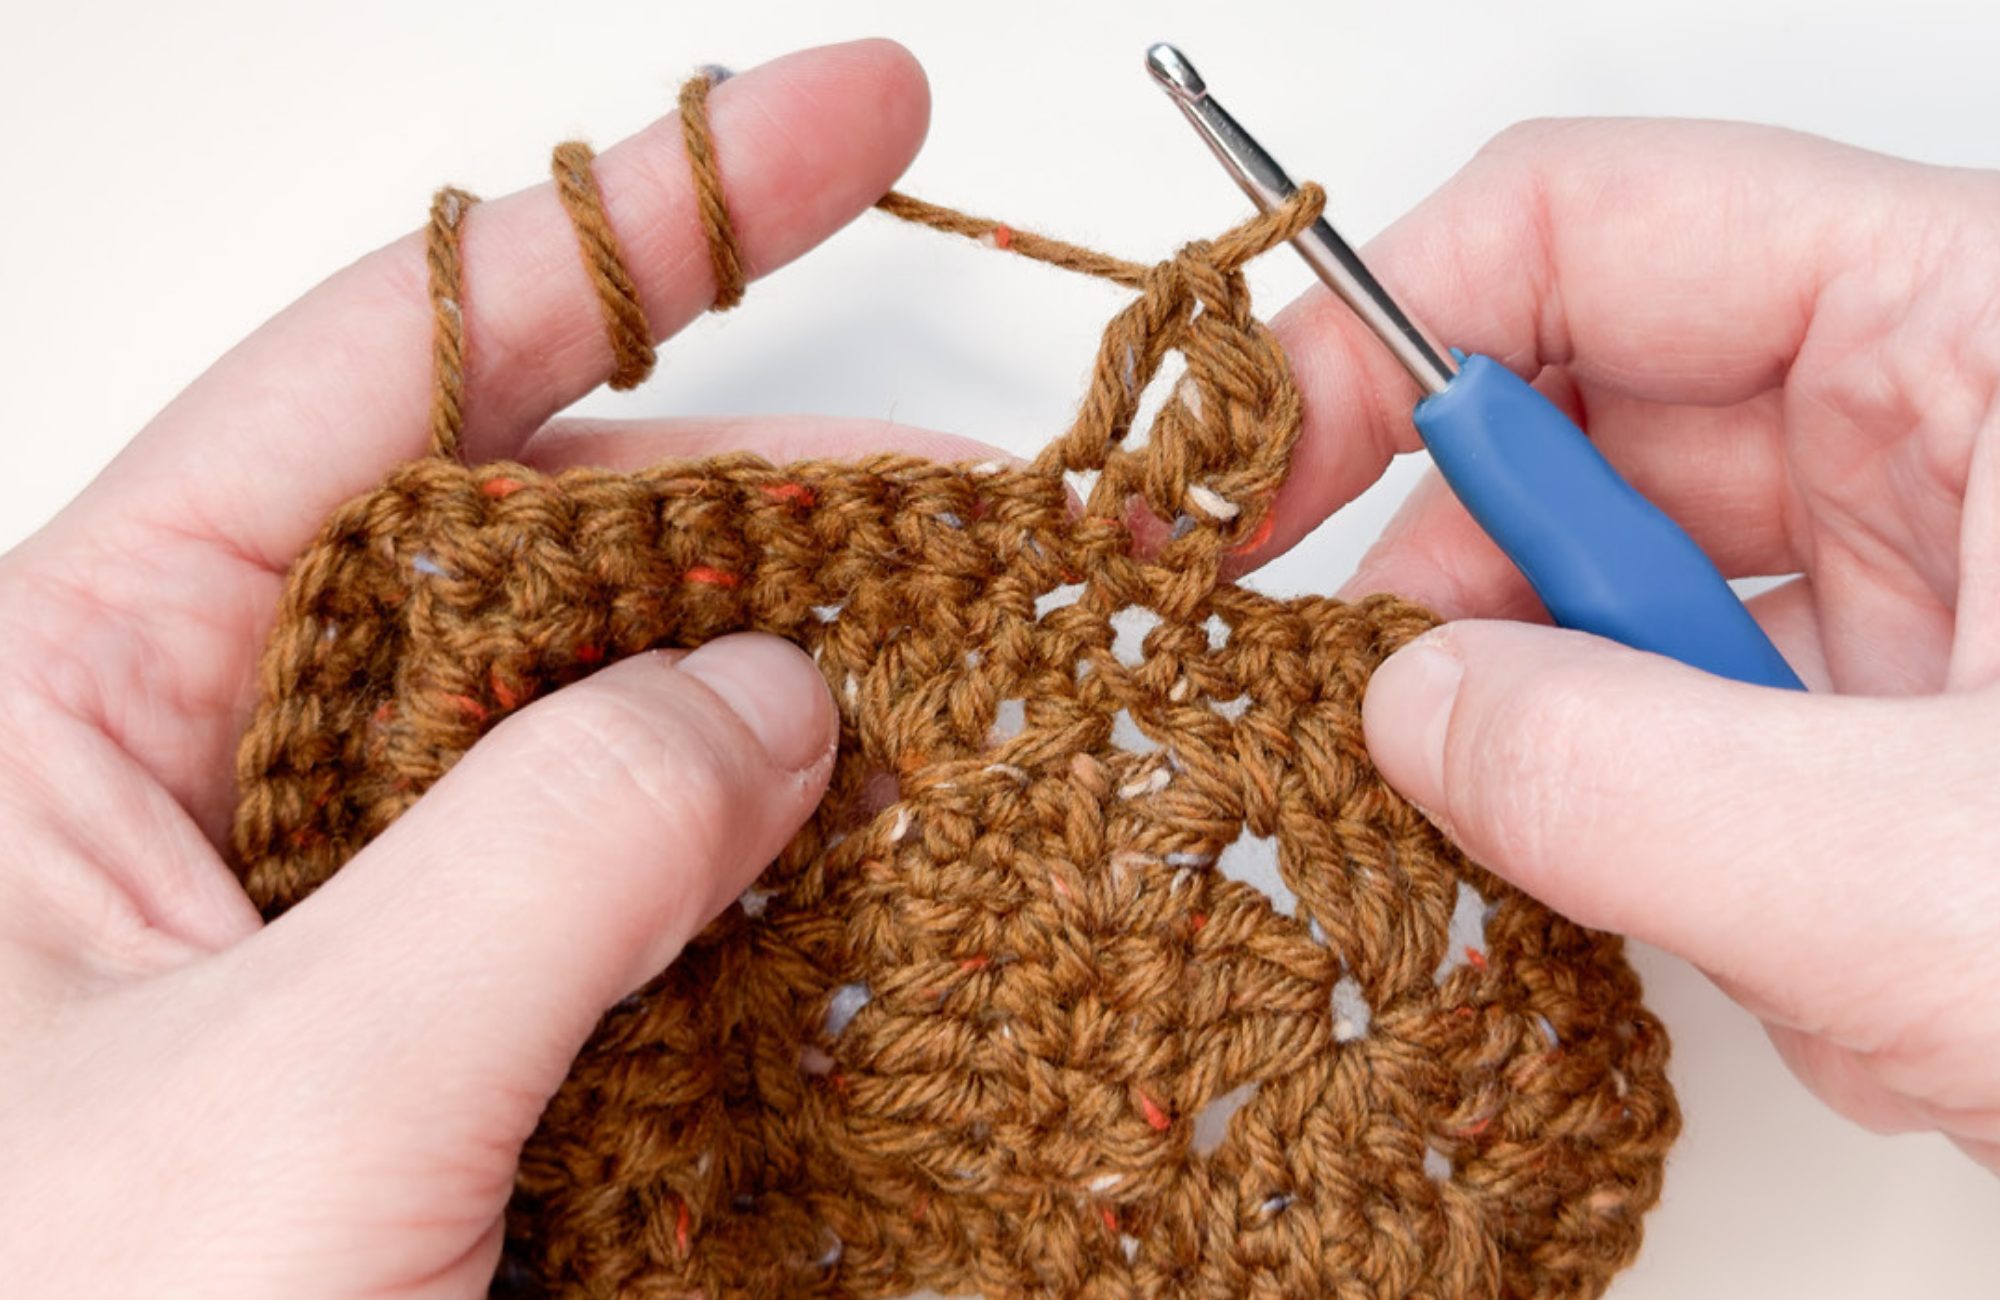
We will sew the edges of the little squares. Put two squares together, insert the needle
and wrap the yarn around the holes of the little squares several times so it is attached to the corner. Then start sewing the edges of the squares together by sewing corresponding stitches. When you complete sewing the edge, cut the yarn and secure the extra yarn. Insert extra yarn, in and out the stitches several times in different directions.
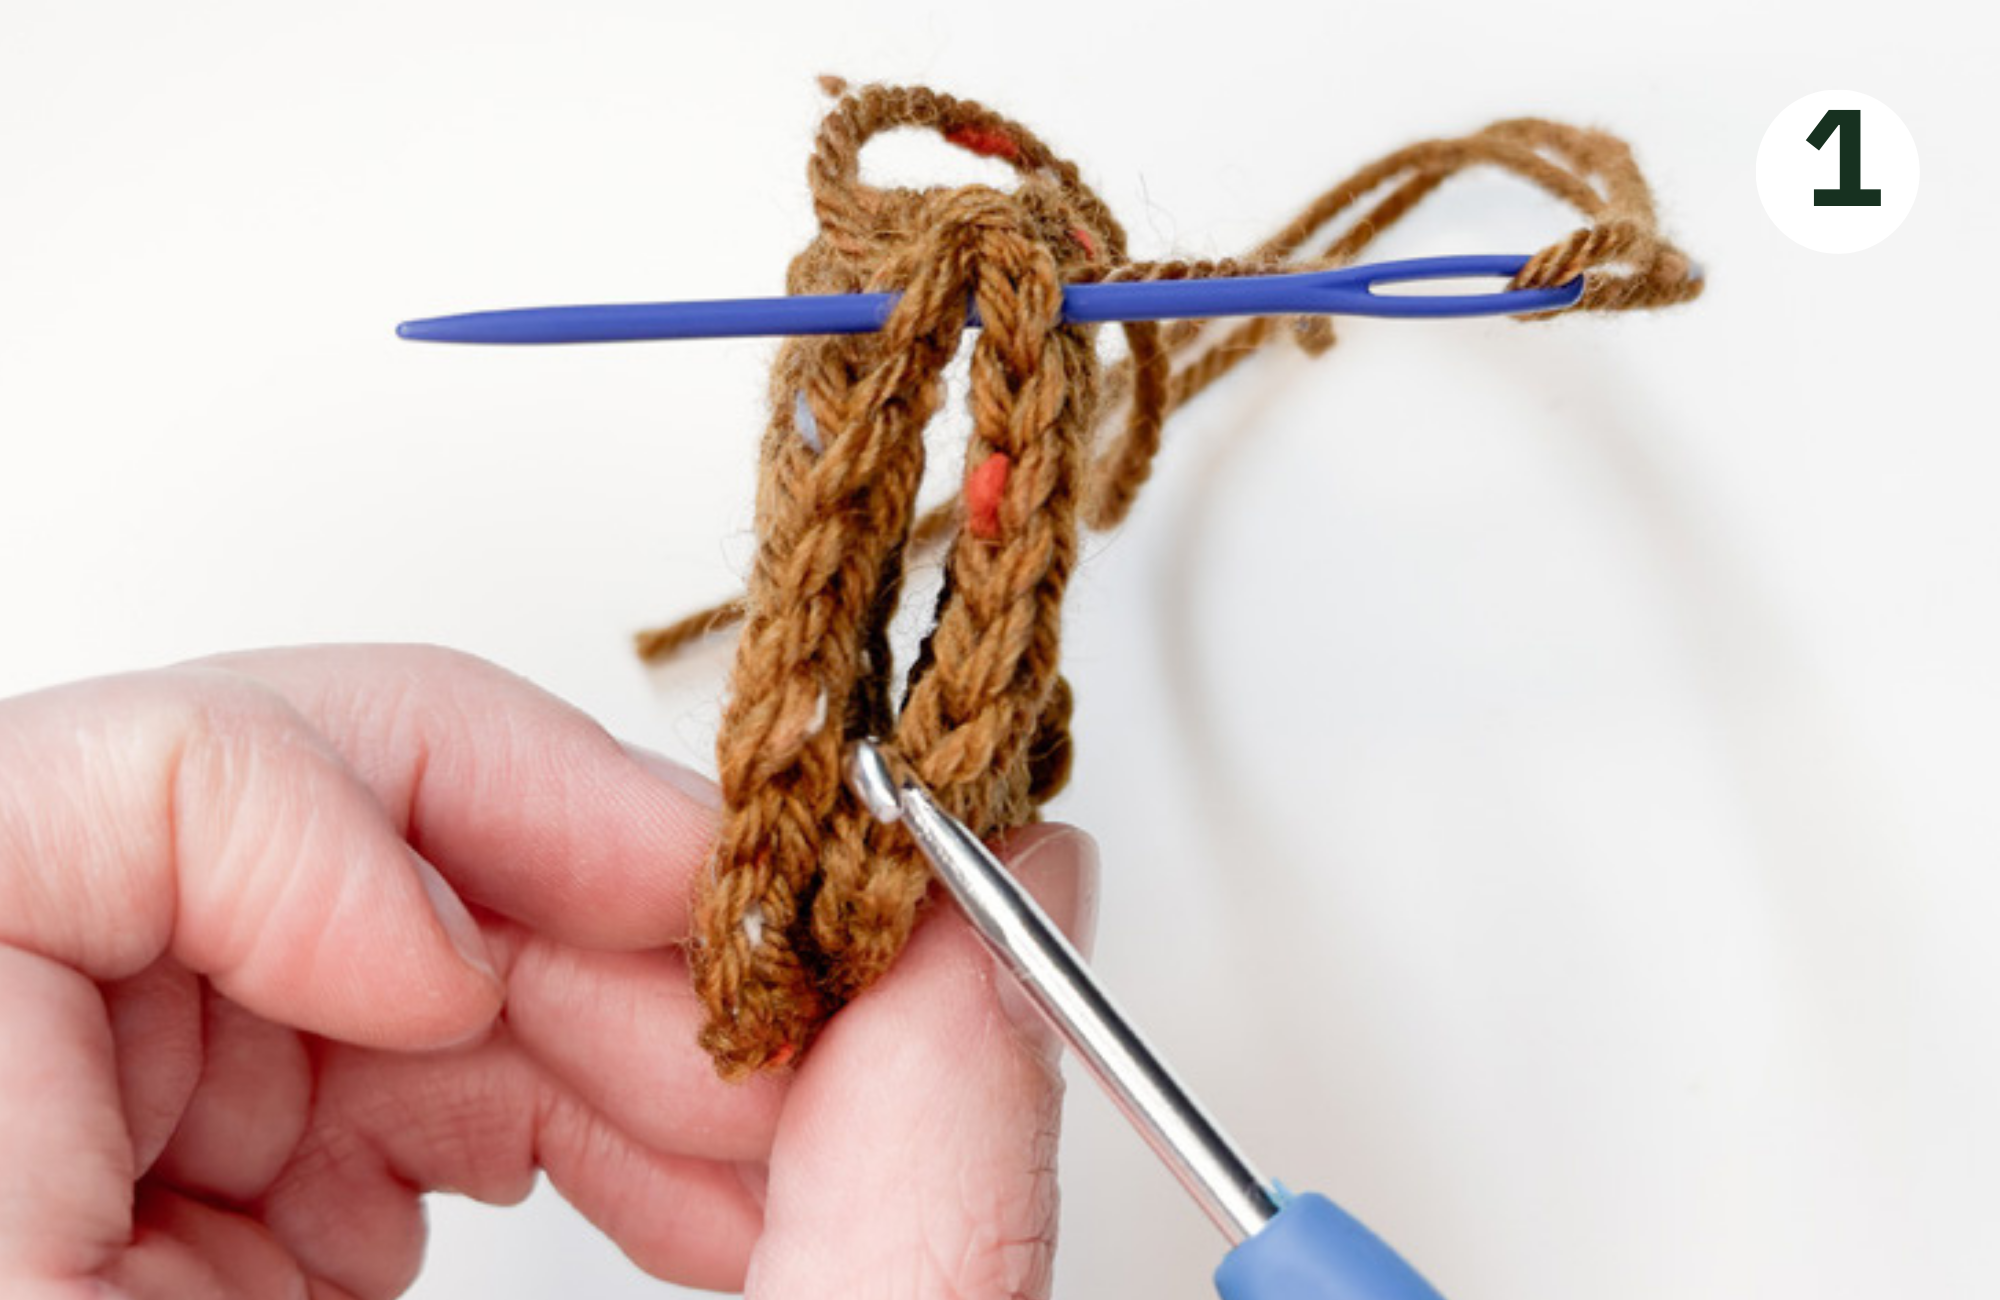
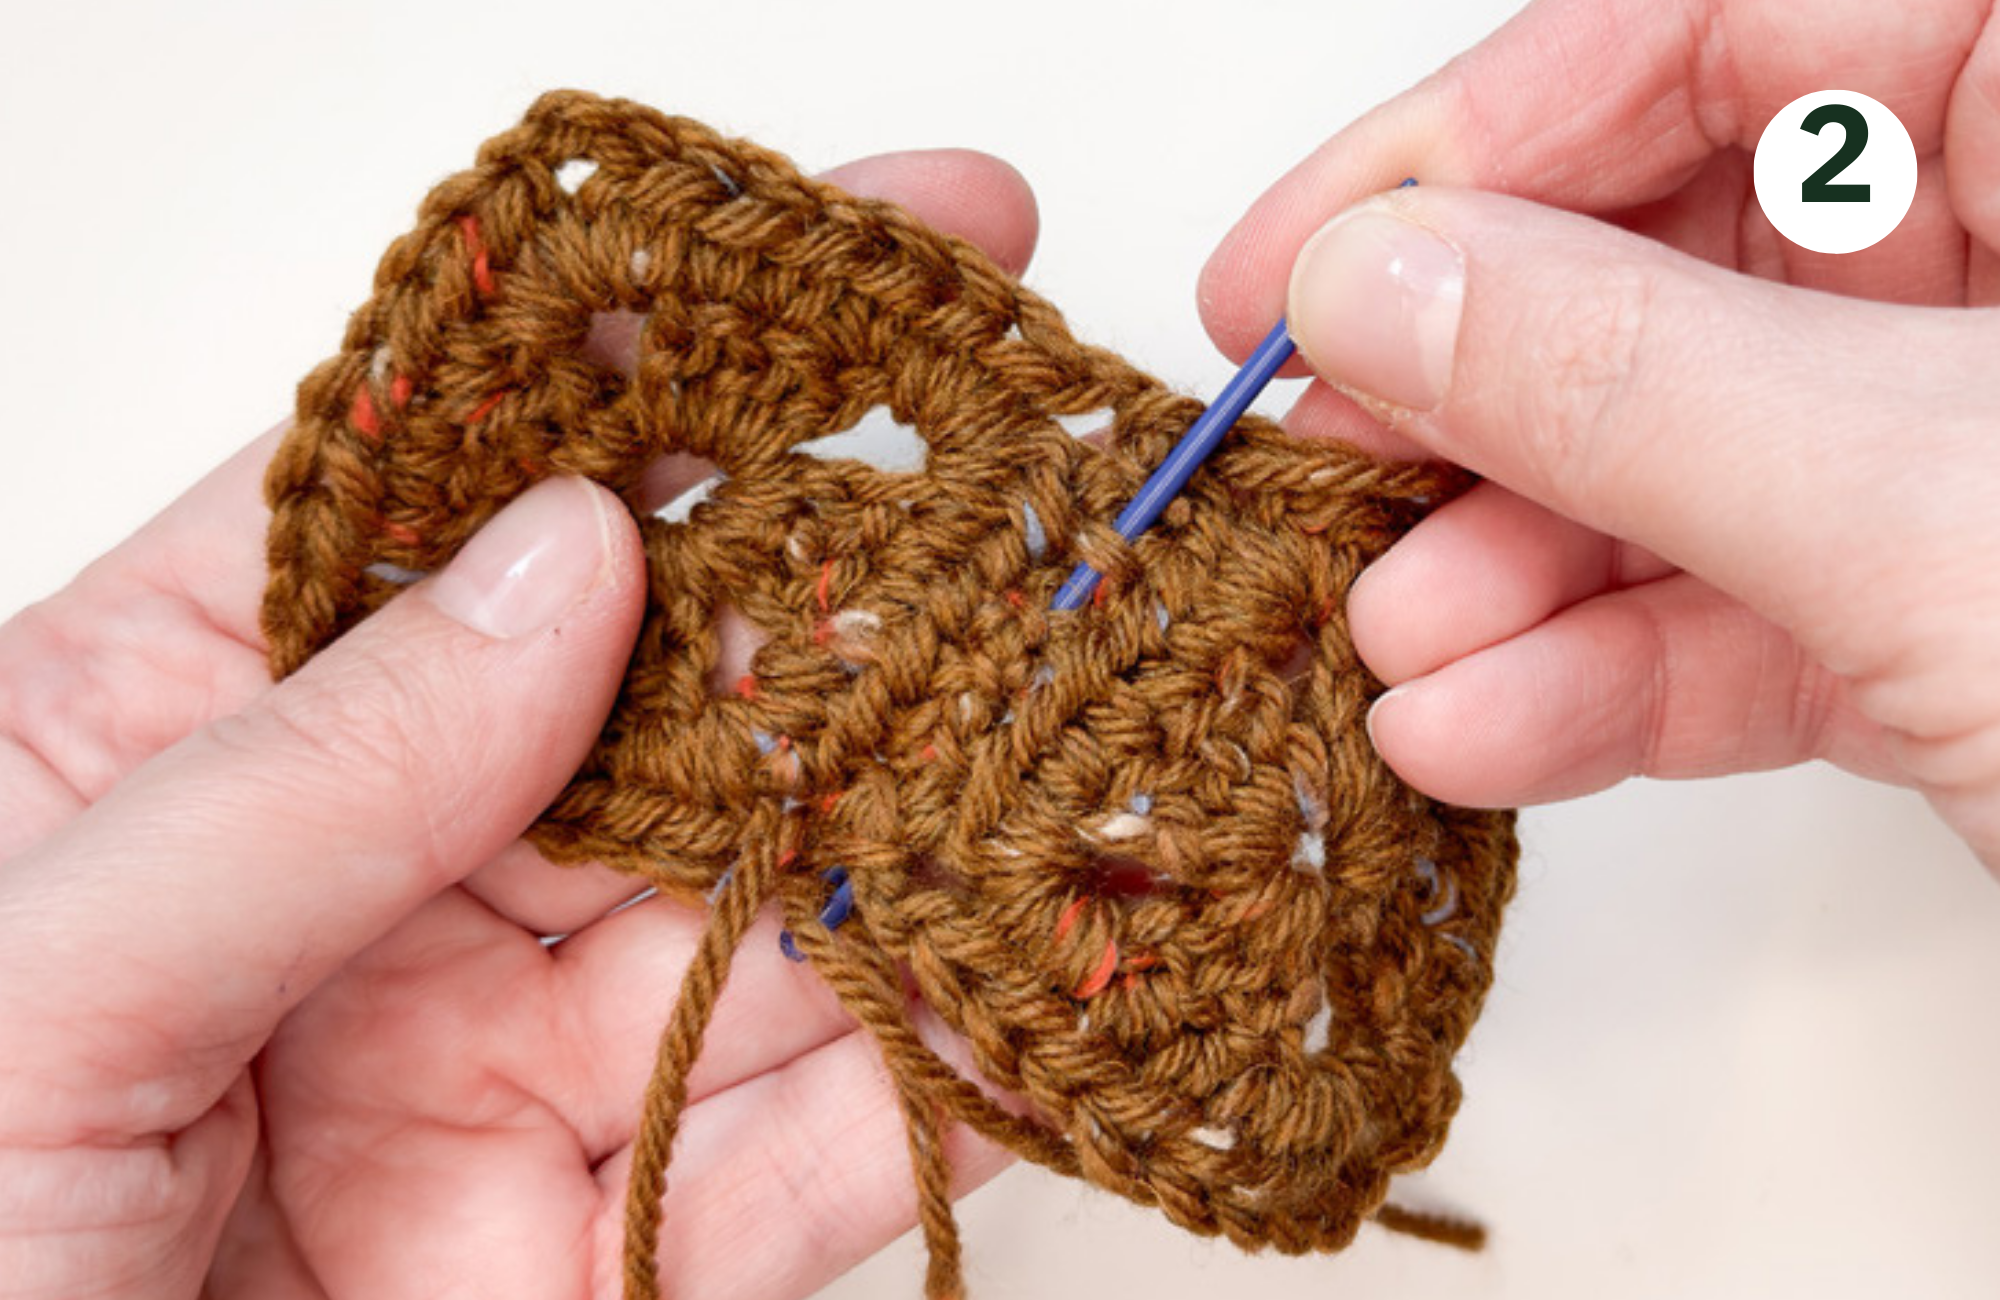
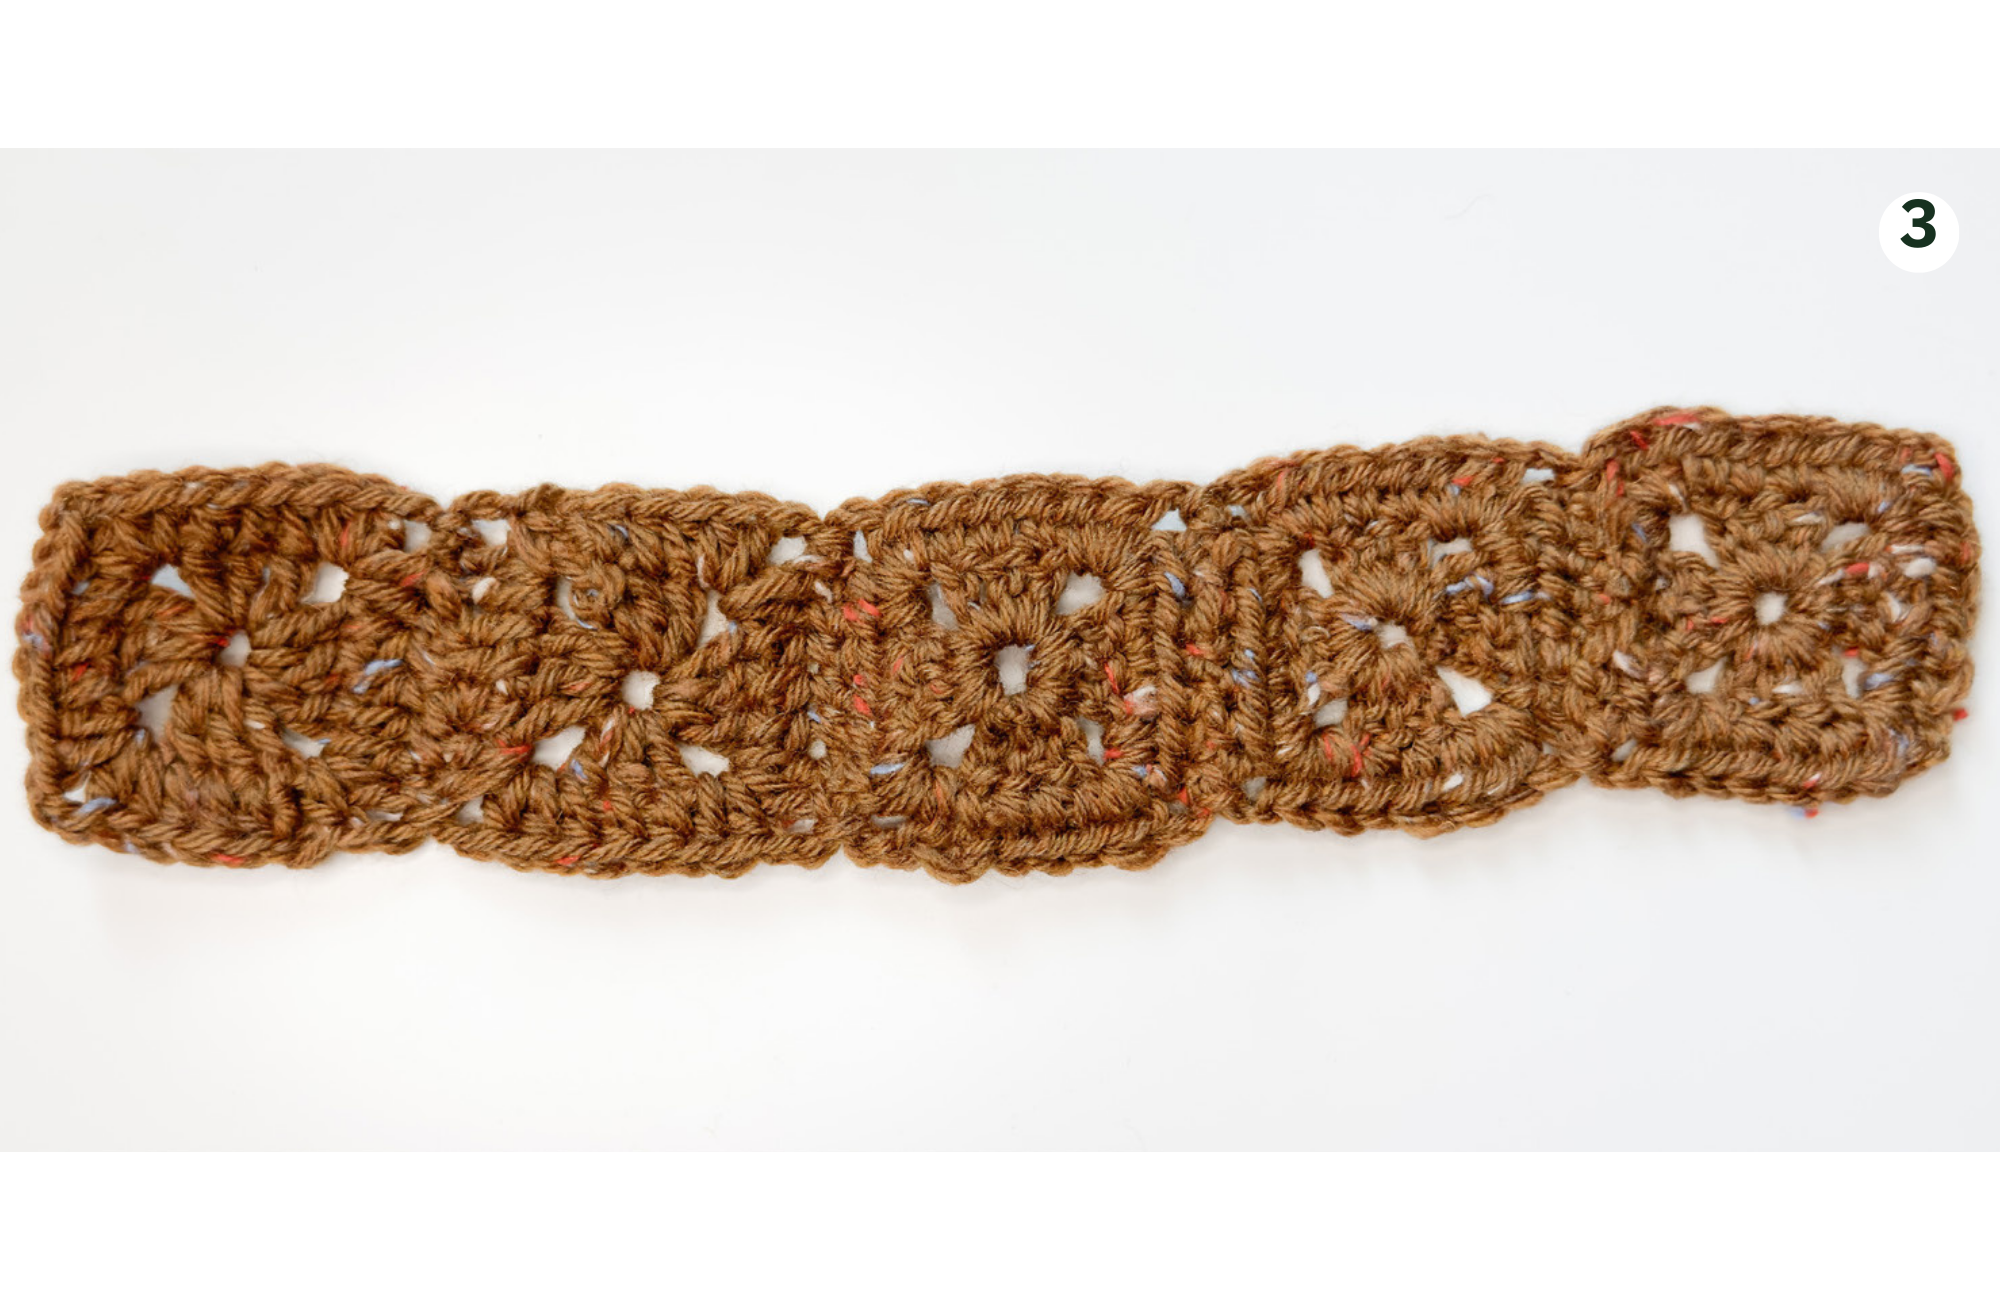
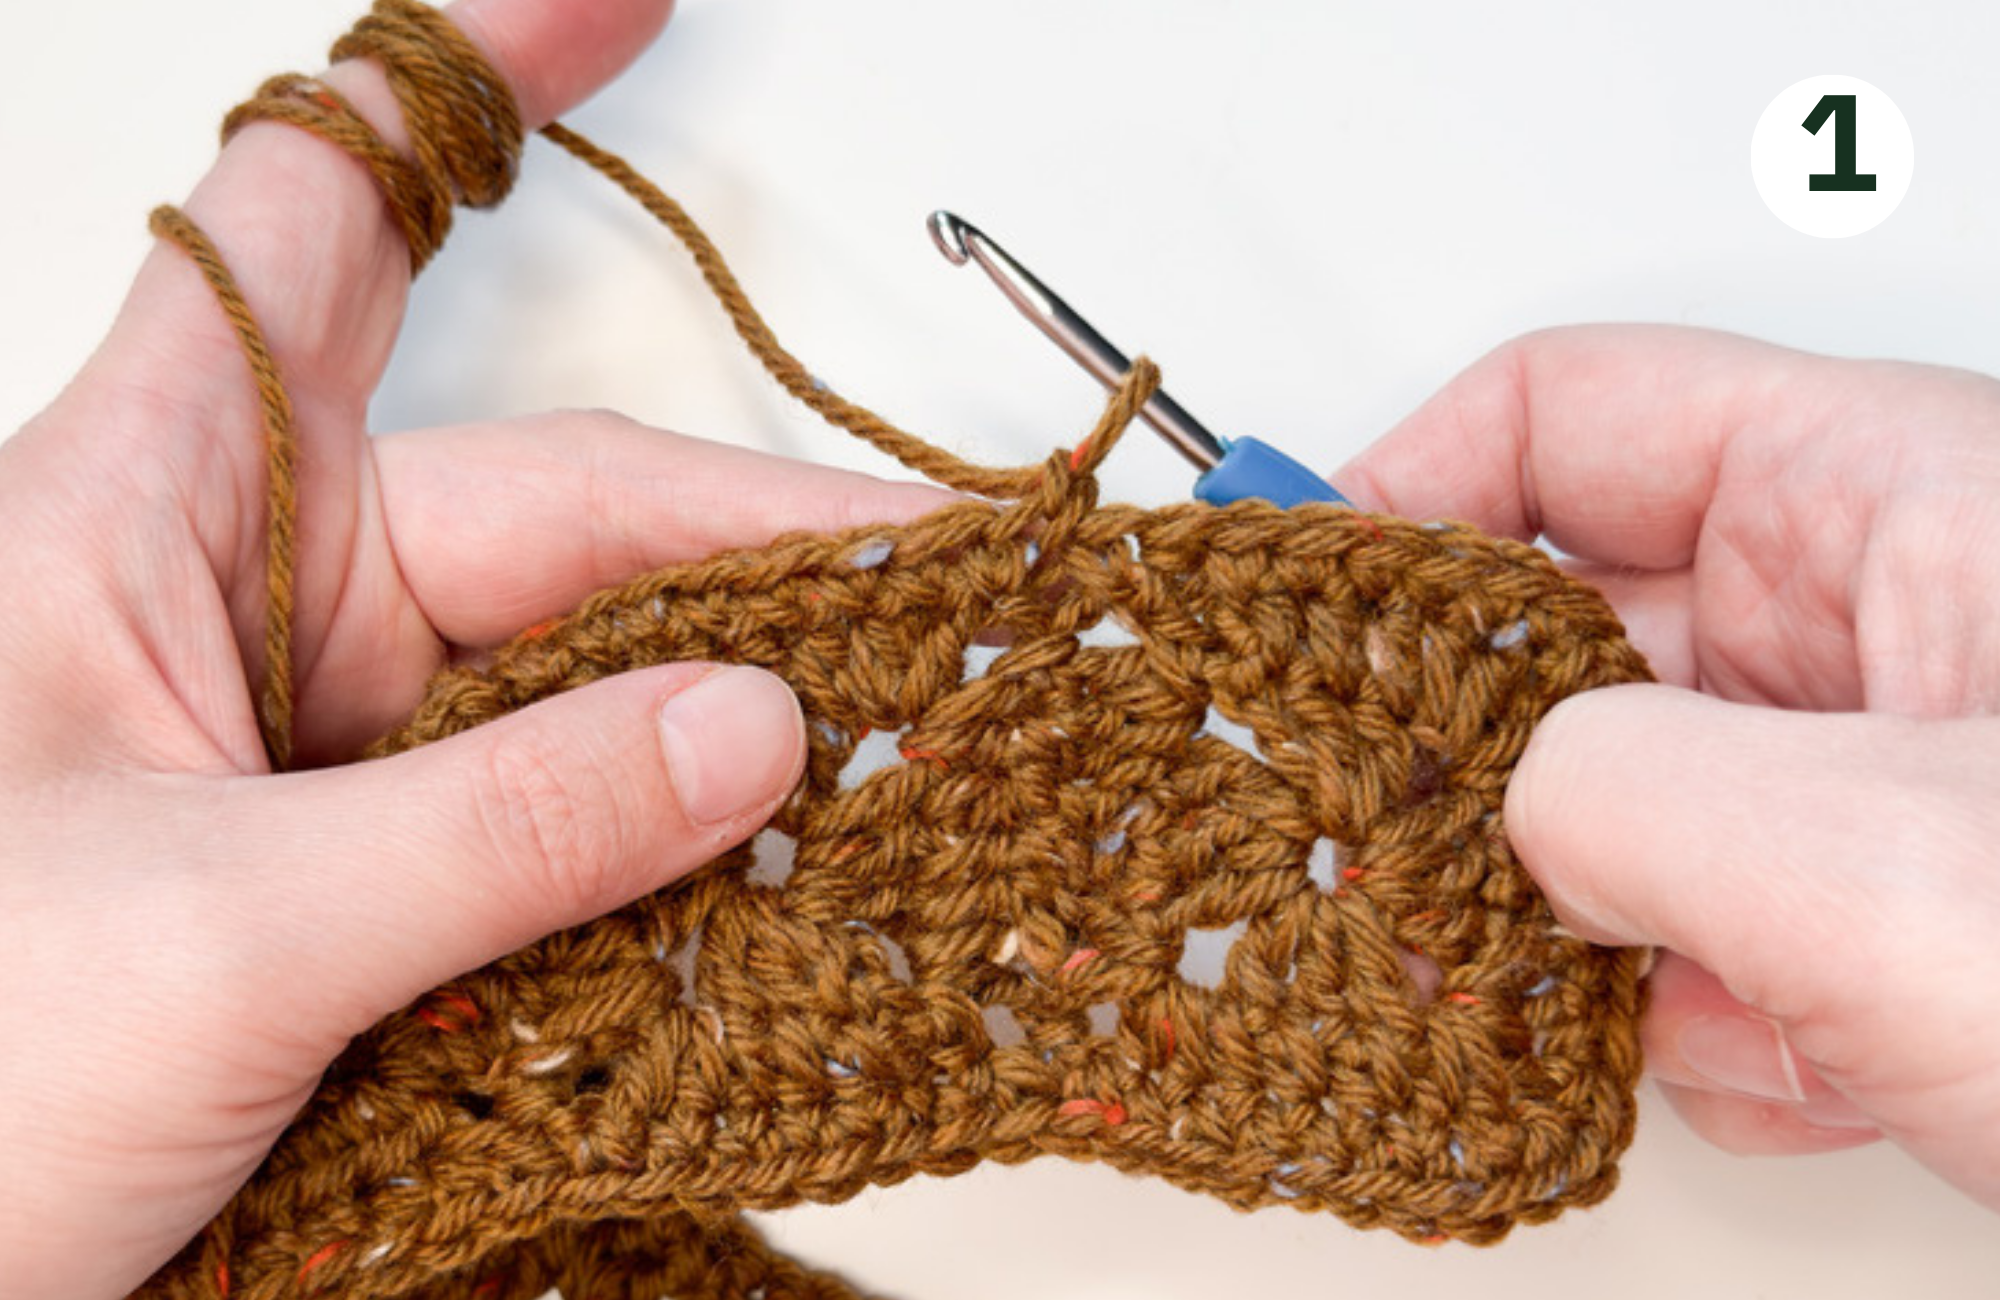
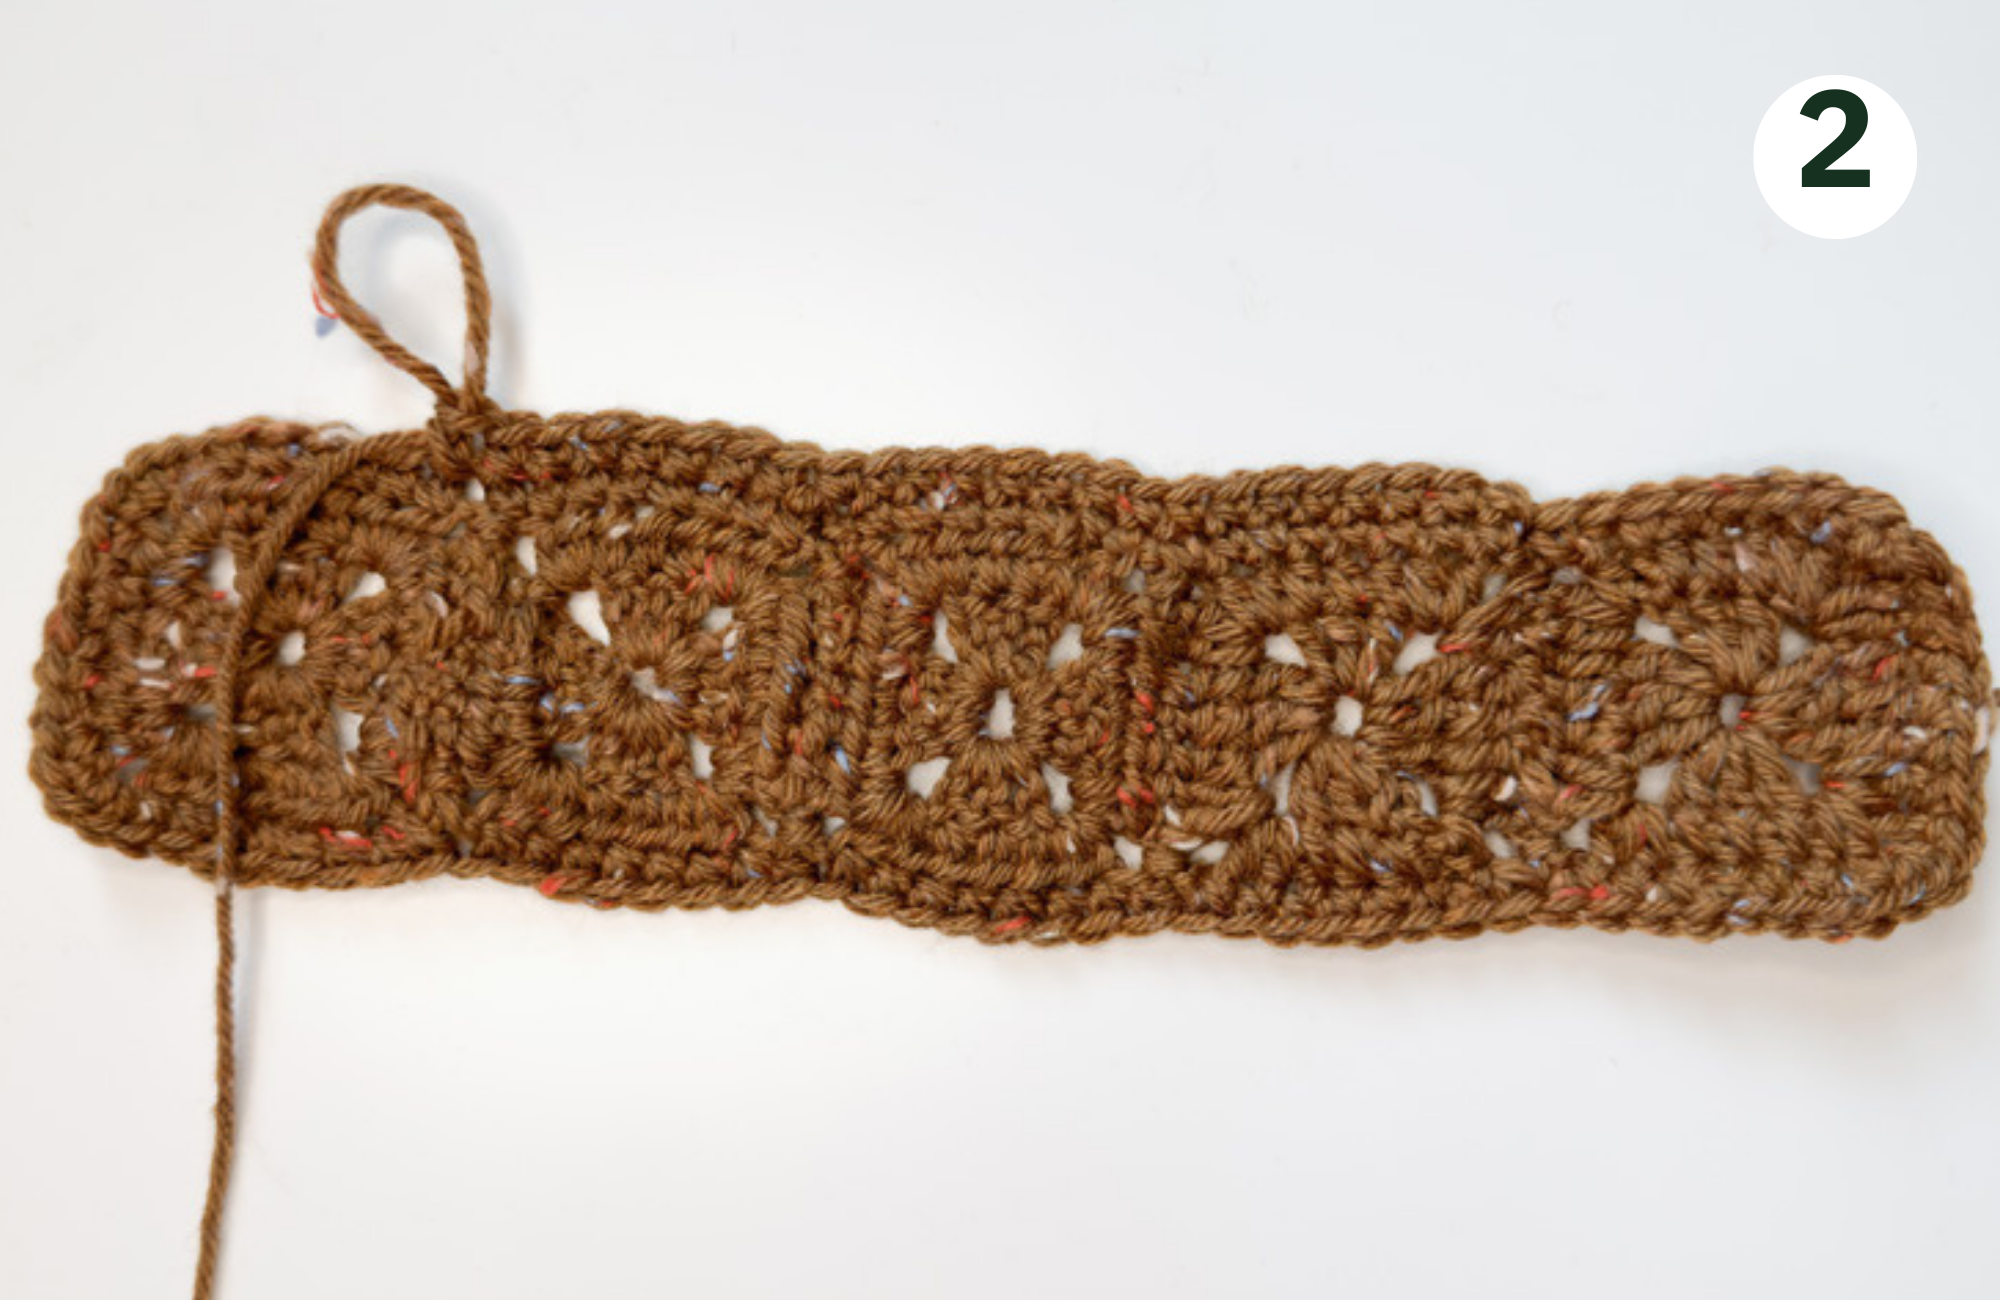
Once you have all 5 little squares sewed together sc around the big square on a clean and nice edge. Start from any corner, make a loop and sc in the corner. Sc 8 on the edge of the little square, you might see holes in the corners, however, do not sc into the holes and continue from the 1st st of the next little square and sc 8. Continue crocheting scs till you reach the corner of the big square. Sc 2 in the corner hole, ch 2, sc 2 into the same hole and then start from the 1st st and sc 8. You will reach the second corner, sc 2 into the corner hole, ch 2, sc 2 into the same hole and then start from 1st st and sc along the edges and corners using the same instructions.
Sl into the 1st st to complete this Part.
Repeat the same instructions for another set of 5 little squares.
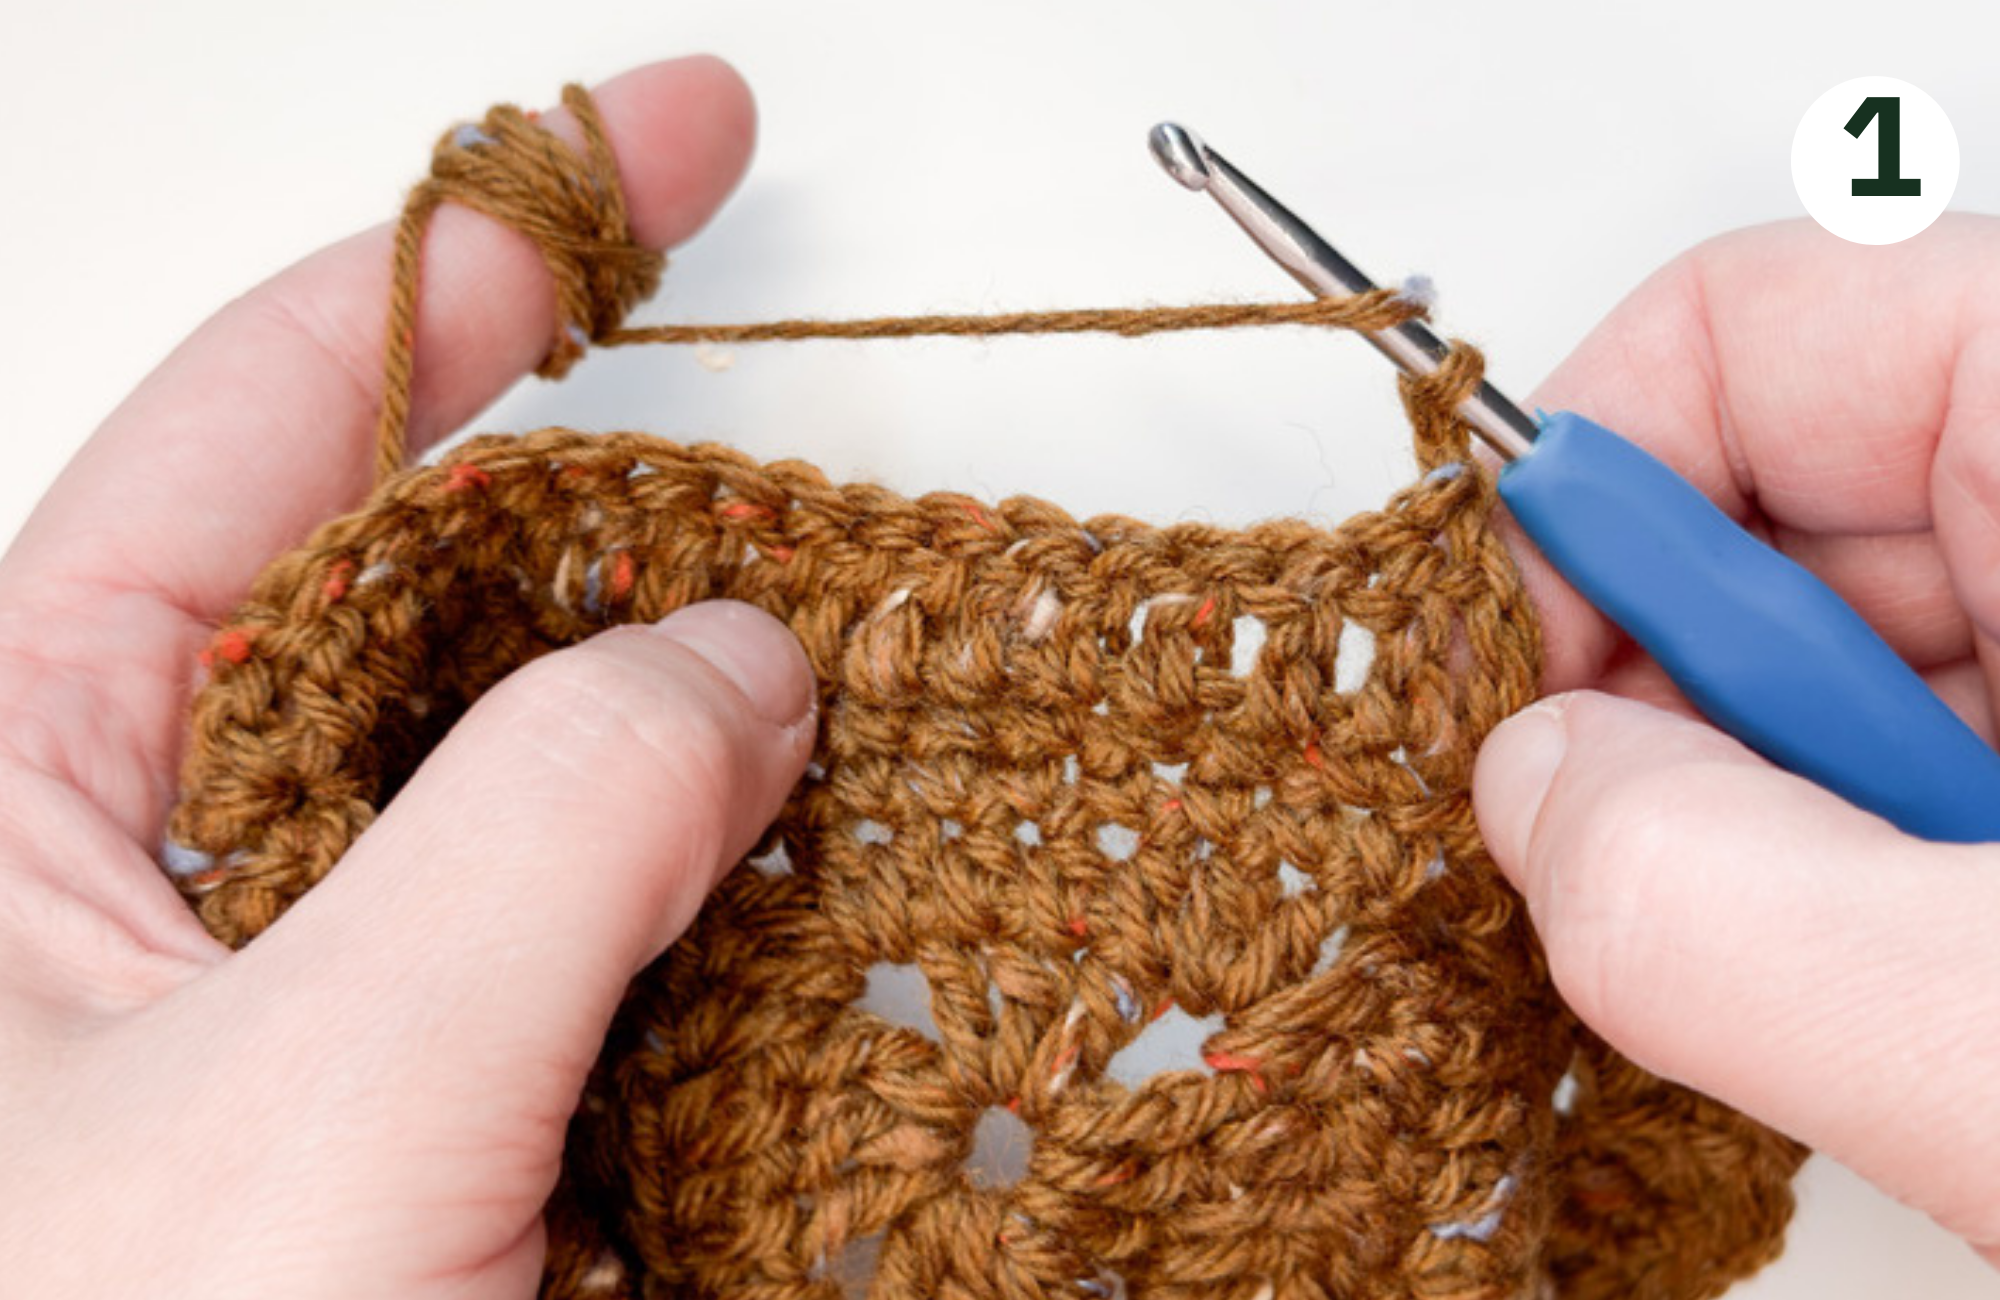
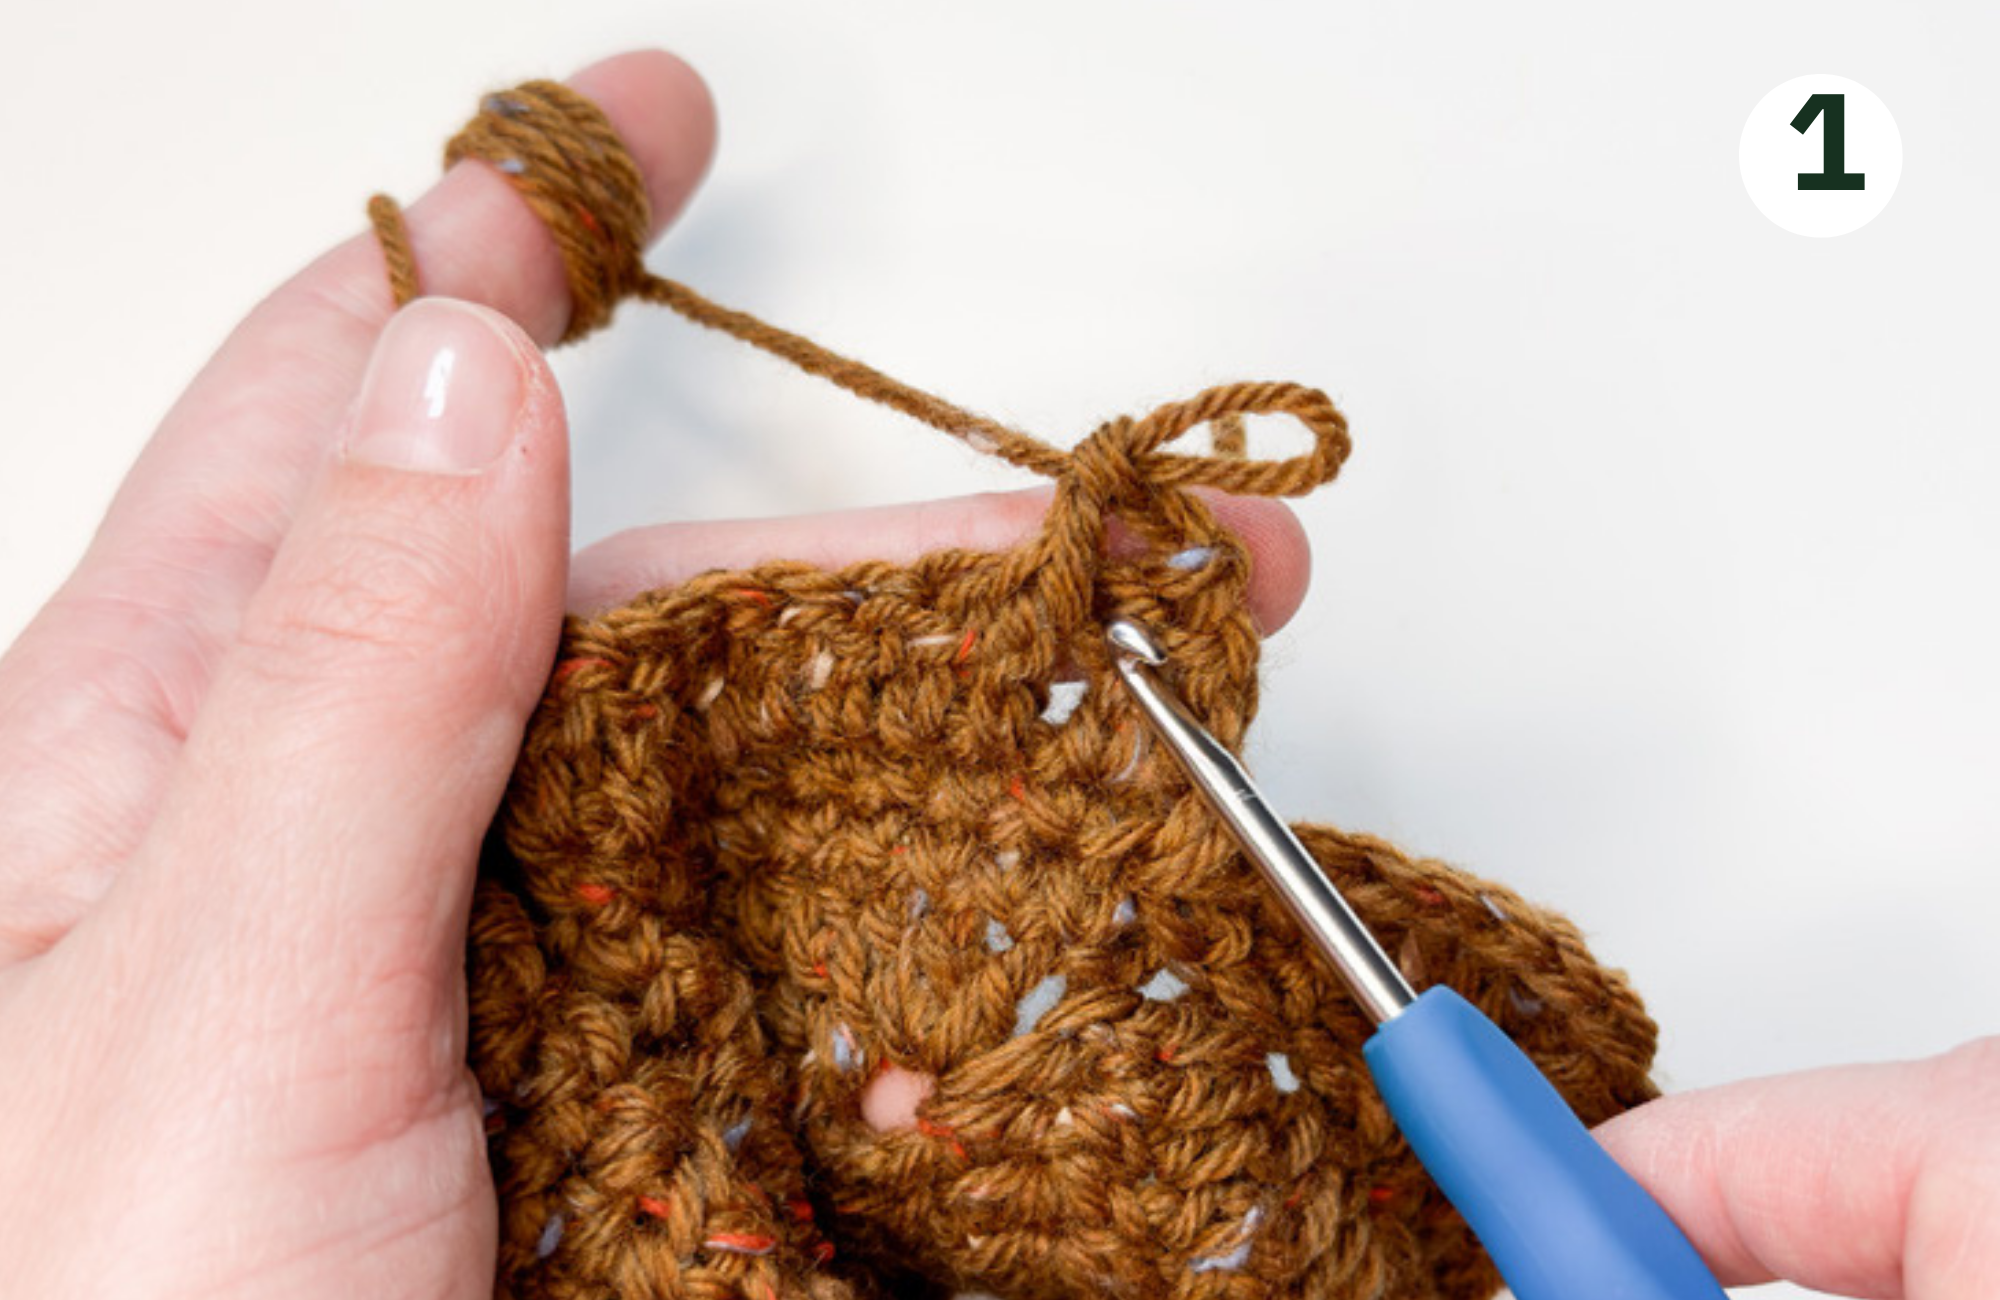
Part 3 – crocheting the body of the bag
Row 1
Find the beginning of the second little square and insert the hook, pull the yarn and make a loop above it. Sc 24.
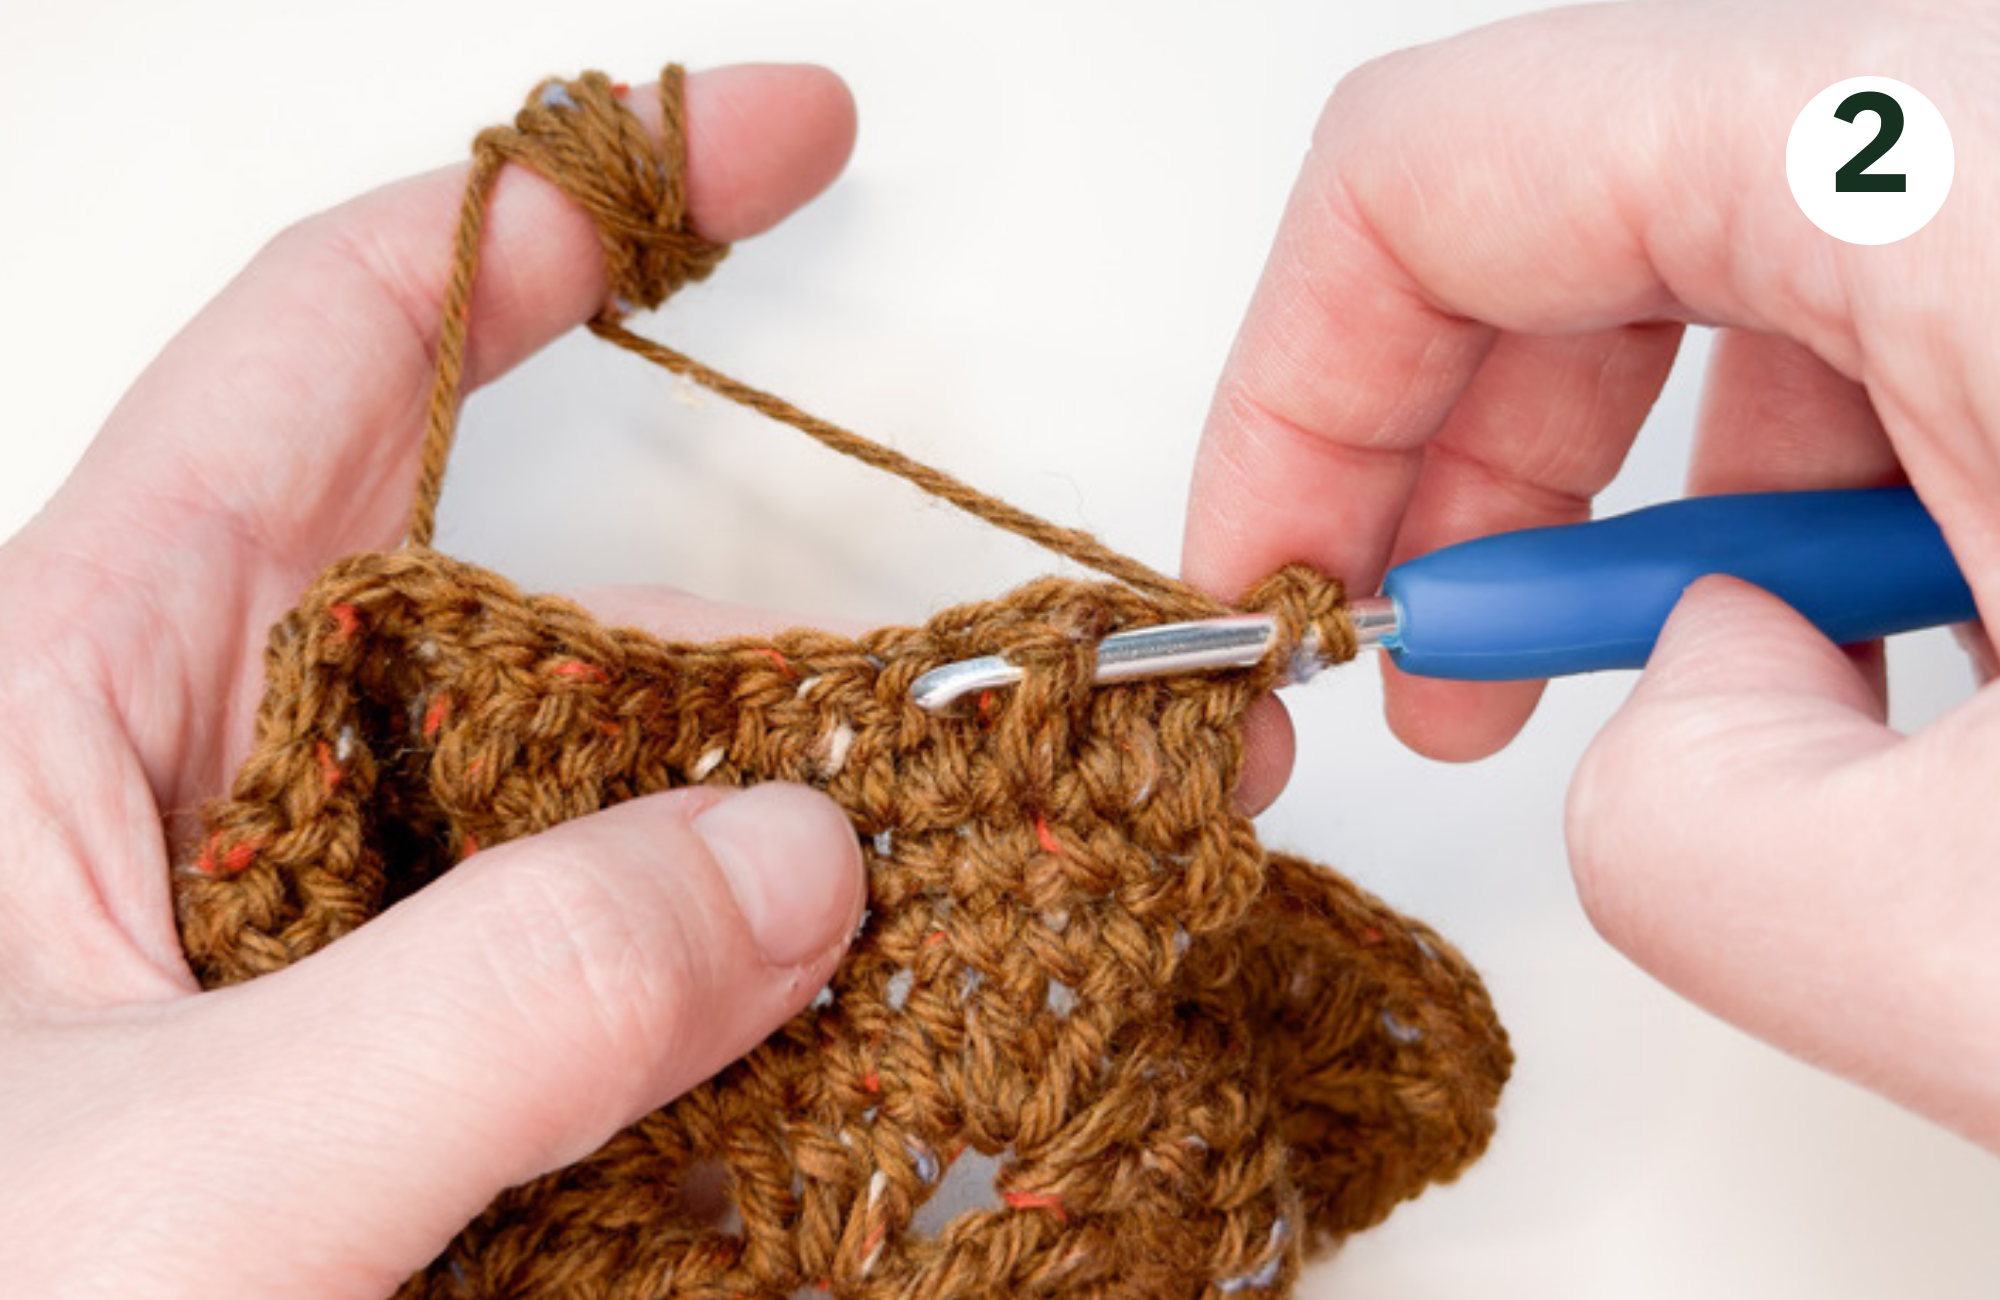
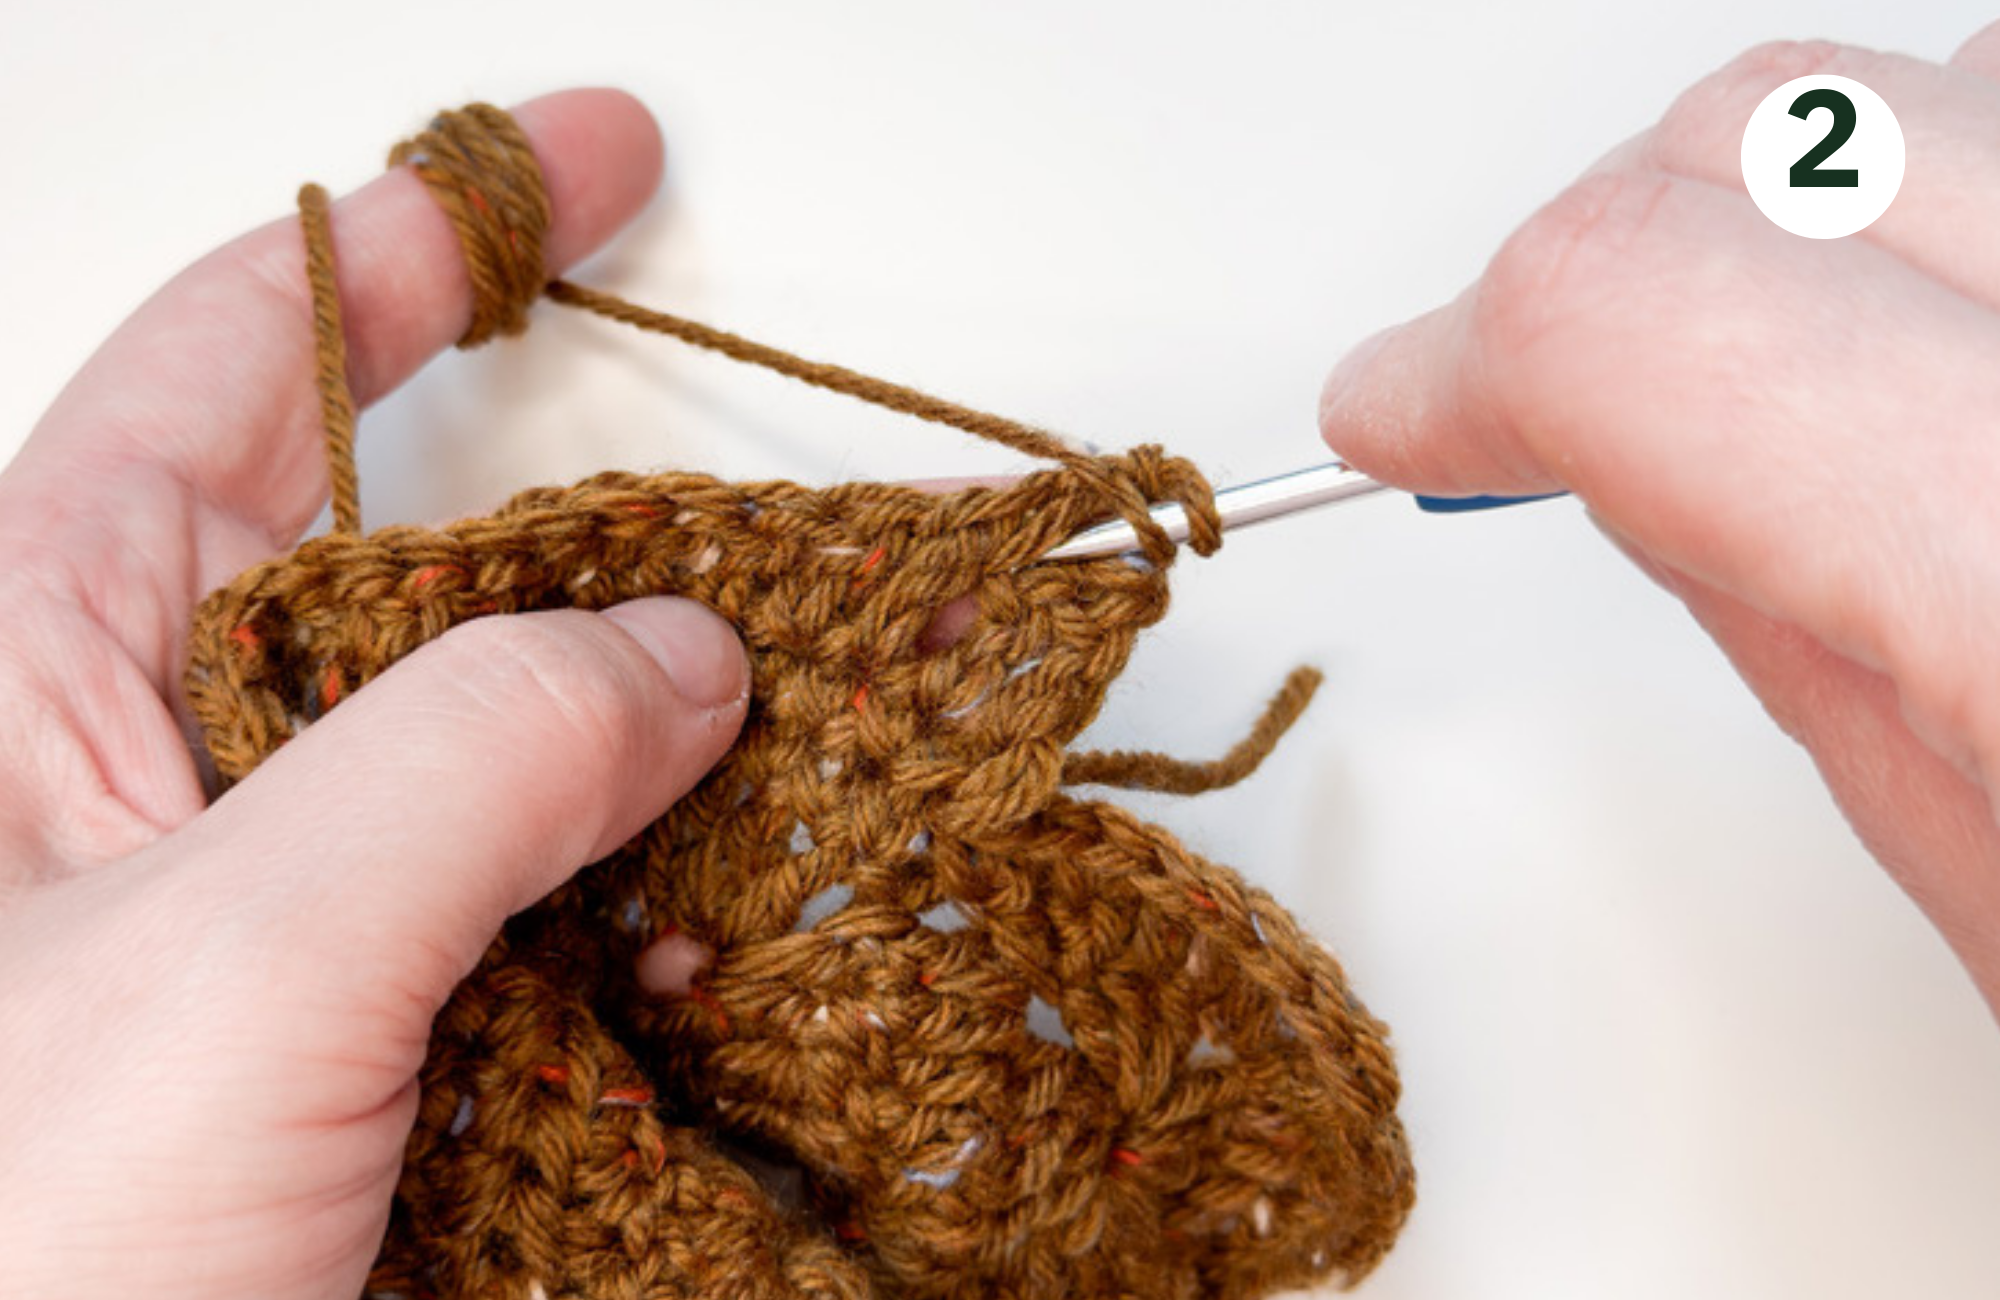
Row 2
Turn the project and ch 2.
Dc 24.
Row 3
Turn the project and ch 2.
In this row, we will make a Front Post Double Crochet stitch.
Skip the stitch, Yarn over, insert the hook in the row below, behind the dc stitch that we made in the previous row, go behind that stitch/column, pull the yarn behind it (you will have 3 loops on the hook) and complete dc (pull through 2 loops, pull through 2 loops). You have completed fpdc
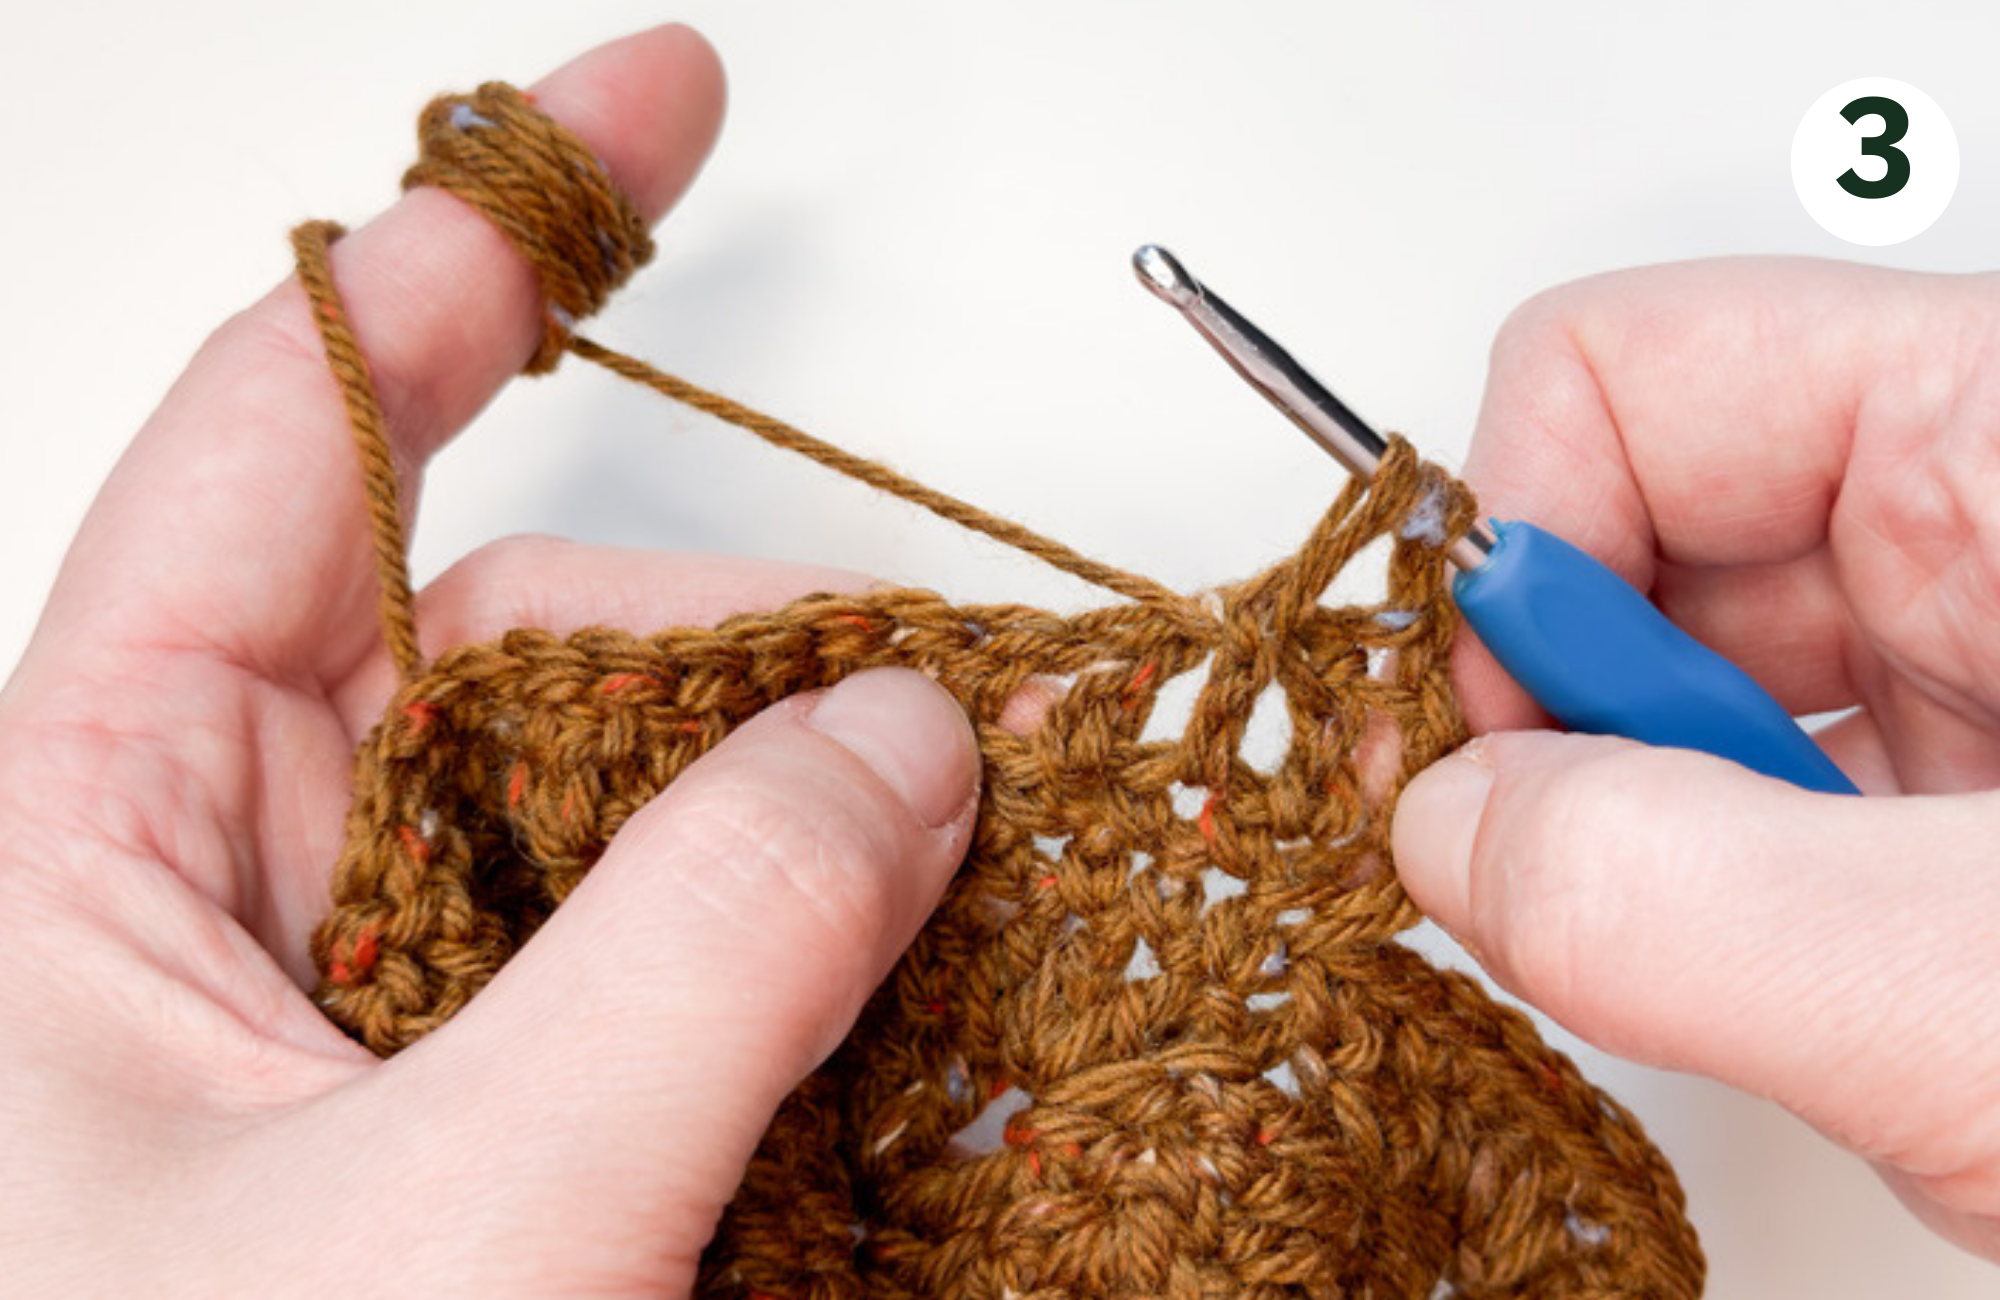
Next, we will make a hdc into the stitch that we skipped before making fpdc. Yarn over, insert the yarn into the skipped stitch, pull the yarn and pull though into 3 loops together.
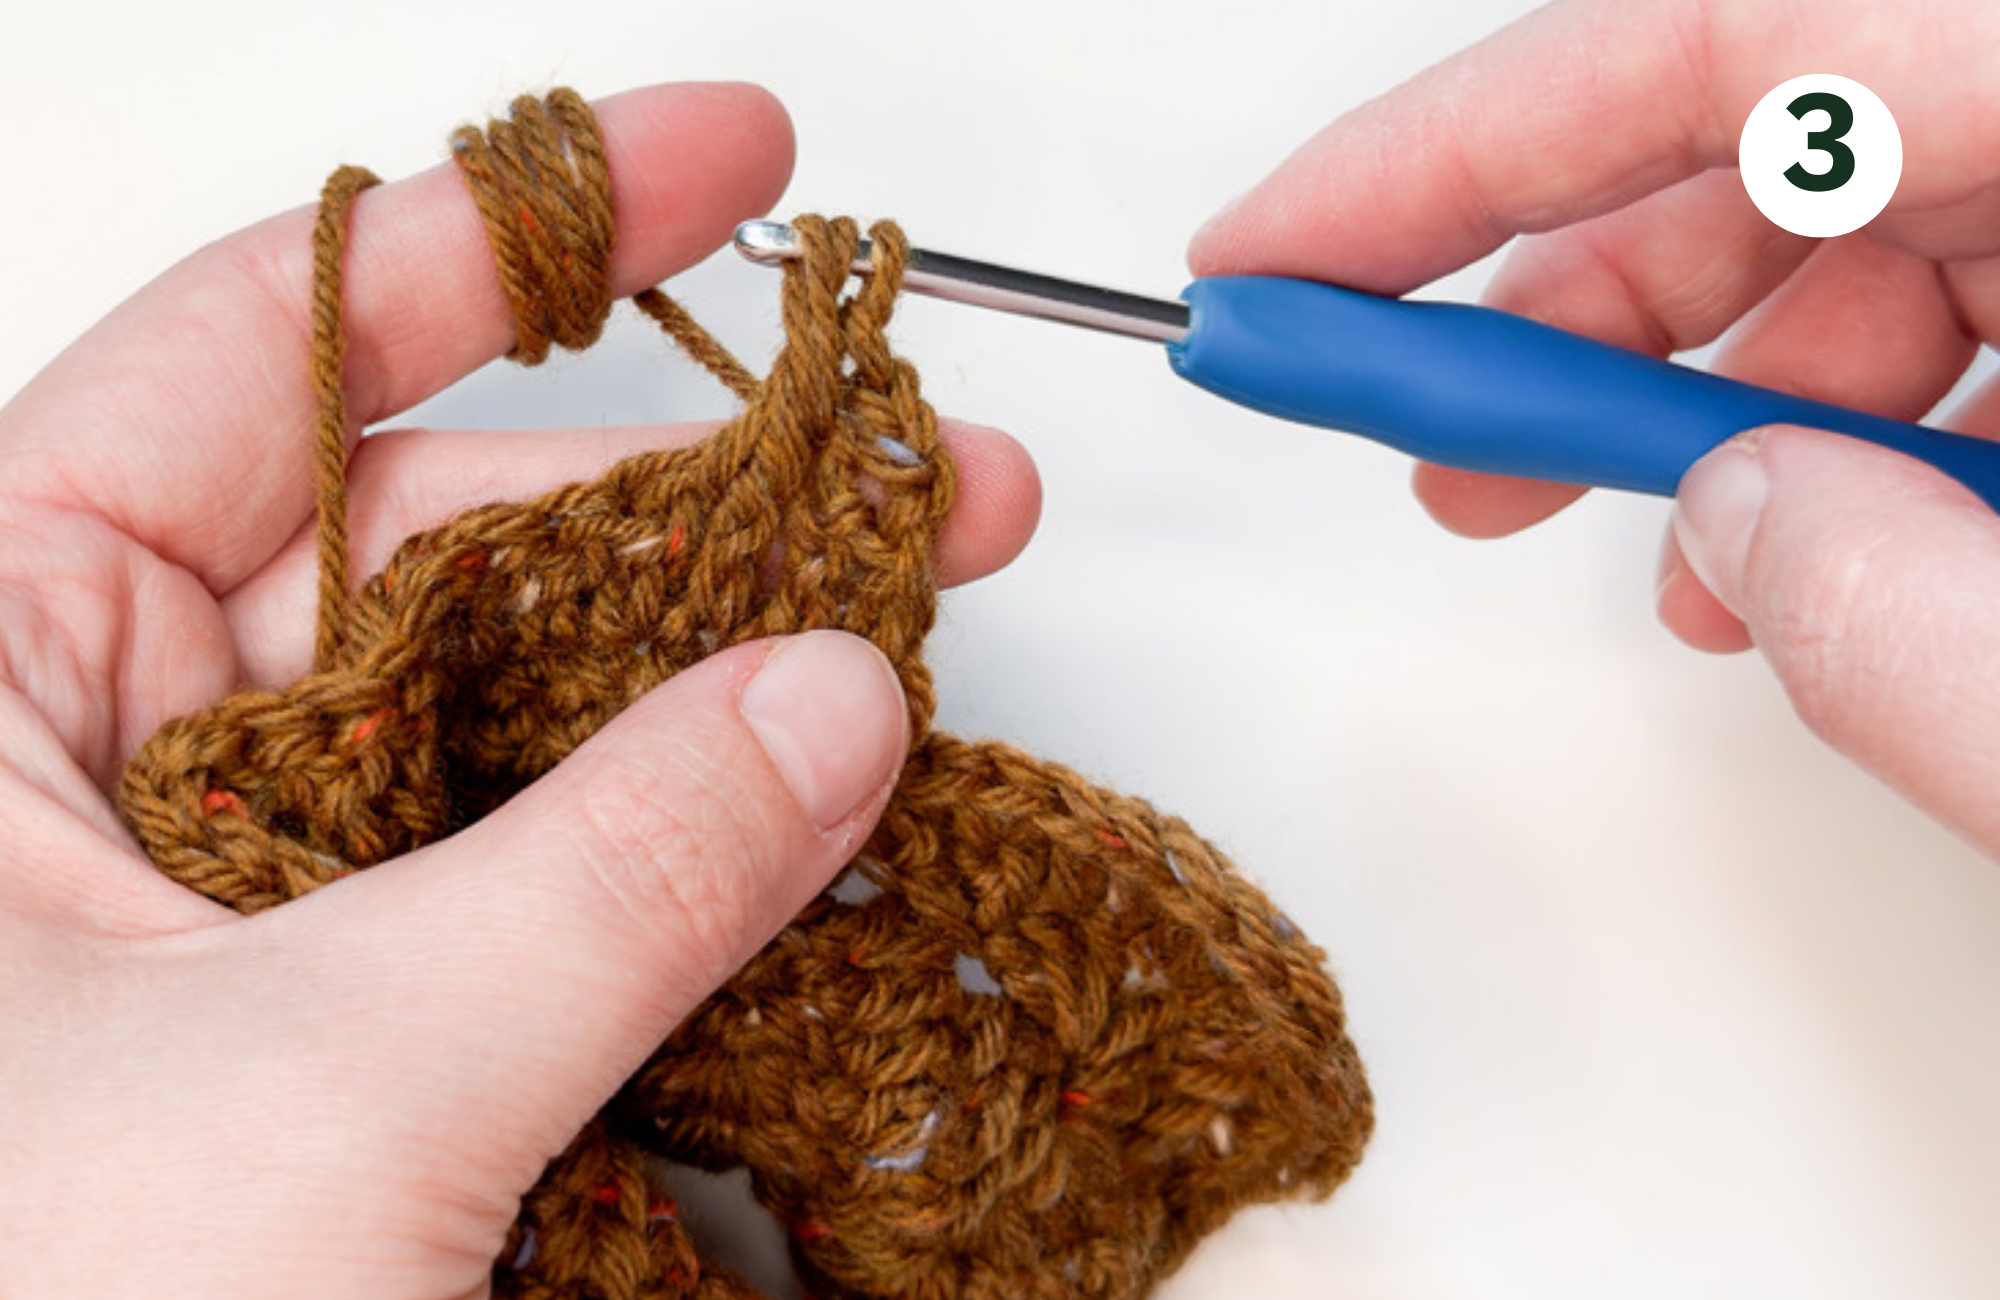
Continue this pattern till the end of this Row – skip st, fpdc, hdc into the skipped st.
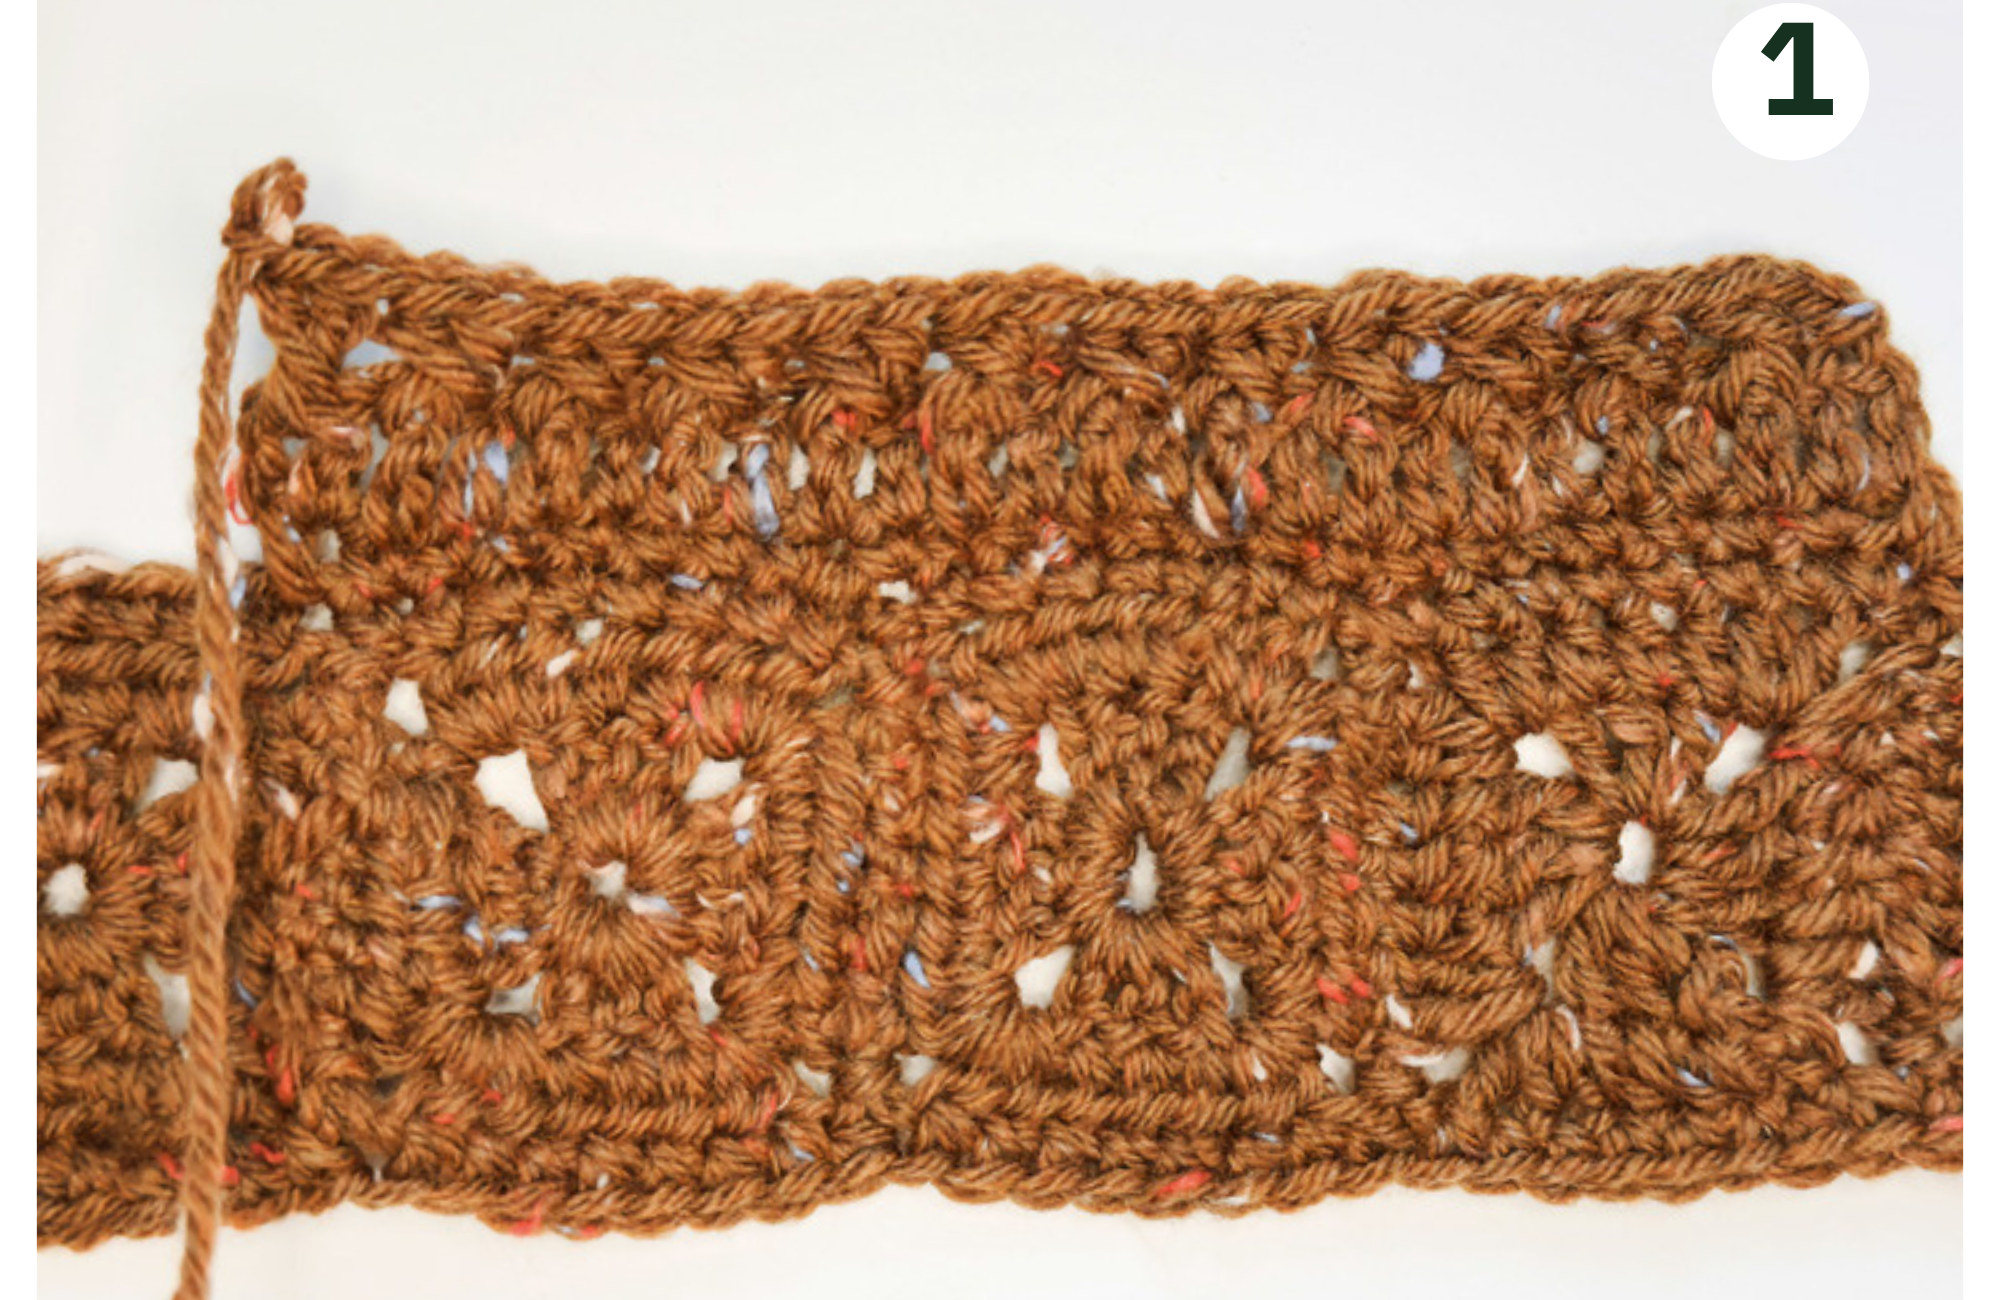
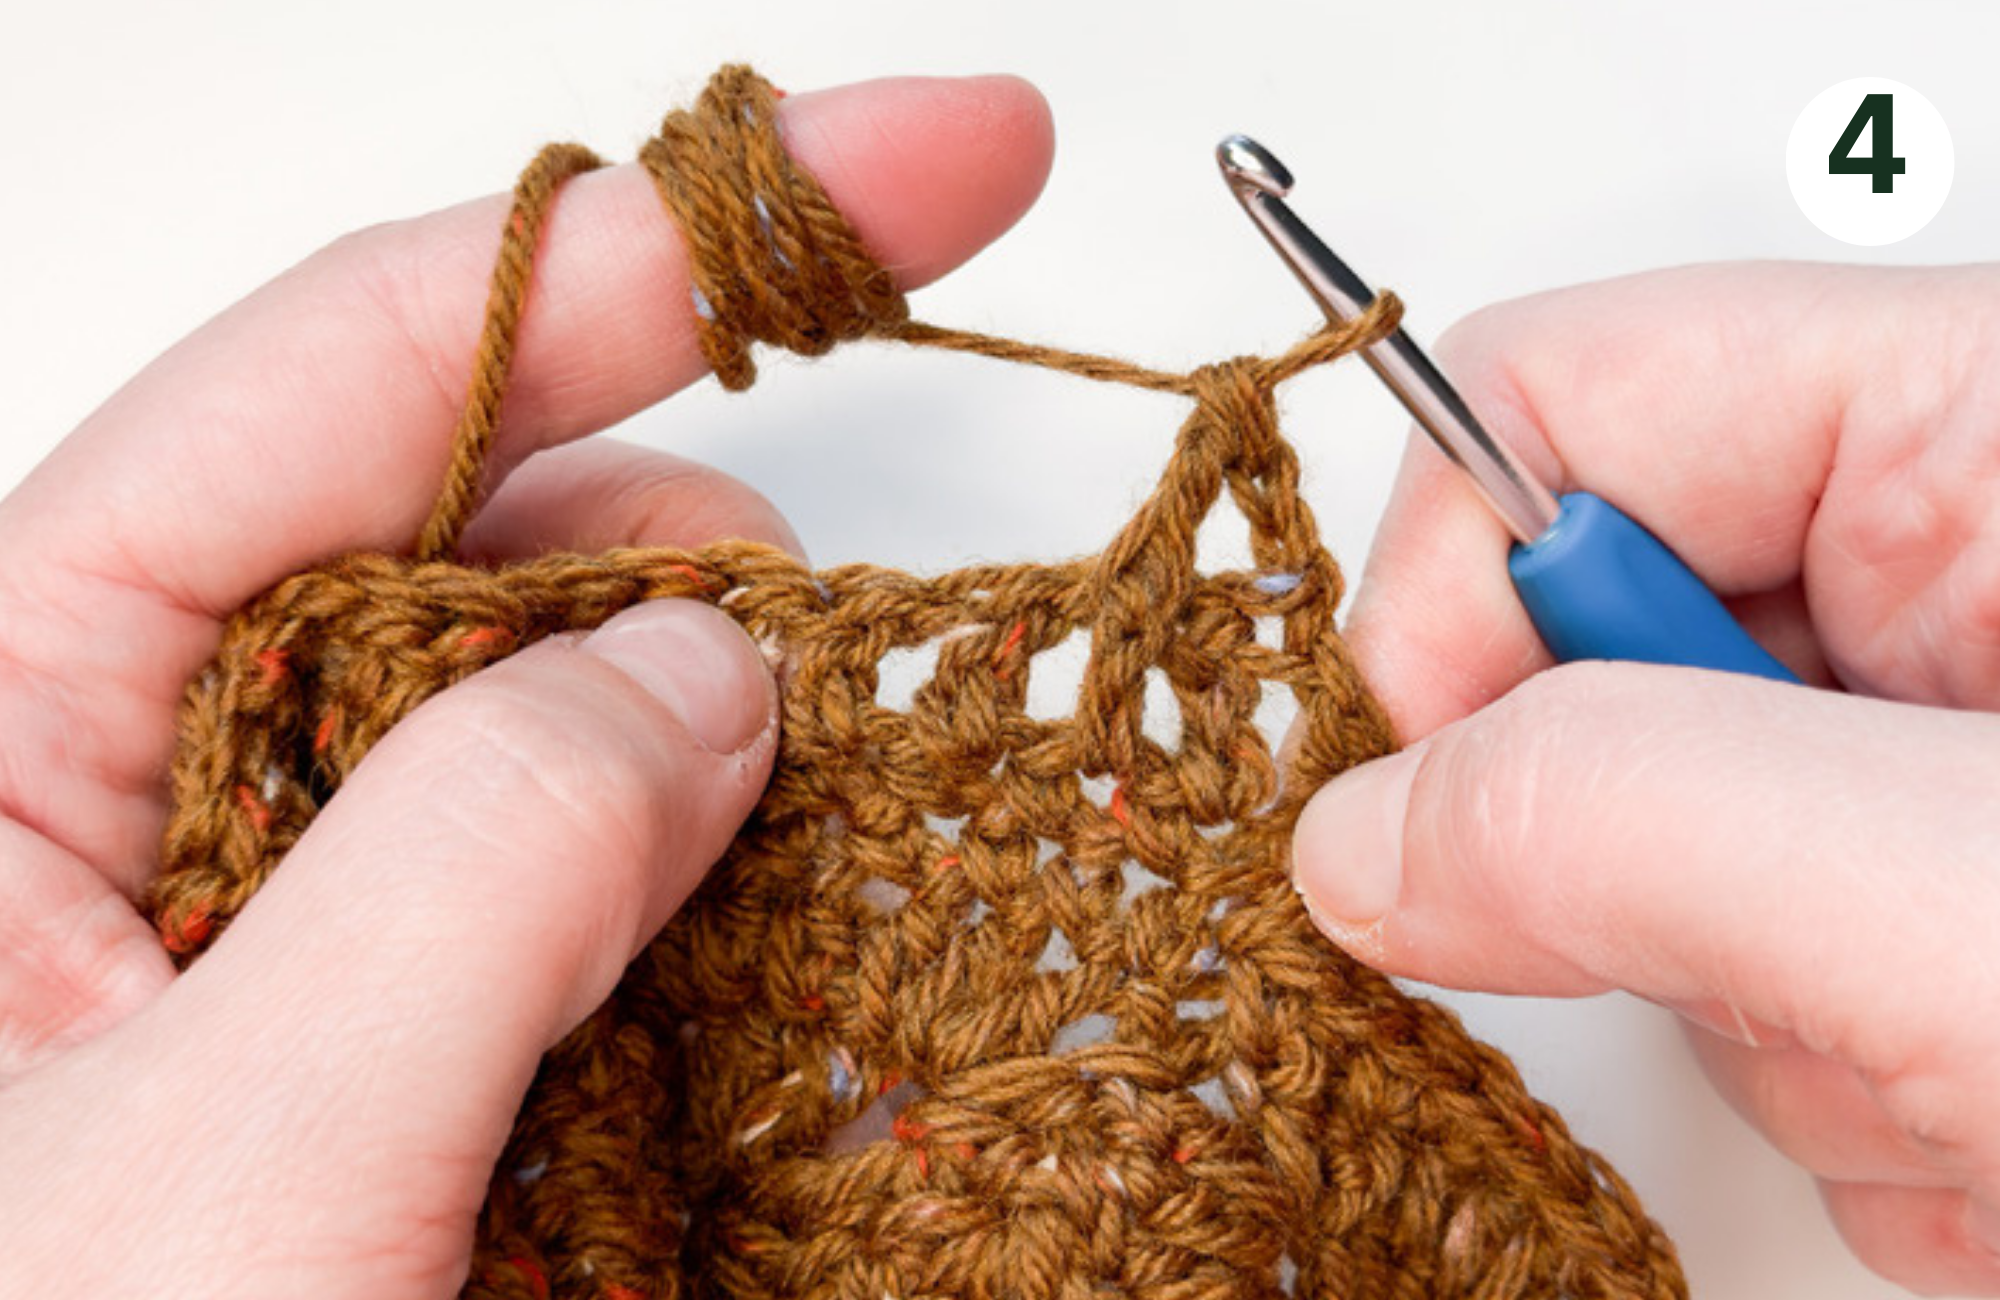
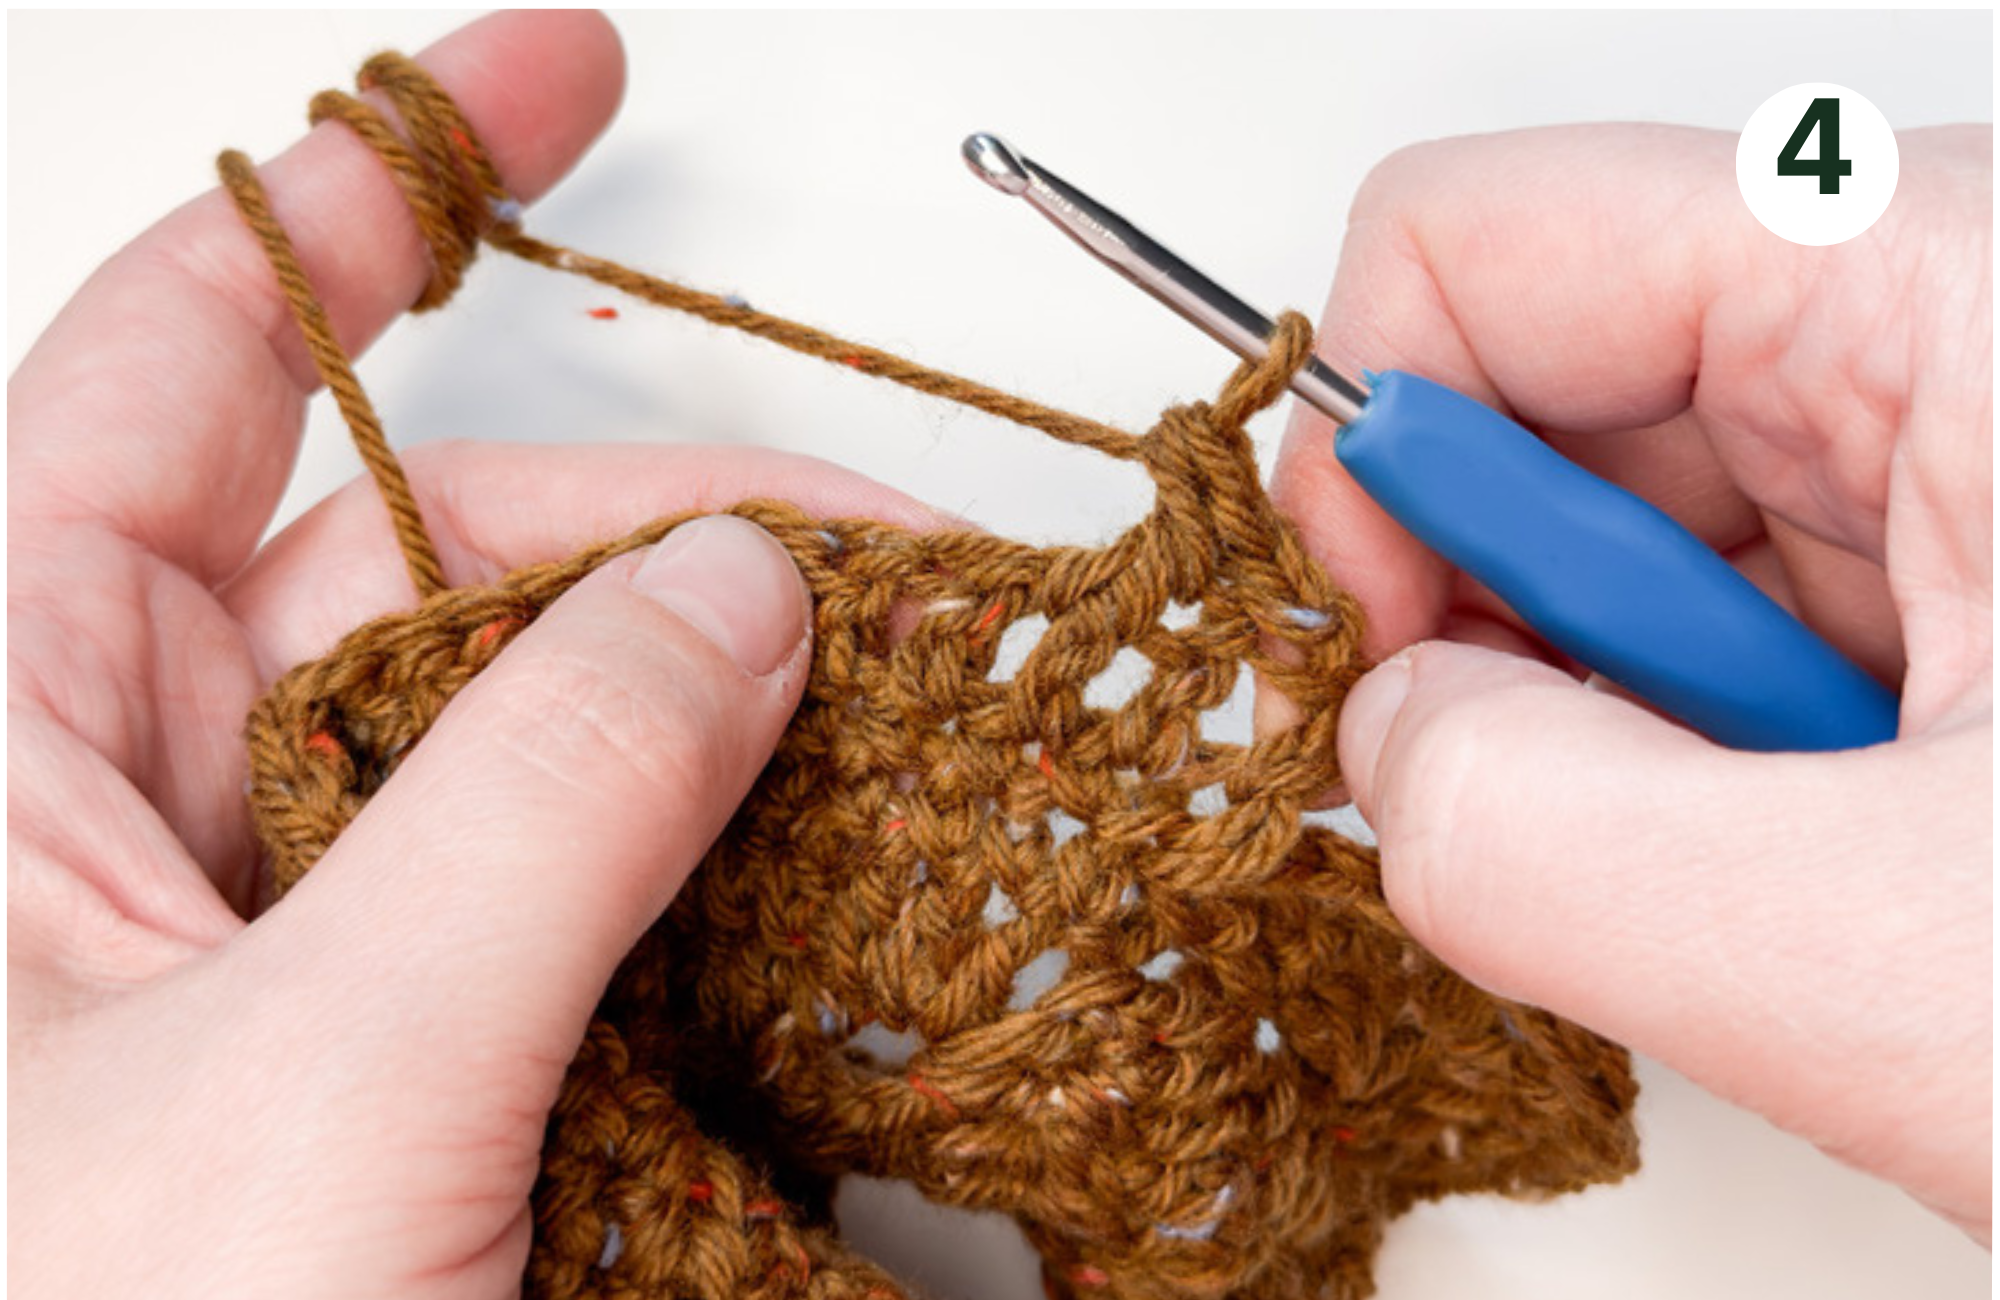
Row 4
Sc 24.
Row 5 and 9 – repeat Row 1
Row 6 and 10 – repeat Row 2
Row 7 and 11 – repeat Row 3
Row 8 and 12 – repeat Row 4
Cut the yarn and leave approximately 20 inches, we will need this extra yarn to sew the bottom of the bag.
Repeat the same instructions to crochet the second part of the bag.
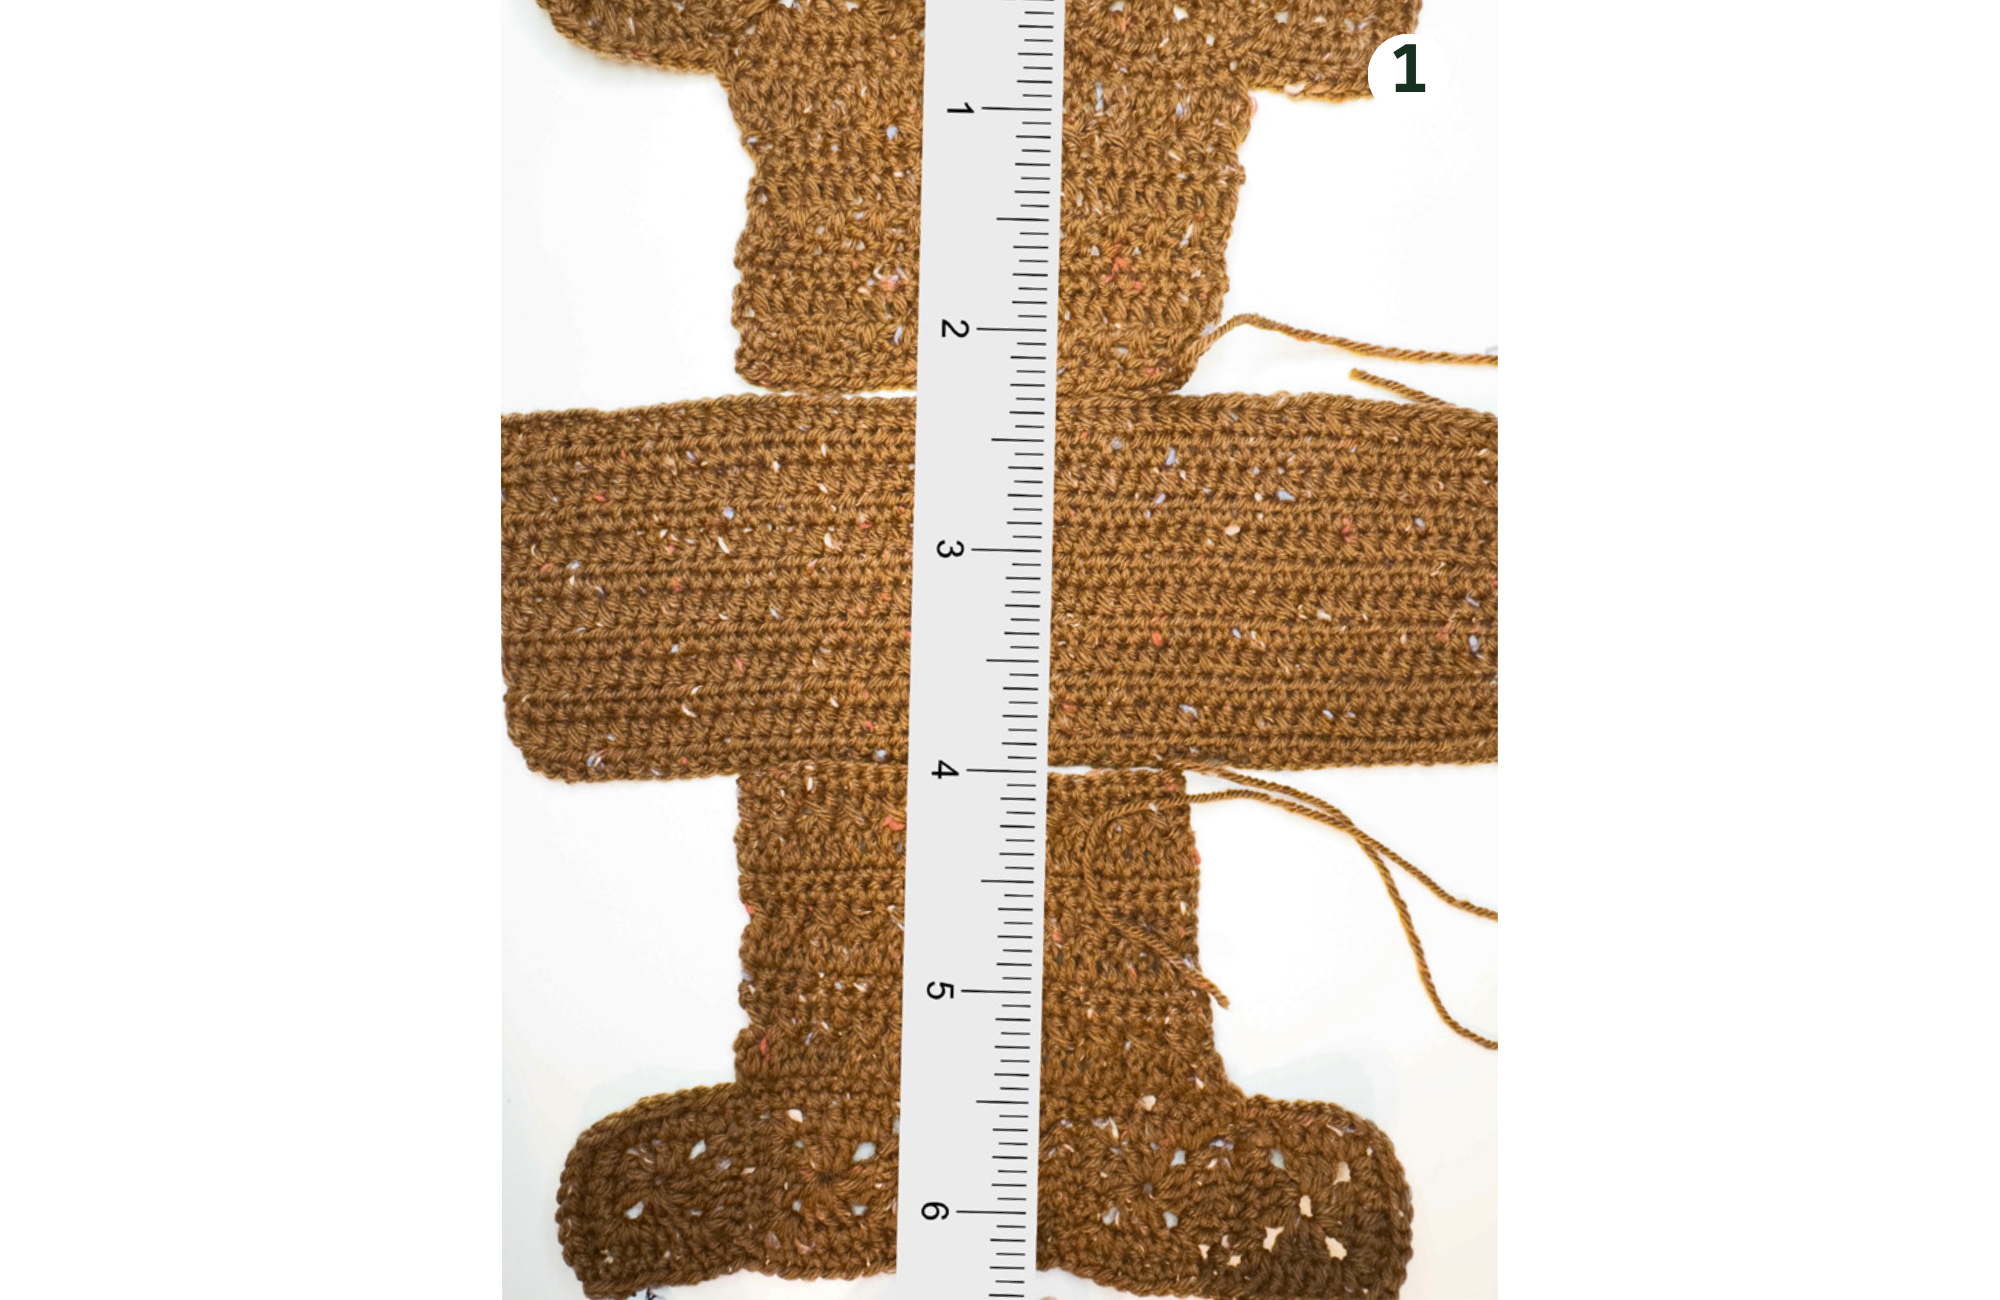
Little squares and the body of the bag together should measure approximately 6 inches.
Part 4 – bottom of the bag
Make a loop and ch 51.
Row 1
Hdc 50.
Row 2
Turn the project, ch 1 and hdc 50.
Rows 3 – 12 – repeat Row 2
Cut the yarn, secure and weave the extra yarn.
Part 5 – attaching a bottom to the main part of the bag
Place all parts together as shown in the photo below. Choose the front and back sides of your project and place them accordingly. The side facing up will be inside of the bag.
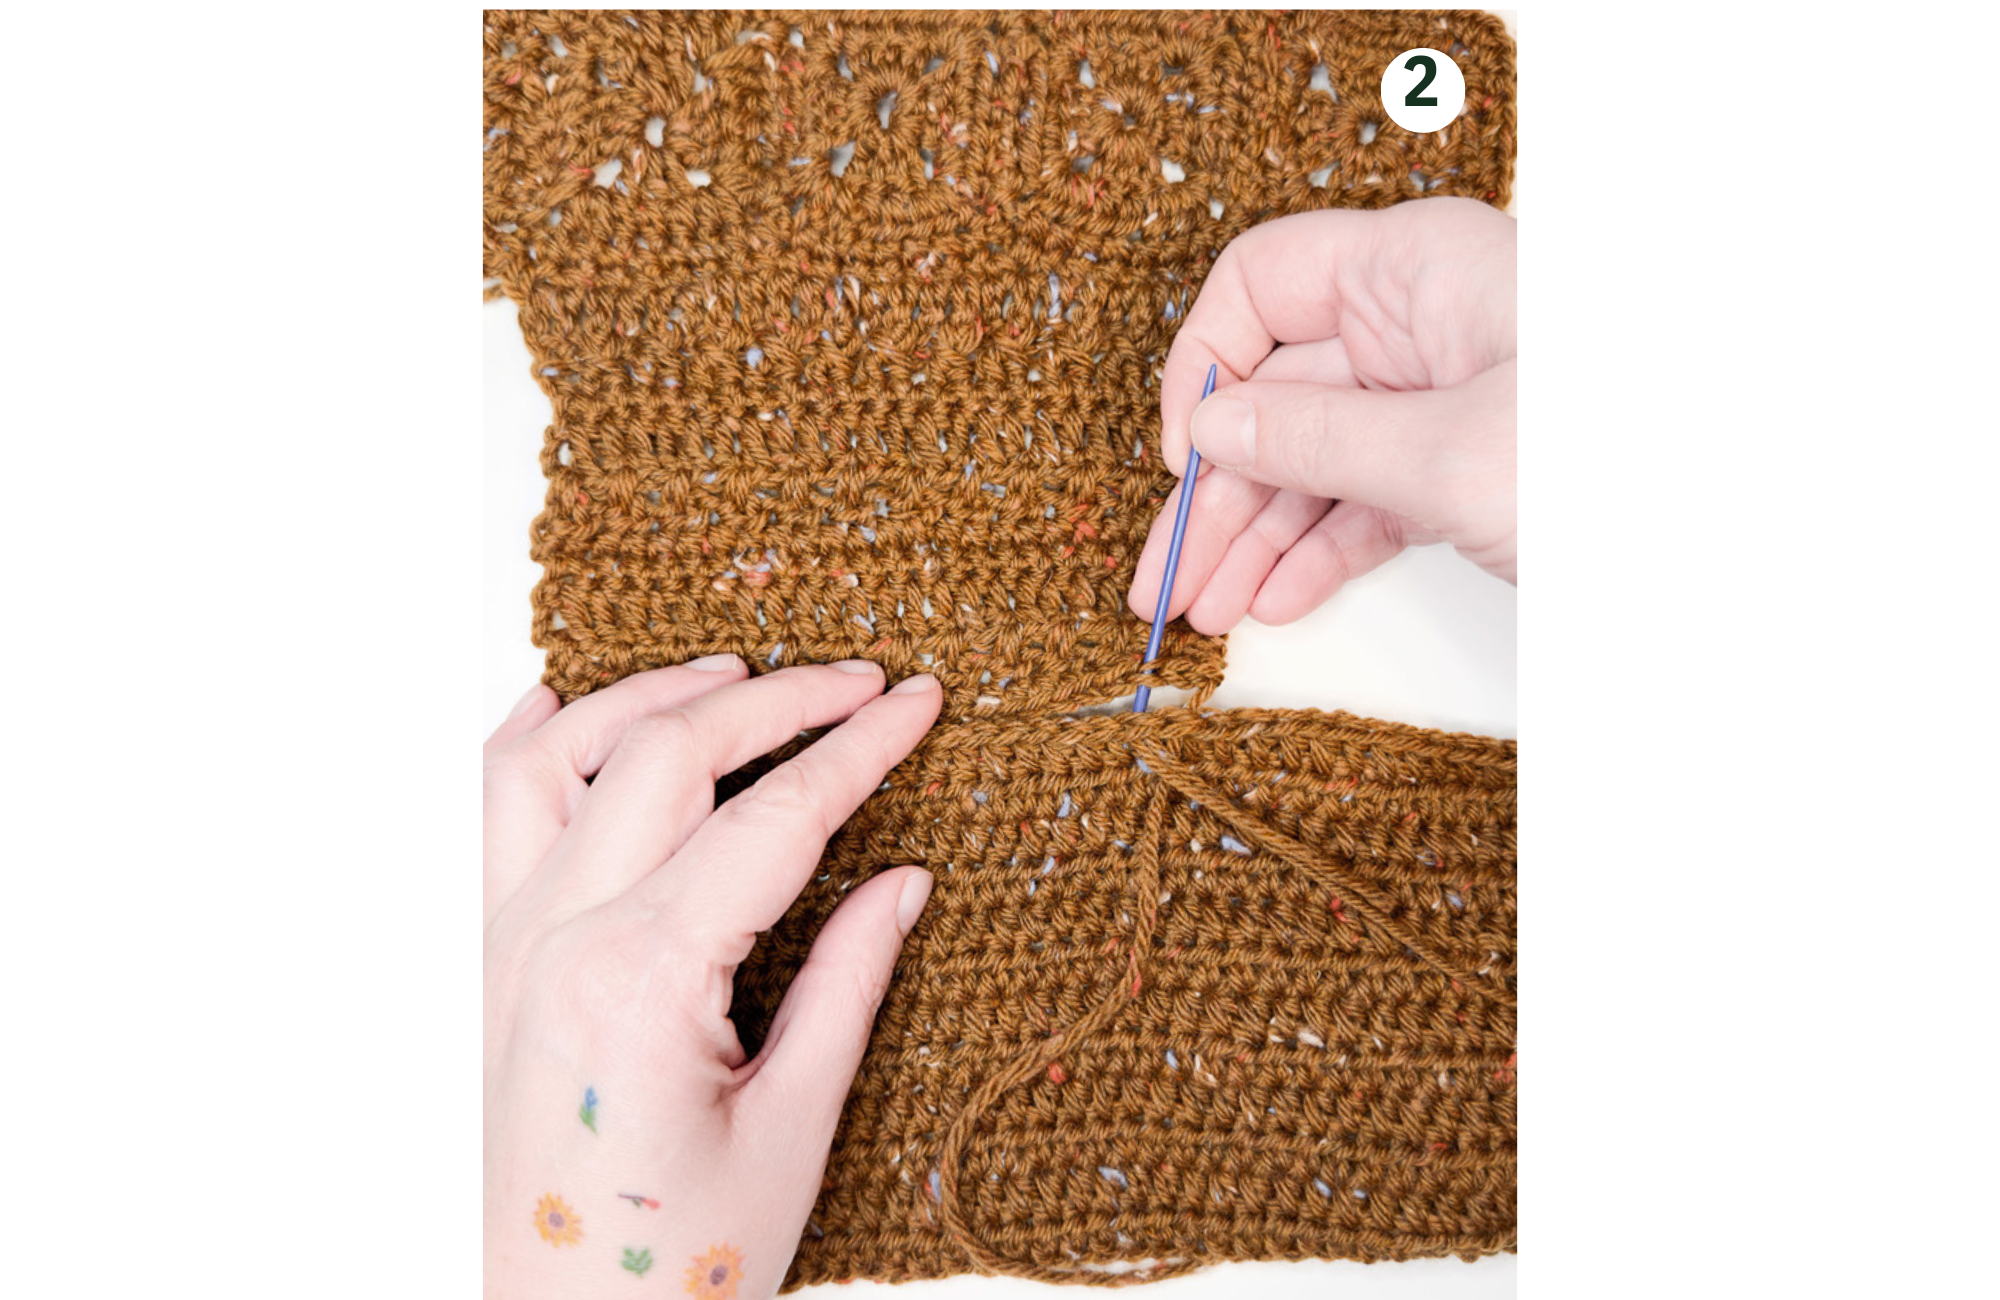
Measure 3.5 inches of the bottom of the bag and start sewing from that point. Use needle and the same yarn to sew the edges on both sides of the bottom part. Cut the yarn. Secure and weave the ends.
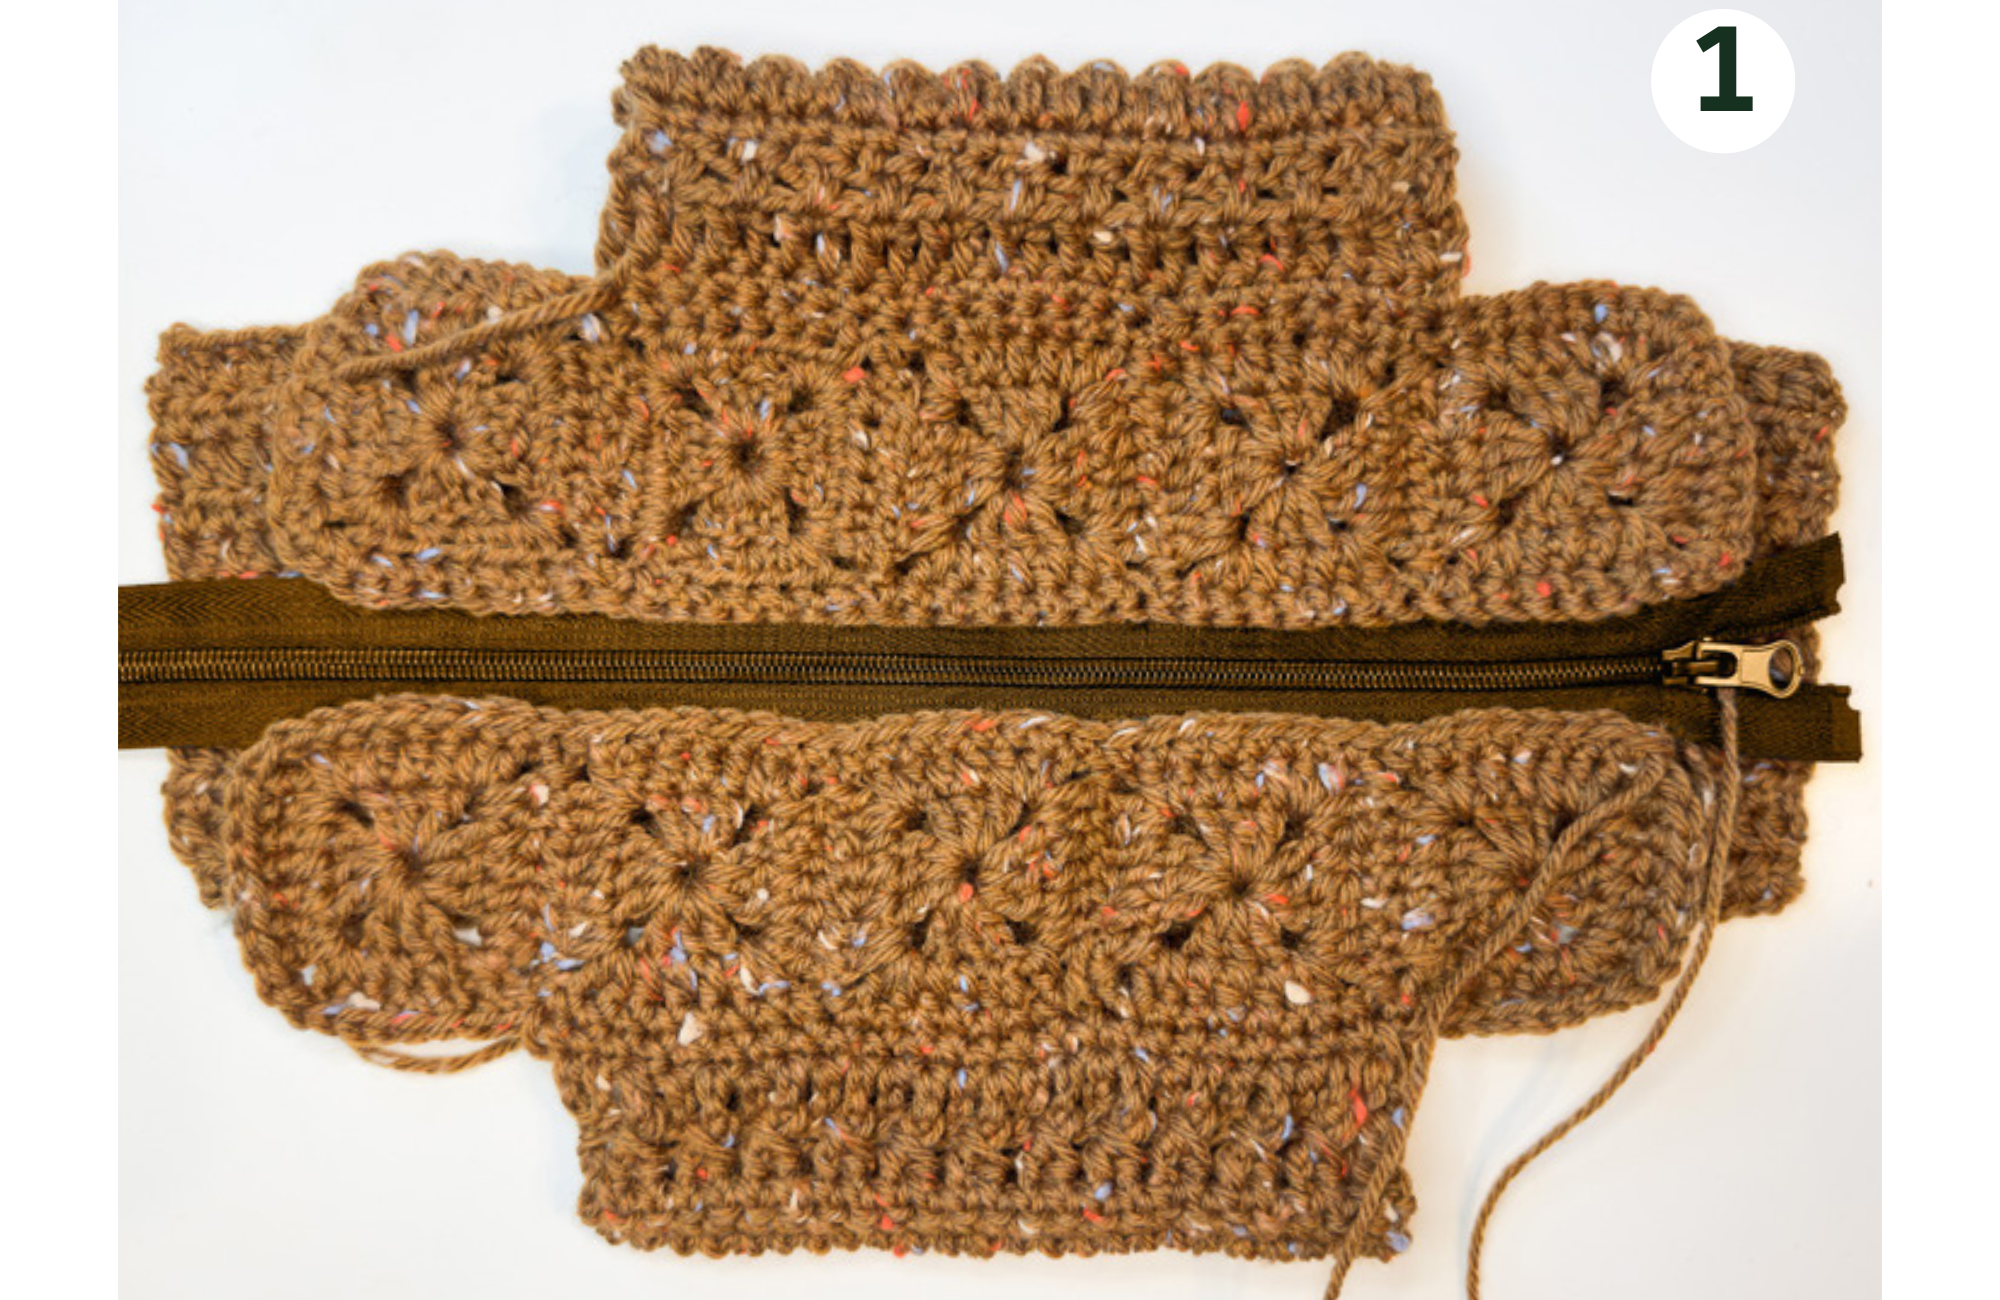
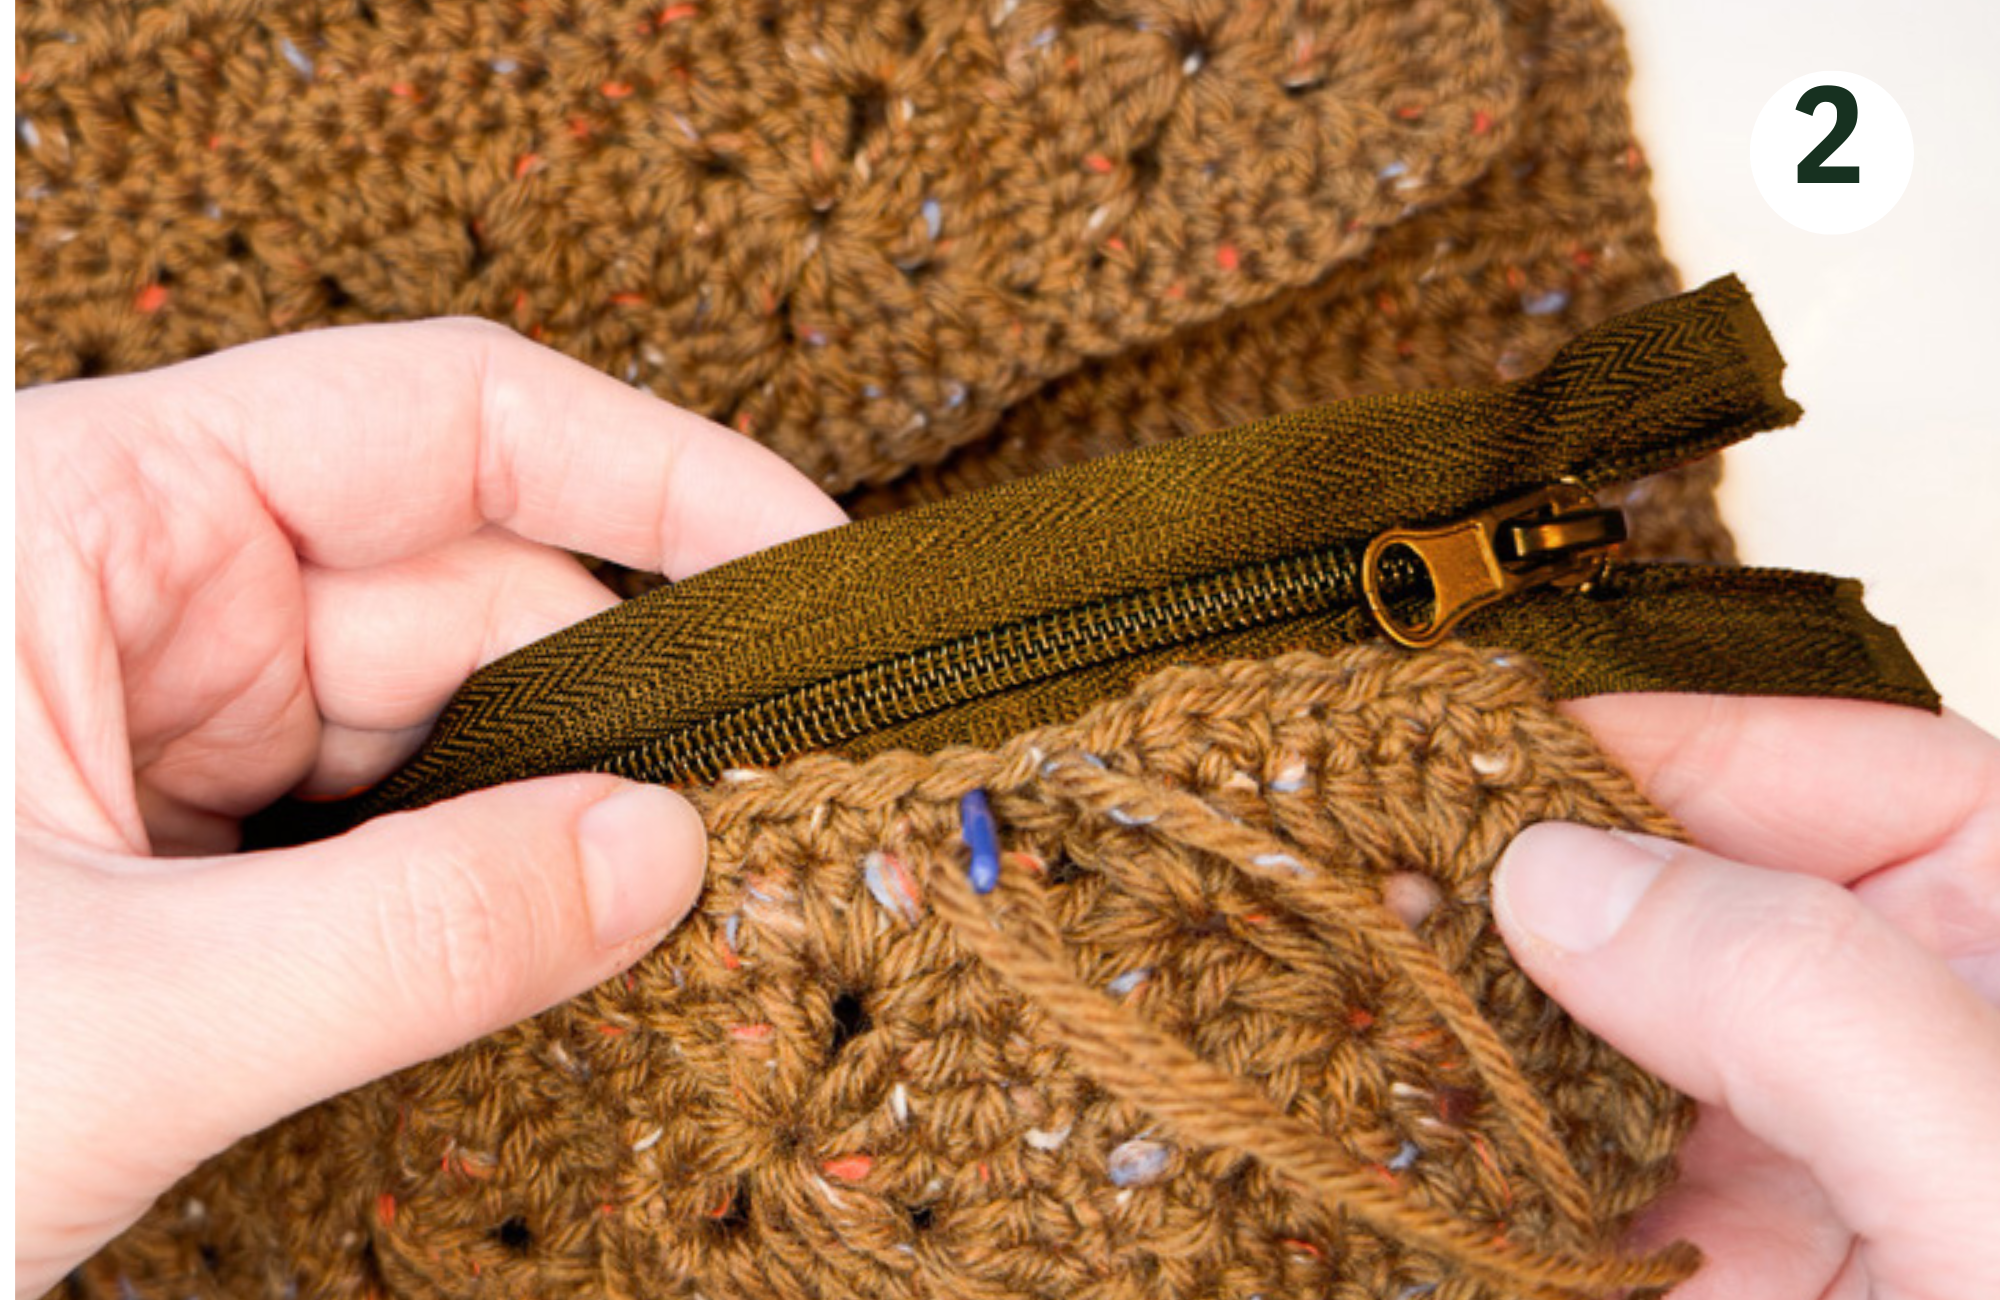
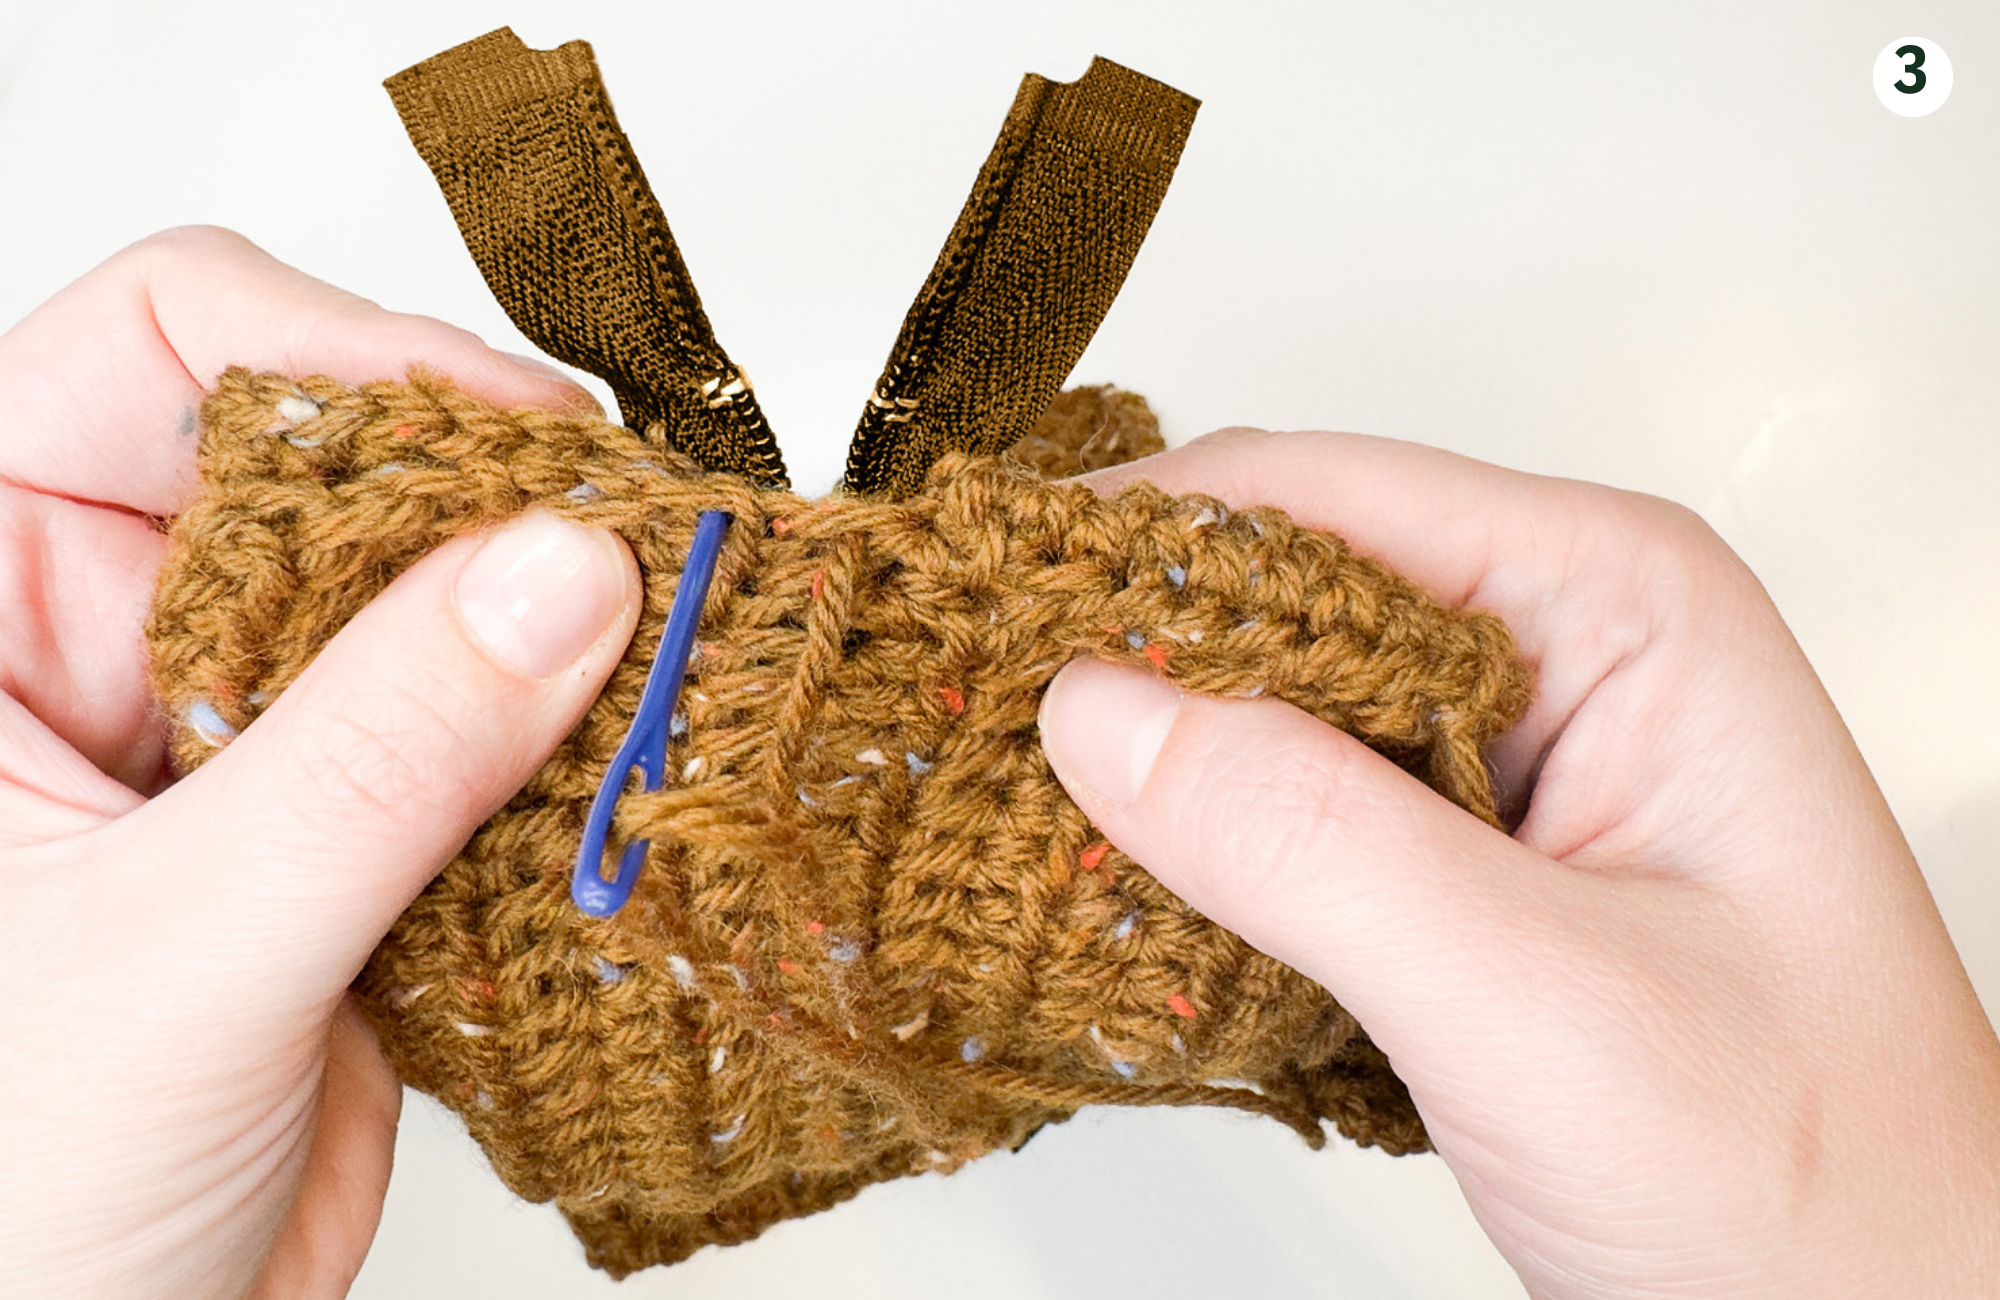
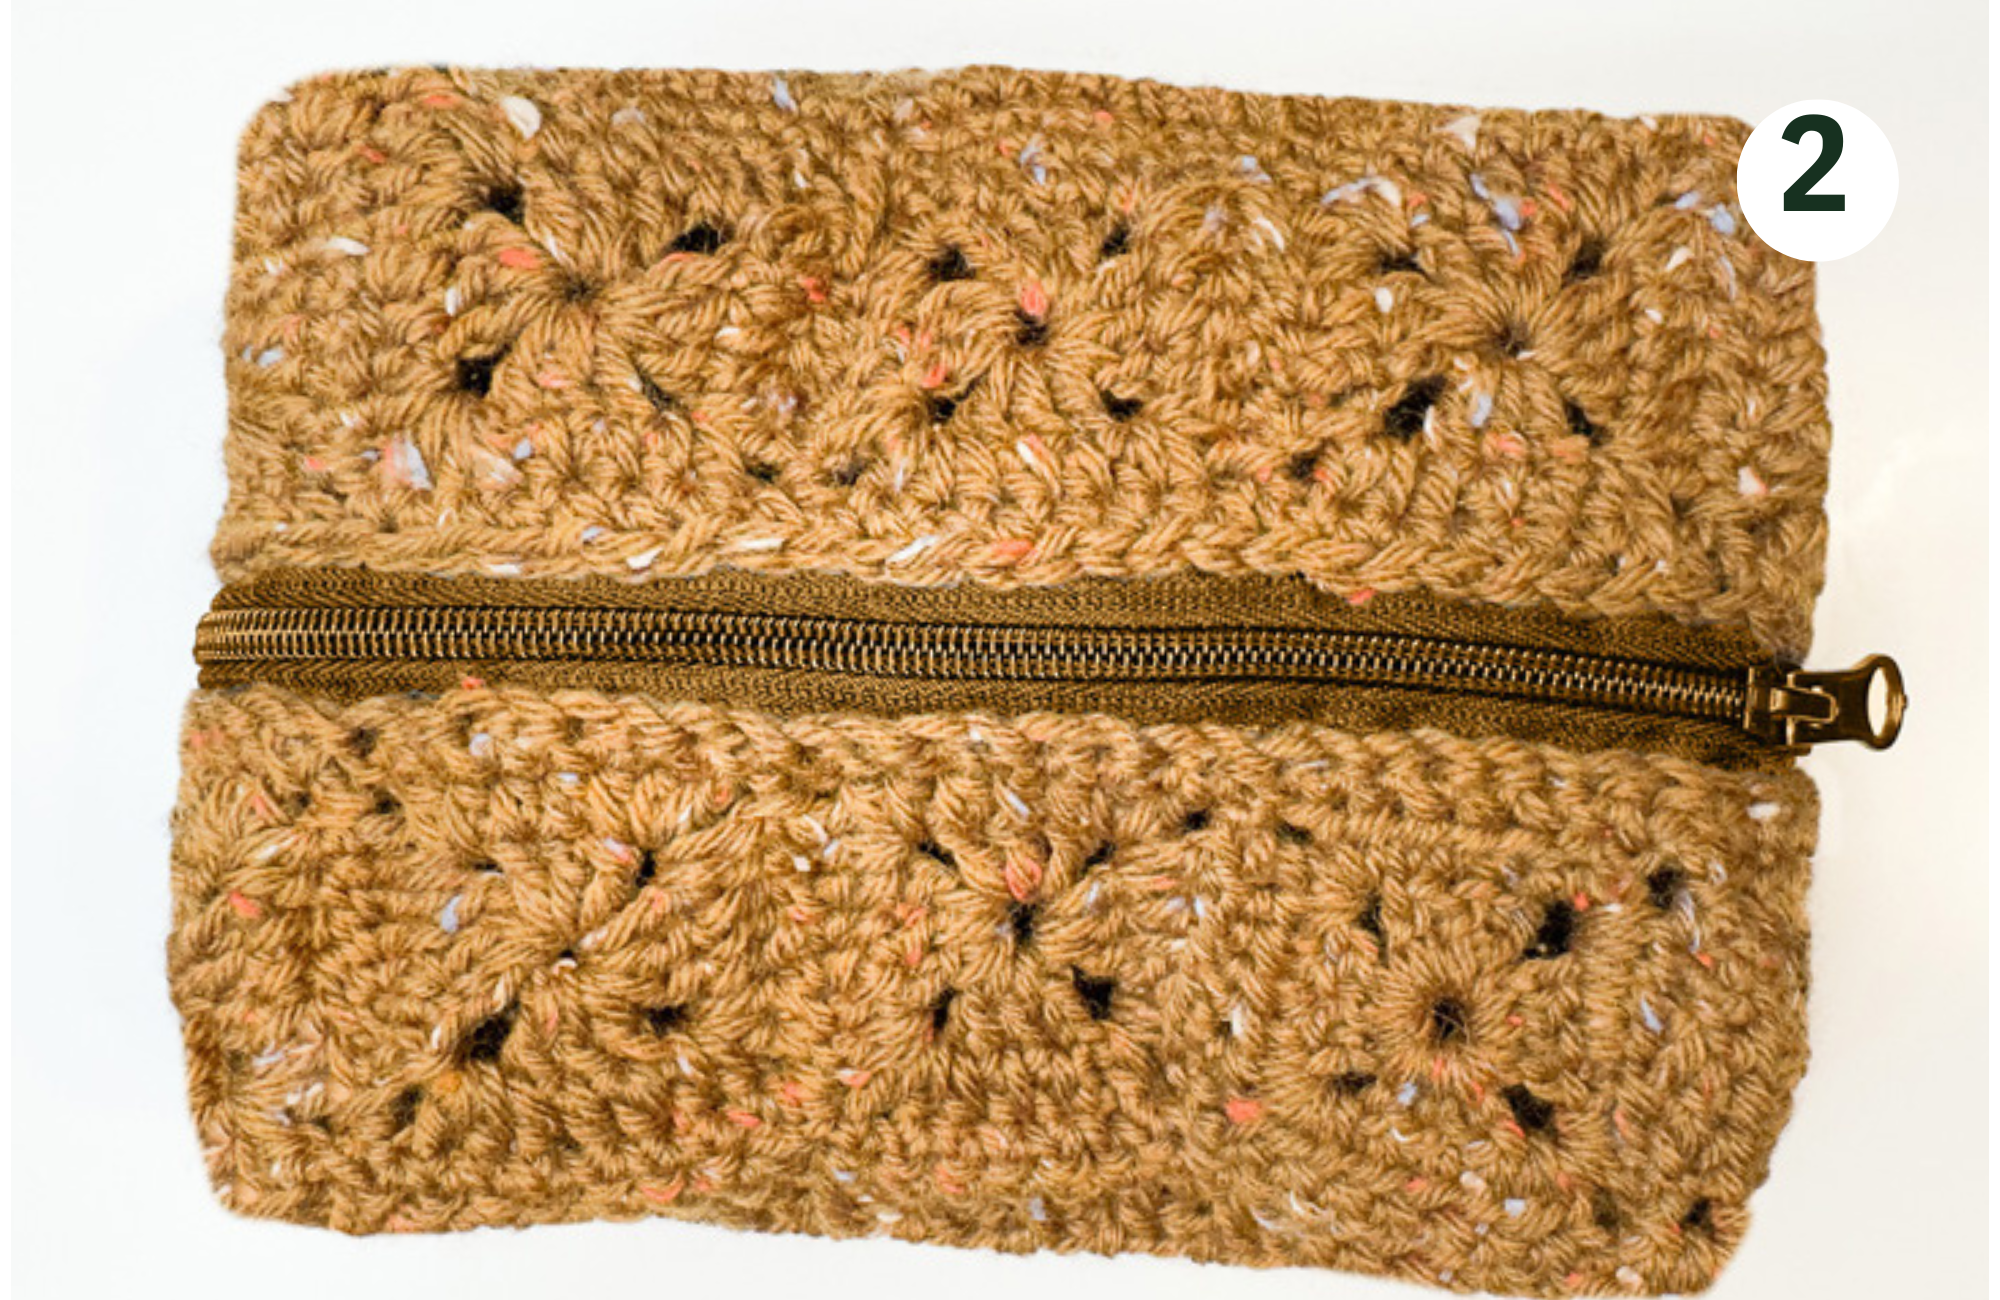
Part 6 – adding a zipper
Place the zipper behind the squares. Use the needle and sew the zipper to the edges of the squares. Secure and weave extra yarns.
Final look of the project