Project #2:
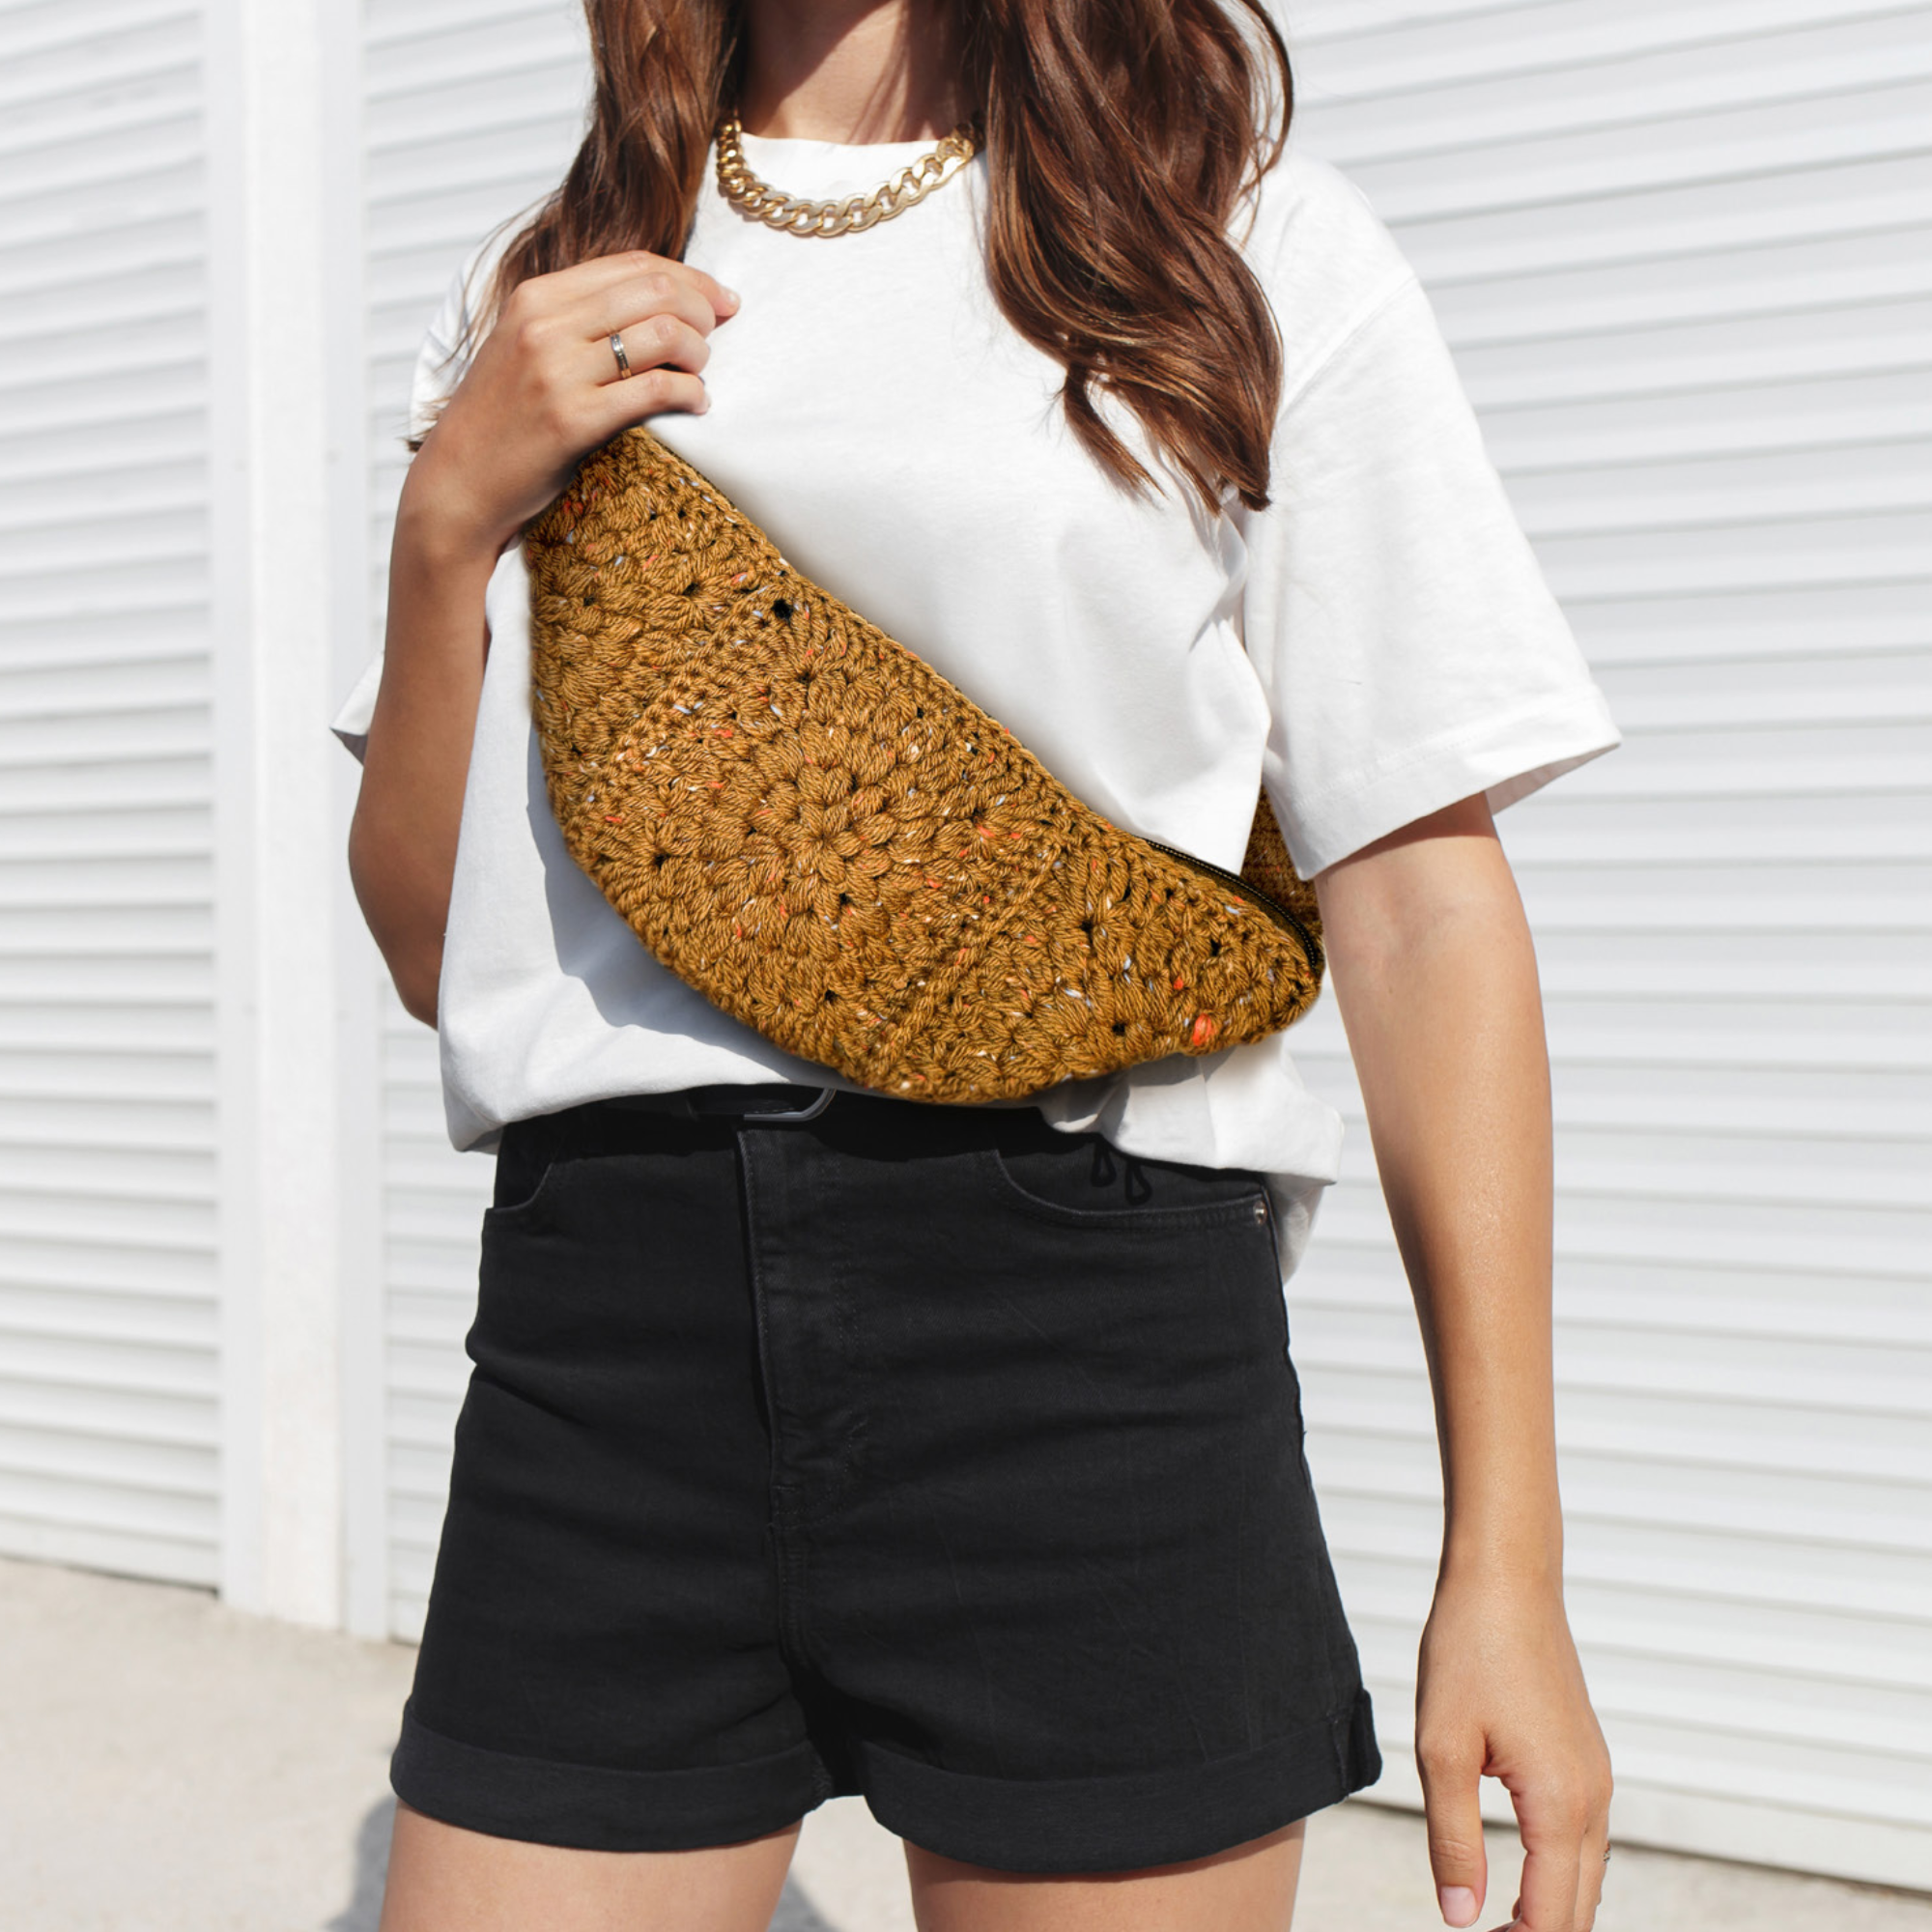
Please note that the yarn color shown in the instructional photos may vary from the color included in your box.
Materials:
- Two skeins of Woodland Whisper yarn
- US size 8 (5mm) crochet hook
- Sewing needle
- Ruler
- Scissors
- Zipper
Stitches uses / abbreviations:
- Magic circle
- Ch – chain
- St(s) – stitch(s)
- Sc – single crochet
- Dc – double crochet
- Hdc – half double crochet
- Sl – slip stitch
Make a loop. Insert a hook into the loop and pull the yarn into the loop. Ch 4 and sl in the 1st st of the chain.
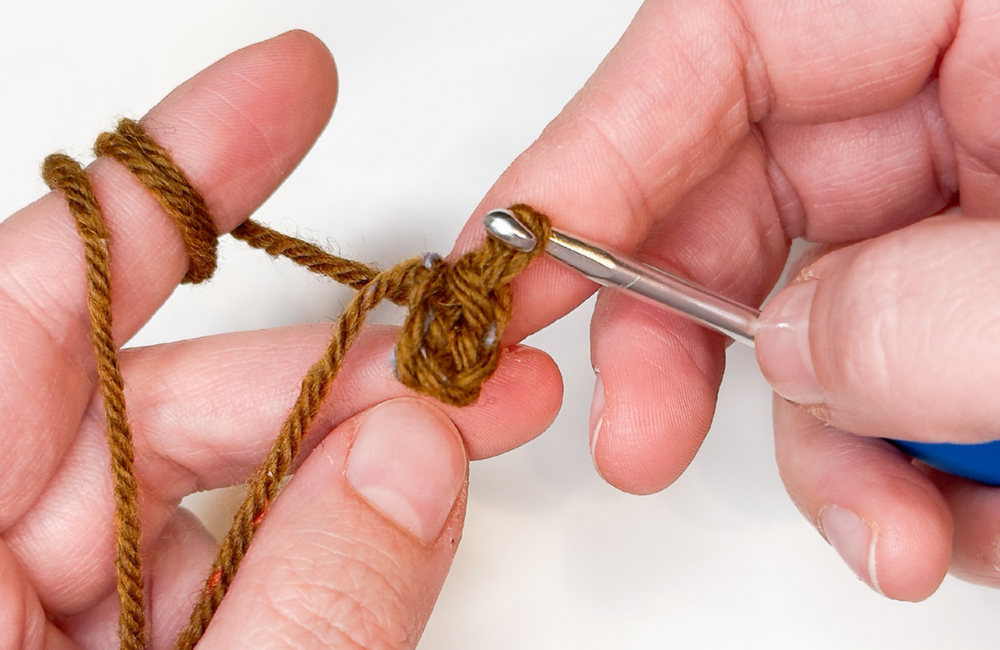
Round 1
Ch 1.
In the Round 1 we will make 6 puff stitches into the circle.
To make a puff stitch – yarn over, pull yarn in the circle, yarn over, pull the yarn in the circle, yarn over, pull the yarn in the circle, you will have 7 loops on the hook. Pull the yarn through all 7 loops together and ch1. You have completed your 1 st puff stitch.
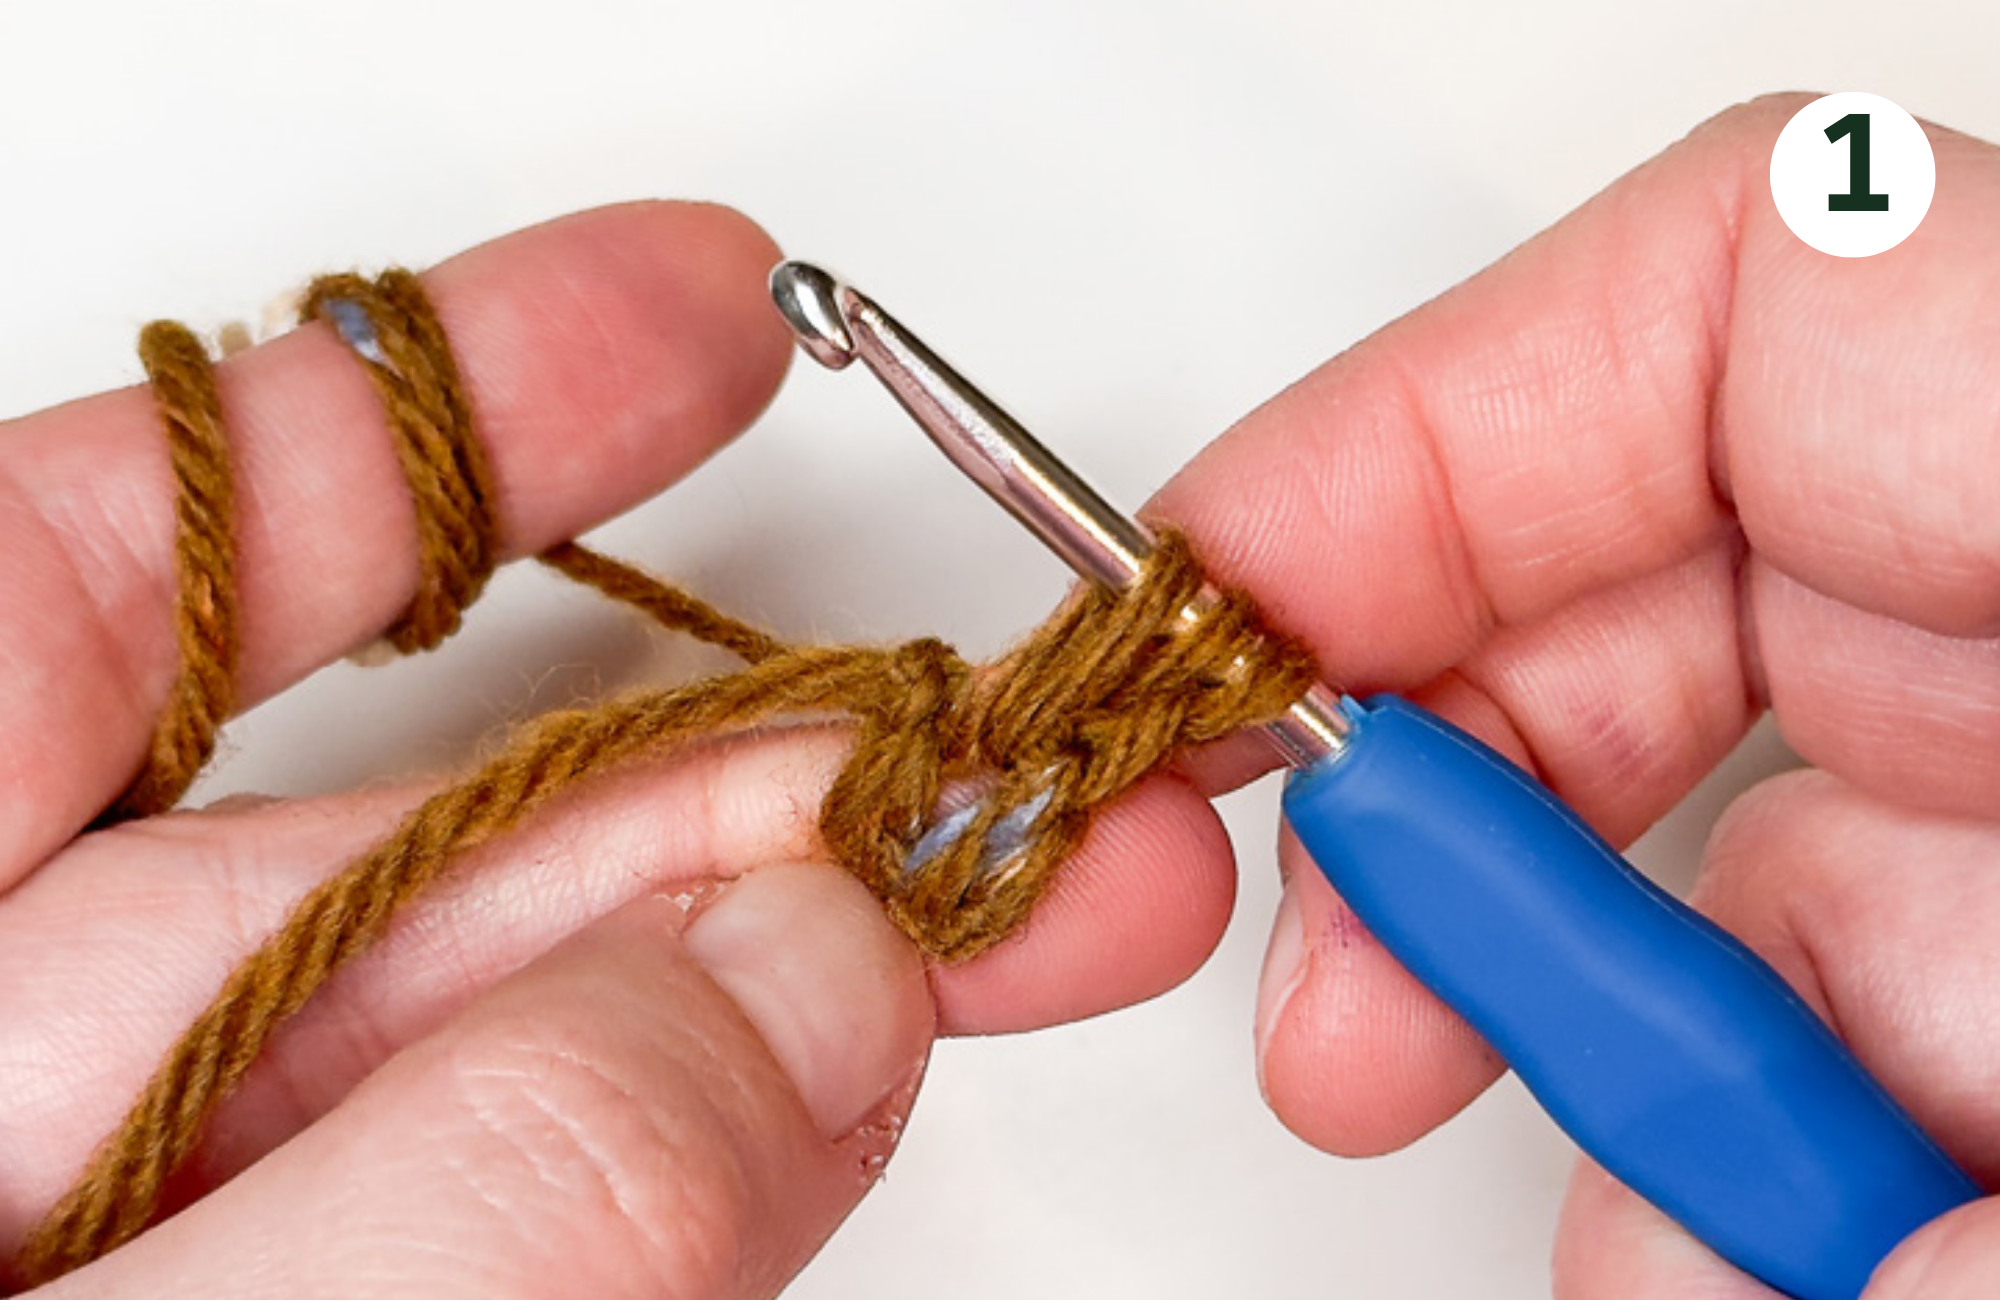
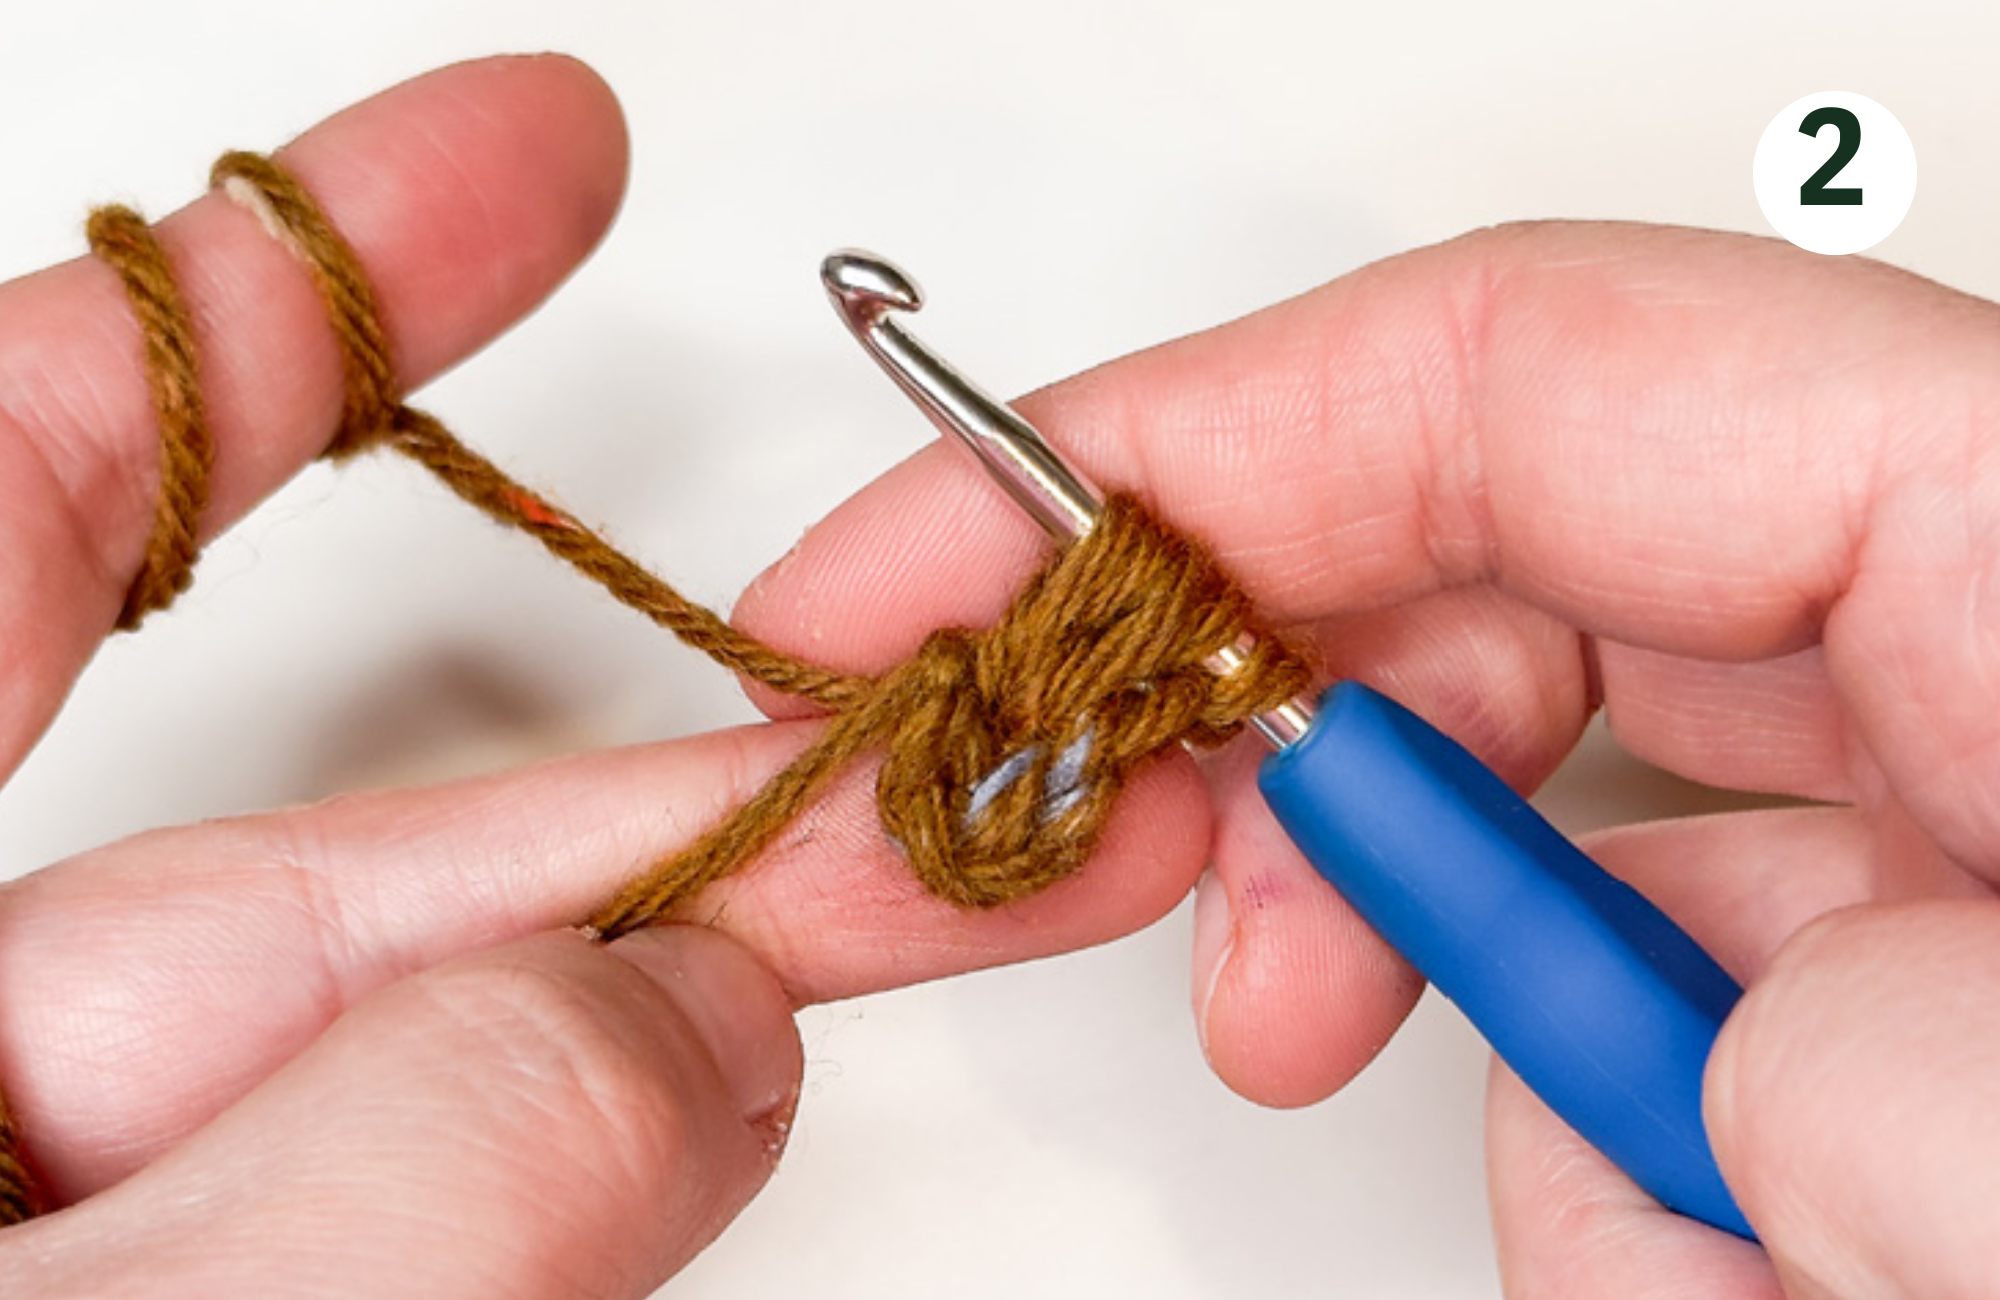
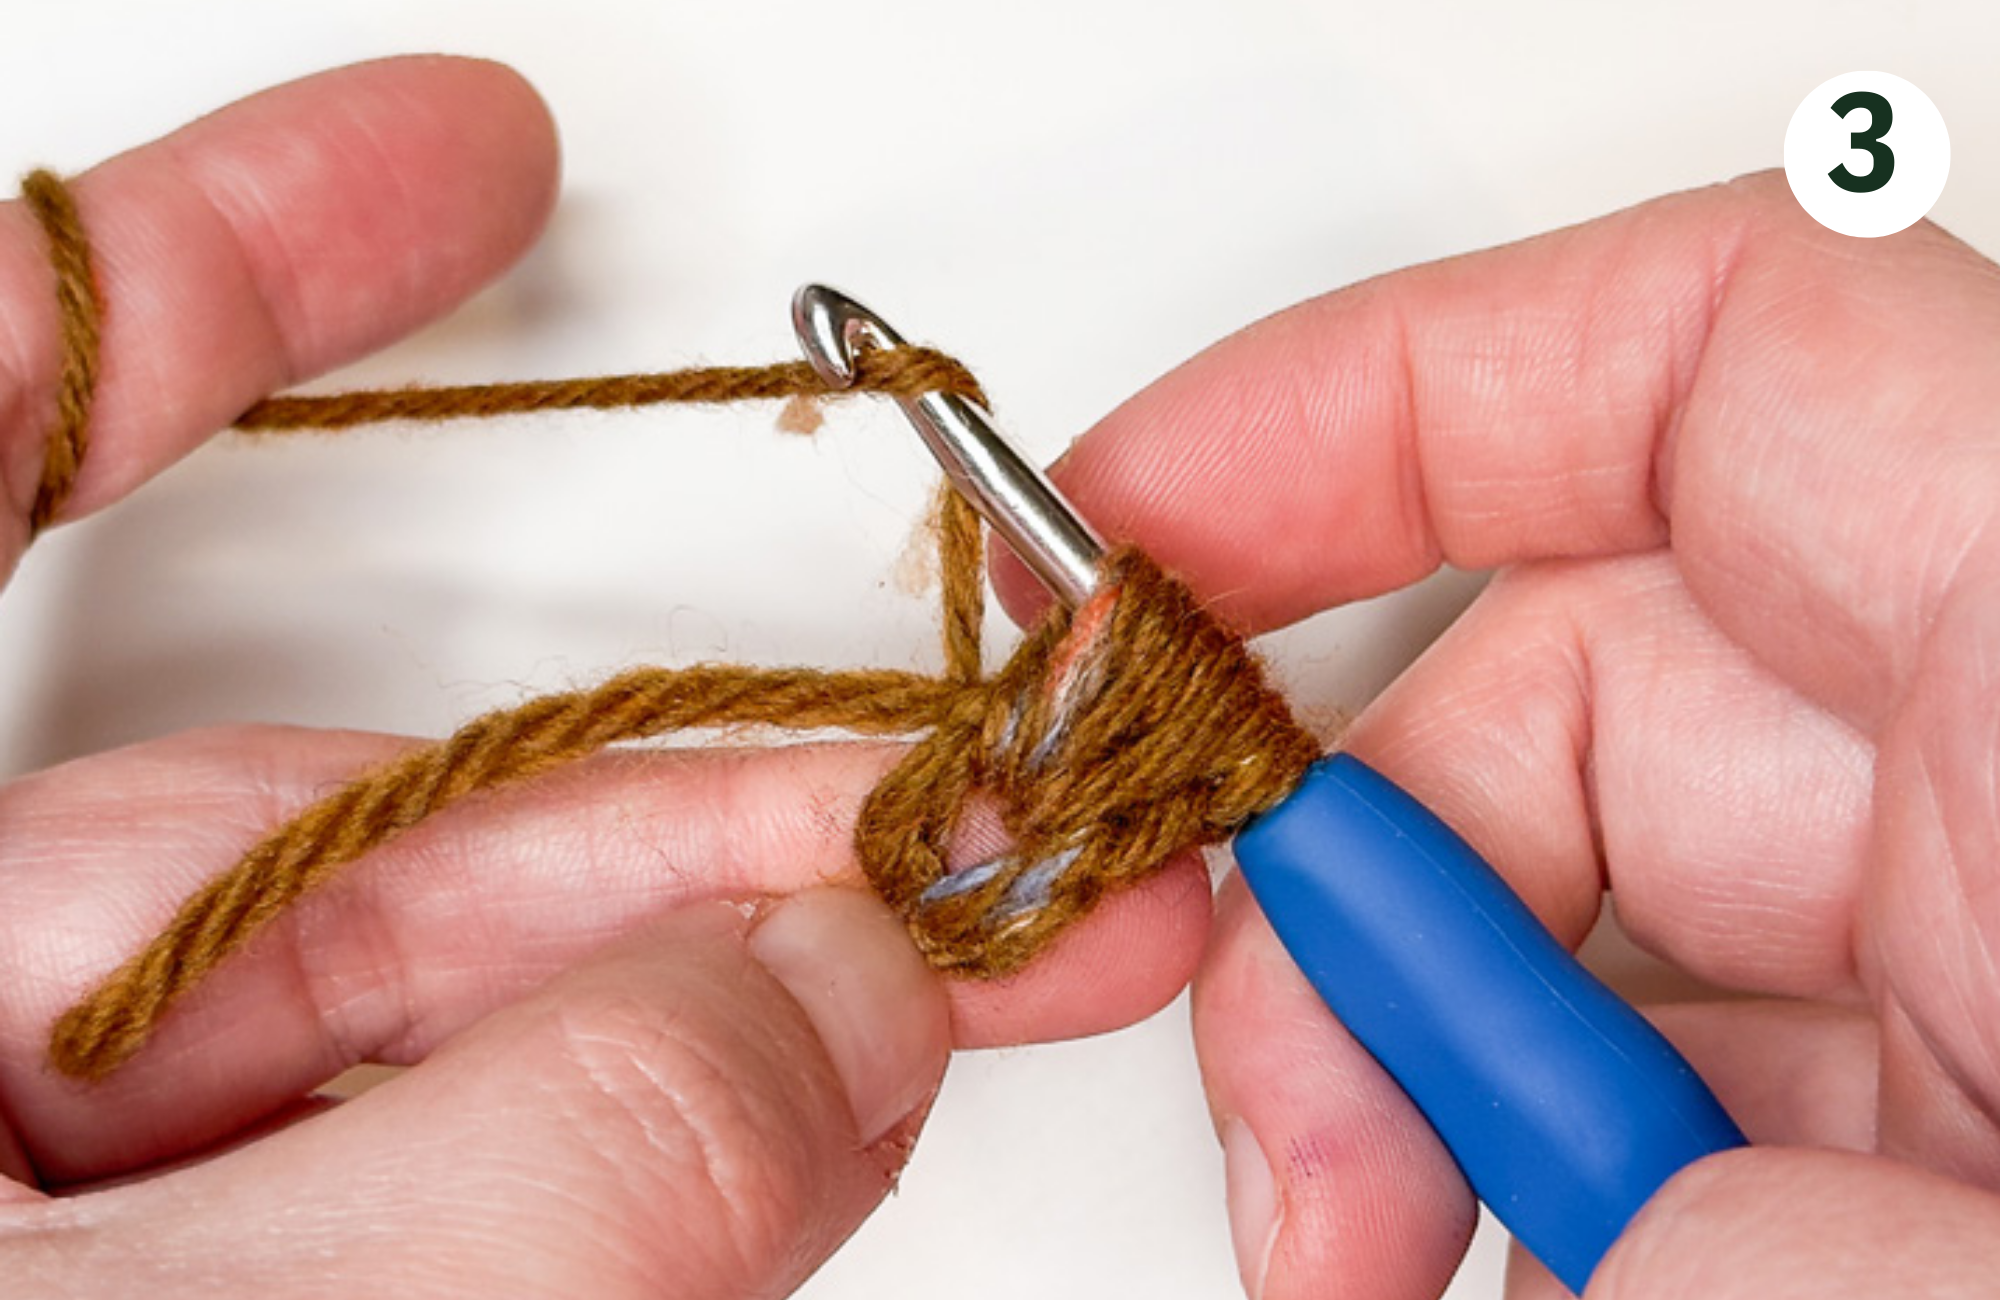
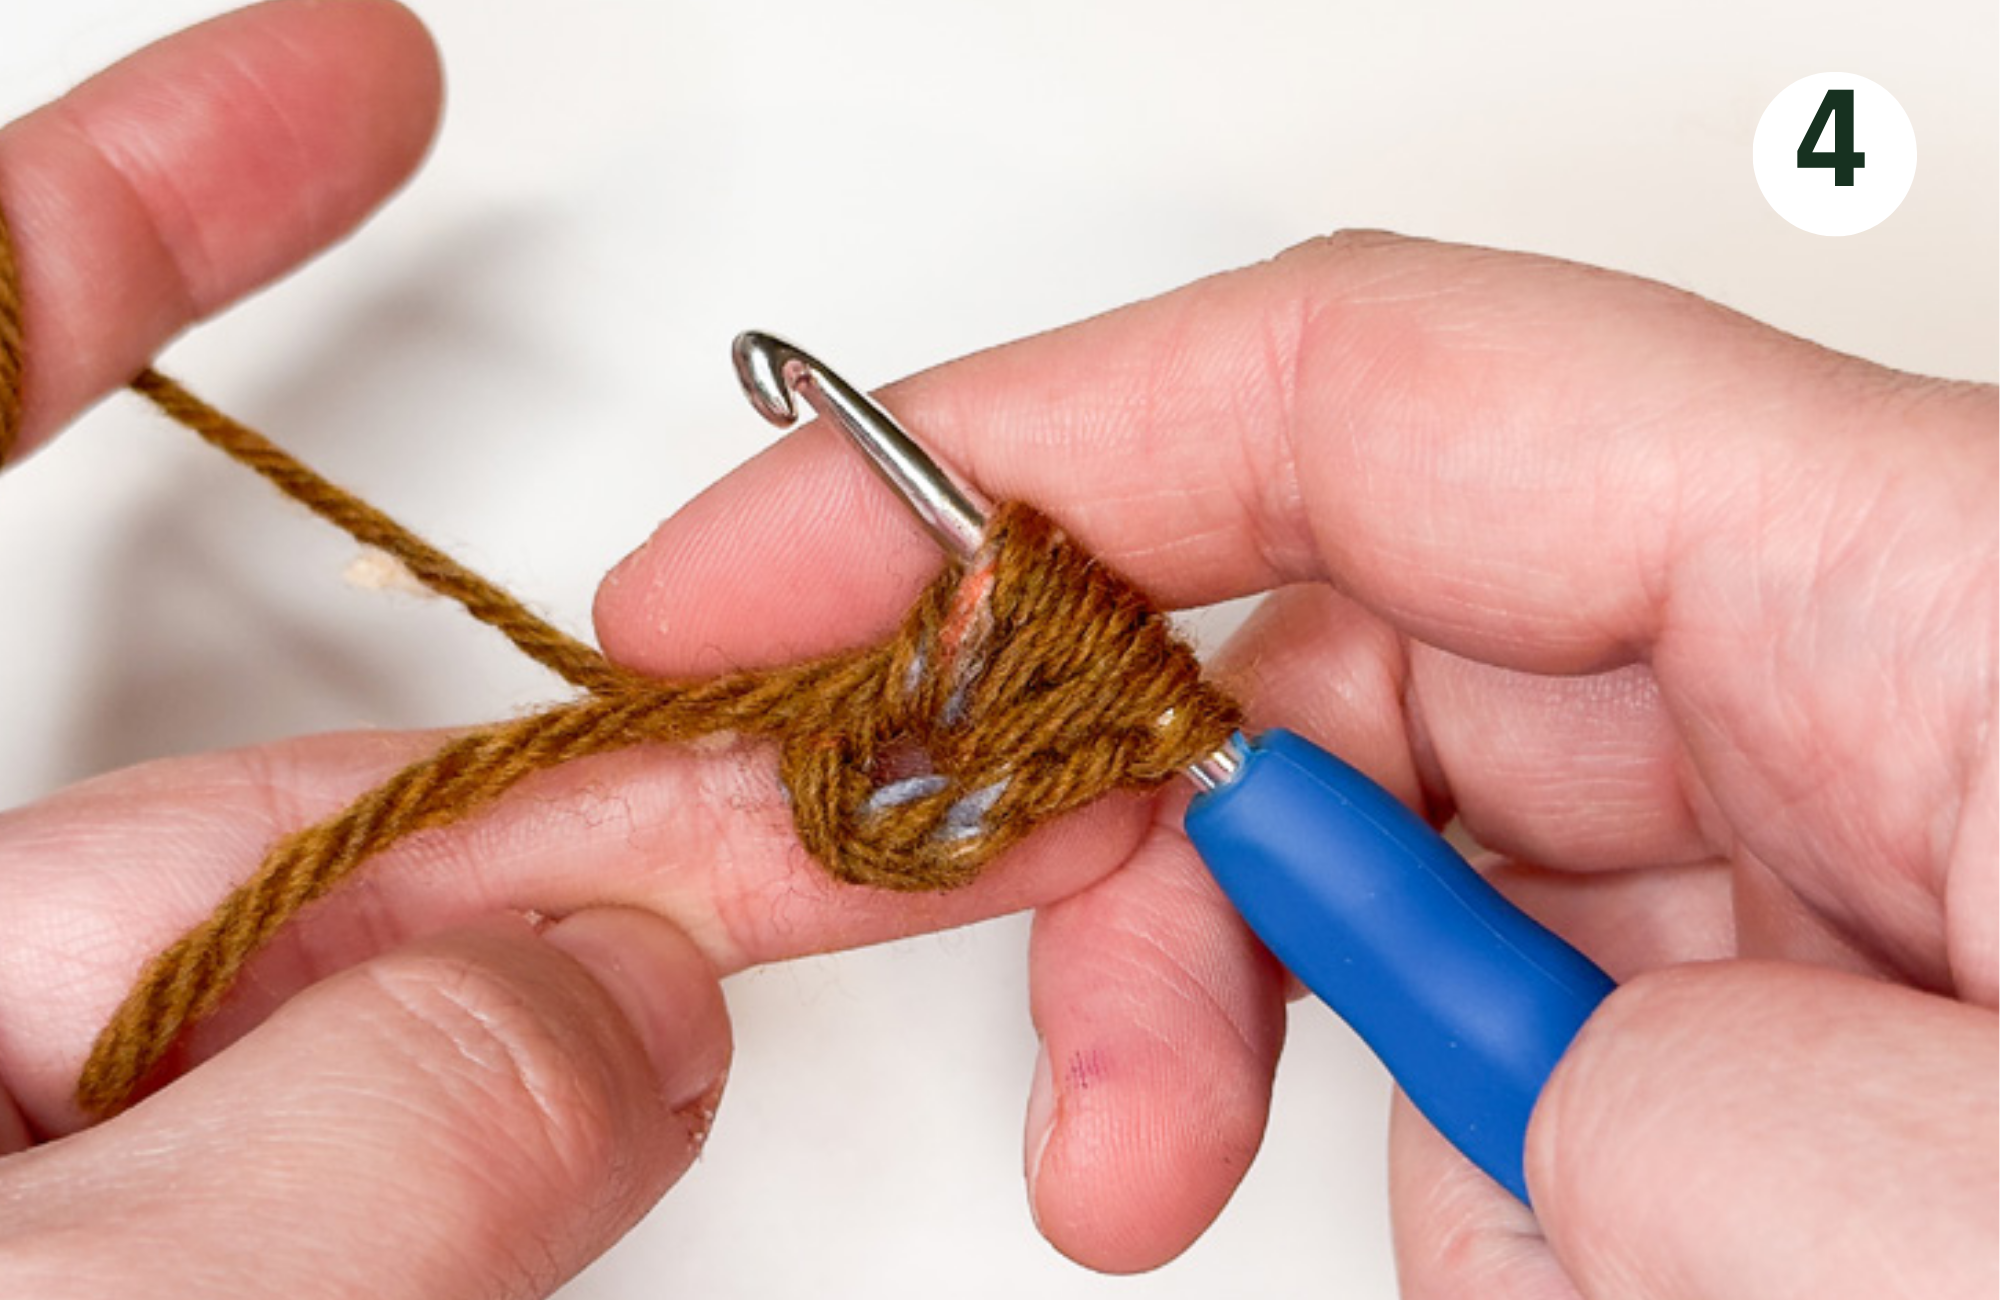
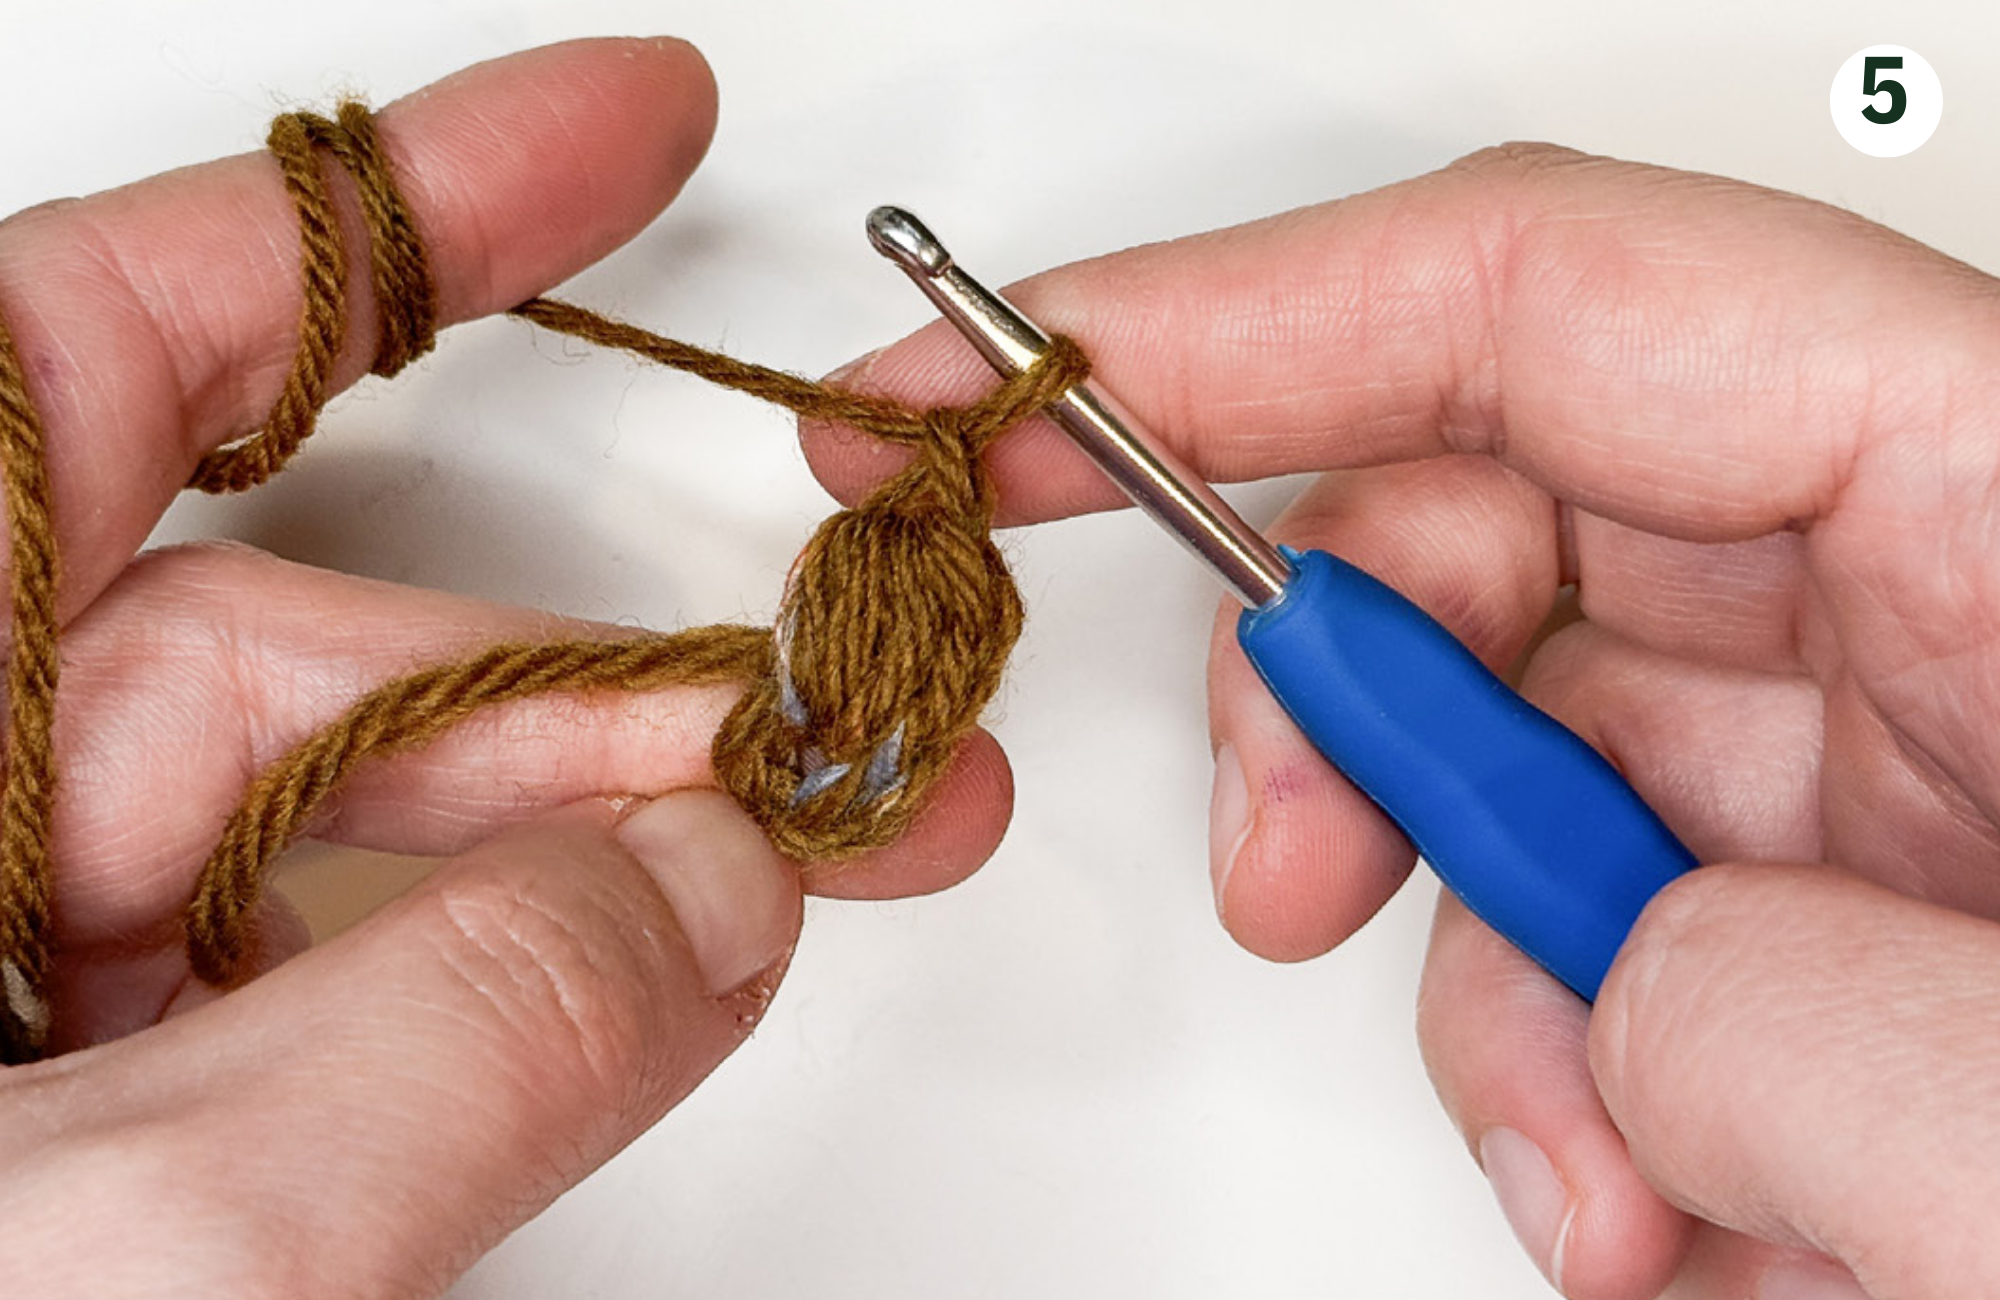
Continue the same pattern and crochet 5 more puff stitches into the circle. You will have 6 puff Stitches in total by the end of this round. Sl into the 1st st.
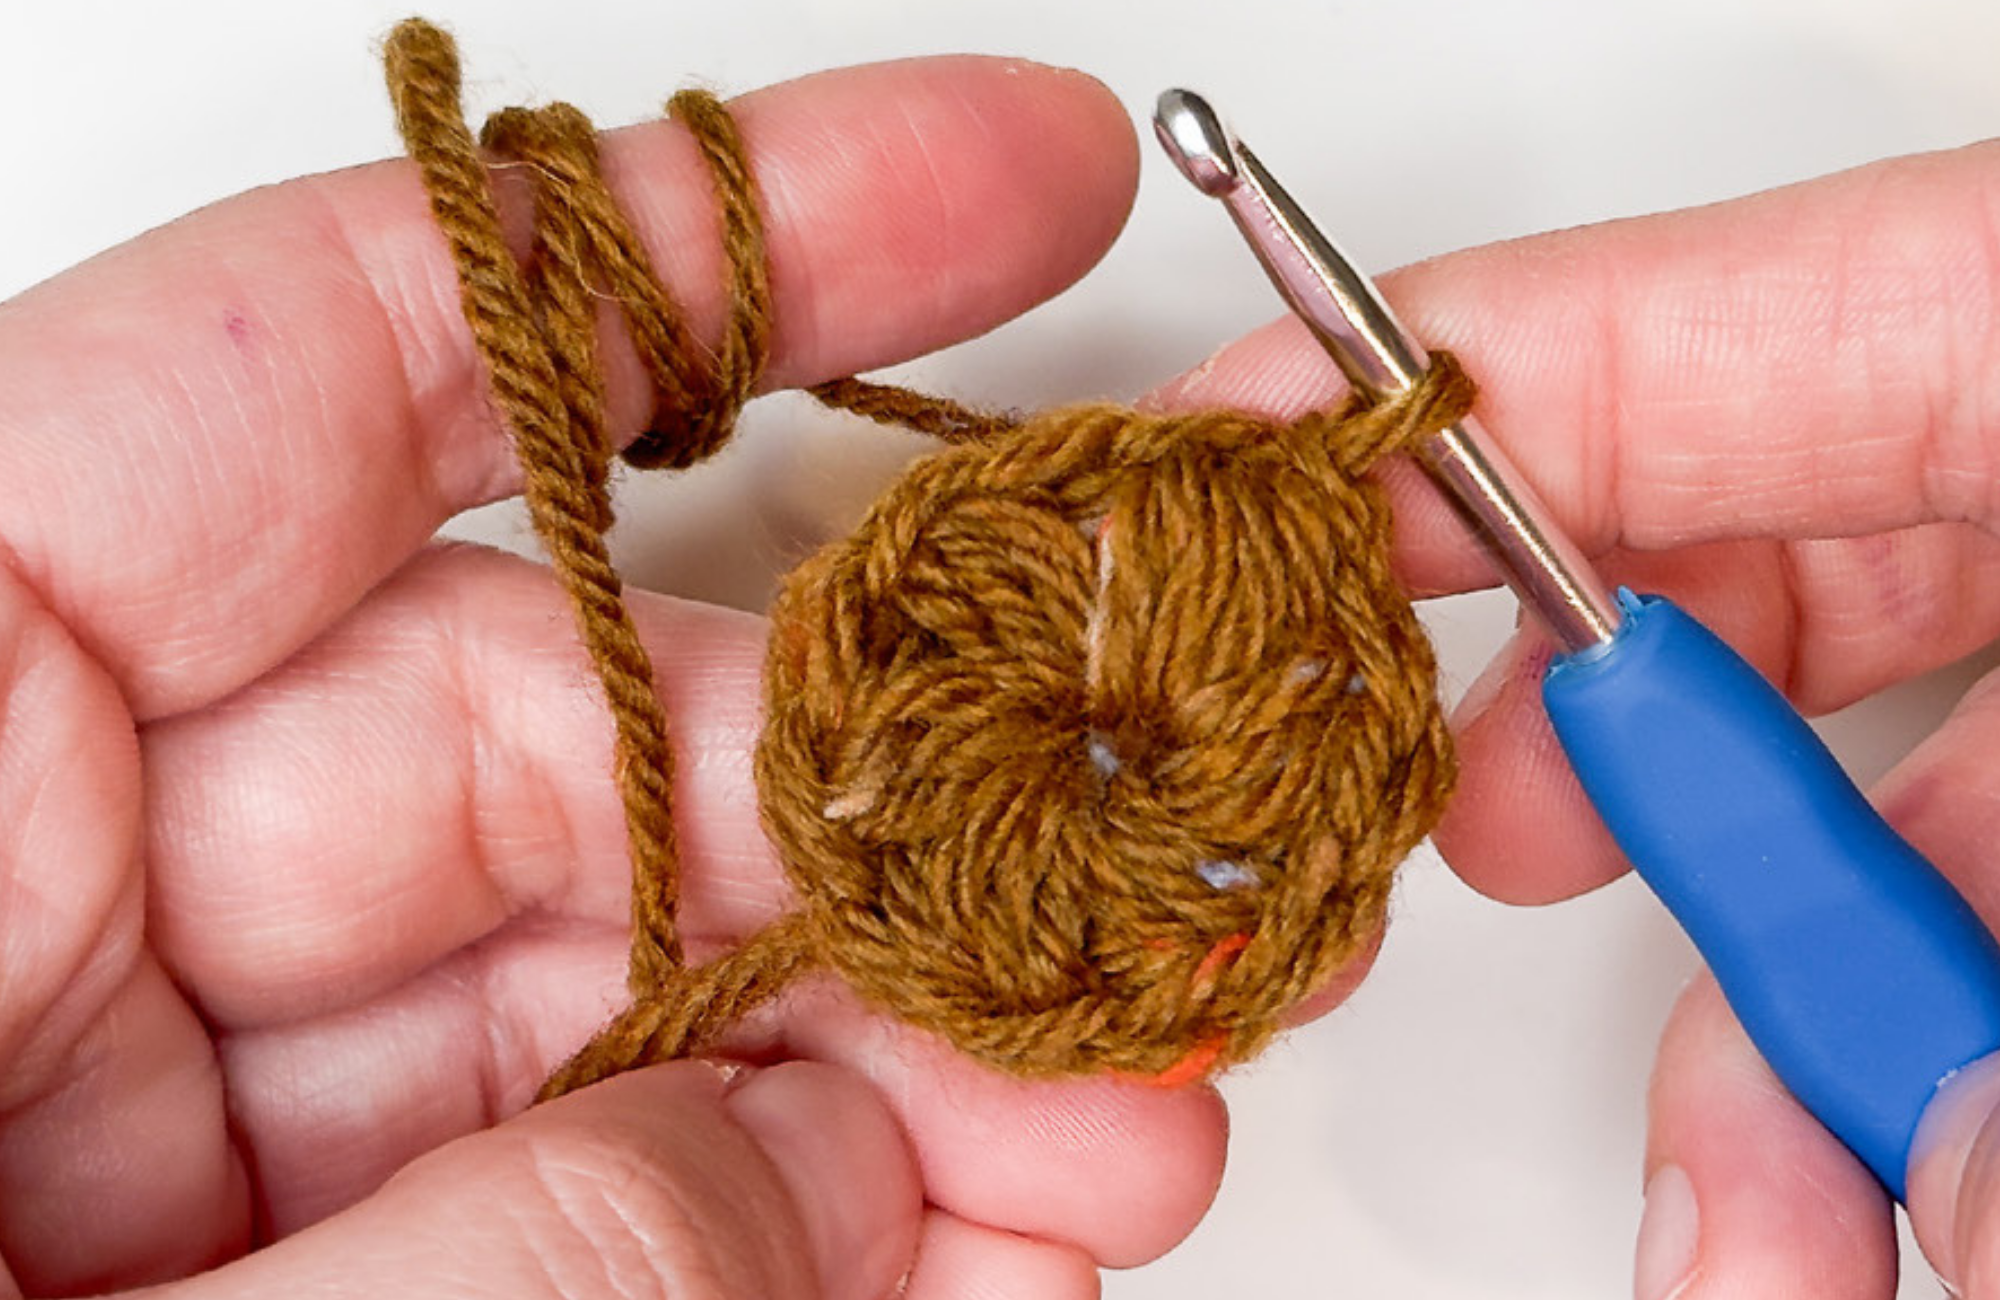
Round 2
Ch1.
In the Round 2, we will continue to make puff stitches into the holes between the puff stitches from round 1. We should make 2 puff stitches into one hole.
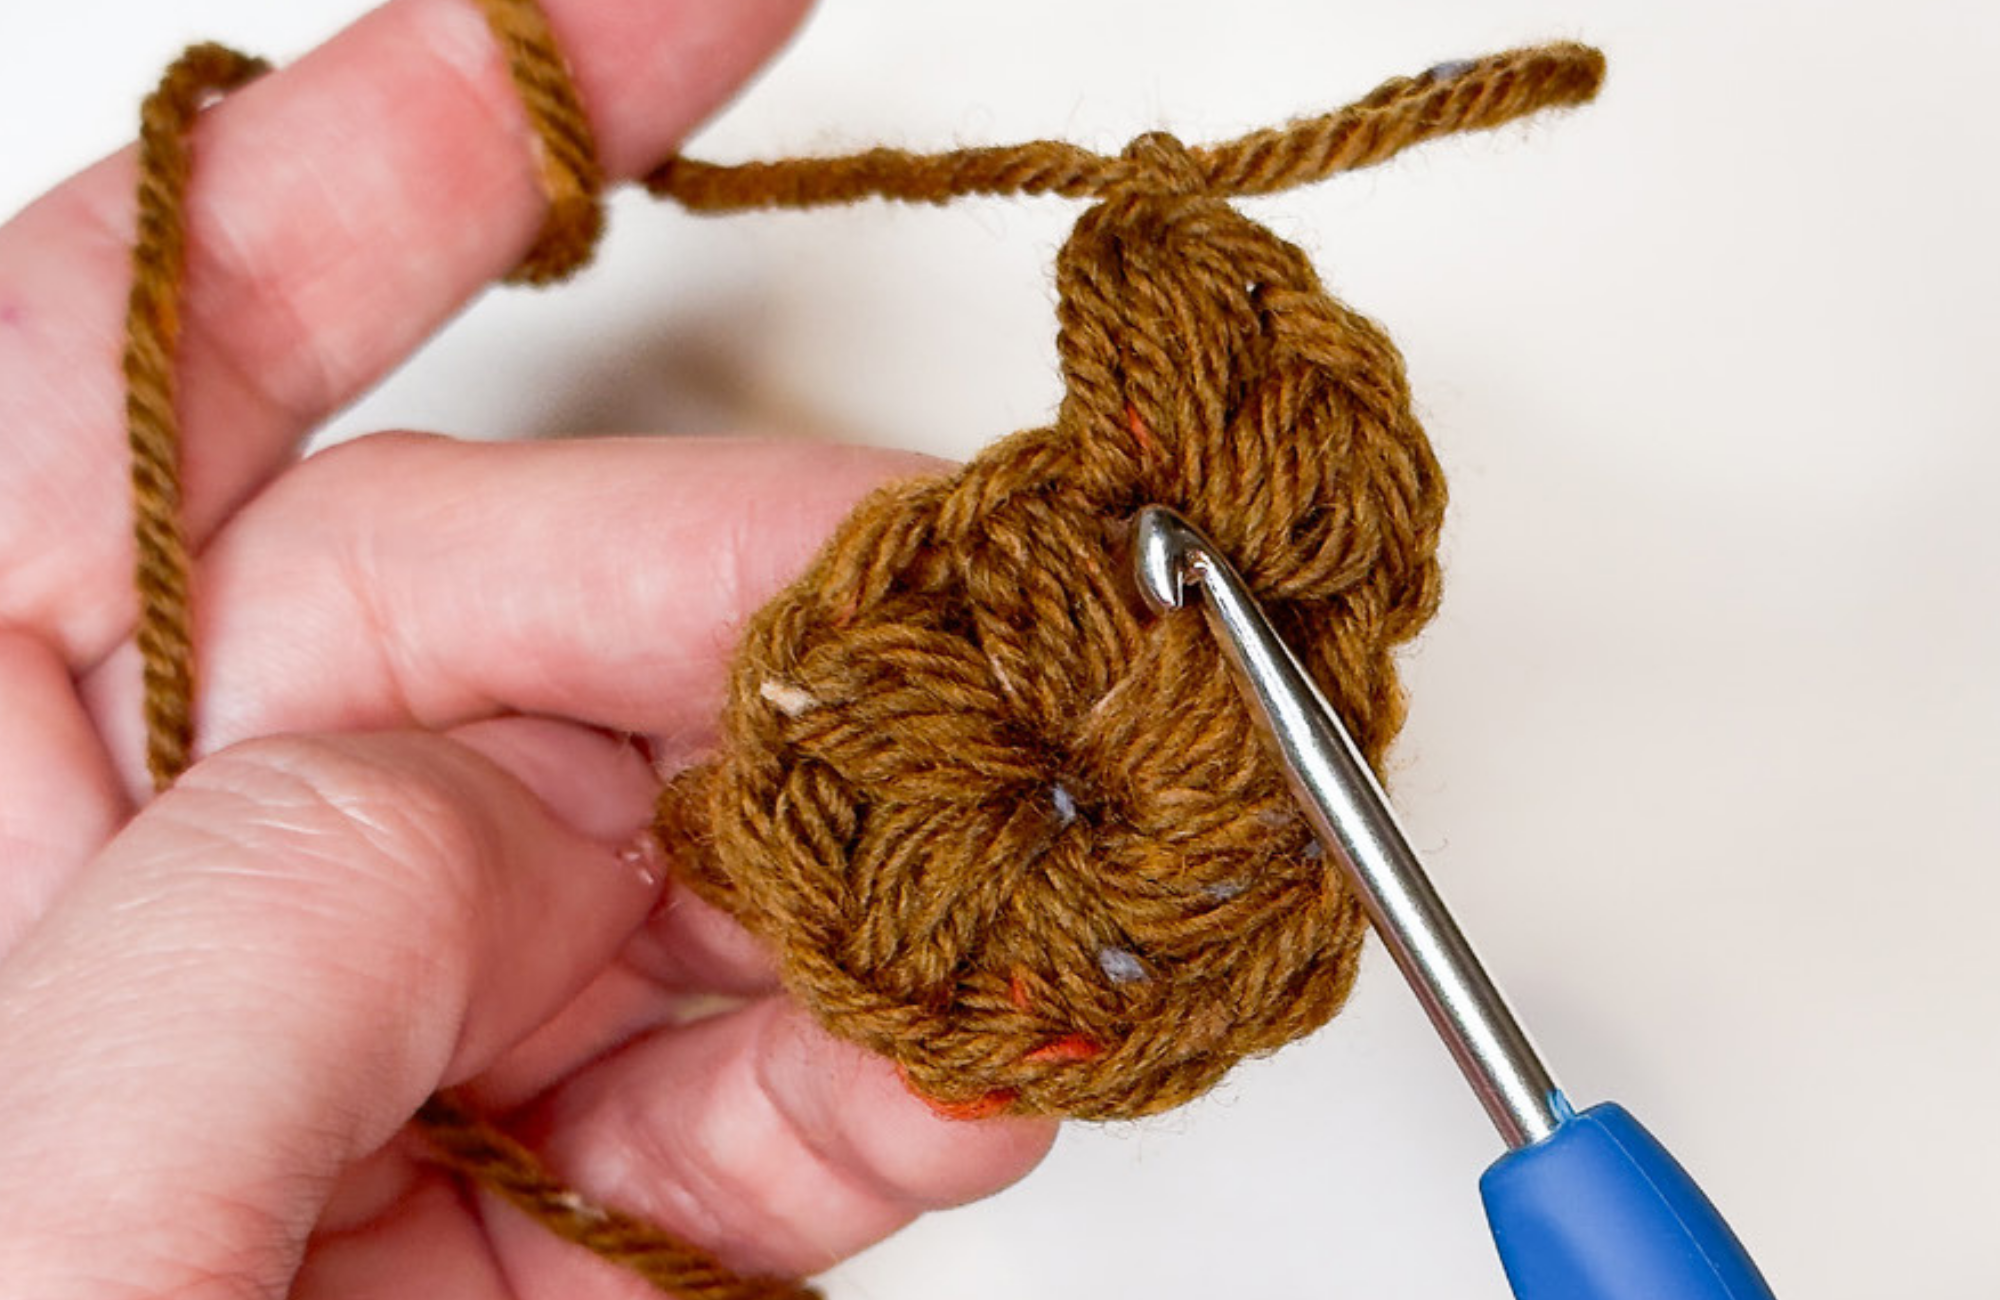
You will have 12 puff stitches by the end of this round. Sl into the 1st st.
Round 3
Ch1.
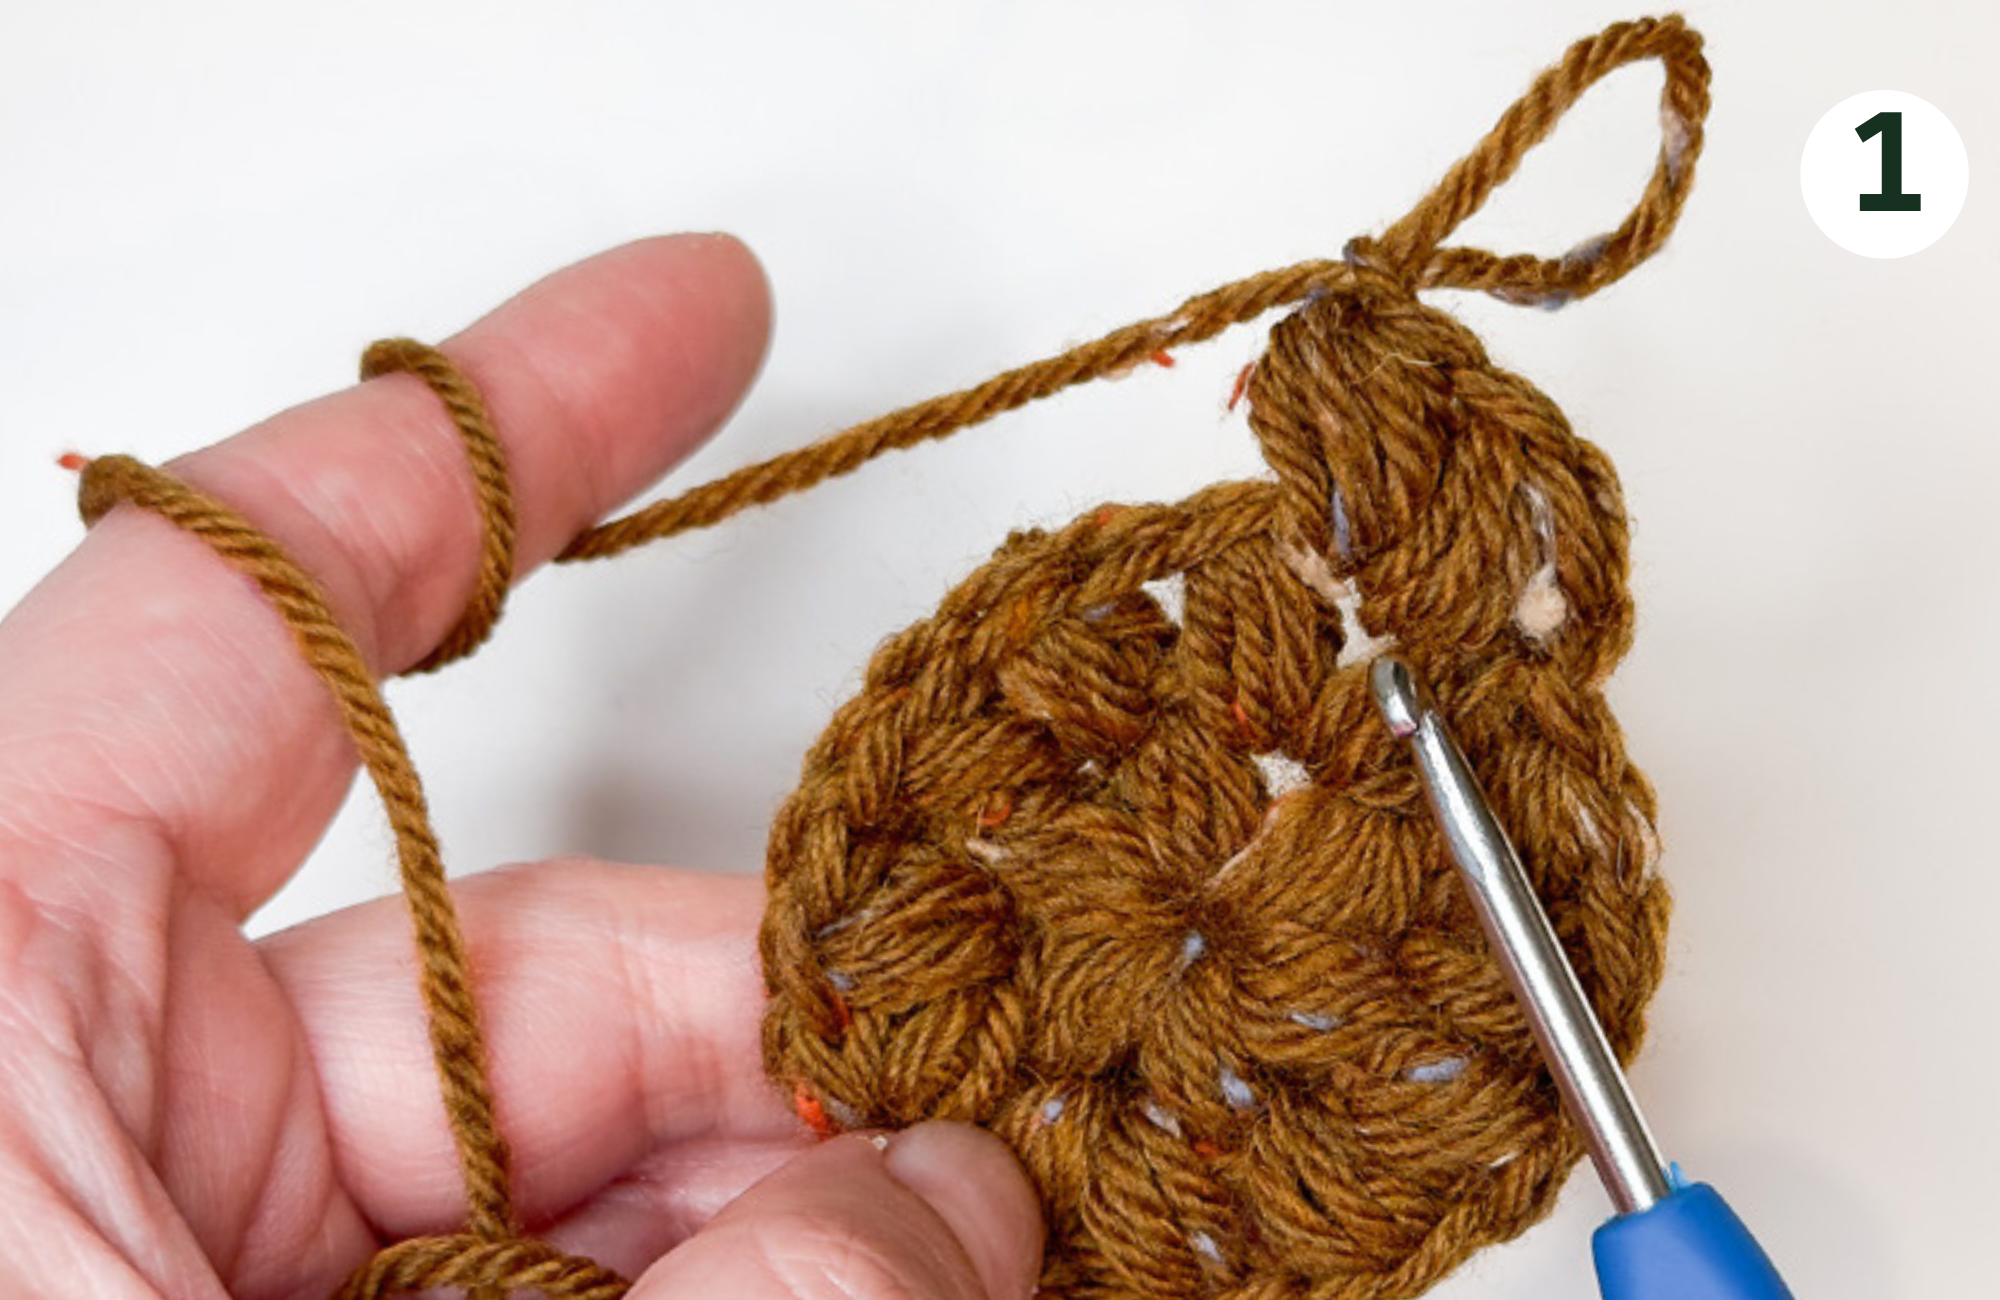
Repeat round 2 and crochet 2 puff stitches into each hole. You will have 24 puff stitches by the end of this round. Sl into the 1st st.
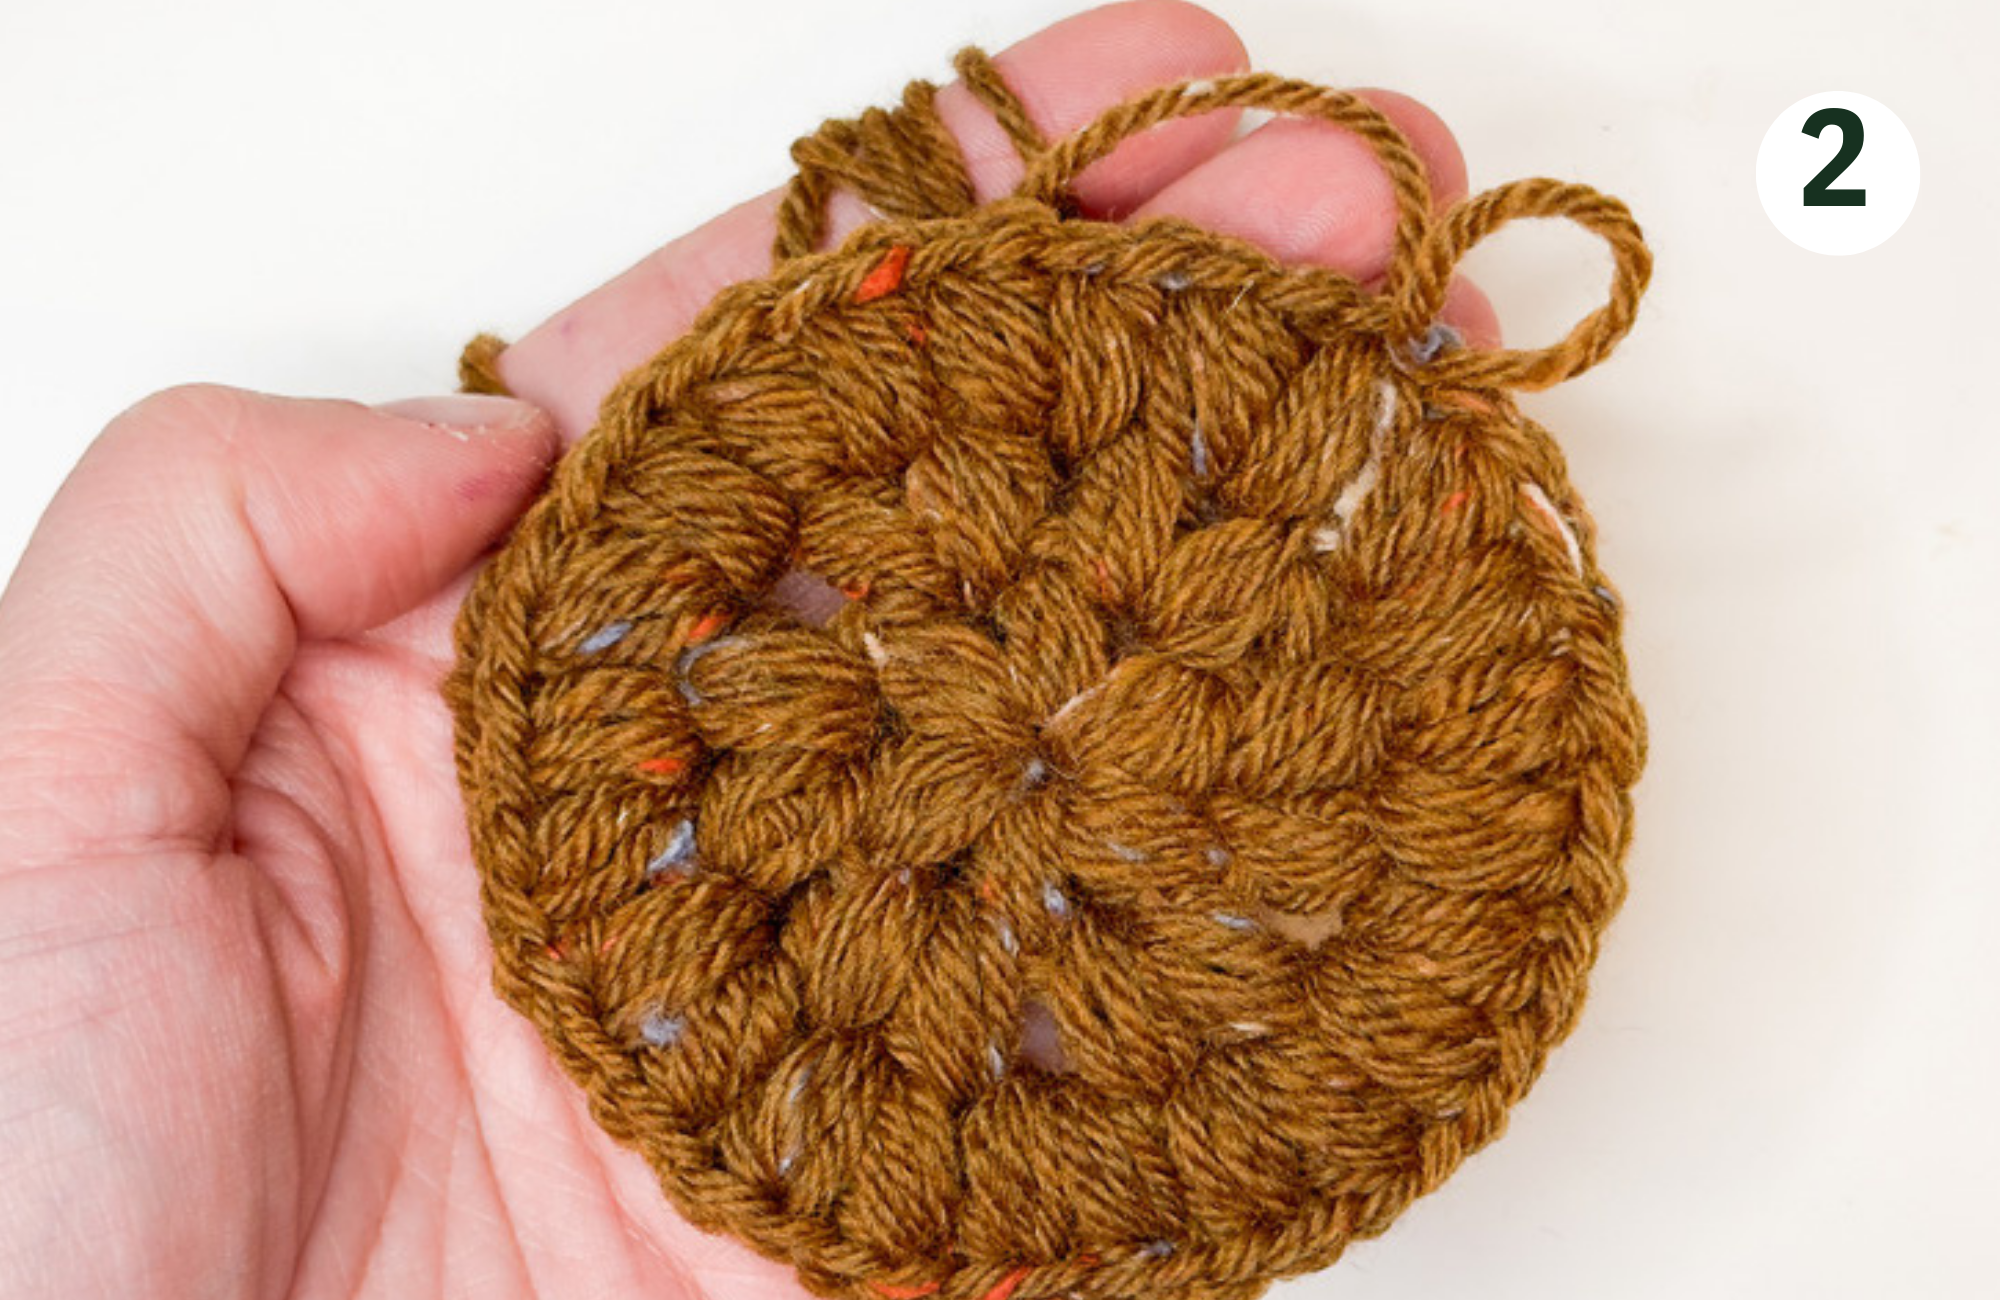
Round 4
Ch 2 (this will count as one dc).
In order to make a dc stitch columns – yarn over, insert hook in the hole between the puffs, pull up a loop. Pull through 2 loops (2 loops on the hook), yarn over, insert hook in the same hole, pull up a loop, pull through 2 loops (3 loops on the hook), pull the yarn through 3 loops together. You have completed your first column in this round.
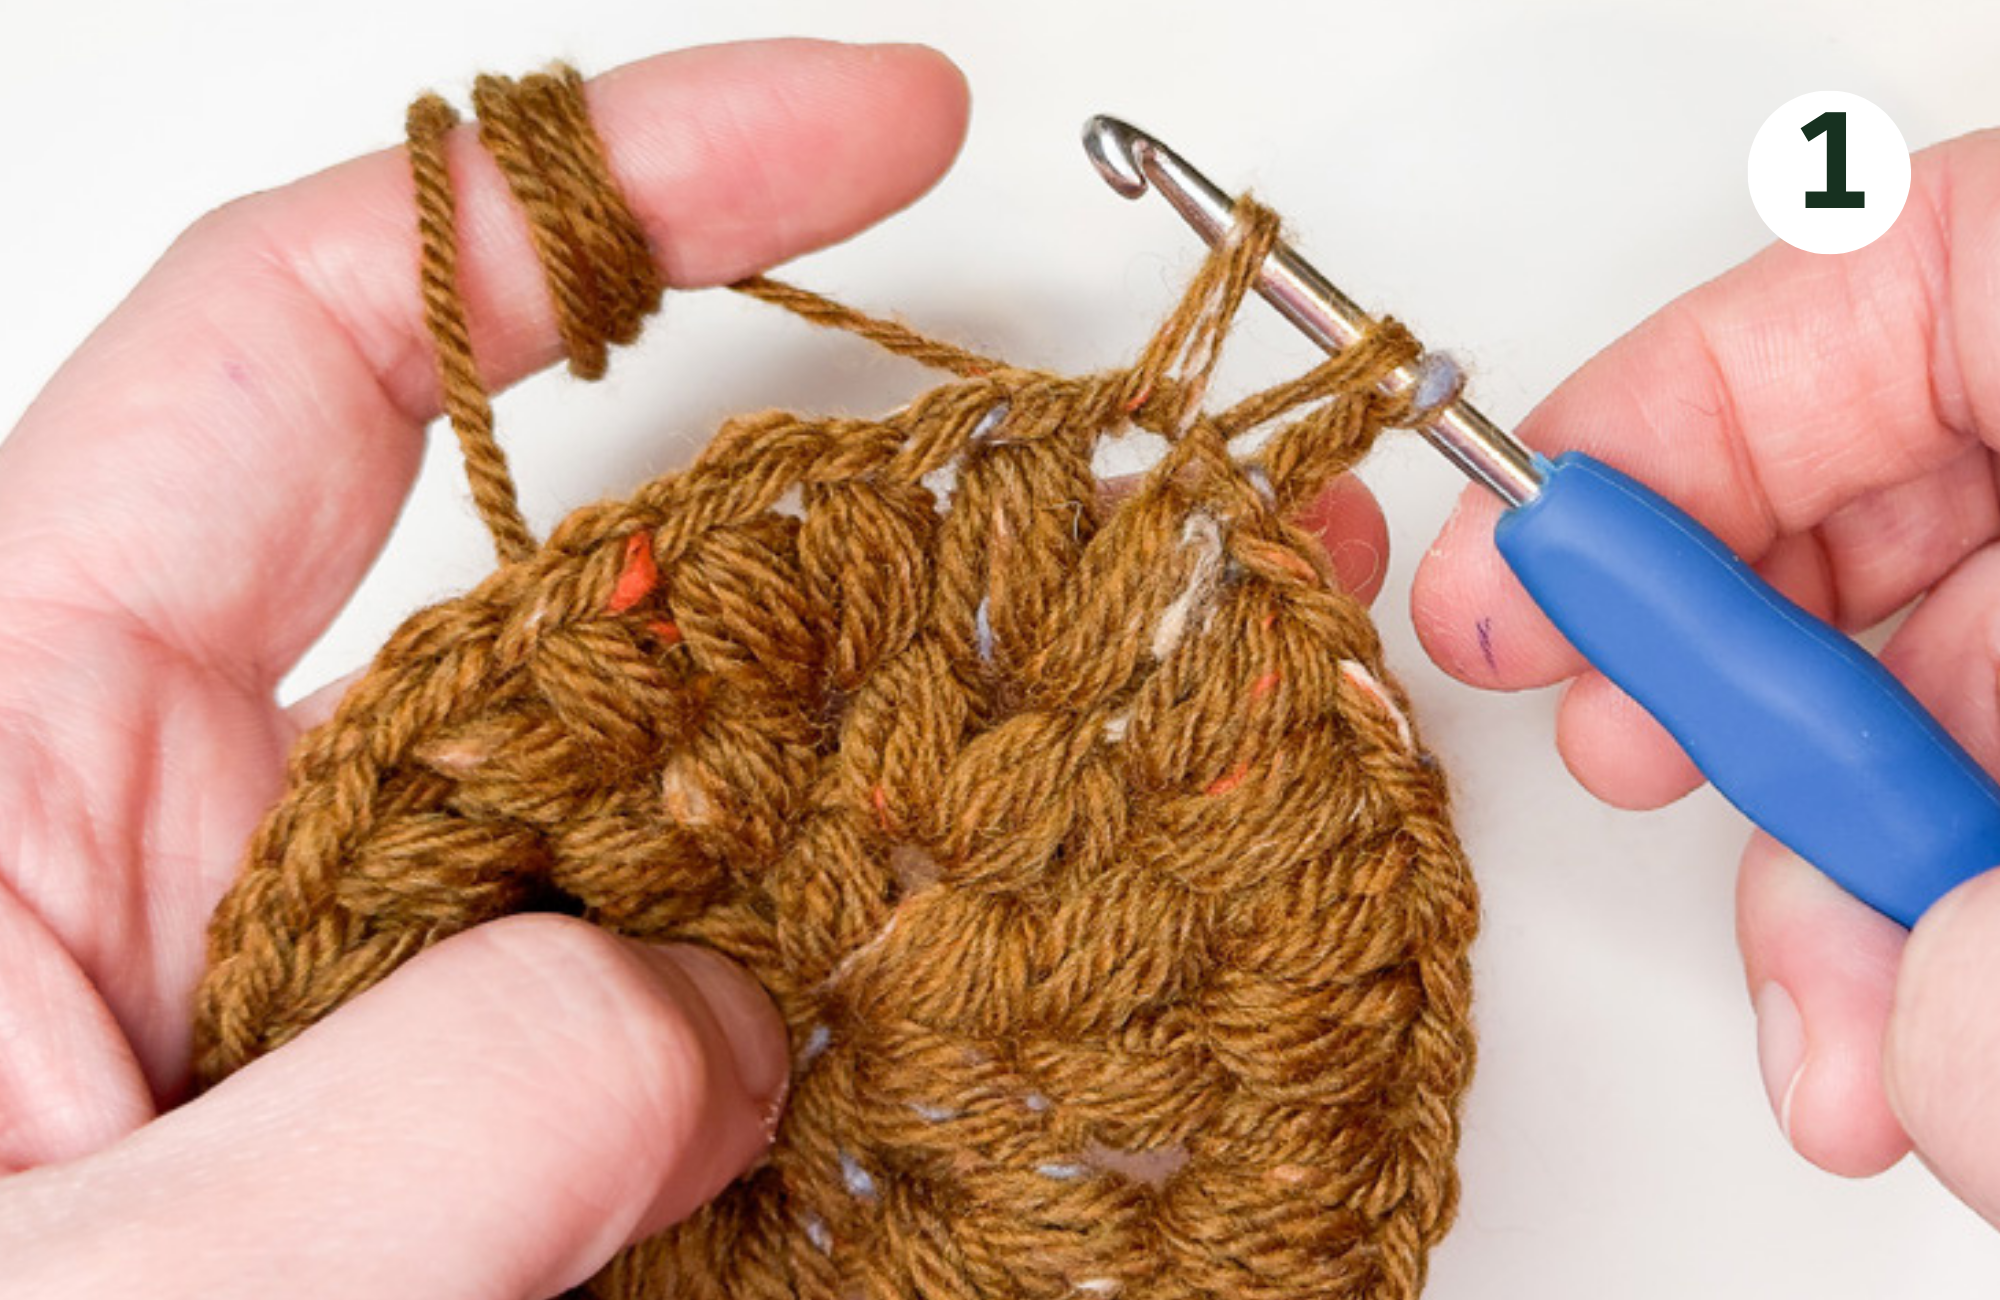
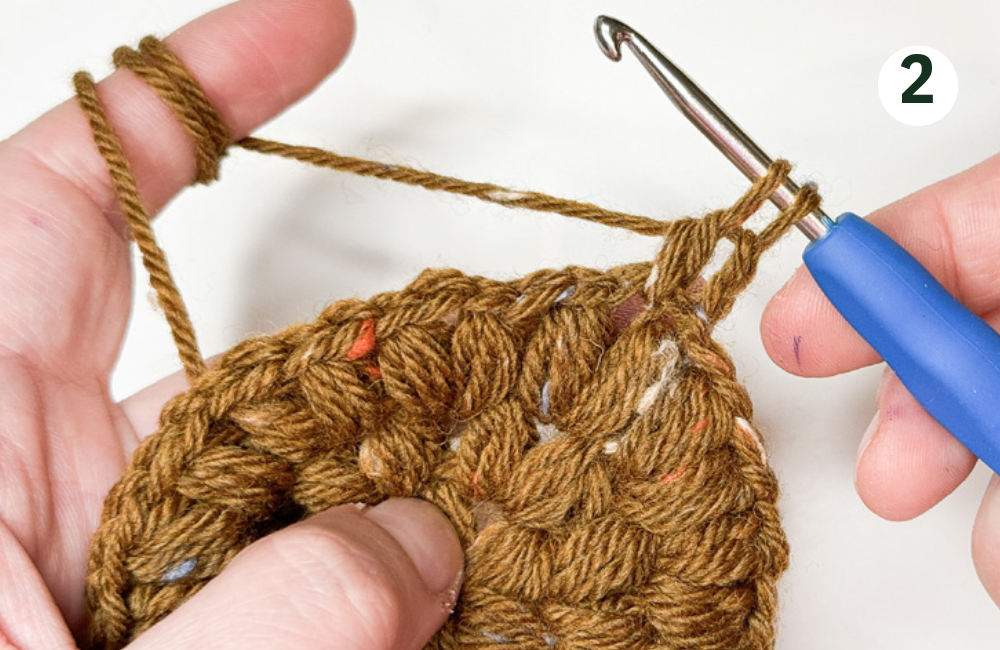
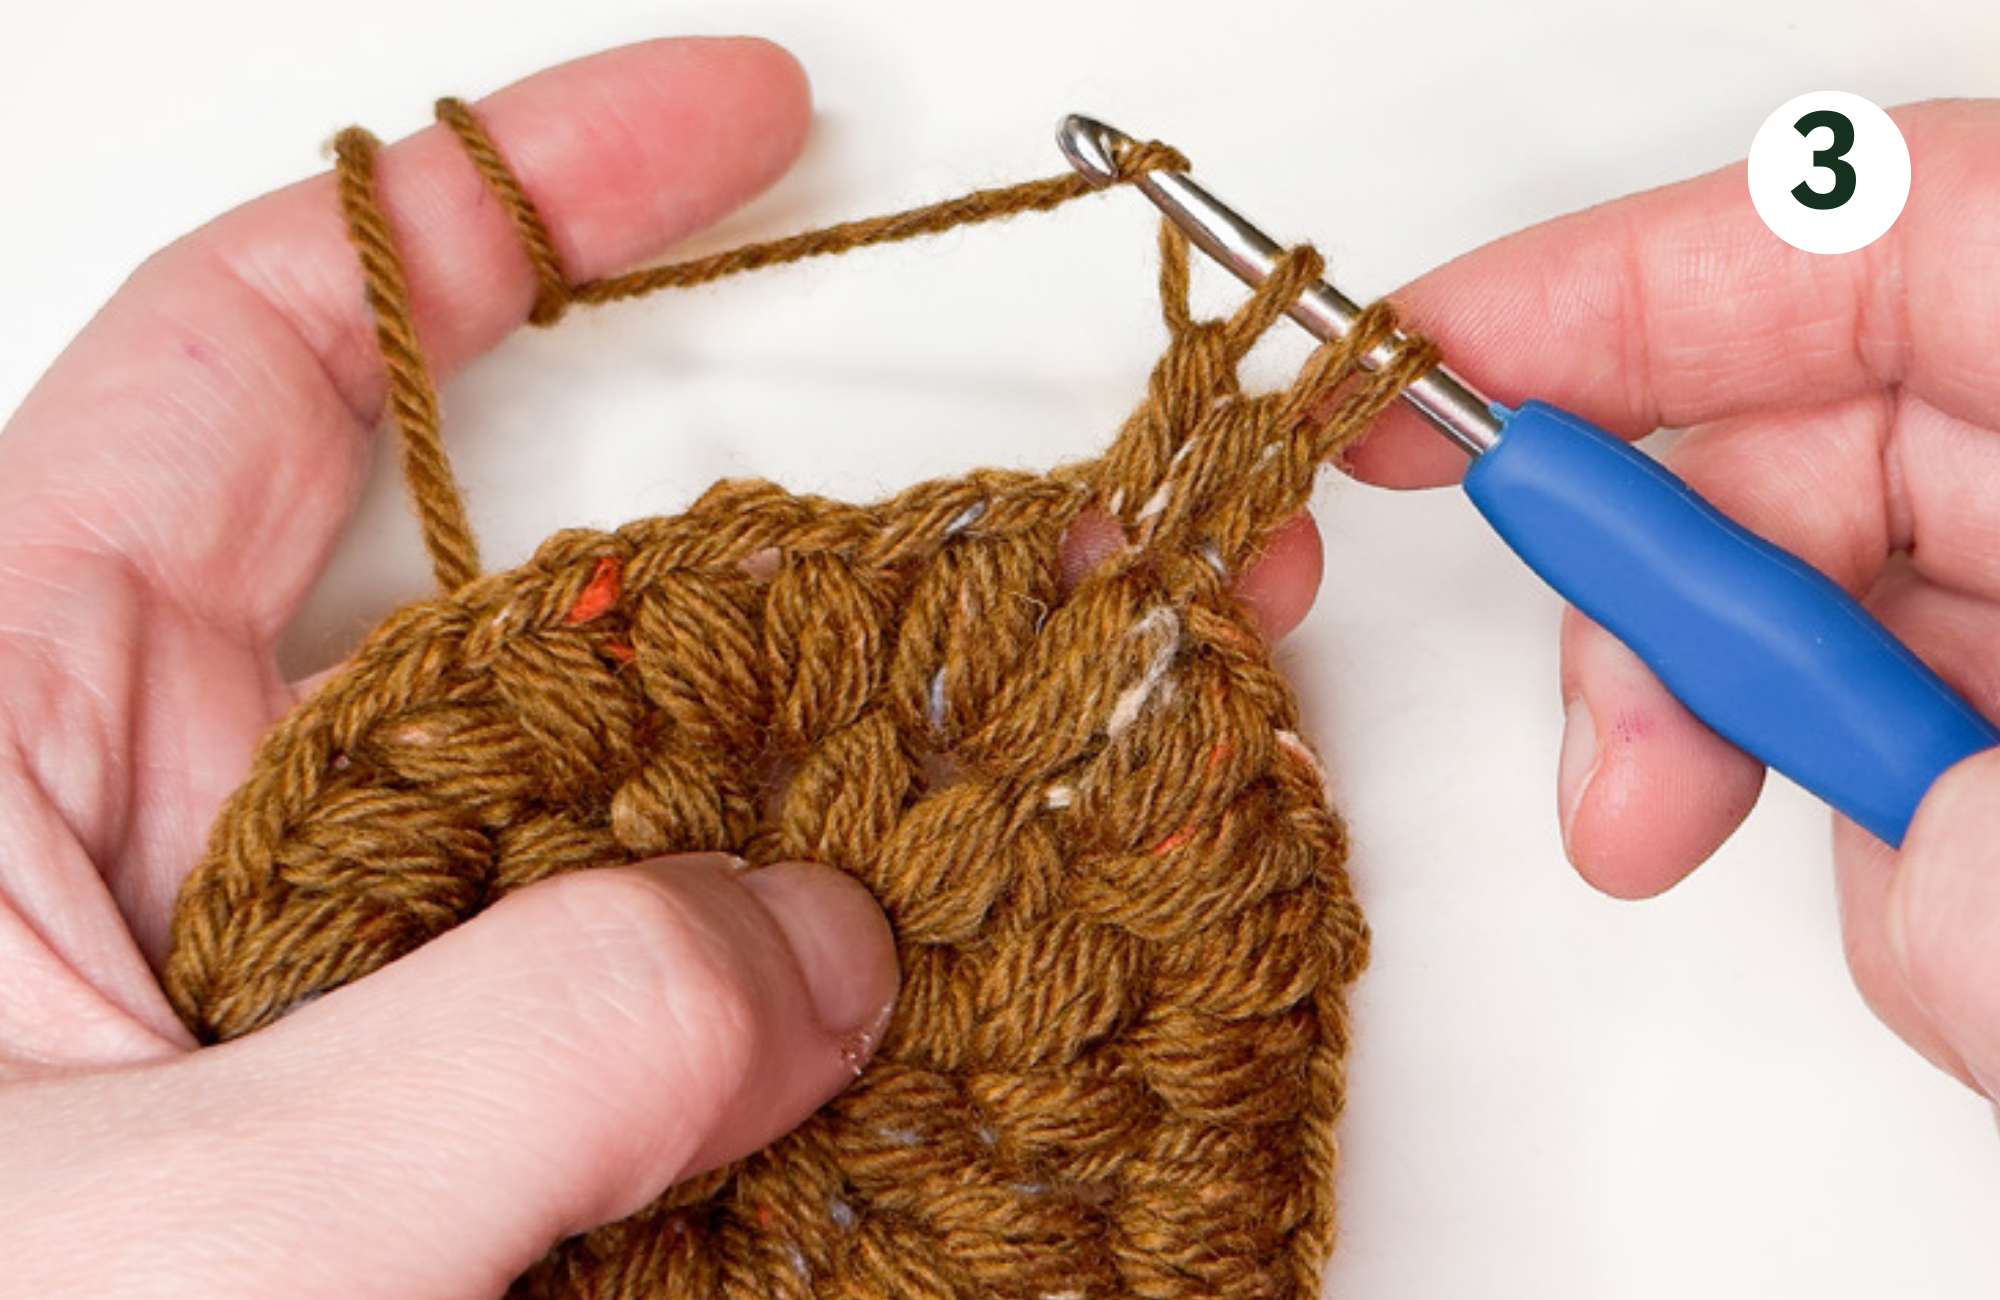
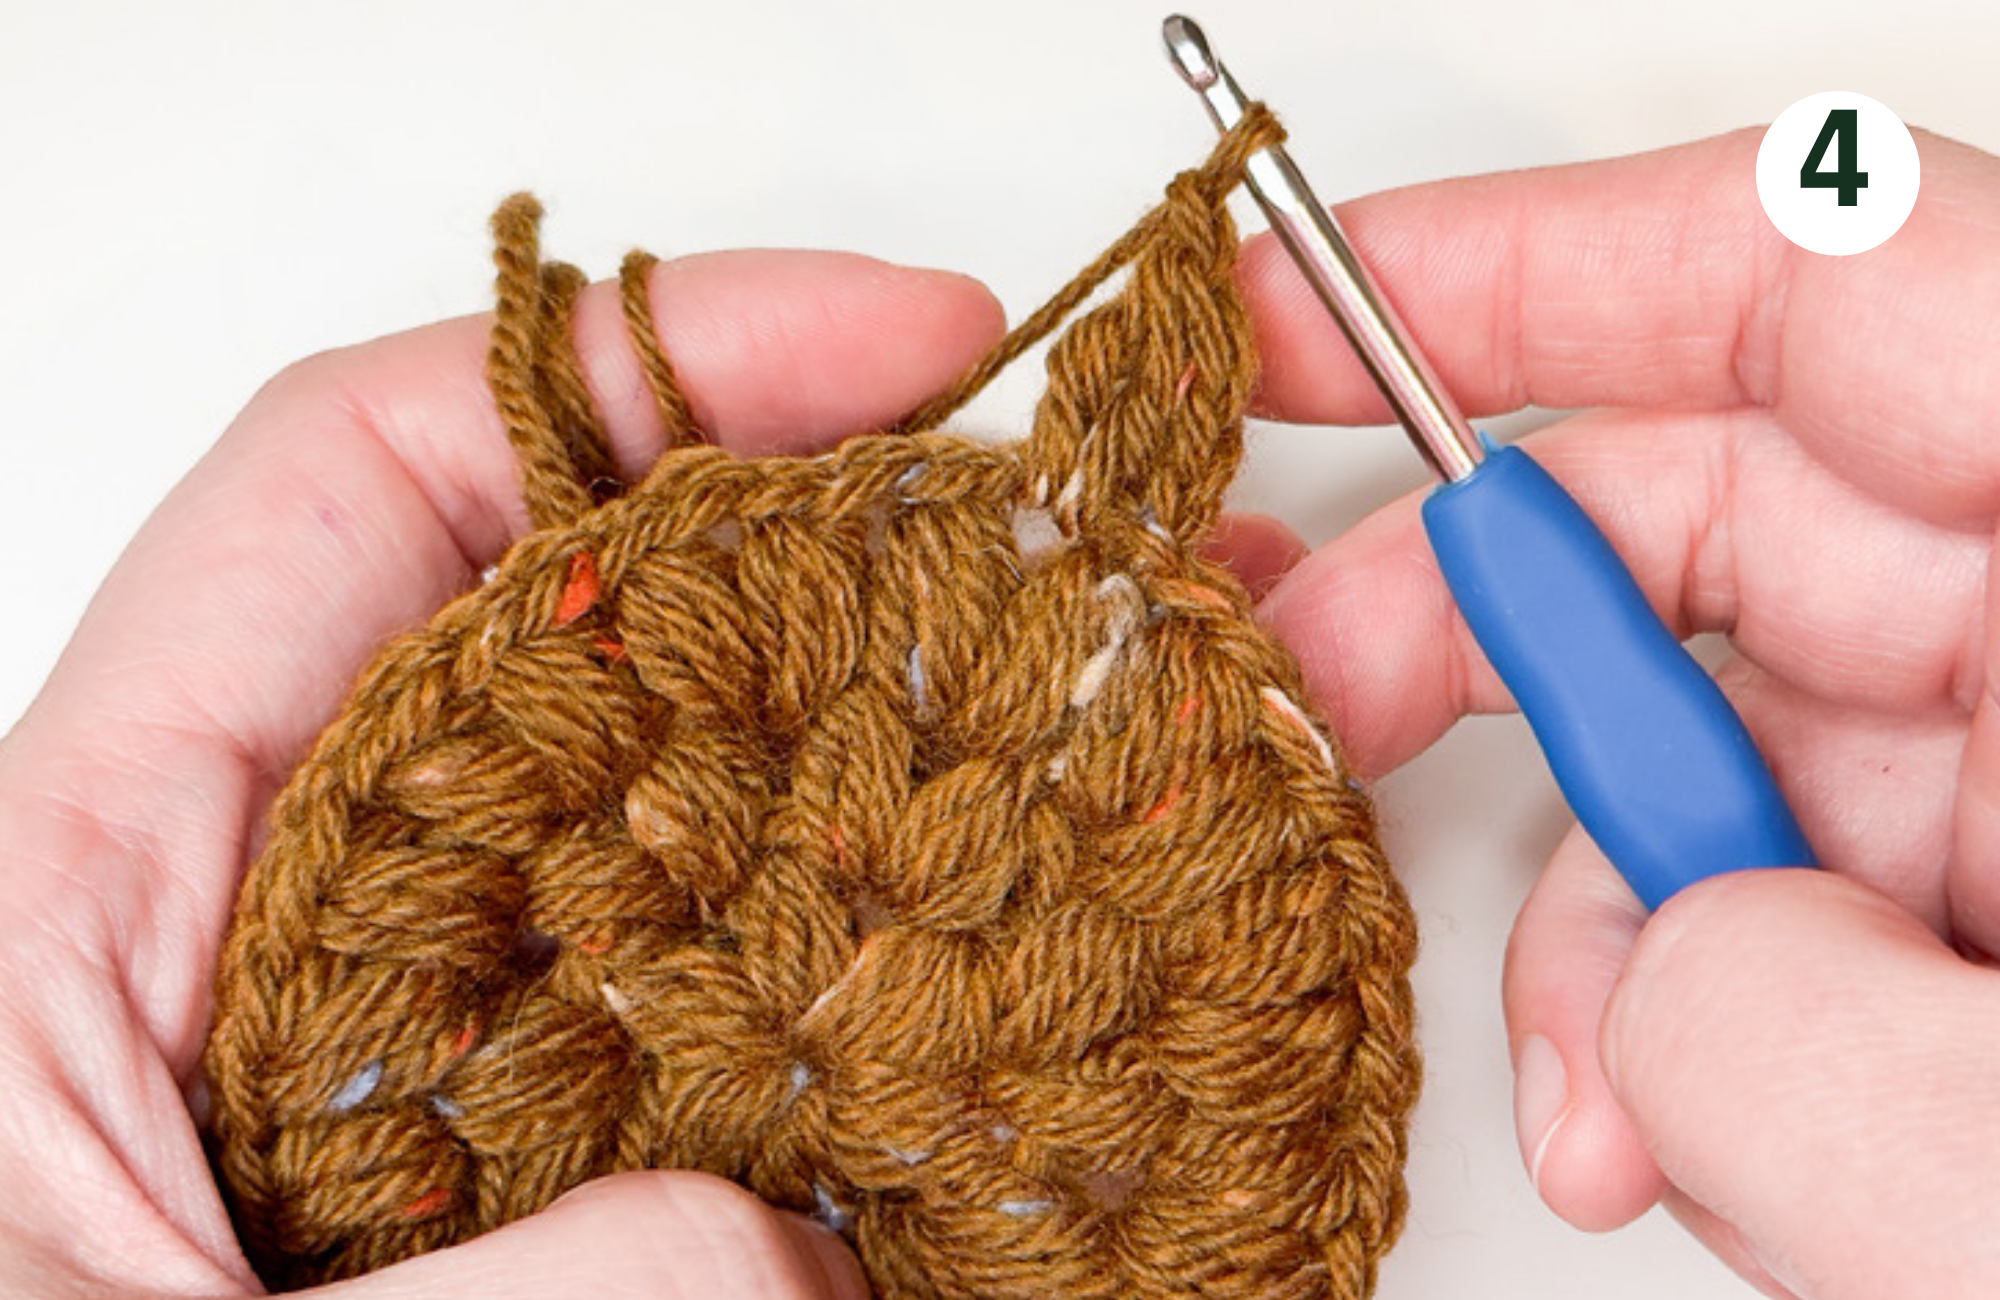
Ch 1.
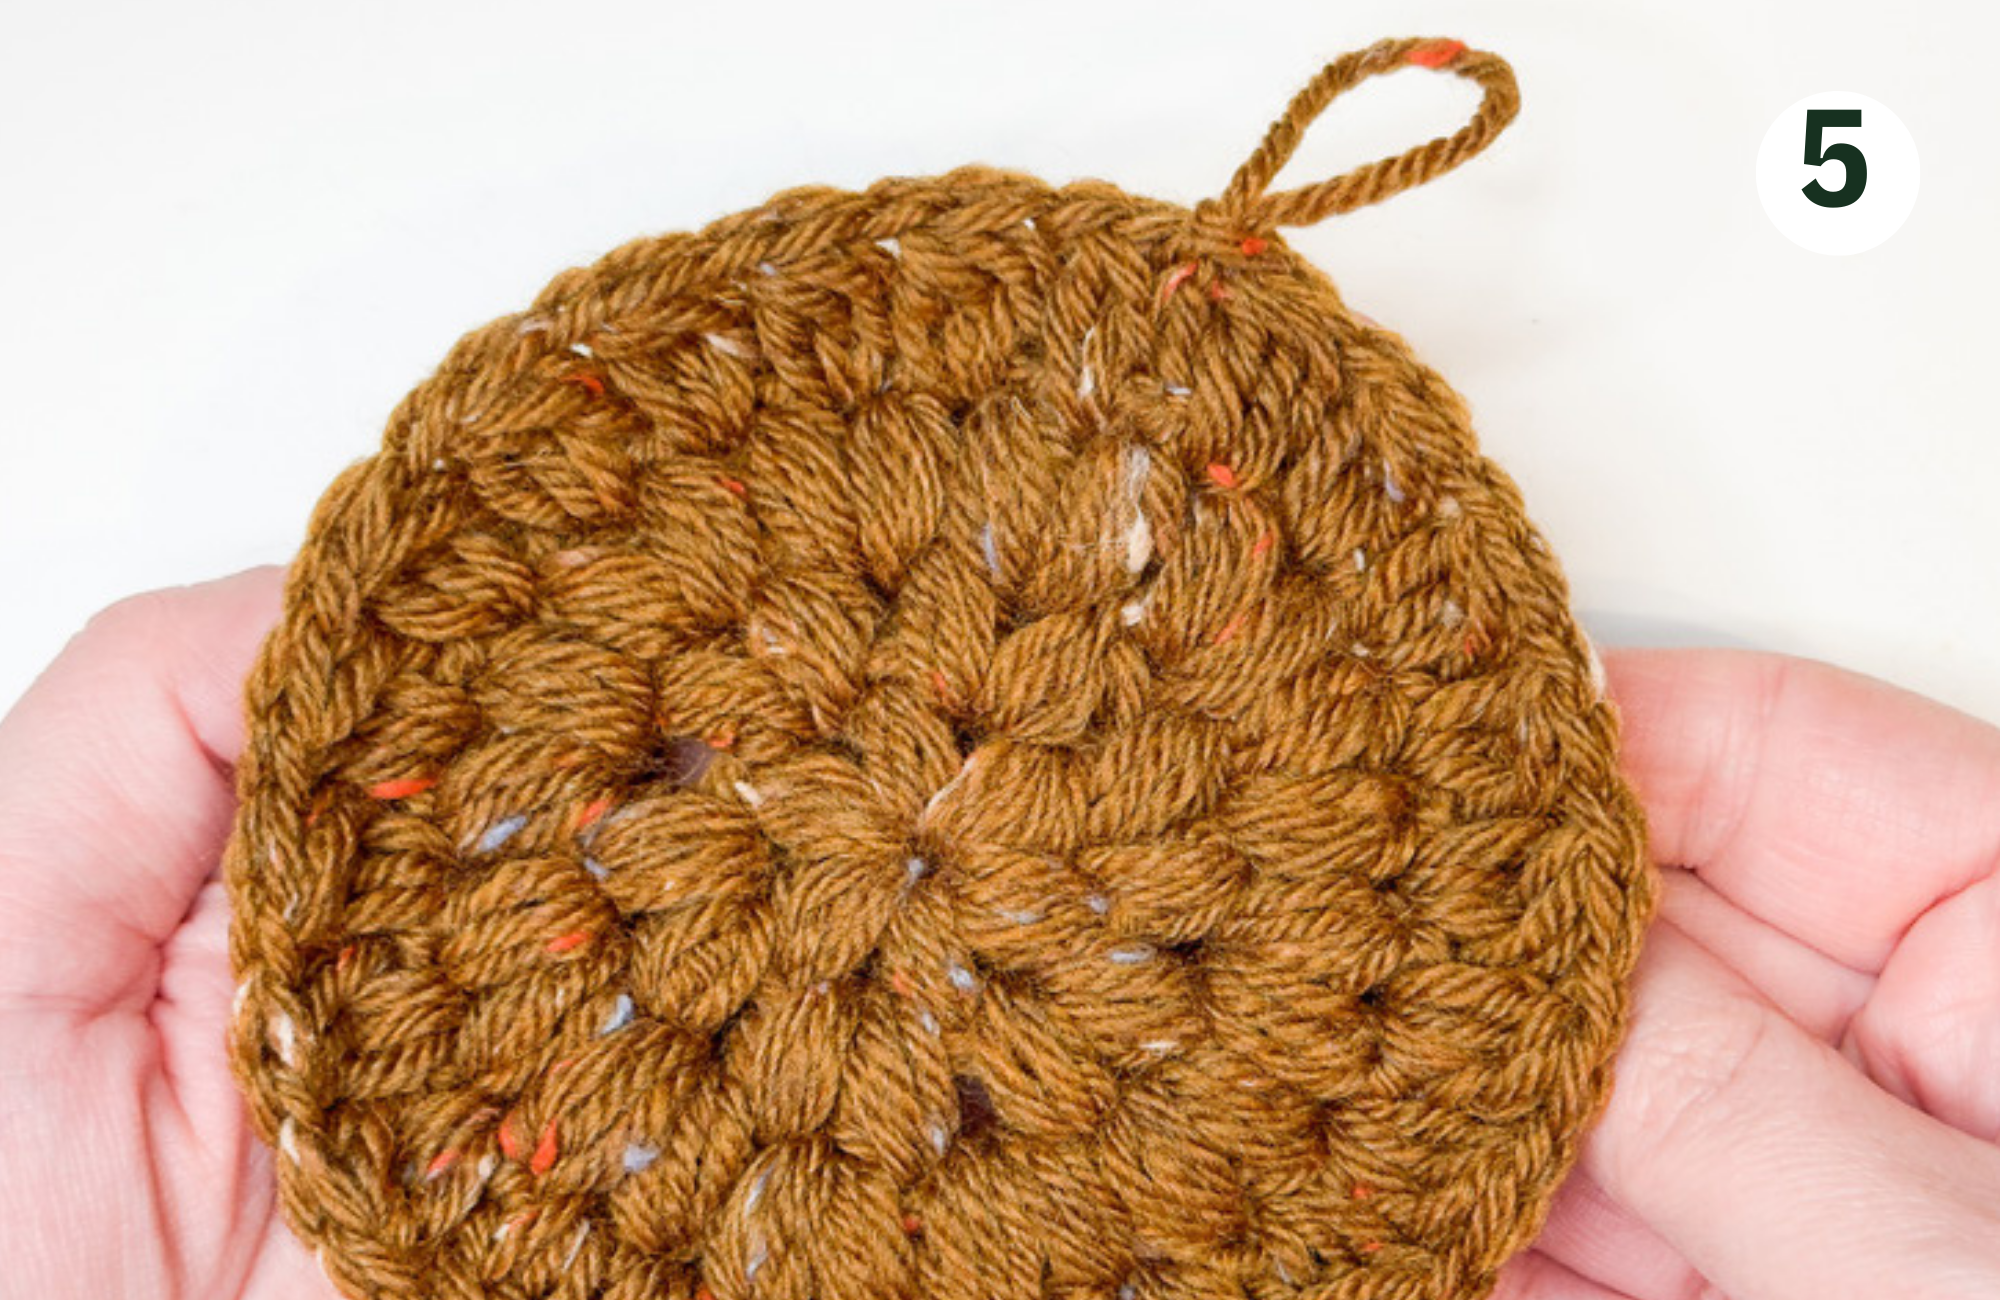
Yarn over, insert hook in the hole between the puffs, pull up a loop. Pull through 2 loops (2 loops on the hook), yarn over, insert hook in the same hole, pull up a loop, pull through 2 loops (3 loops on the hook), insert hook in the same hole, pull up a loop, pull through 2 loops (4 loops on the hook), pull the yarn through 4 loops together continue this pattern till the end of this round. Sl in the 1st st.
Round 5
In round 5, we will make corners of the granny square, so that the circle shape of the pattern transfers into the square.
Ch 2 (it will count as the column), tc 2.
In order to tc – yarn over 2 times and pull the yarn from the st (4 loops on the hook), pull through 2 loops (3 loops on the hook), pull through 2 loops (2 loops on the hook), pull through 2 loops (1 loops on the hook).
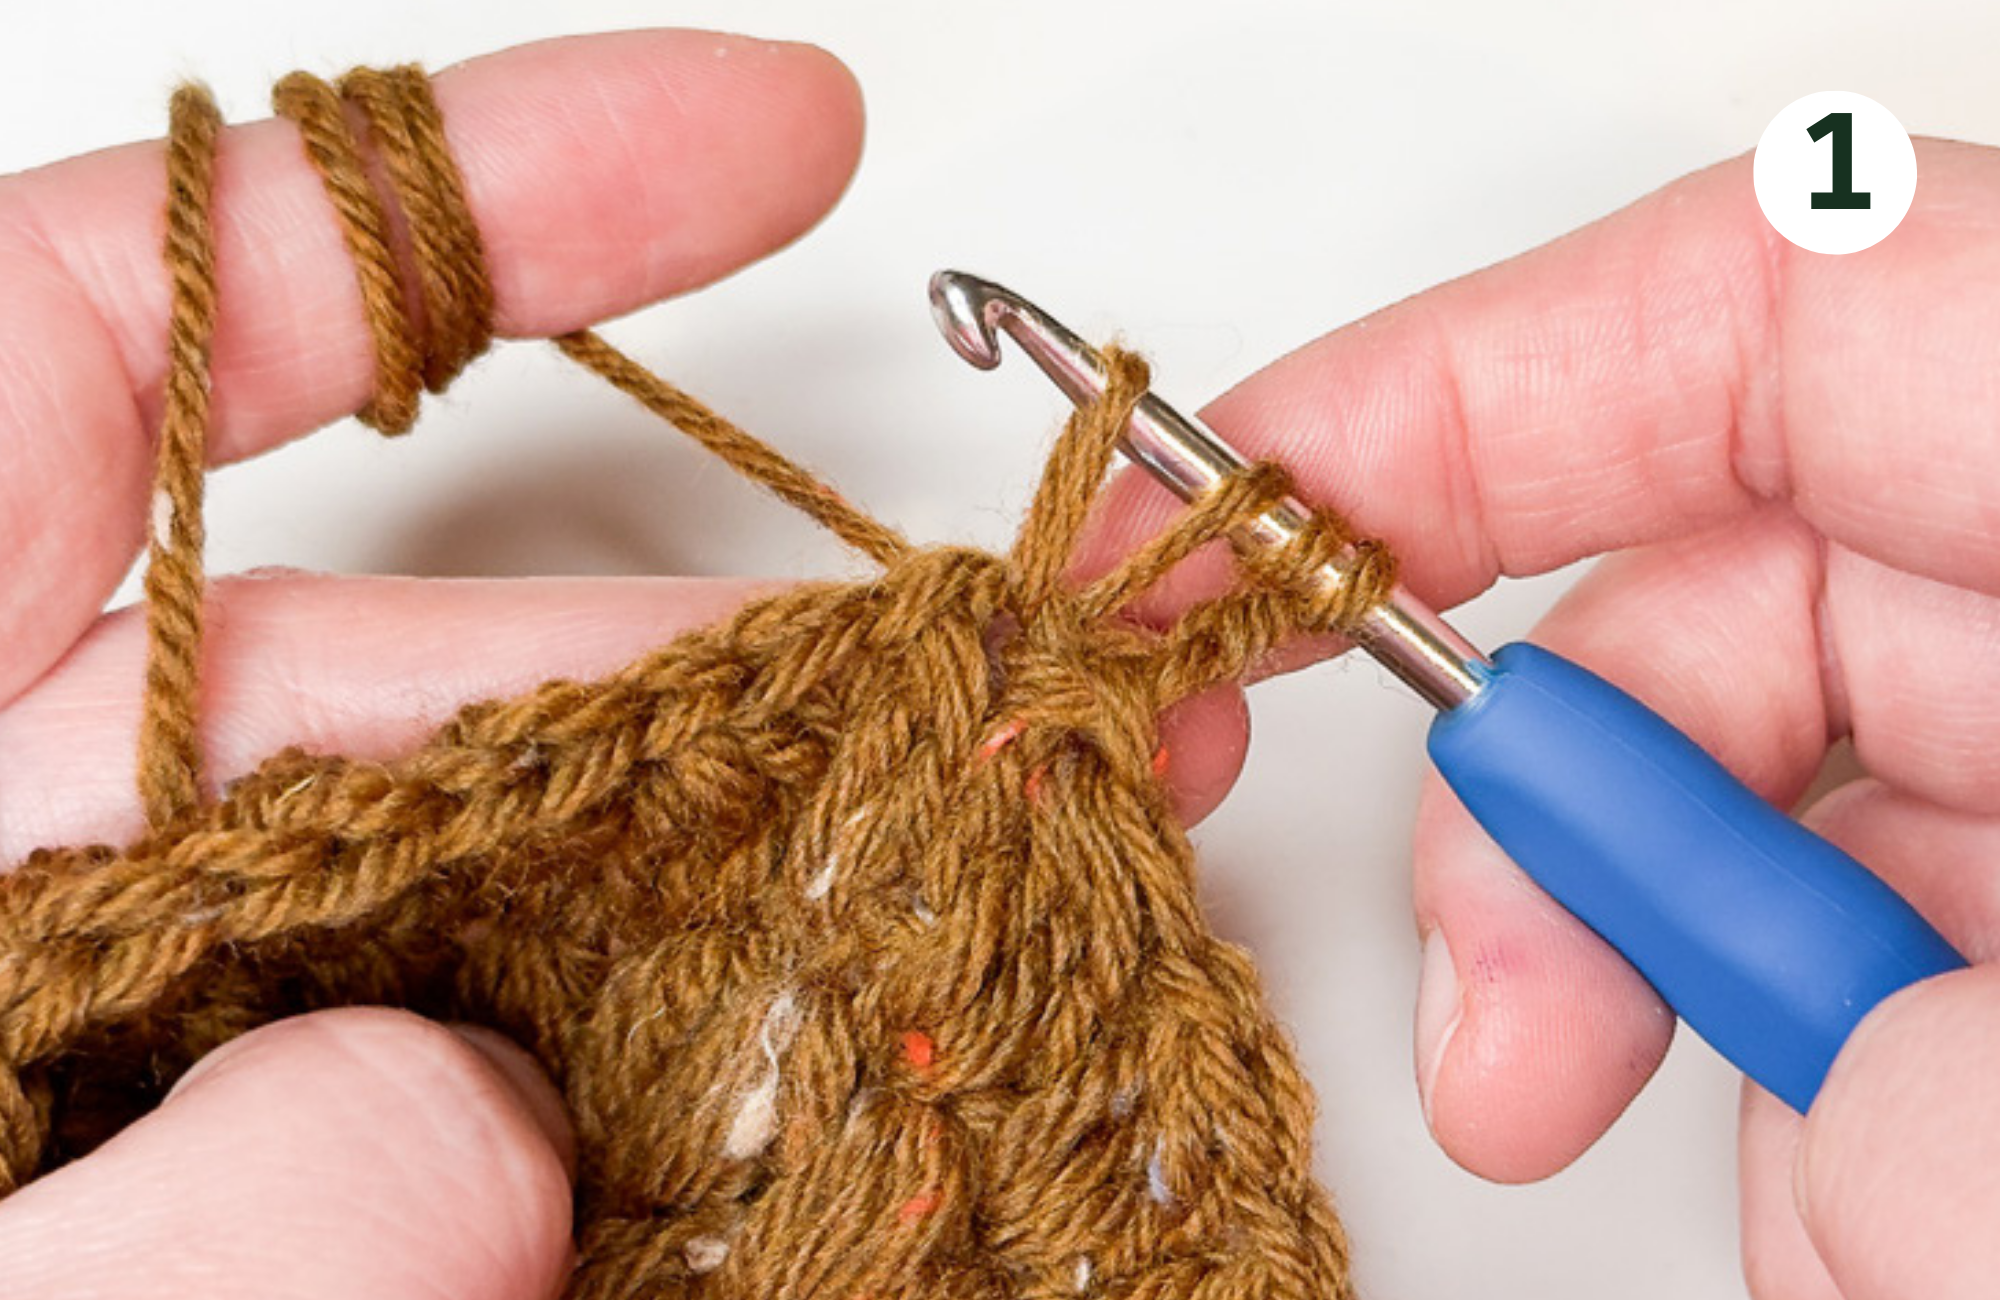
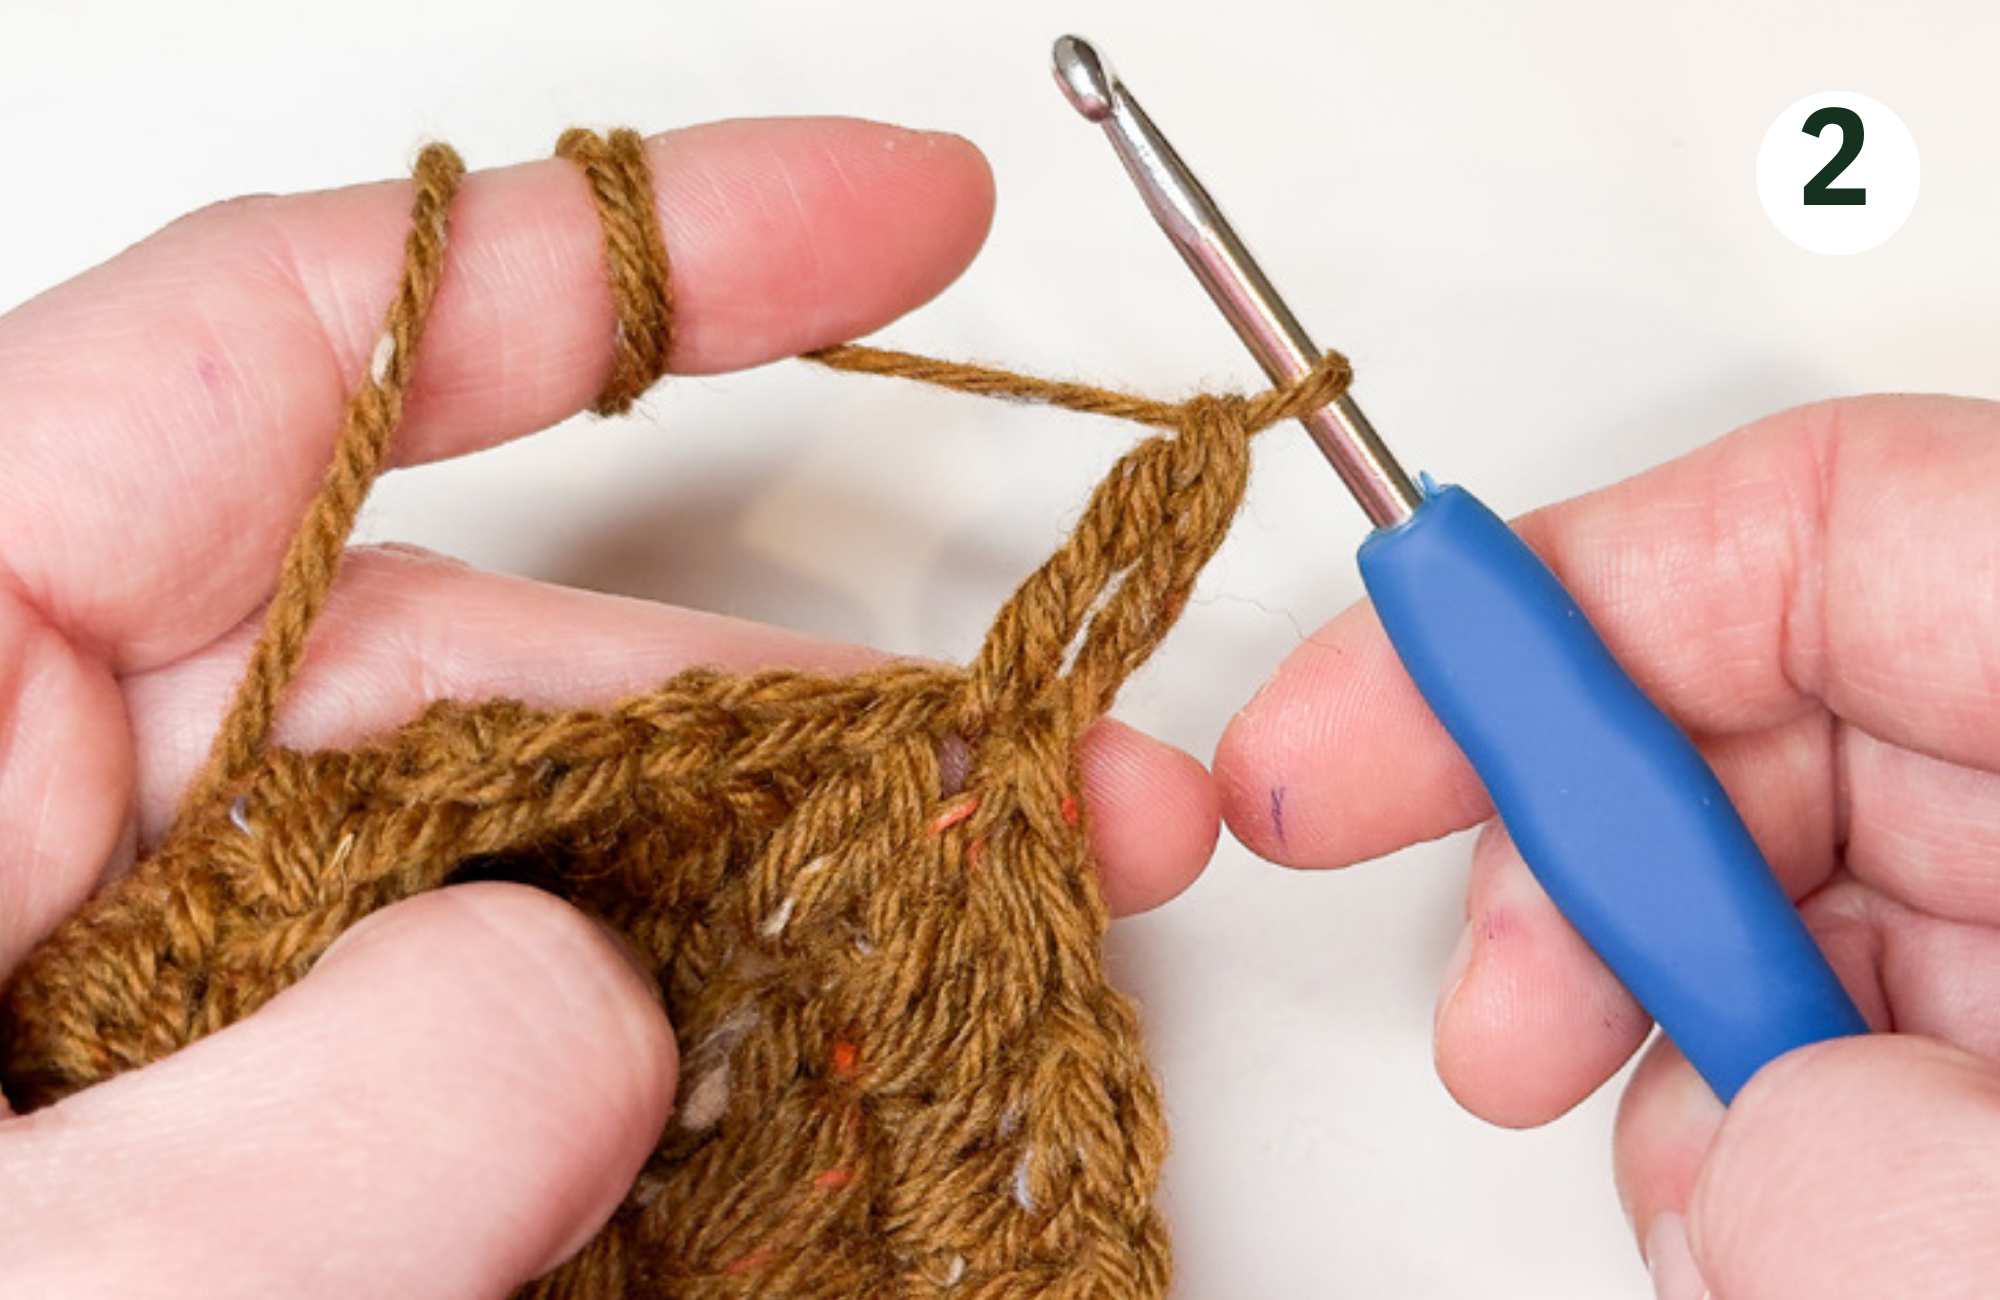
Ch 2, tc 3 in the same hole.
Dc 2 into the next st, hdc 2 in the next st, sc 2 in the next st, hdc 2 in the next st, dc 2 in the next st, tc 3 ch 2 tc 3 in the same hole (this last step will make a corner).
Continue this pattern until you have crocheted 4 corners.
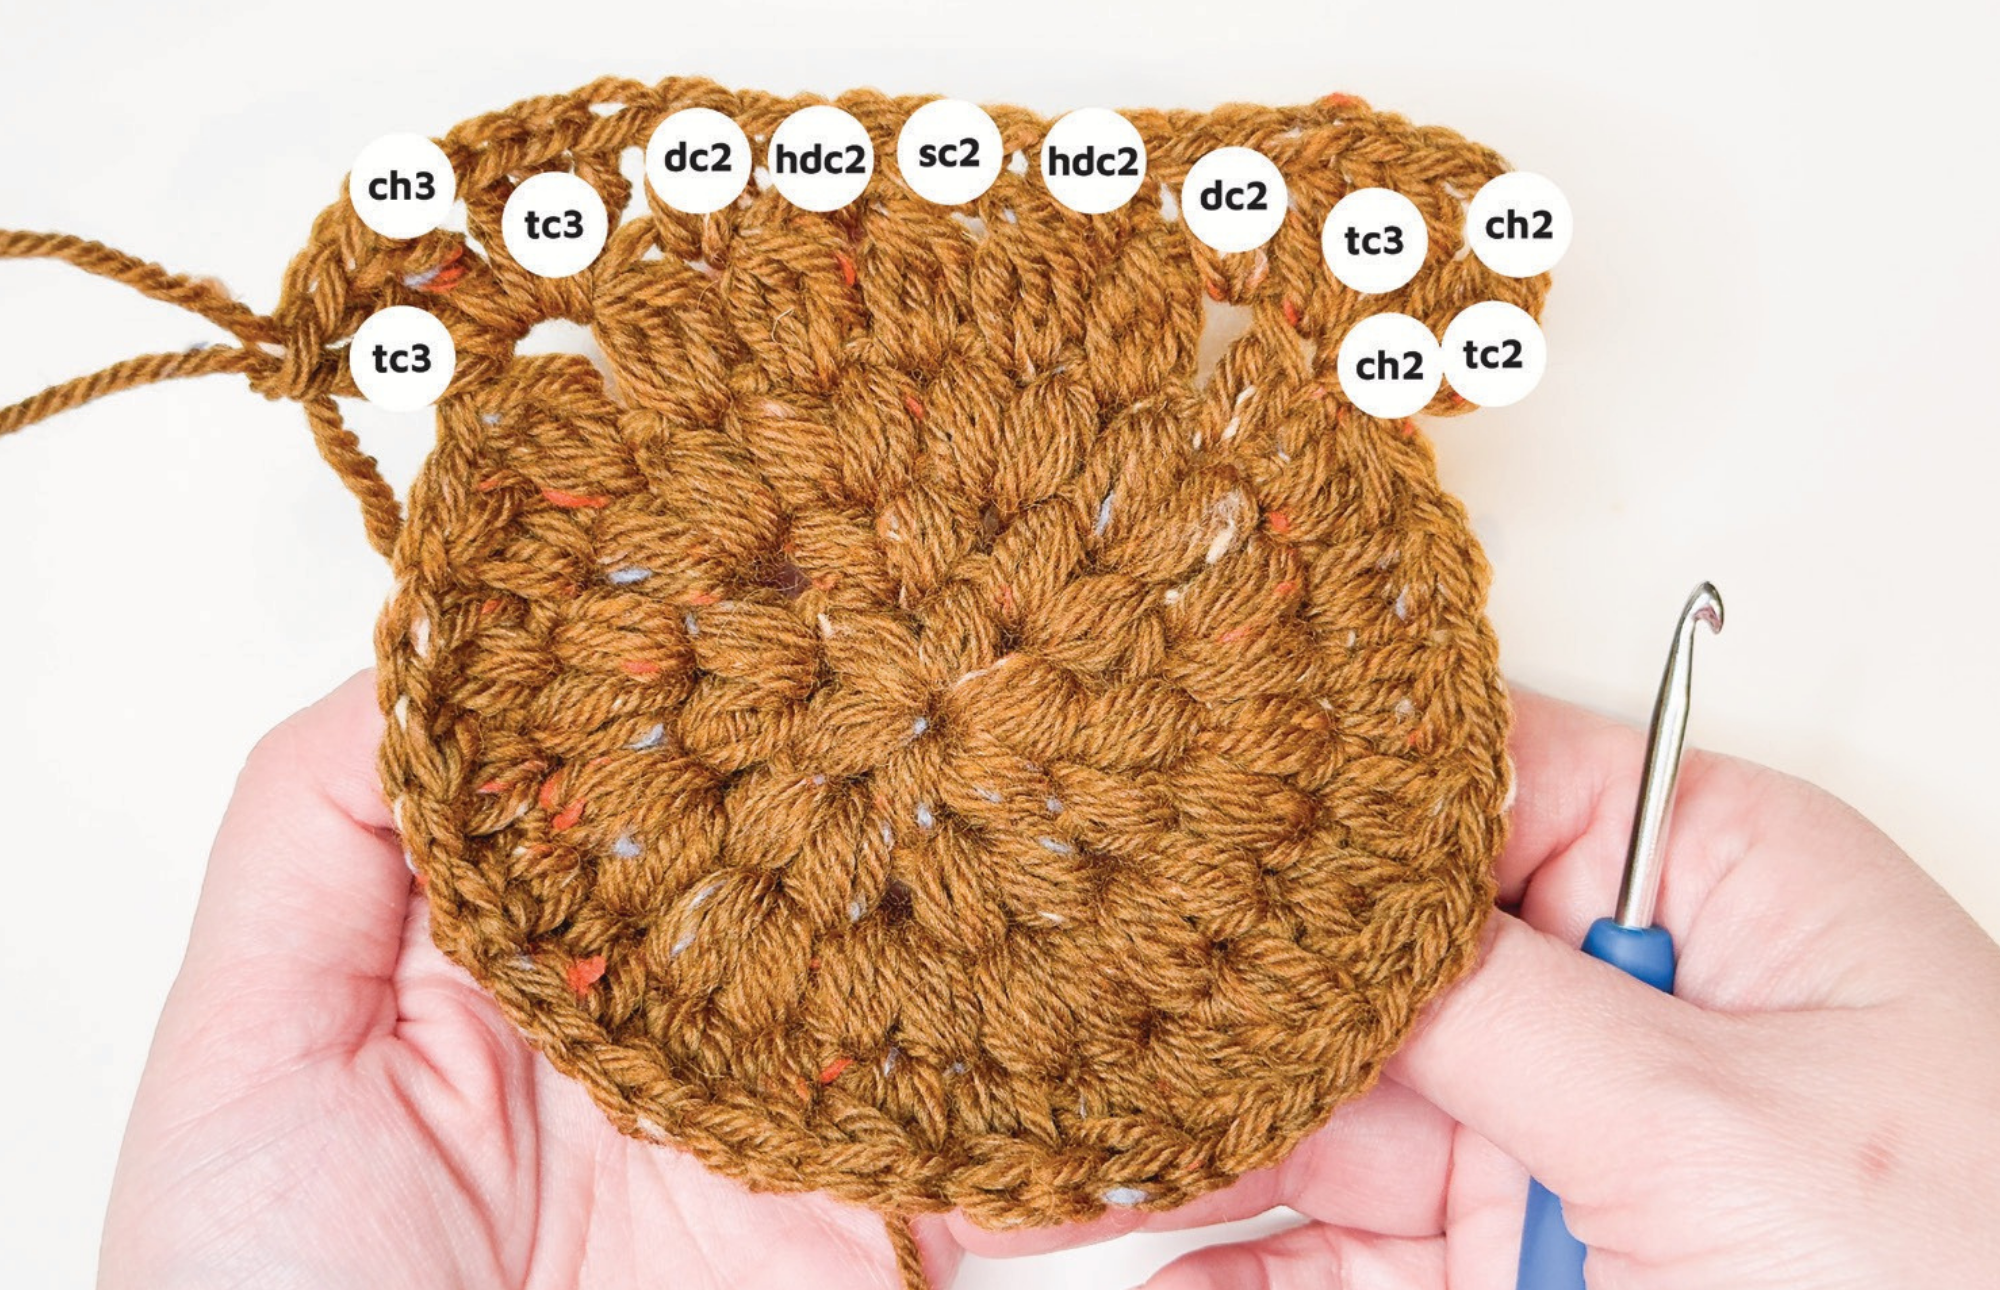
Sl in the 1st of this round.
Assembling the pieces
Granny square will measure approximately 5x5 inches. In order to make a crossbody bag, we need 4 granny squares. Use this pattern and make 4 squares in total.
Put together two squares and place them in the middle, fold the squares diagonally and place folded squares on both sides of the middle square as shown on the photo below.

Remember to check the front and back sides of the squares, you may decide which side you would like to be the front side or mix the sides.
You will need a needle to secure and weave extra yarn – pull the yarn into and through the stitches several times and in different directions.
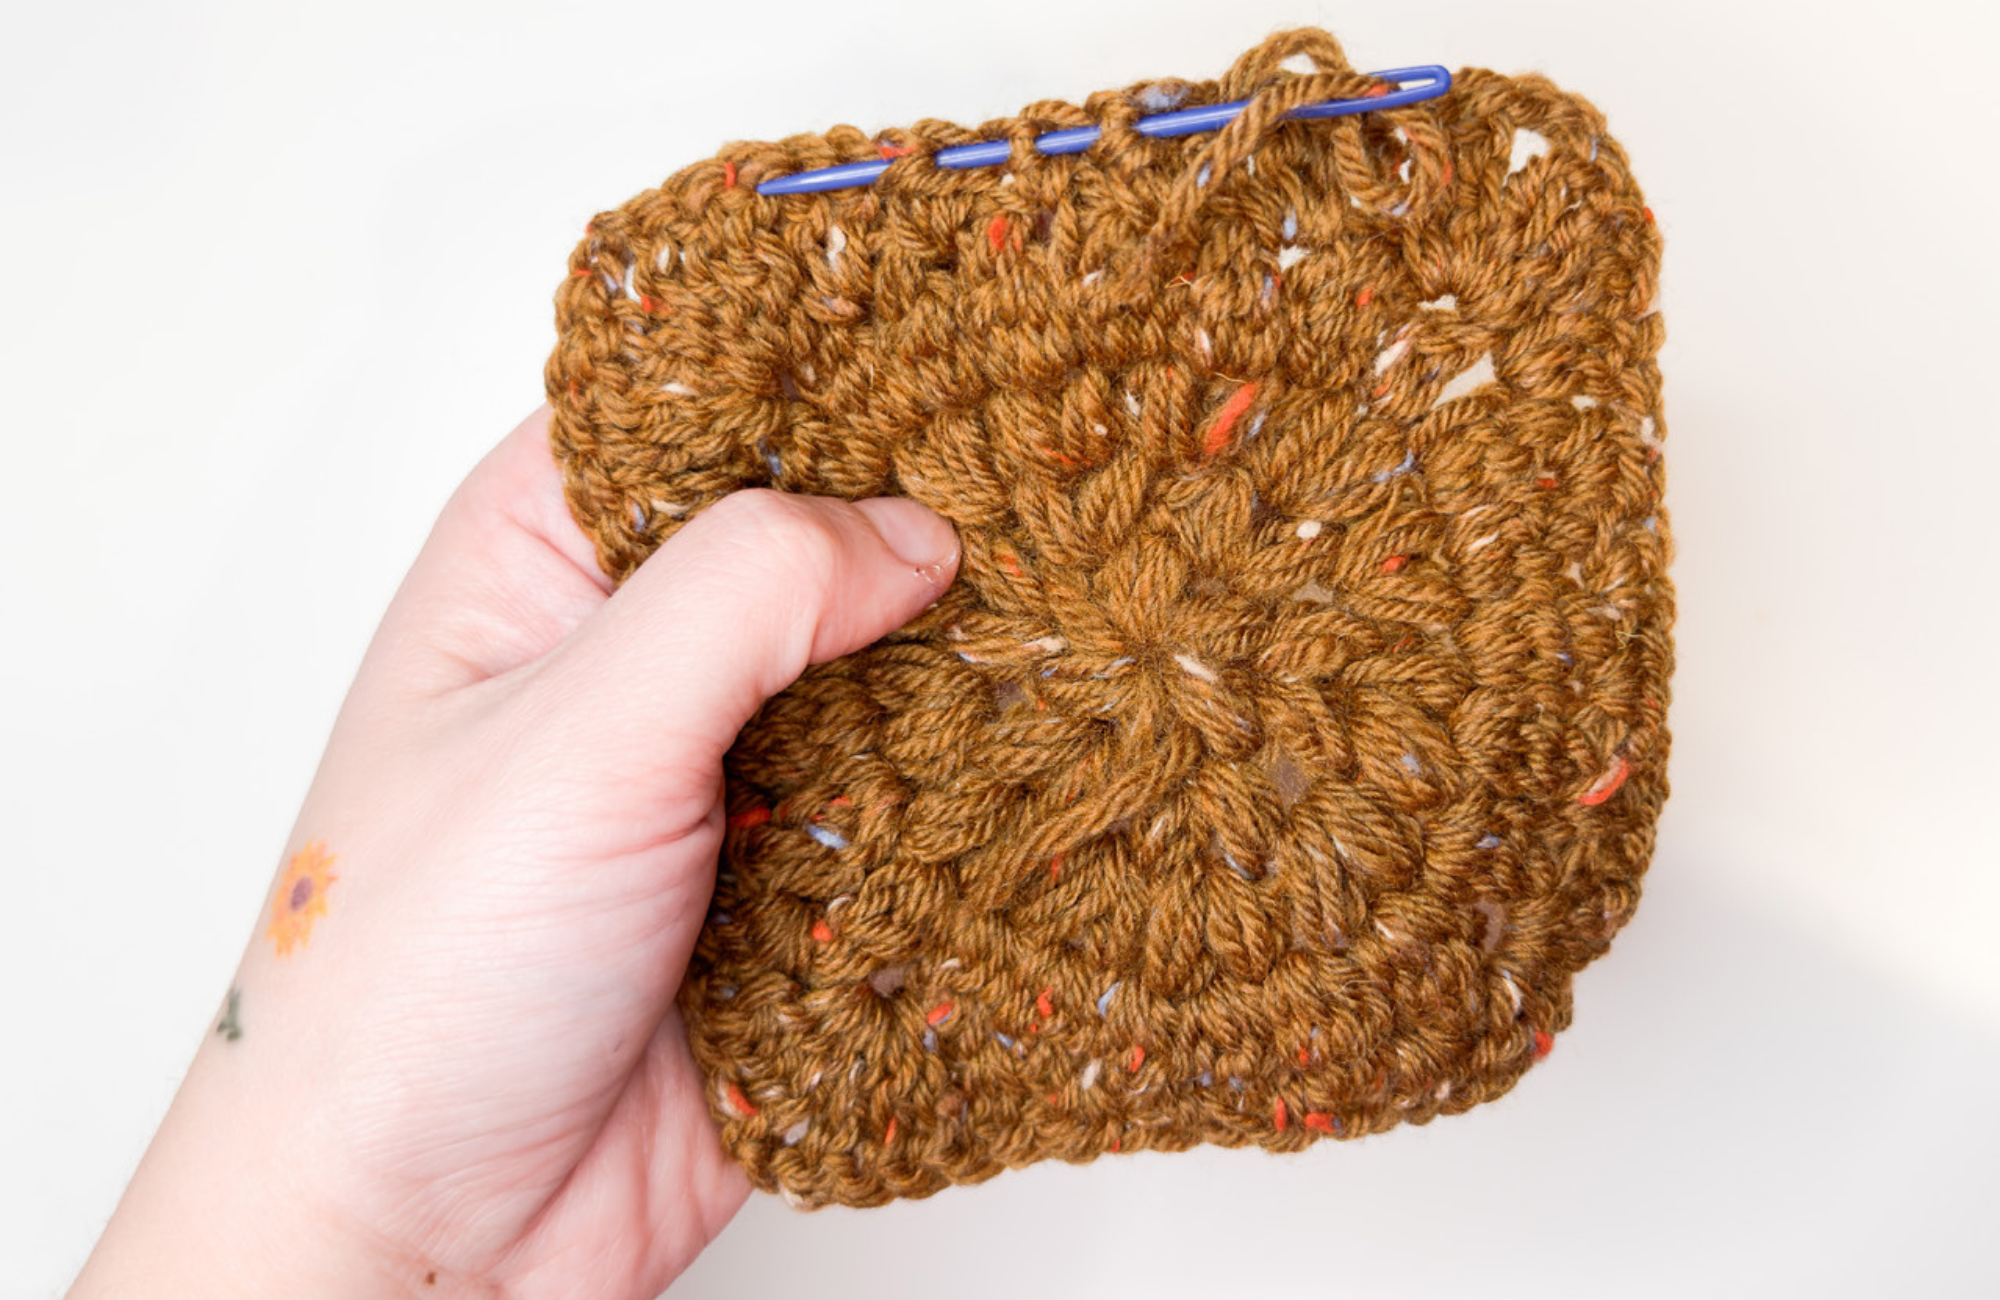
We will start assembling the project by attaching folded sides to the middle part. Make a loop and ch 1 in the corners and sc across the edge stitch by stitch. When you complete sc on one side, turn the project around, and attach the second middle square to the folded square with sc.
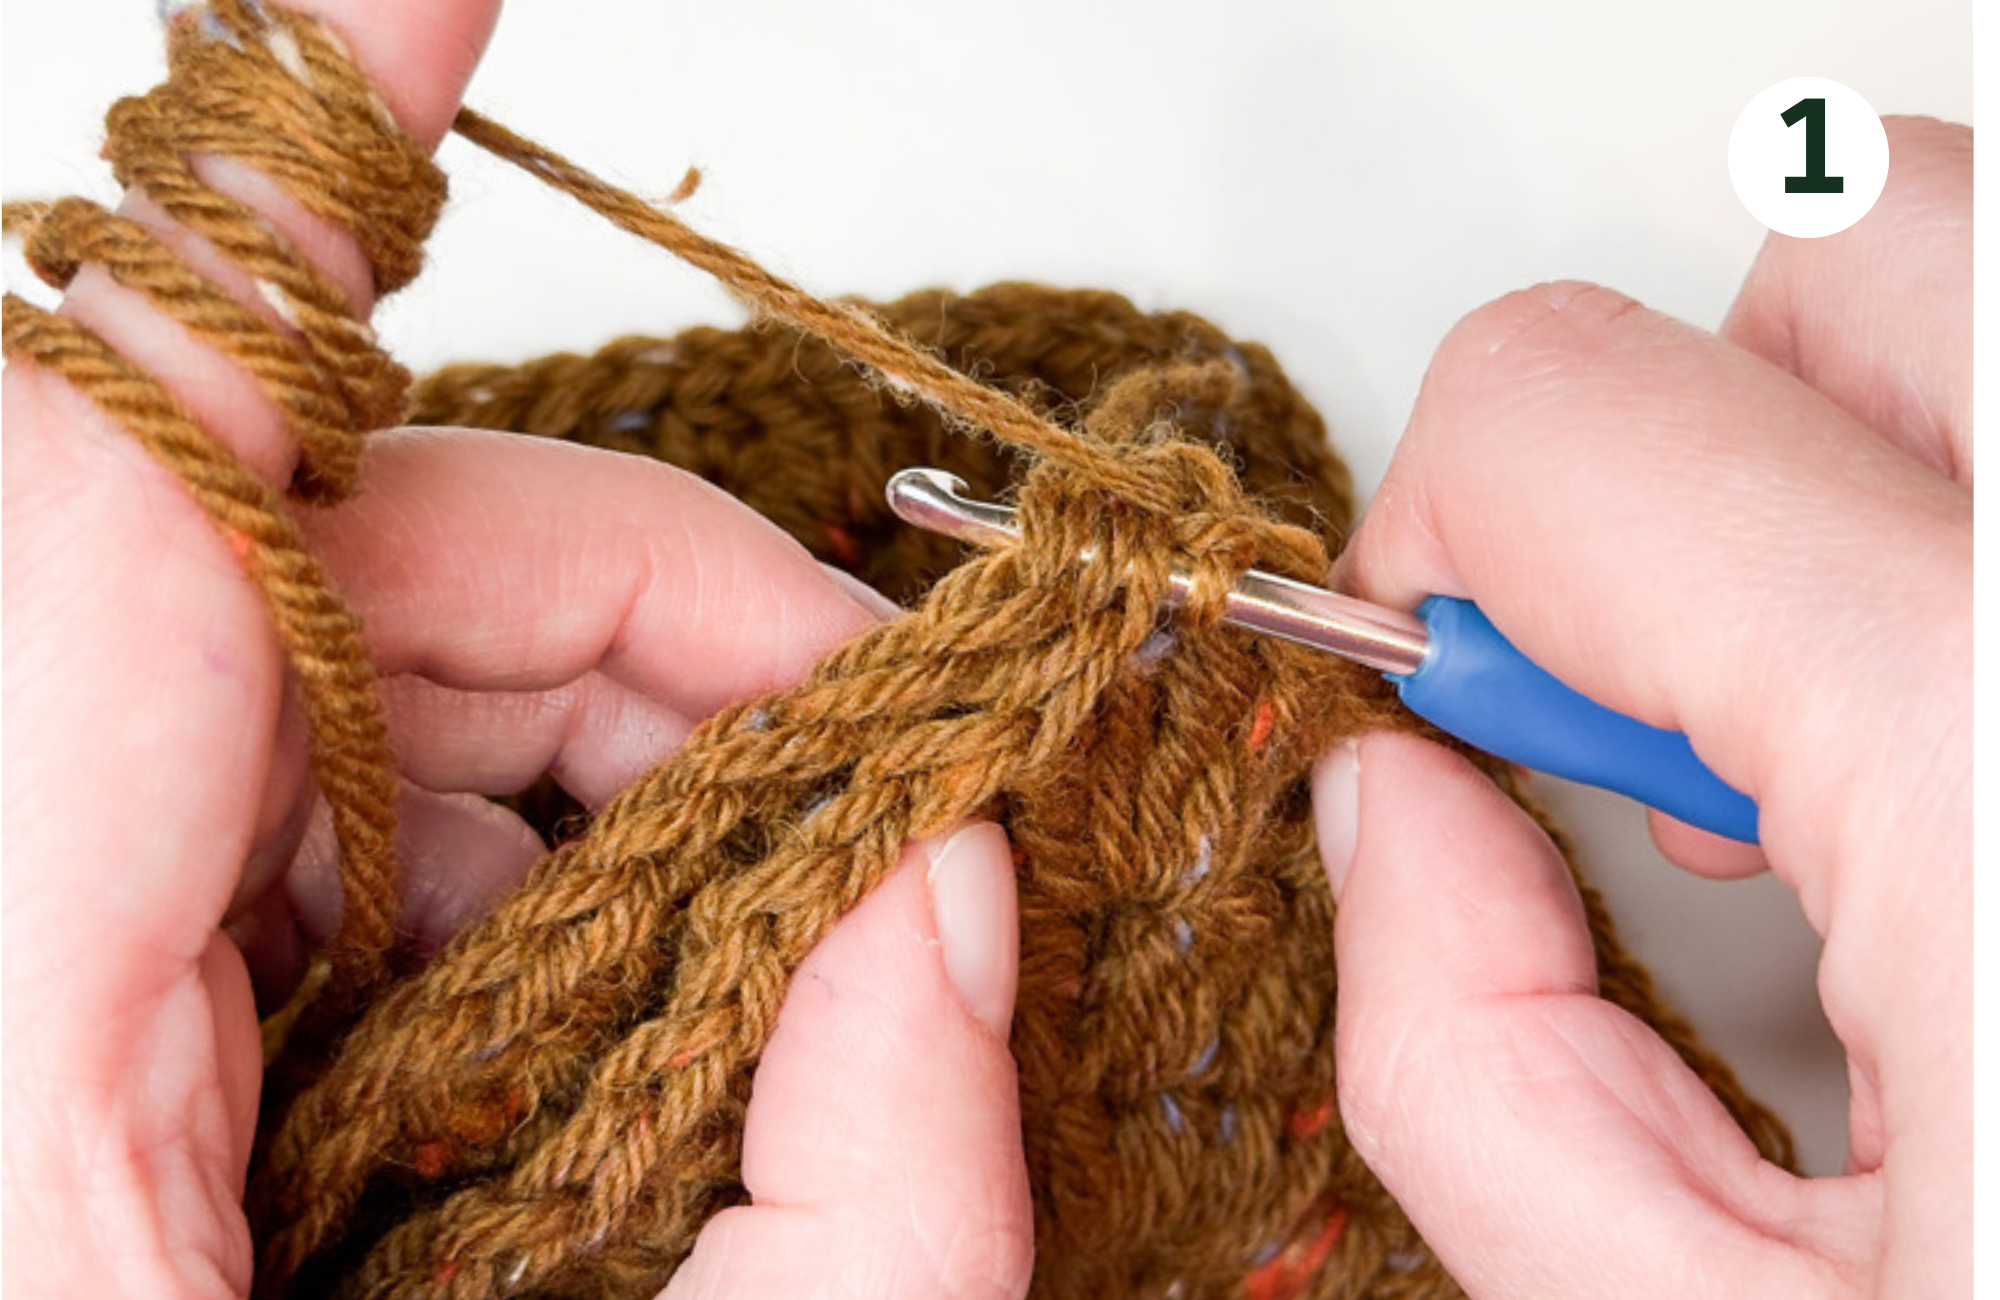

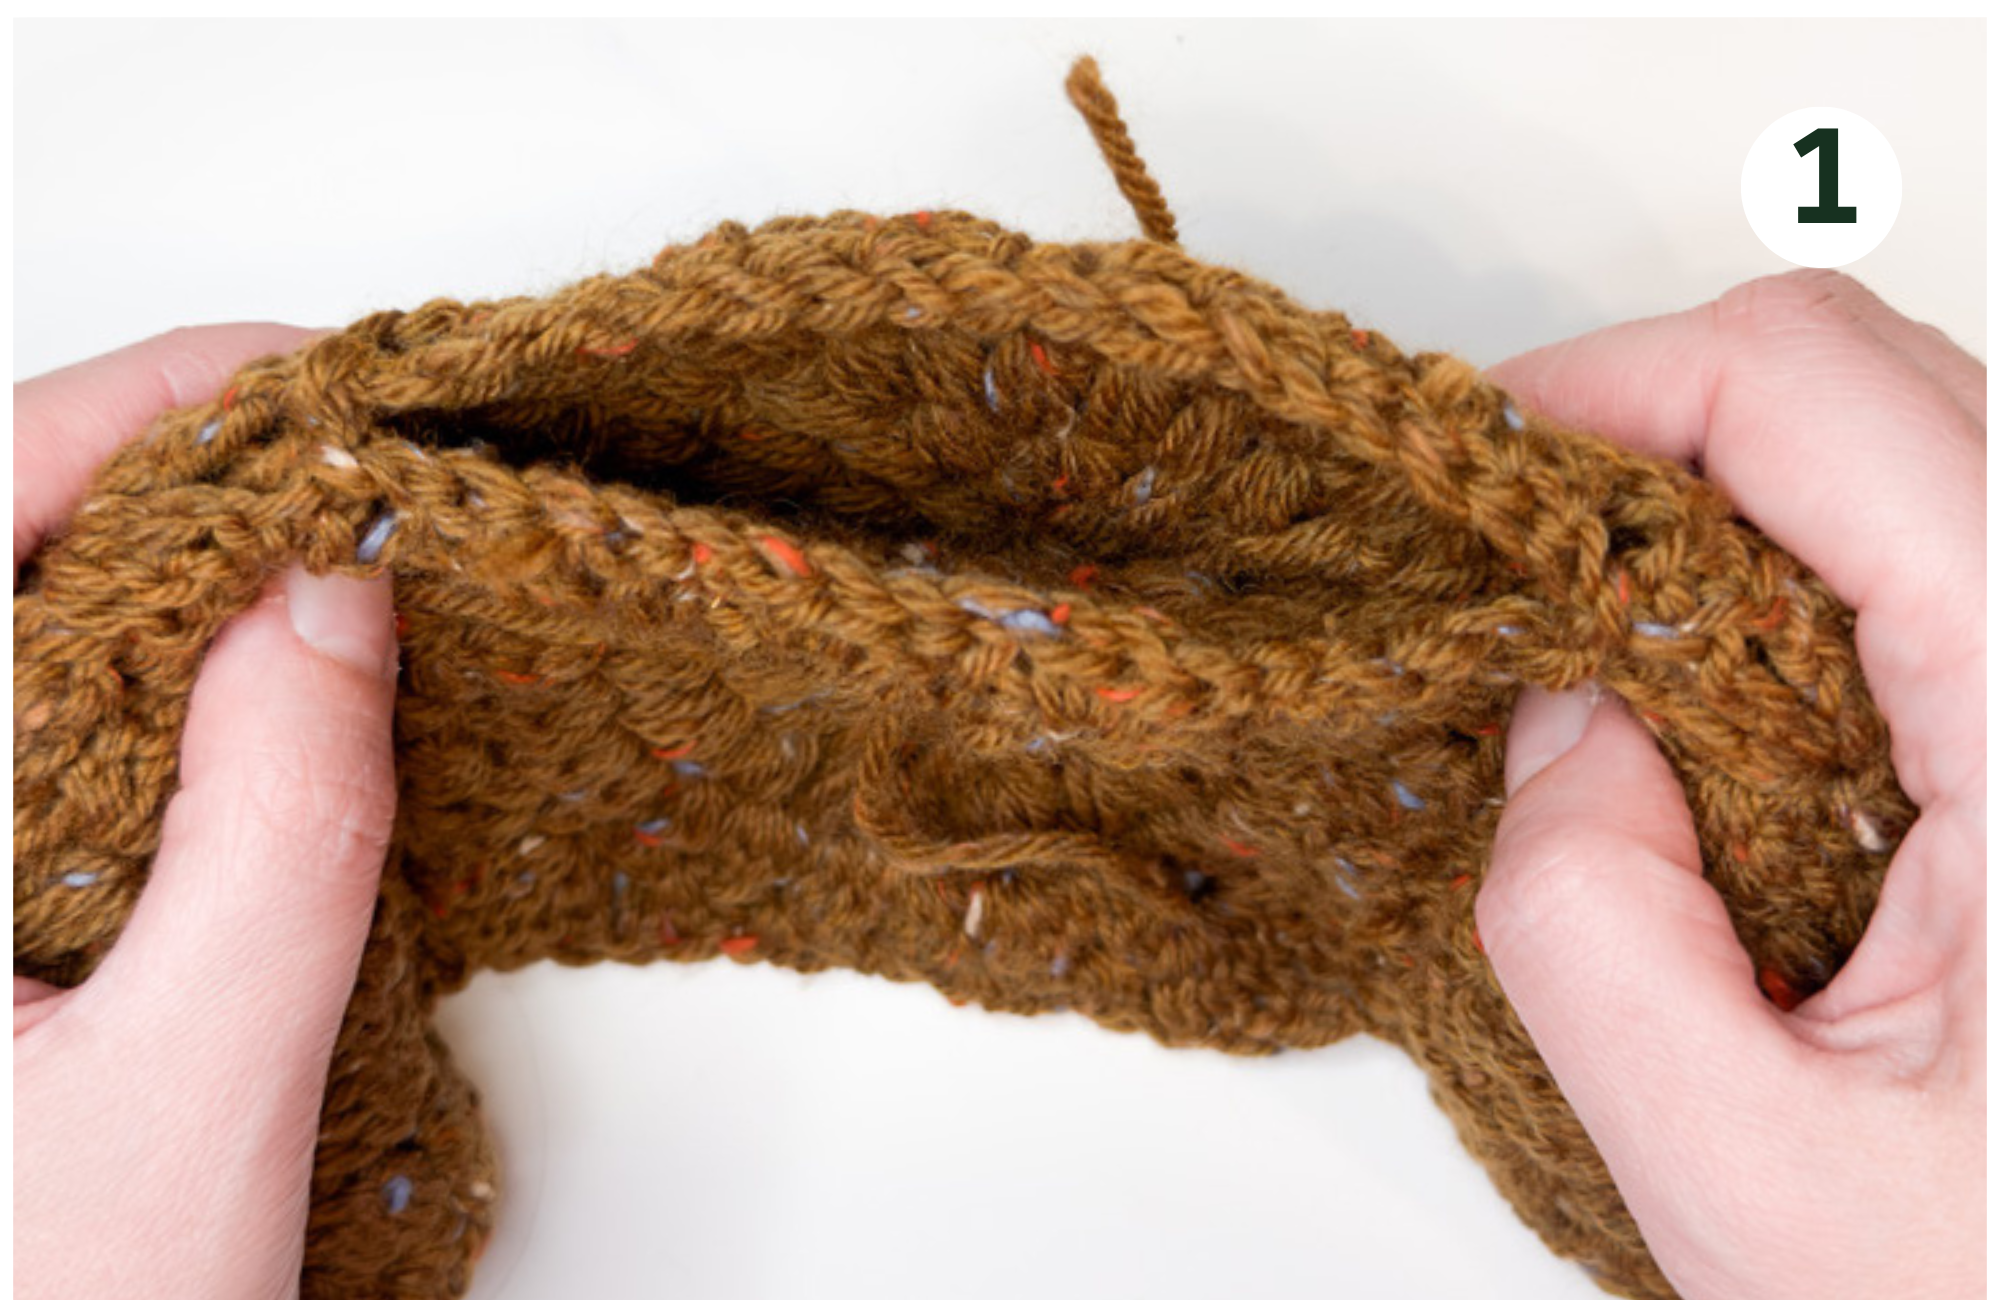
Sew the bottom of the middle part
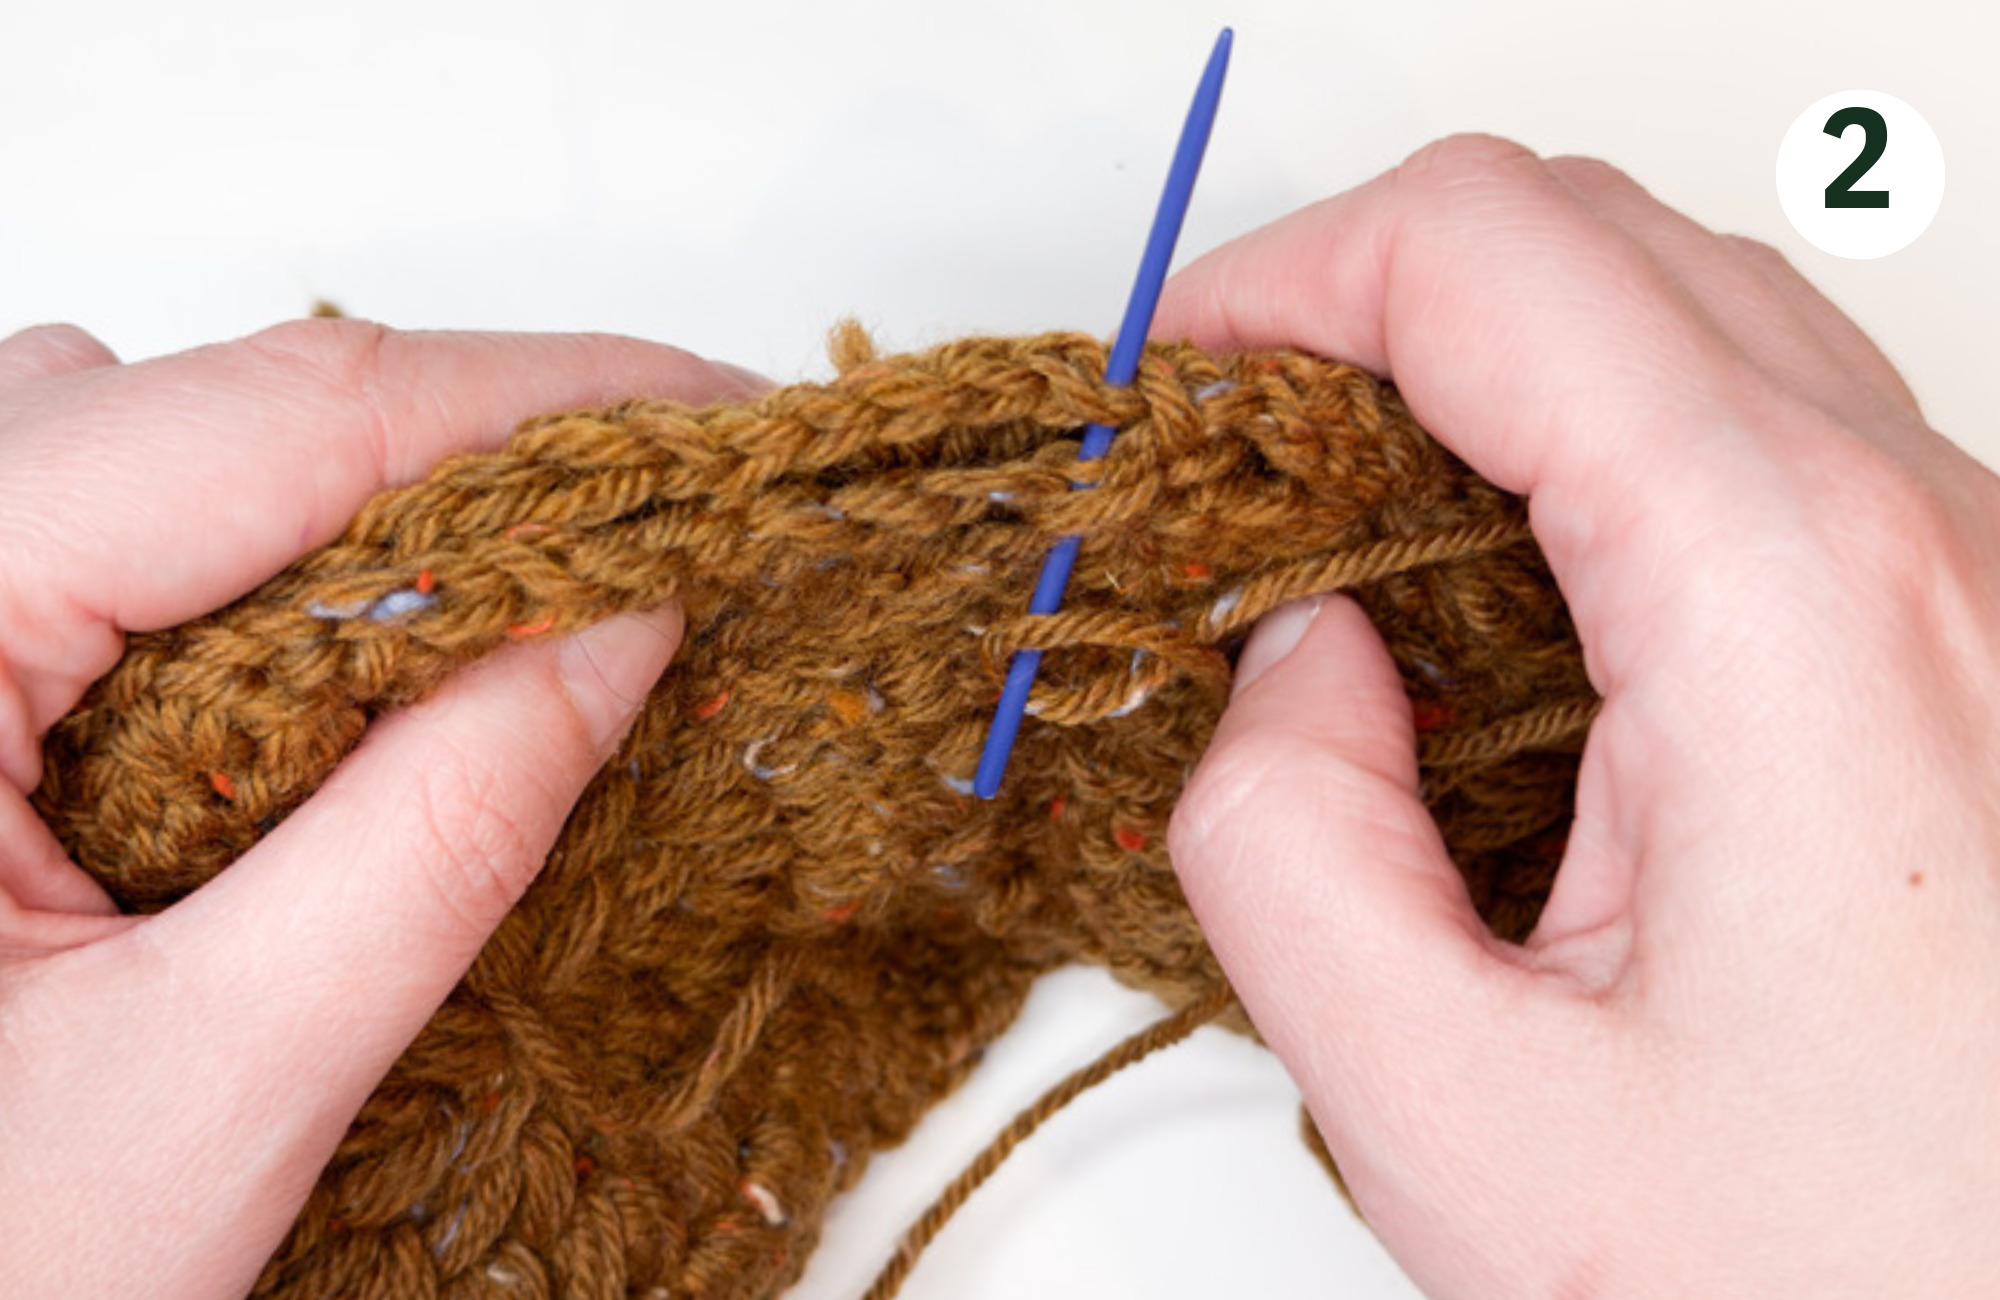
Strap
Make a loop and ch 9 (make sure that you have loose yarn approximately 2 inches, that you will use to sew the strap in the end).
Insert hook into the first st and hdc 8 till the end of the row. *Hdc – yarn over, pull the yarn from the st, you will have 3 loops on the hook, pull throughthe yarn in all 3 loops.
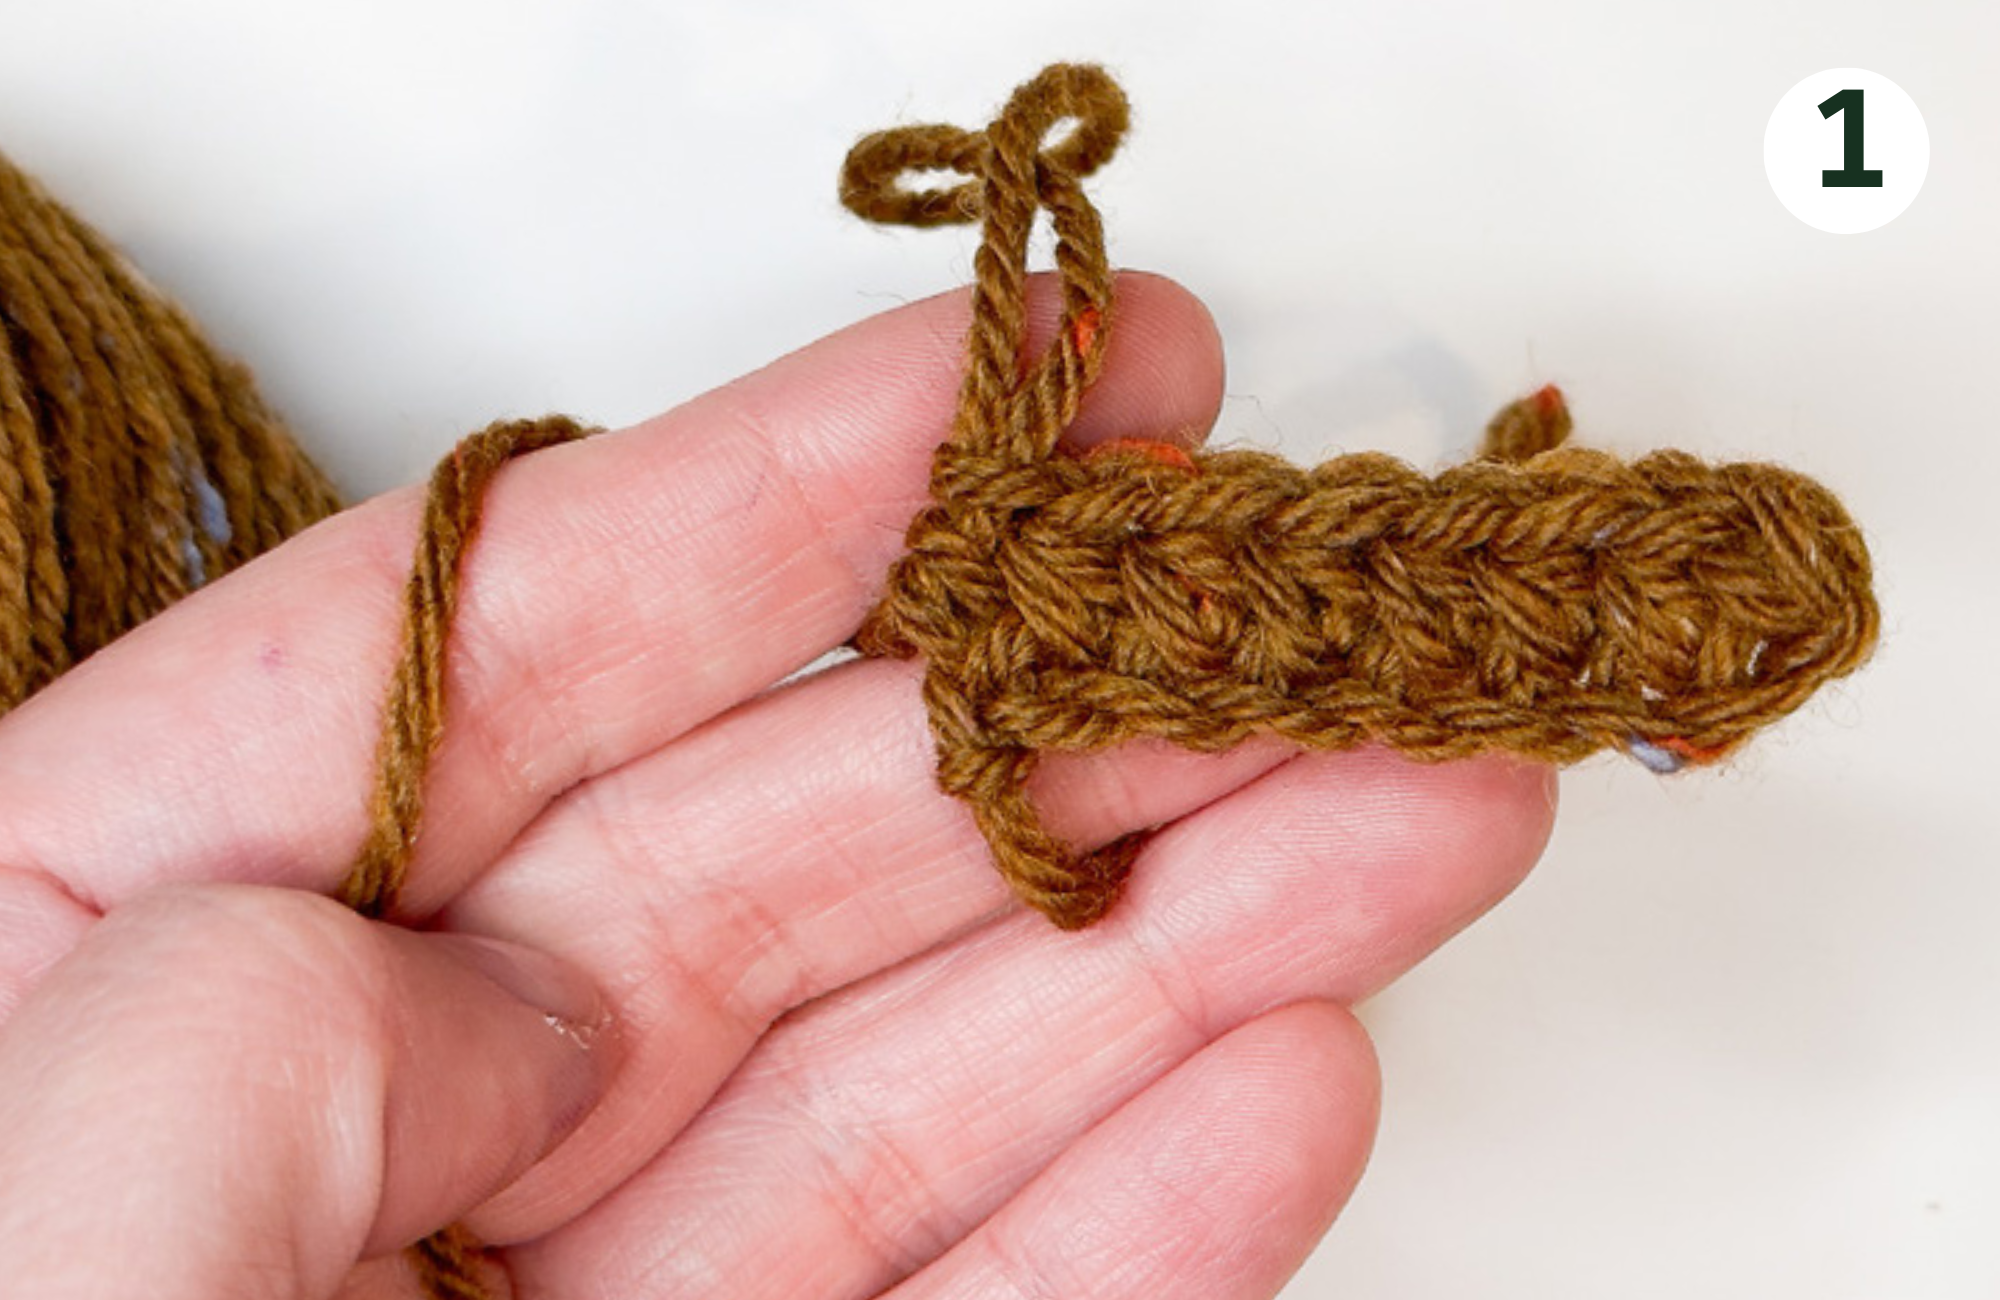
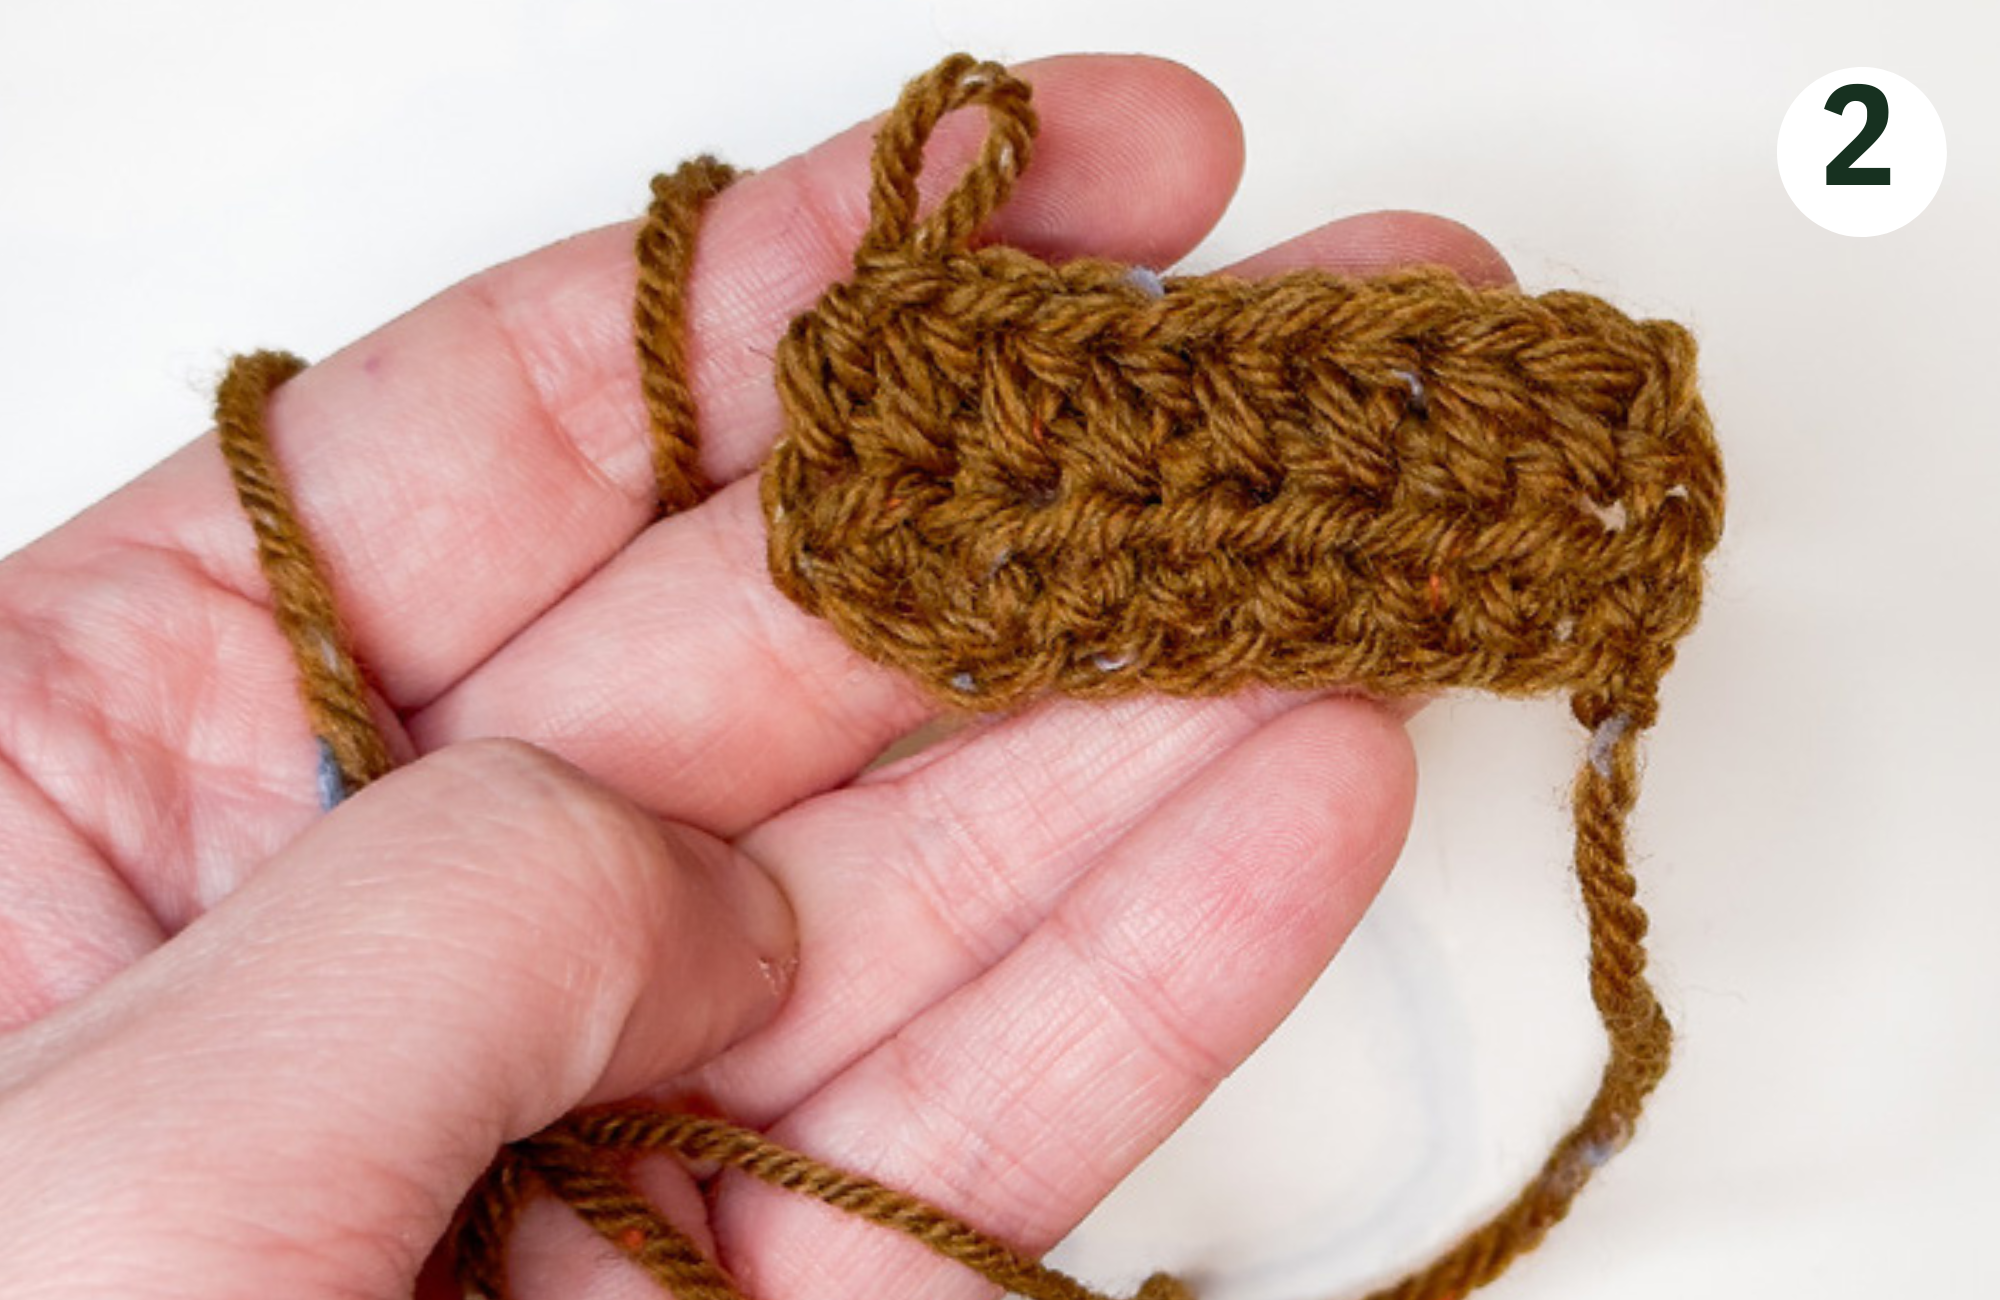
Turn the project on the other side, ch 1 and hdc 8. Continue this pattern until you reach your desired length of the strap.
We made 88 rows, that is approximately 40 inches. Cut the yarn and leave extra yarn, approximately 2 inches, that you will use to attach the strap to the edges of the bag.
Attaching the strap
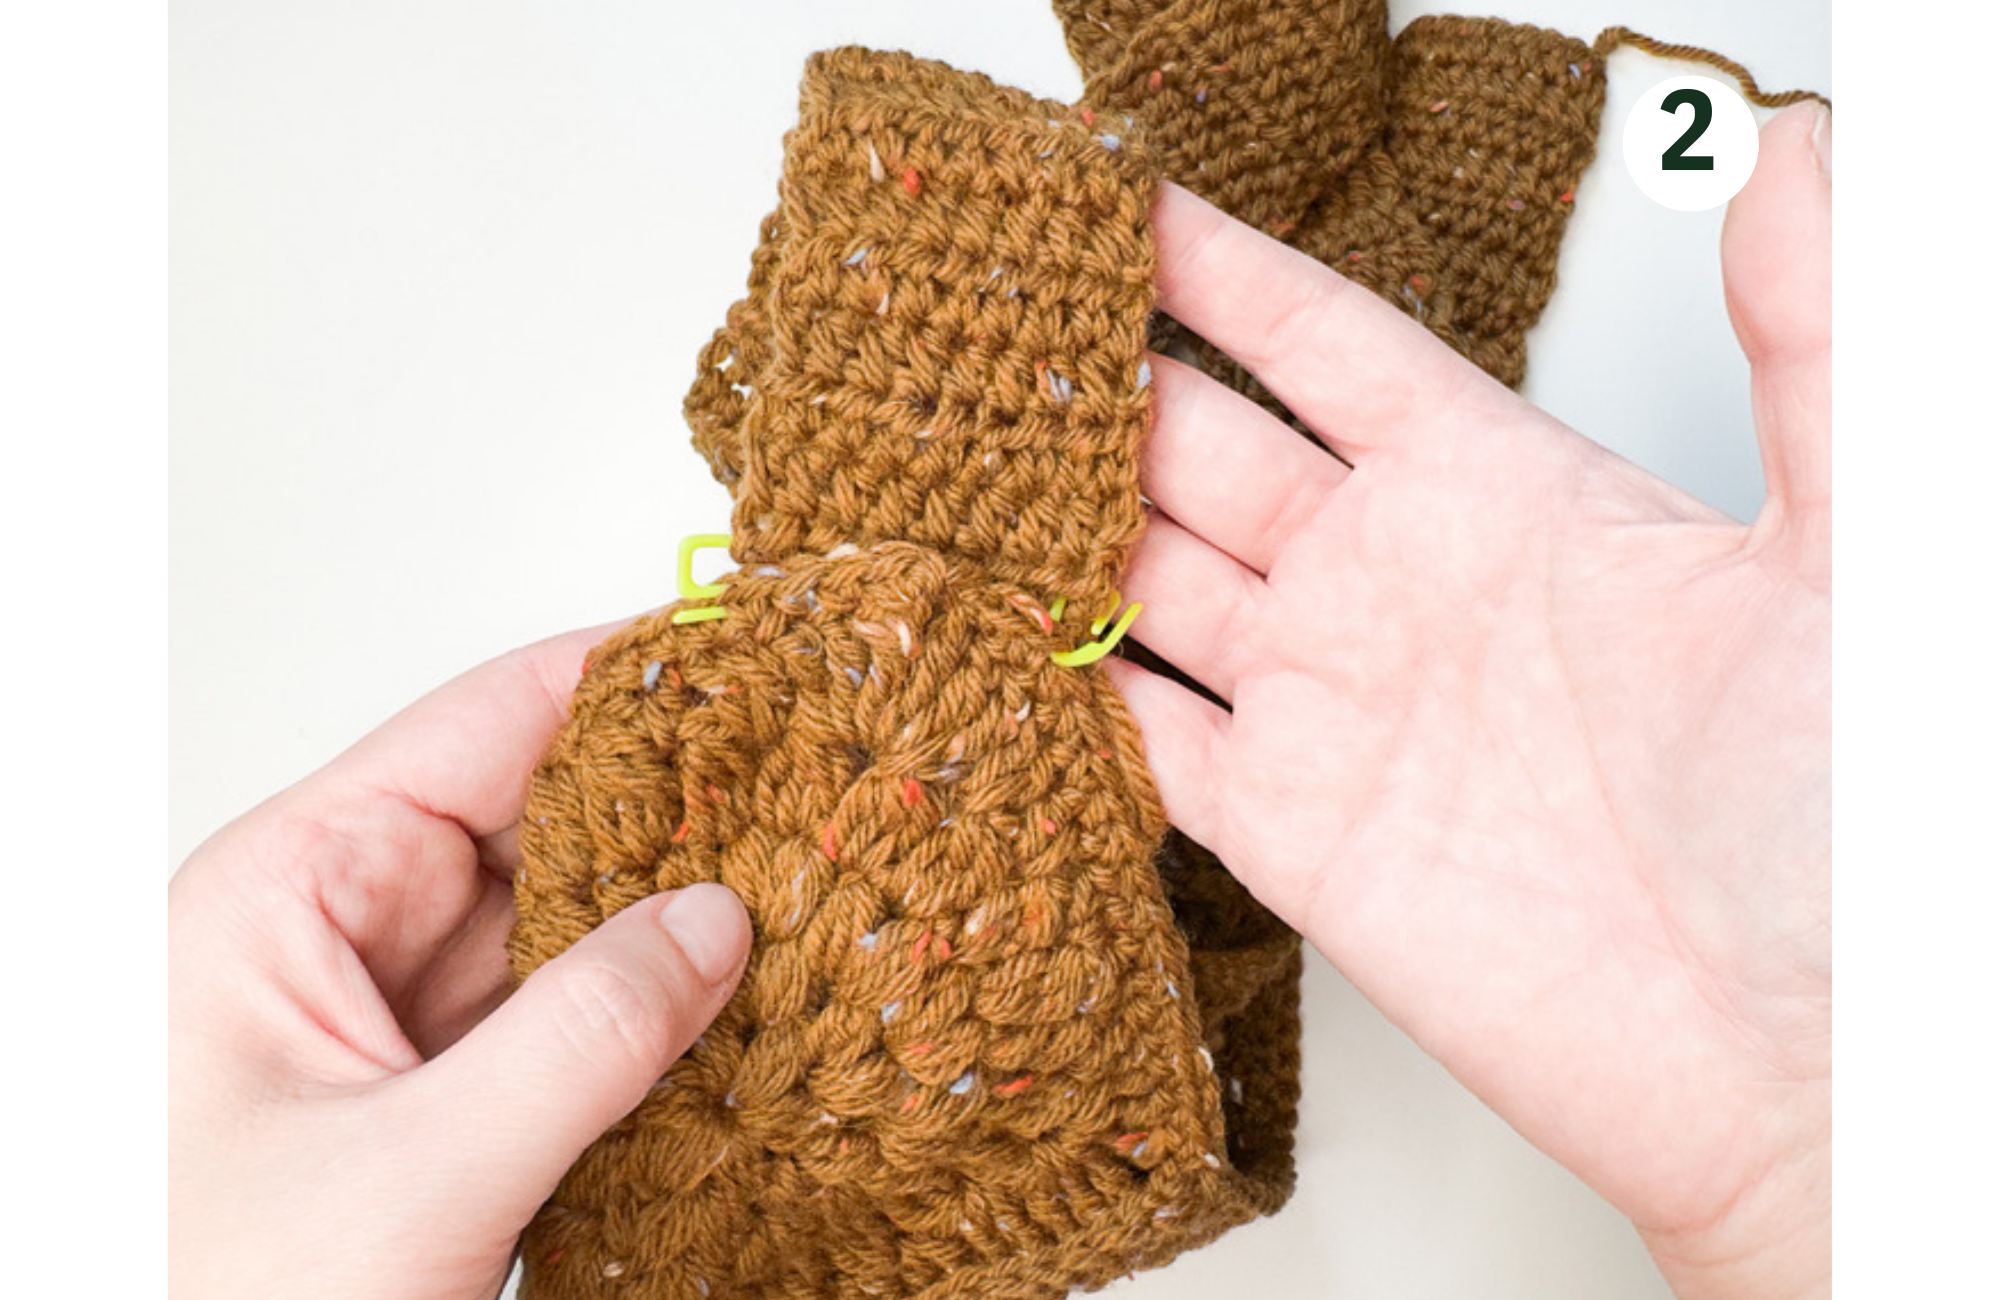
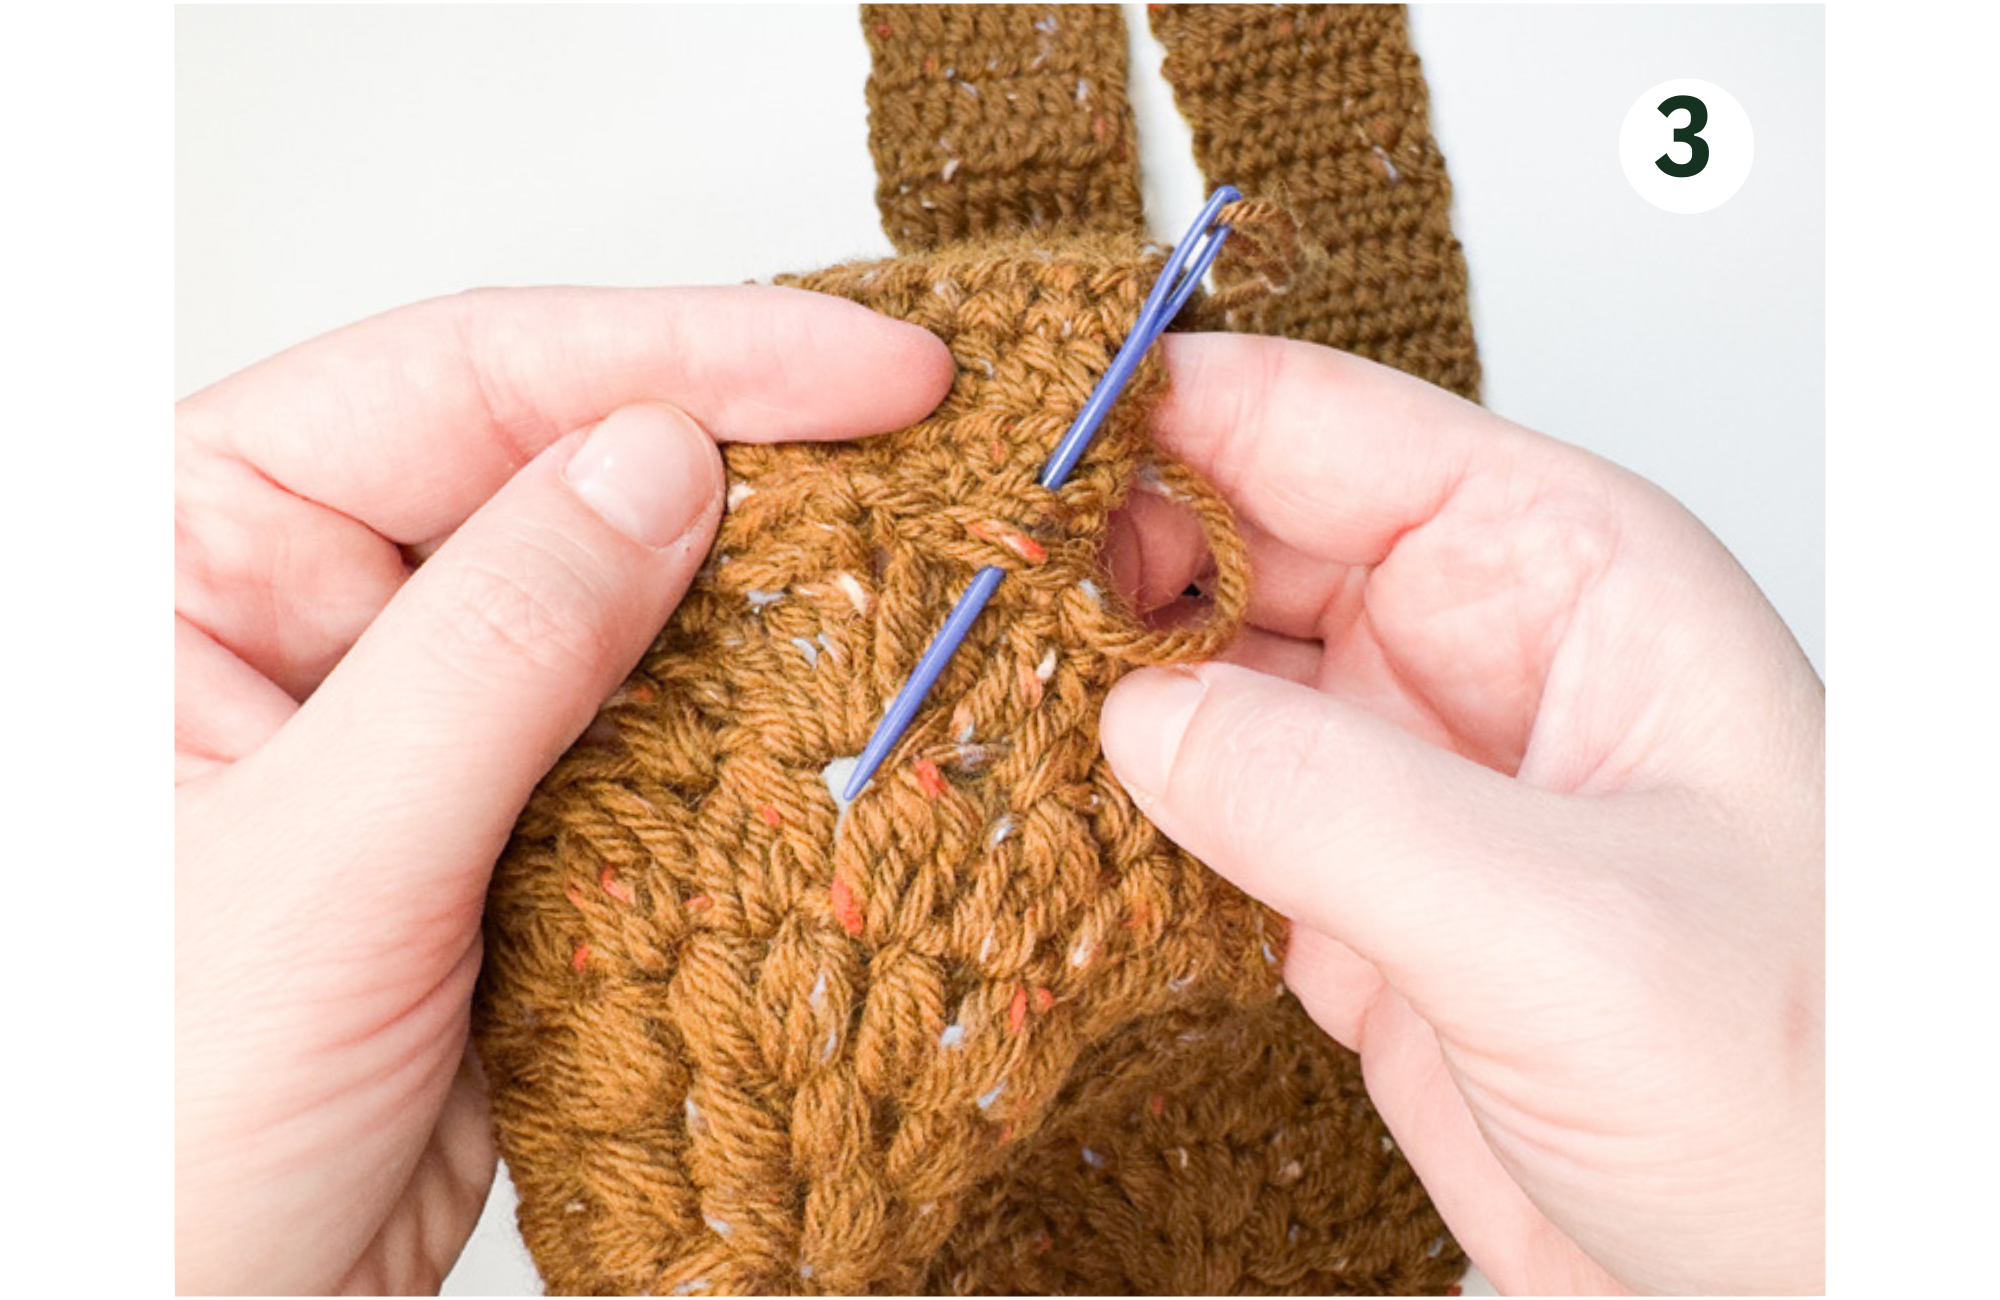
You may use a stitch marker to secure the straps before sewing them. Attach straps to the both corners of the project. Use needle and the extra yarn to sew the strap.

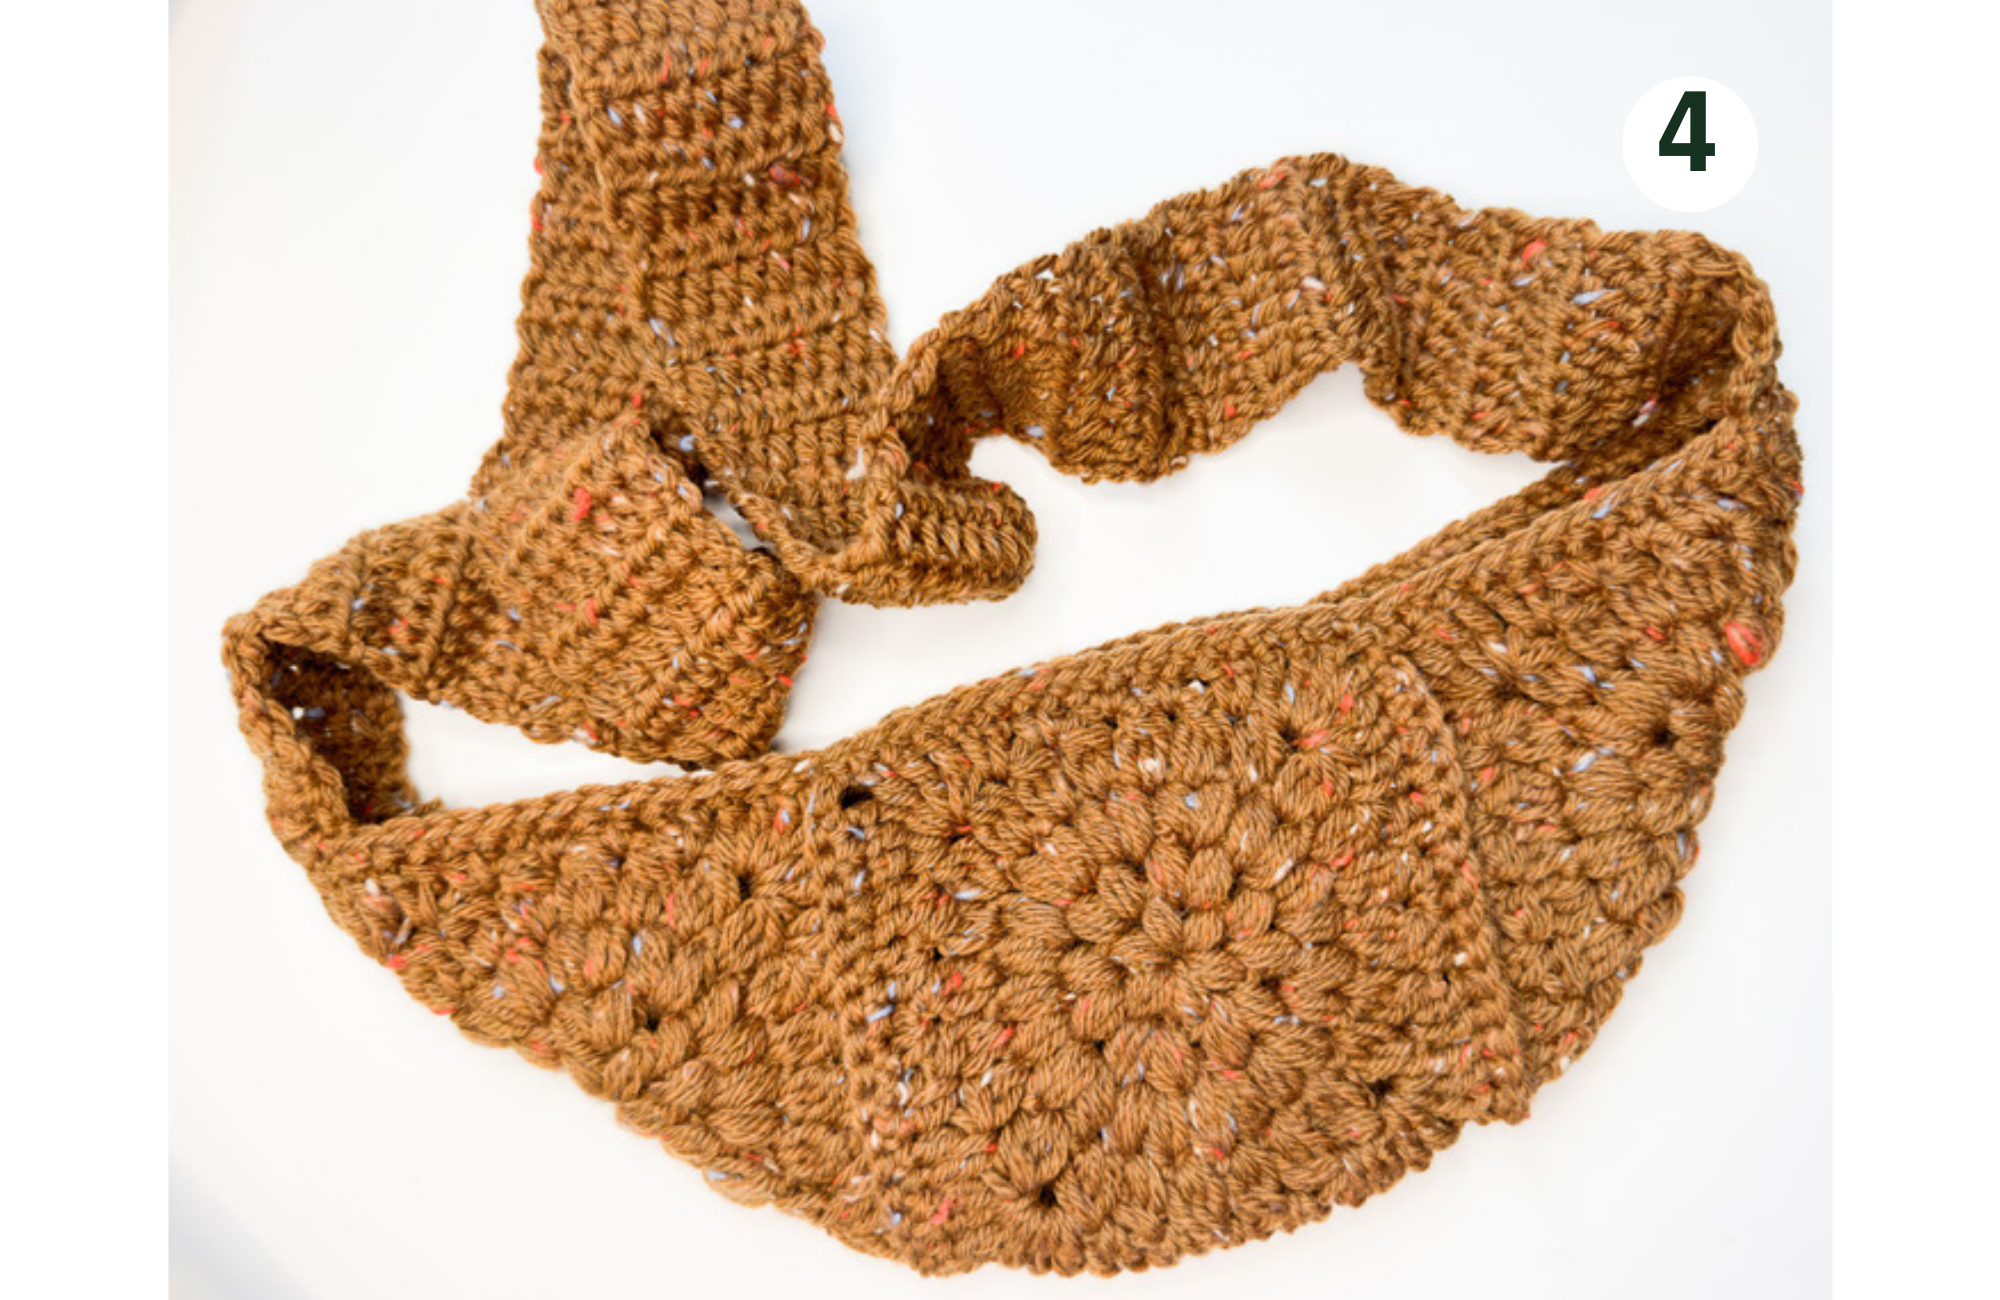
Your bag should look like this.
Attaching a zipper
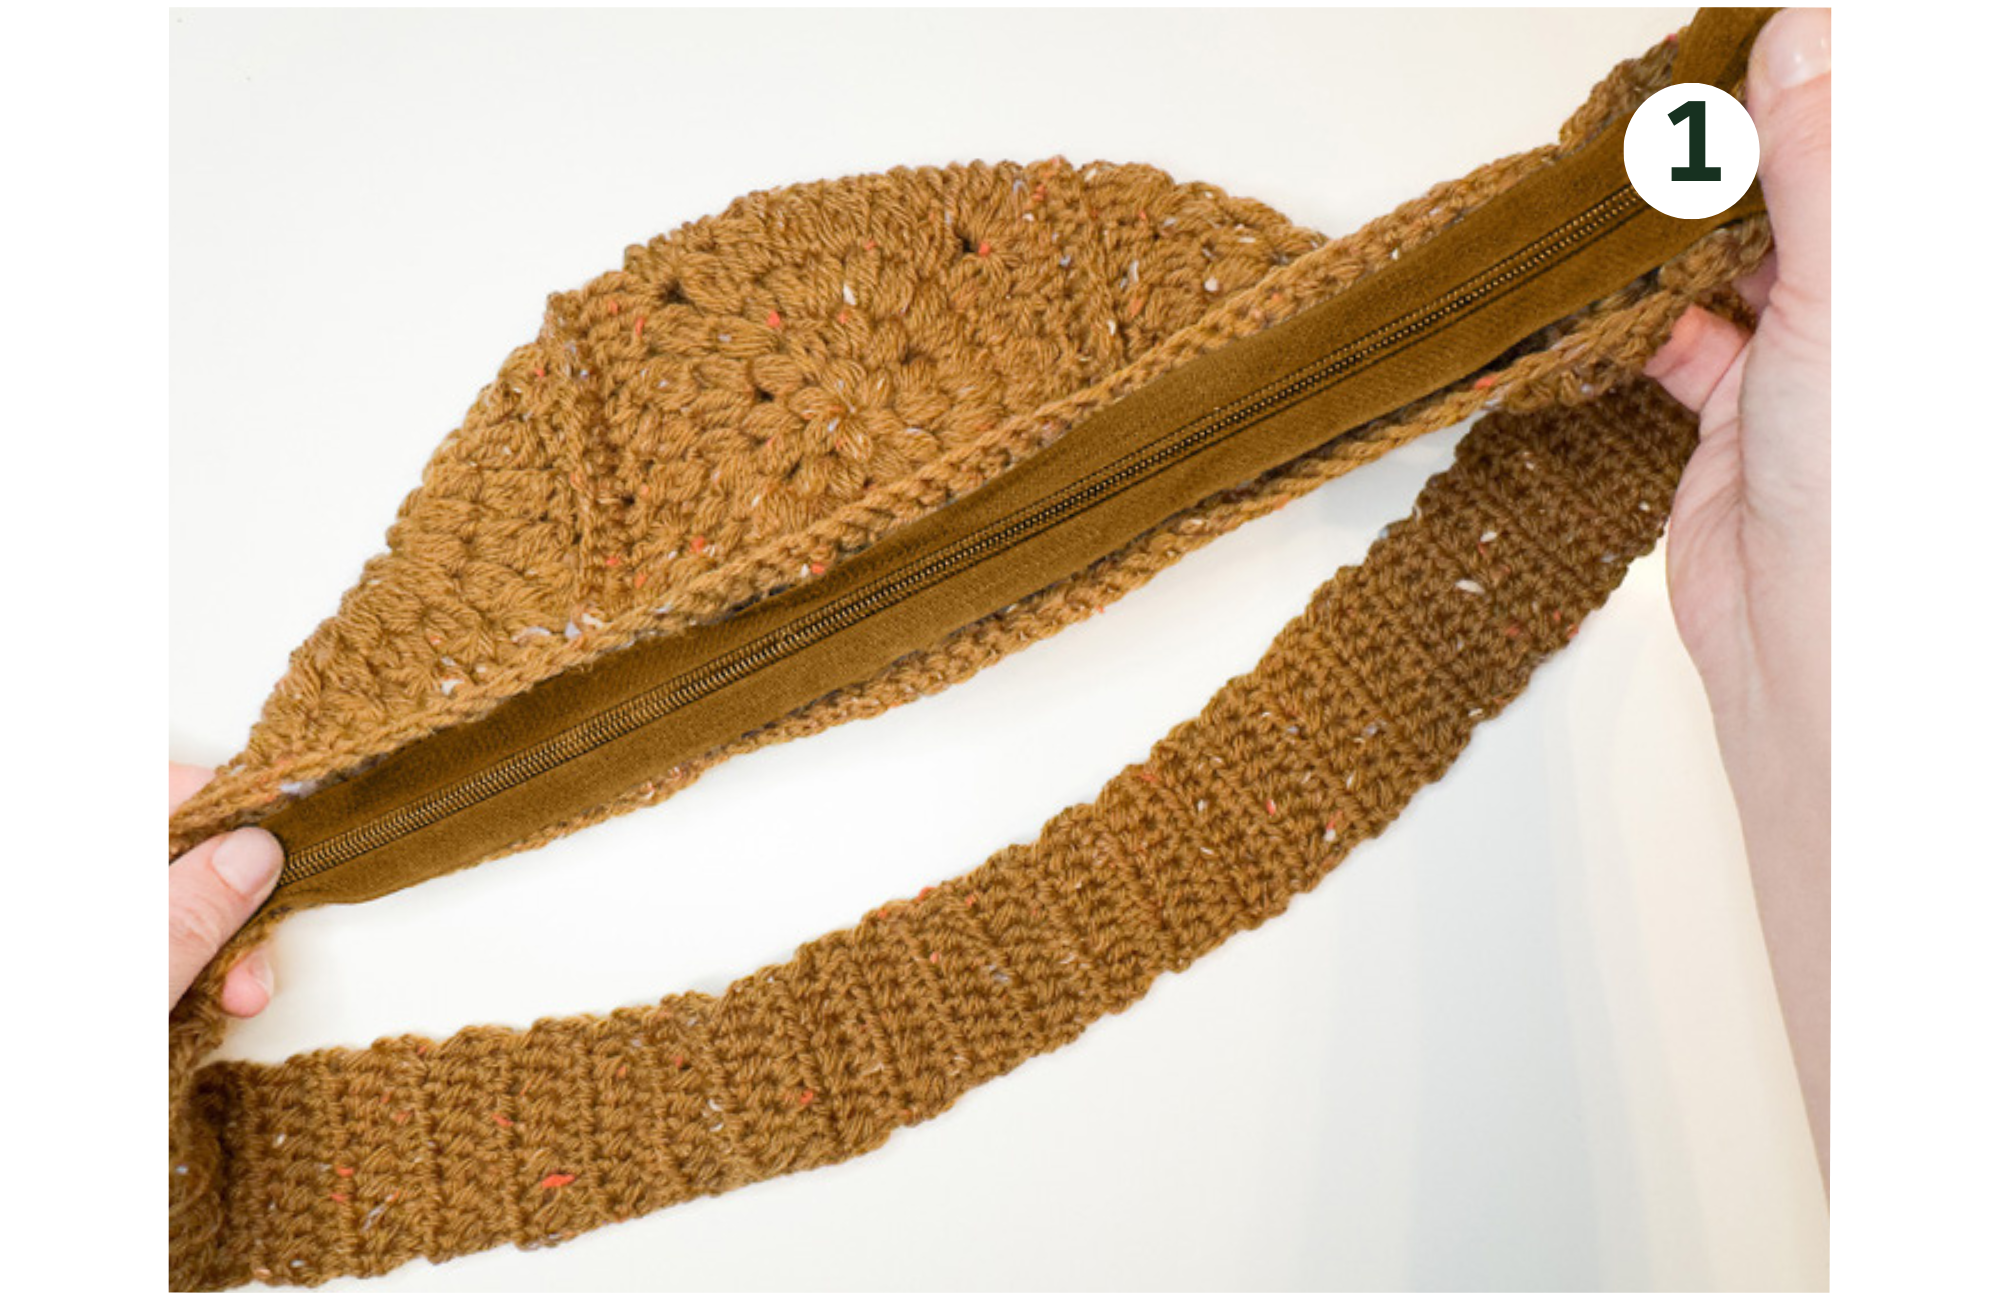
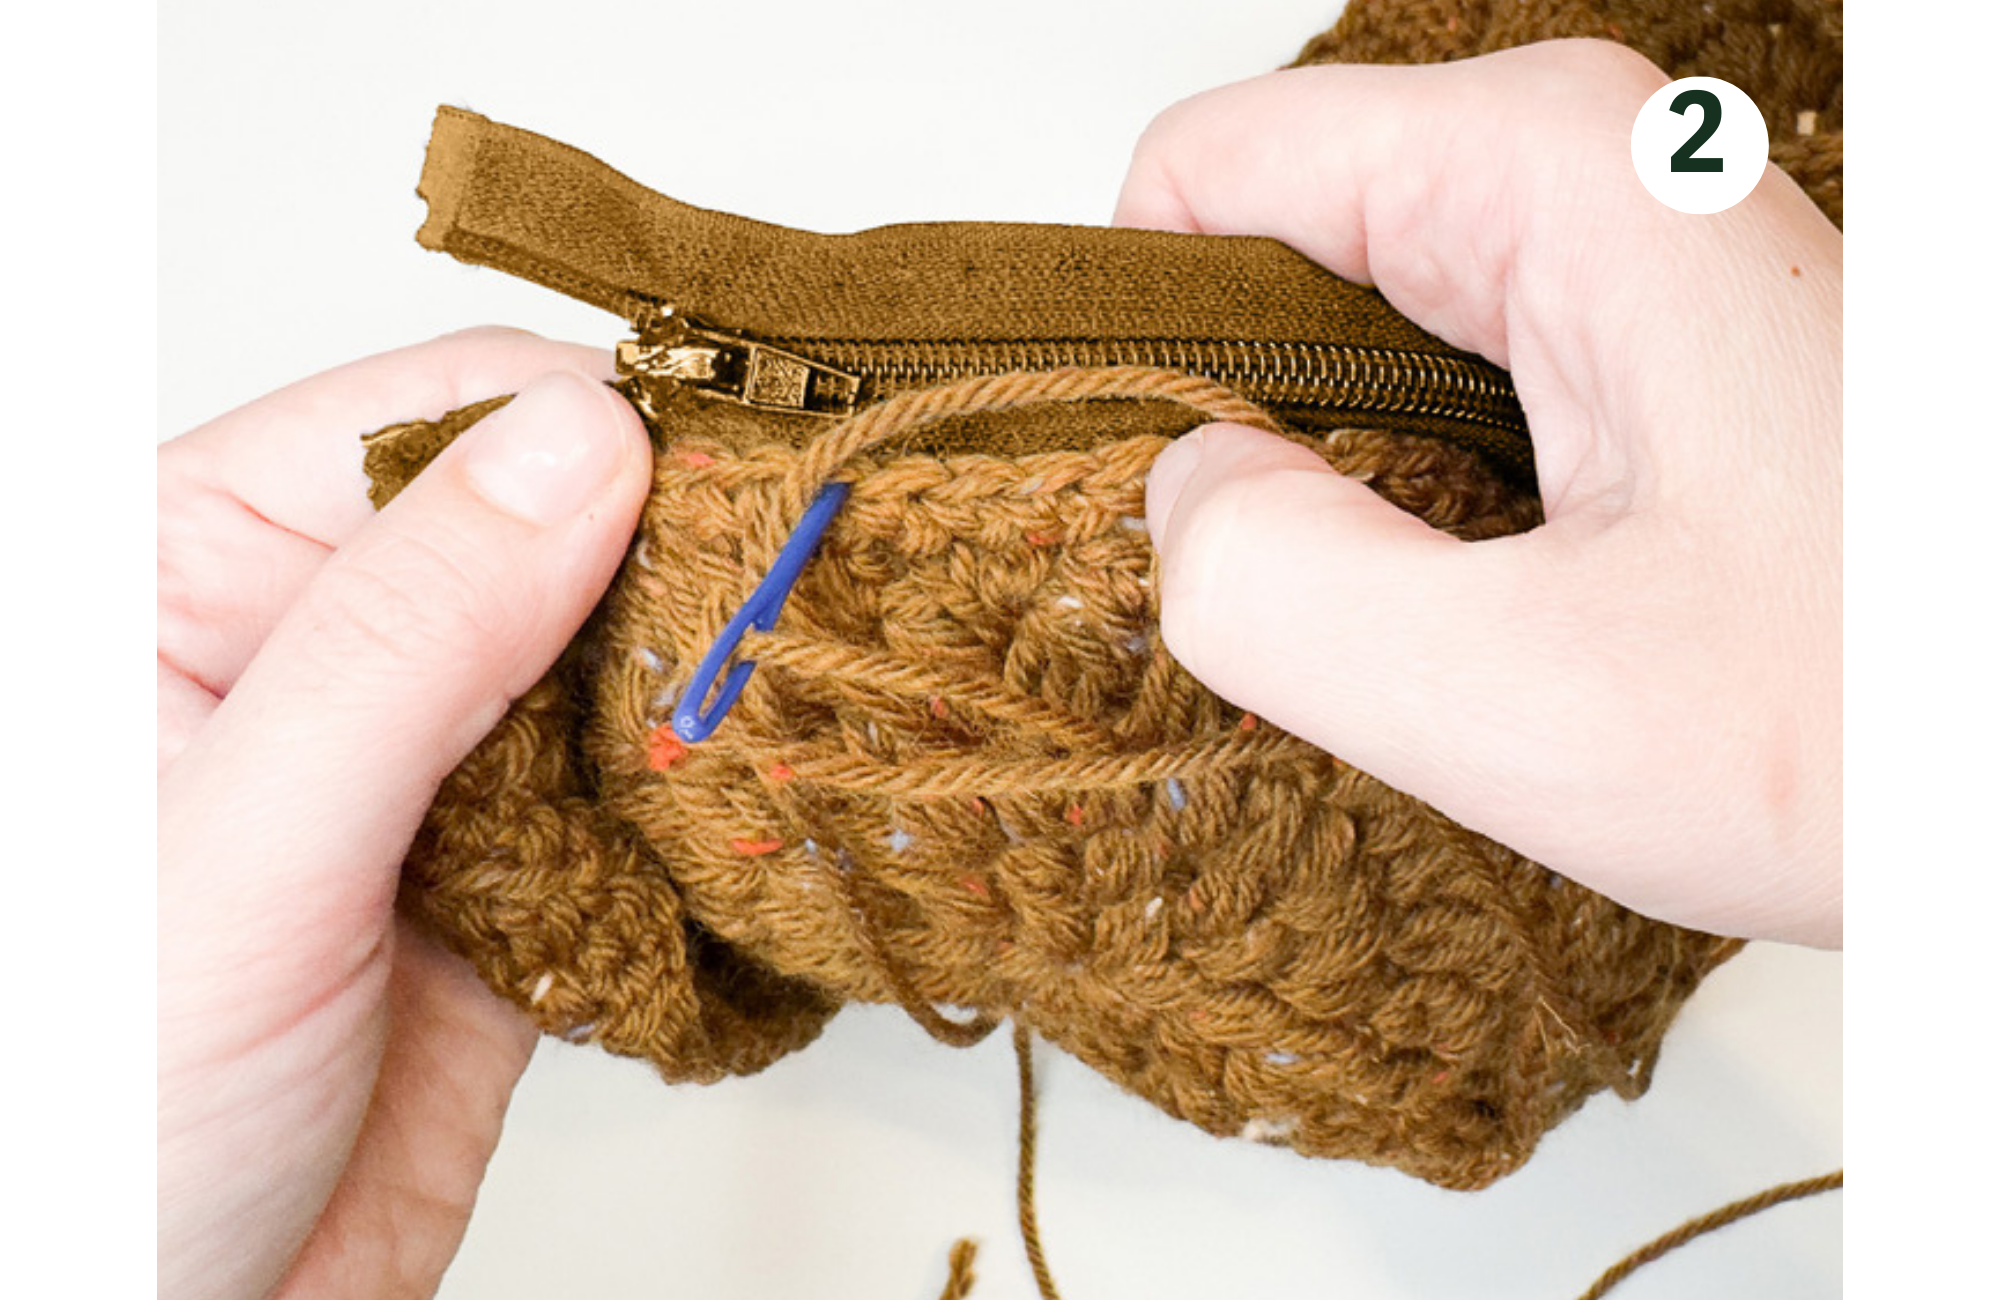
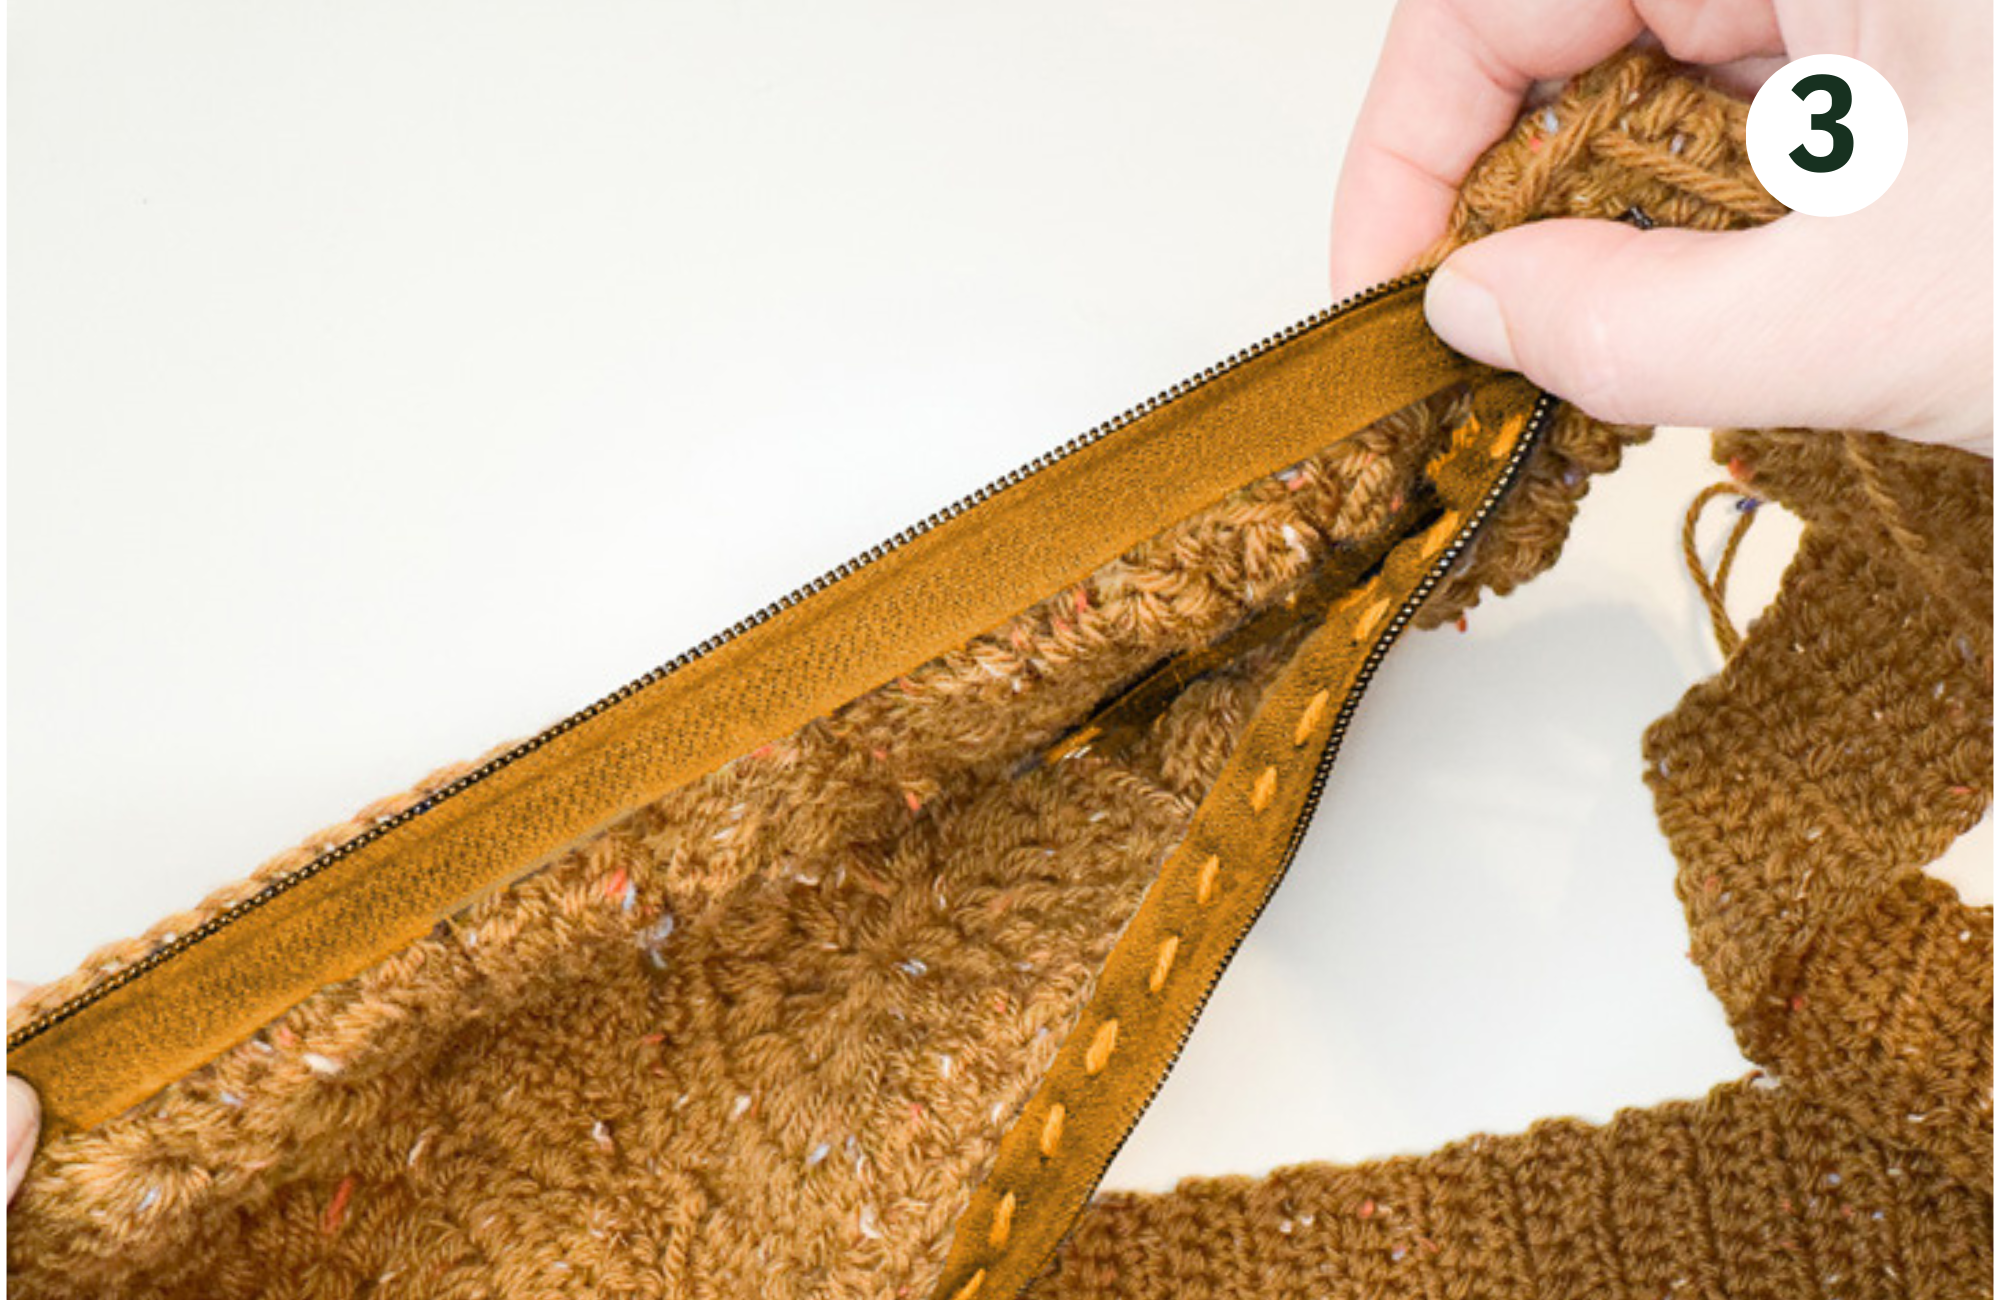
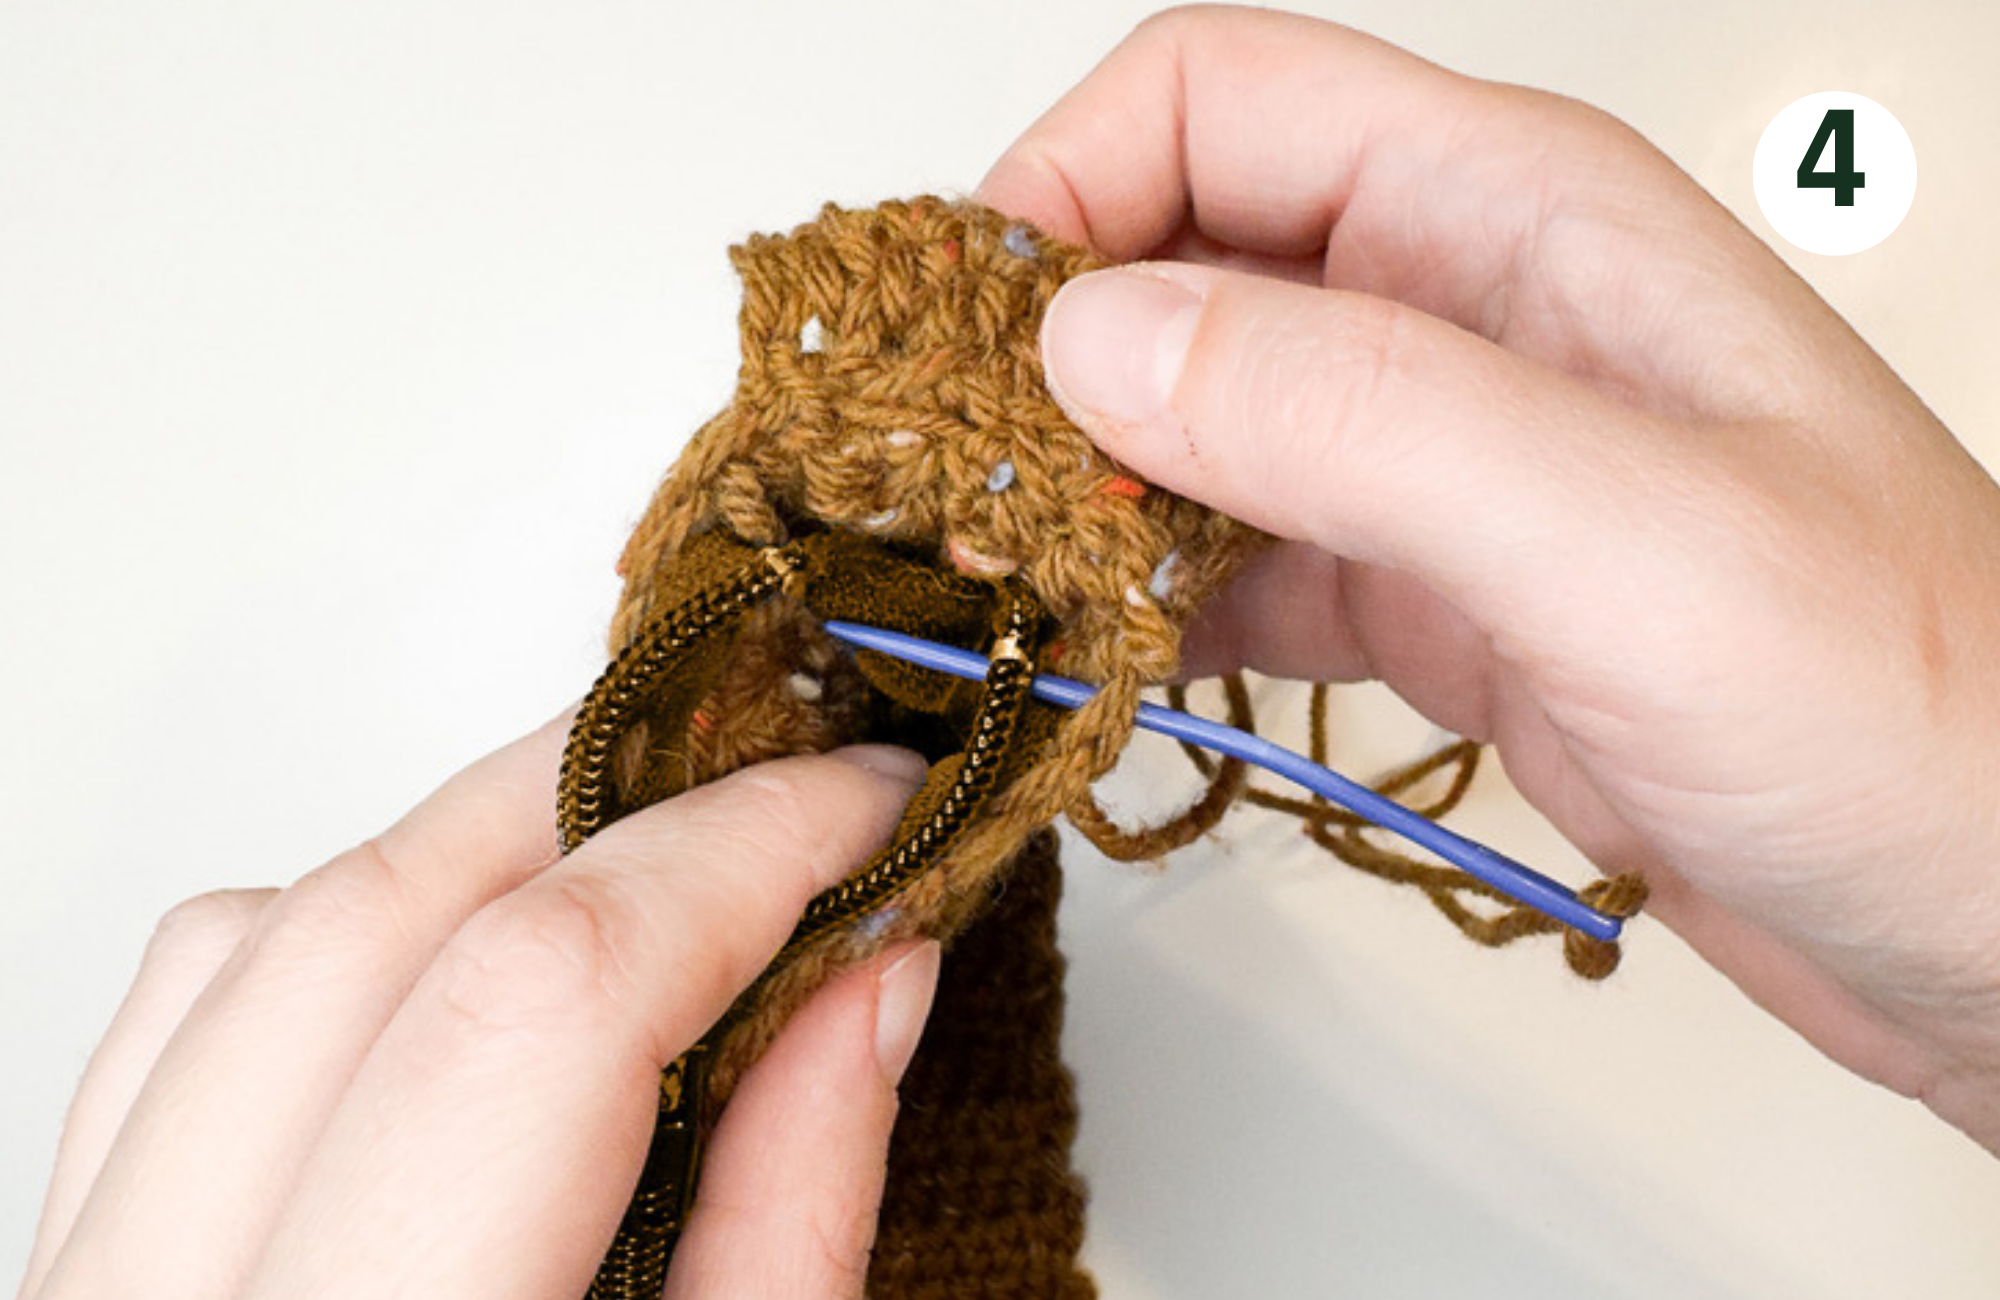
You will need a needle and yarn to attach a zipper to the bag. Take the zipper and place it along the edges. You should sew the zipper along the edges of the bag. When you reach the corners, make sure to sew it securely and make several knots to secure the beginning and the end of the zipper to the project.
Final project
