Amigurumi is a crochet technique used to make small, stuffed toys with adorable designs. It’s beginner-friendly, requiring just a few tools like yarn, a hook, and stuffing. This guide covers everything you need to get started, from choosing materials to mastering basic stitches like the magic ring and single crochet. You'll also learn how to follow patterns, shape your creations, and assemble them into finished toys. Ready to start? Let’s dive into the essentials and create your first amigurumi project.
Tools and Materials You'll Need
Starting with amigurumi doesn't require a long list of supplies - just yarn, a hook, stuffing, and a few basic tools.
Selecting Your Yarn
For beginners, acrylic worsted weight yarn (also known as medium or Category 4) is a solid choice. It's budget-friendly, easy to find, and forgiving if you make small errors. If you'd like crisper stitch definition, cotton yarn is another great option. It holds its shape well and makes it easier to see where to place your hook. Both yarn types are durable and easy to clean.
When choosing colors, steer clear of dark shades like black or navy, as well as pure white. These colors can make individual stitches harder to spot. Also, avoid textured or "eyelash" yarns until you’ve gained more experience. Worsted weight yarn offers an ideal balance - it’s manageable to work with and produces clear, defined stitches.
Once you've picked your yarn, it's time to gather the rest of your amigurumi essentials.
Hooks, Stuffing, and Other Supplies
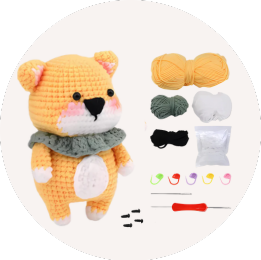
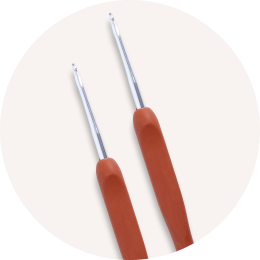
For amigurumi, opt for a hook that's 0.5mm to 2.0mm smaller than the size recommended on your yarn label. This ensures a tight, sturdy fabric that keeps the stuffing securely inside. For worsted weight yarn, a 3.0mm to 4.0mm hook works perfectly. You’ll also need polyester fiberfill (commonly called poly-fil) to stuff your creations - a 250g bag is usually enough for four to five medium-sized toys.
Round out your toolkit with a blunt-tipped tapestry needle, stitch markers (or scrap yarn as an alternative), and sharp embroidery scissors. If you're adding facial features, consider using safety eyes in sizes like 6mm, 8mm, or 10mm. However, for toys meant for children under three, skip safety eyes and use embroidery floss to avoid choking hazards.
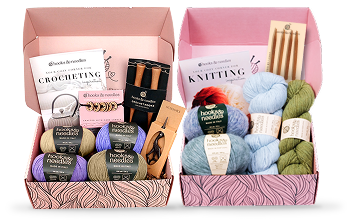
Ready to gather everything you need? Check out our crochet and knitting kits for curated supplies to jumpstart your amigurumi journey.
sbb-itb-f7119e8
How to Read Amigurumi Patterns
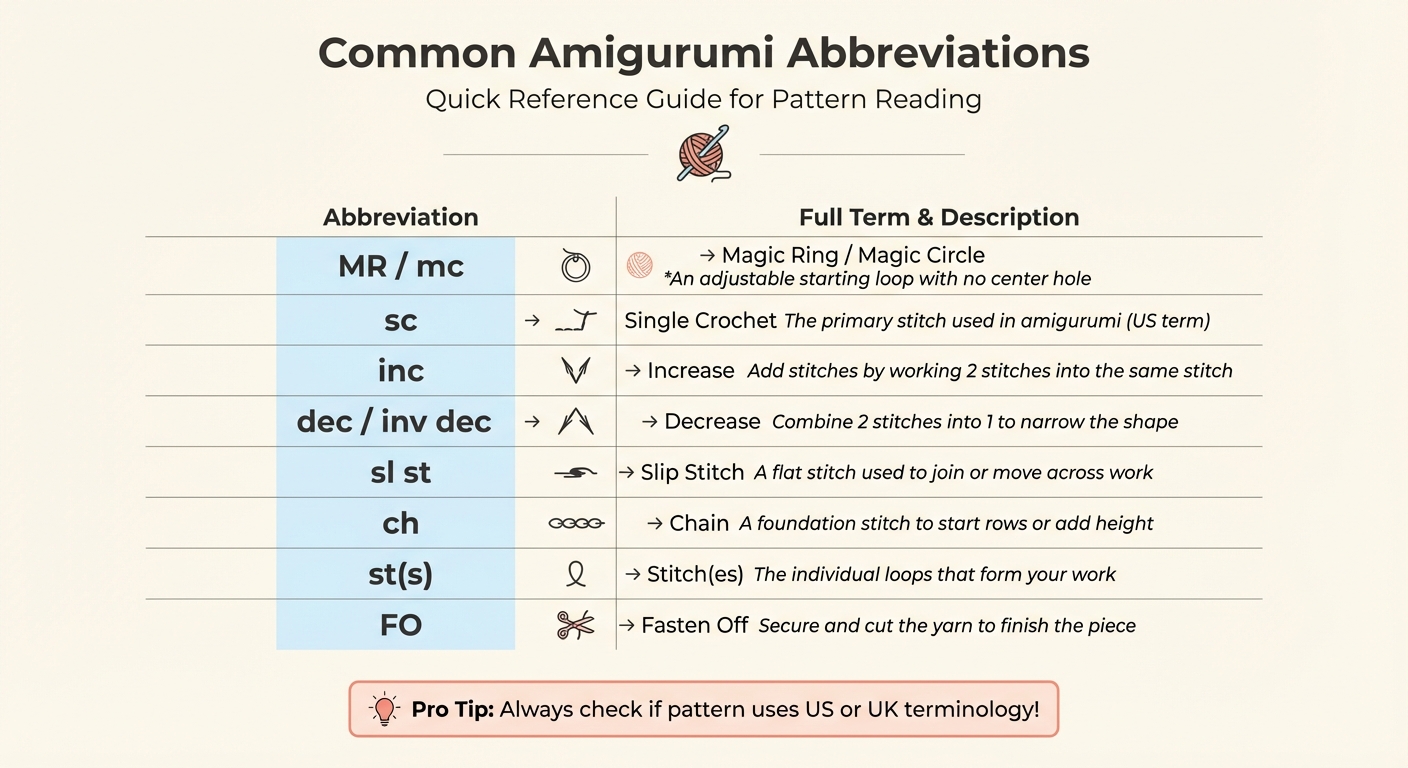
Common Amigurumi Pattern Abbreviations and Their Meanings
Once you’ve gathered your materials, the next step is to understand how to read amigurumi patterns. These patterns have their own unique style, and learning how to interpret them will set you up for success.
Understanding Pattern Instructions
Amigurumi patterns are different from traditional crochet patterns. They are typically worked in continuous spirals, meaning there’s no need to join or turn your work at the end of each round. This technique creates smooth, seamless shapes, but it requires careful tracking of your progress. A stitch marker is a must-have tool to help you keep track of where each round begins and ends.
Pay close attention to the numbers in parentheses at the end of each round’s instructions. These numbers indicate the total stitch count for that round. For example, if the pattern says (12), you should count 12 stitches when that round is complete. Brackets are also used to simplify instructions. For instance, [sc, inc] x 6 means you’ll repeat the sequence of a single crochet and an increase six times in total.
Another important detail is whether the pattern uses US or UK terminology. This distinction matters because a US "single crochet" (sc) is called a "double crochet" (dc) in UK terms. Most patterns will specify which system they follow in the introduction or abbreviation section, so double-check before you begin to avoid confusion.
Once you’ve got the basics down, it’s time to familiarize yourself with the abbreviations you’ll encounter.
Common Abbreviations You'll See
Amigurumi patterns rely on shorthand to keep instructions concise. Understanding these abbreviations will make reading patterns much easier. The single crochet (sc) is the most commonly used stitch in amigurumi because it creates a tight, sturdy fabric that holds stuffing well. To shape your project, you’ll frequently use increases (inc) to widen areas and decreases (dec) to narrow them.
Here’s a handy table of abbreviations you’ll often see:
| Abbreviation | Full Term | What It Means |
|---|---|---|
| MR / mc | Magic Ring / Magic Circle | An adjustable starting loop with no center hole |
| sc | Single Crochet | The primary stitch used in amigurumi (US term) |
| inc | Increase | Add stitches by working 2 stitches into the same stitch |
| dec / inv dec | Decrease / Invisible Decrease | Combine 2 stitches into 1 to narrow the shape |
| sl st | Slip Stitch | A flat stitch used to join or move across work |
| ch | Chain | A foundation stitch to start rows or add height |
| st(s) | Stitch(es) | The individual loops that form your work |
| FO | Fasten Off | Secure and cut the yarn to finish the piece |
Always double-check your stitch count at the end of each round using the numbers provided in parentheses. With these tips in hand, you’re ready to dive into mastering basic stitches and techniques.
Basic Stitches and Techniques
Once you've gotten the hang of reading pattern instructions, it's time to dive into the essential techniques that bring amigurumi creations to life. At the core of most amigurumi projects are single crochet stitches and straightforward shaping methods. These techniques are beginner-friendly and form the foundation for crafting those charming, intricate toys. Let’s break down the basics that every amigurumi maker should know.
Starting with a Magic Ring
The magic ring - sometimes called a magic circle or adjustable loop - is the starting point for nearly all amigurumi pieces. As designer lilleliis explains:
Every piece in amigurumi begins with a magic ring (also called adjustable loop). You start the head with it, the body, both legs, both arms etc. You need this stitch to begin every piece you make, so you better learn it well. - lilleliis
The magic ring is prized for its ability to close tightly, eliminating any gaps or holes in the center of your work. This snug closure ensures that the polyester fiberfill stuffing stays put and doesn’t peek through. While there are alternative methods, such as the "chain 2" technique, the magic ring offers a polished, seamless finish that’s worth mastering.
Most amigurumi projects begin with 6 single crochet stitches worked into the magic ring. After completing these stitches, you pull the yarn tail to tighten the loop, making the center hole vanish. Though the first round can feel tricky, consistent practice will make it second nature.
Single Crochet, Increases, and Decreases
Once you’ve mastered the magic ring, the next step is understanding the stitches that shape your amigurumi. The single crochet (sc) is the foundation of amigurumi, creating the dense, sturdy fabric that holds your toy’s shape. These stitches are worked in continuous spiral rounds, so you won’t join at the end of each round. This requires careful attention to keep track of your progress.
Shaping your amigurumi involves two key techniques: increases and decreases. To increase (inc), simply work two single crochet stitches into the same stitch. To decrease (dec), combine two stitches into one. For a cleaner look, many crafters recommend using the invisible decrease. This method works through the front loops of two stitches, minimizing gaps and creating a smoother finish. As Kristina from Tiny Curl Crochet shares:
Invisible decreases are essential to reduce holes in your amigurumi. Even if a pattern just says to decrease (dec), I always use the invisible decrease stitch. - Kristina, Tiny Curl Crochet
Making Your First Amigurumi Toy
Now that you've practiced the essential stitches, it's time to take the next step and create your first amigurumi toy. You'll work in continuous rounds and follow a simple pattern, learning how this technique ensures a smooth, seamless finish.
Crocheting in Continuous Rounds
Amigurumi stands out because of its spiral method, which skips the traditional slip stitch join at the end of each round. Instead, you crochet in a continuous loop, creating a flawless surface with no visible seams. This technique is what gives amigurumi toys their polished, professional look. To stay on track, use a stitch marker to mark the start of each round. Counting your stitches at the end of each round is also essential to catch any accidental increases or decreases that could throw off the shape of your toy.
As you work, ensure the V-shaped stitches face outward. If the piece begins to curl into a bowl shape and you notice horizontal bars on the outside, flip it right-side out before the opening becomes too small to fix. With these tips in mind, you're ready to tackle a beginner-friendly pattern.
Simple Beginner Pattern
Let’s start with a basic sphere pattern - an ideal project for beginners. This sphere can be the base for countless creations, from simple balls to character heads and bodies. The pattern uses magic rings, increases, and decreases, all skills you’ve already practiced.
| Round | Instructions | Total Stitches |
|---|---|---|
| Rnd 1 | 6 sc in magic ring | 6 |
| Rnd 2 | Inc in each st around | 12 |
| Rnd 3 | [1 sc, inc] repeat 6 times | 18 |
| Rnd 4 | [2 sc, inc] repeat 6 times | 24 |
| Rnd 5 | [3 sc, inc] repeat 6 times | 30 |
| Rnd 6–10 | Sc in each st around (5 rounds total) | 30 |
| Rnd 11 | [3 sc, dec] repeat 6 times | 24 |
| Rnd 12 | [2 sc, dec] repeat 6 times | 18 |
| Rnd 13 | [1 sc, dec] repeat 6 times (stuff firmly after this round) | 12 |
| Rnd 14 | Dec 6 times | 6 |
| Finish | Fasten off and sew the hole closed | - |
For the best results, use worsted weight (Category 4) acrylic or cotton-blend yarn in a light, solid color. This makes it easier to see and count your stitches. Throughout the pattern, use the invisible decrease method to keep your work looking smooth and seamless. After Round 13, stuff the piece evenly with small amounts of fiberfill to avoid lumps. Once you complete Round 14, fasten off and weave the yarn tail through the remaining 6 stitches to close the opening securely.
Assembly and Finishing
Once all the pieces of your project are complete, it’s time to bring them together. This phase involves stuffing and assembling your amigurumi to create a finished toy that’s both sturdy and visually appealing.
Stuffing Your Toy
For stuffing, 100% polyester fiberfill is your best option. It’s soft, easy to shape, washable, and resists water. Add the stuffing in small amounts to ensure it’s evenly distributed and free of lumps. As Jess Coppom wisely suggests:
When in doubt, add more stuffing!
Keep in mind that fiberfill compresses over time with use, so it’s better to stuff more firmly than you might initially think necessary. Use tools like a chopstick, pencil, or even your crochet hook to push the stuffing into tight or narrow areas.
Start stuffing before the opening becomes too small - ideally before the last few rounds of decreases. Aim for a firm but not overstretched fill. Overstuffing can cause the fabric to stretch or the filling to become visible. For a softer, more natural effect, consider leaving the top third of the arms lightly stuffed or even empty. This allows the arms to drape naturally against the body instead of sticking out stiffly. Once stuffed, you’re ready to move on to attaching the parts.
Attaching Parts and Weaving in Ends
To ensure proper placement, dry-fit limbs and ears with sewing pins before attaching them. This helps you check for symmetry and make adjustments if needed. When you’re ready to secure the parts, thread the yarn tail onto a needle and use whip stitches or vertical stitches for a strong, seamless join. Pull the yarn snugly every few stitches to create an invisible connection.
For weaving in ends, thread the yarn tail through several stitches inside the toy, then bring it out at a different spot. Trim the tail close to the surface, and use the blunt end of your crochet hook to push any remaining fibers back inside. Becky Skuse offers this helpful advice:
Pull gently to tuck the knot inside, trim the tails, and use your hook to push in any visible yarn.
This method ensures your finished toy looks tidy and professional, with no stray yarn tails visible.
Continue Your Amigurumi Journey with Hooks & Needles
Once you've completed your first amigurumi, why stop there? Hooks & Needles offers curated kits and a subscription service to help you build on your skills and keep your creativity flowing.
Crochet Kits for Beginners
Looking to tackle your next project? The 29-Piece Crocheting Kit from Hooks & Needles has you covered. Originally priced at $90.83, it’s now available for $54.99. This kit includes high-quality natural fiber yarns, durable tools, and exclusive patterns to help you create with ease. If you're diving deeper into amigurumi, the Amigurumi Box is a great choice, offering all the essentials: a variety of yarn colors, stuffing, safety eyes, and embroidery floss.
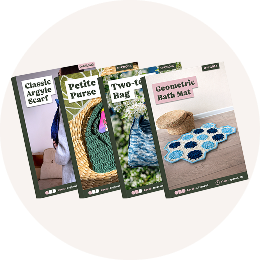
You can also explore digital patterns like the Baby Lamb Stuffie, available for just $5.97. Plus, take advantage of 25% off sitewide with the code WINTERSALE25.
And if you’re looking for ongoing inspiration, the subscription service is a fantastic way to stay motivated.
Hooks & Needles Subscription Box
Ready to take your skills to the next level? The Hooks & Needles monthly subscription is designed to grow with you. For $34.97 per month, you’ll receive curated yarn, patterns, and supplies tailored to your skill level. With over 225,000 boxes shipped to a community of more than 169,000 crafters, it’s no wonder the service boasts a 4.8/5 rating. Jessica L., a happy subscriber, shared:
I went from buying yarn I never used to completing 12 beautiful projects this year. The difference? Having everything I need in one place.
The subscription starts with Box 1, guiding you through beginner-friendly projects, and gradually introduces more advanced techniques. The first two boxes include step-by-step video guides to ensure you master the basics before moving on. QR codes in the pattern booklets link directly to video tutorials, so you can easily follow along - even with more complex stitches.
Flexibility is key: you can pause or cancel anytime, and new subscribers enjoy a 30-day money-back guarantee. It’s the perfect way to keep your amigurumi journey exciting and rewarding.
FAQs
What kind of yarn should beginners use for amigurumi?
For those just starting out, medium-weight yarn (often called worsted weight) is a fantastic option for amigurumi projects. It’s simple to handle, keeps its shape nicely, and makes stitches easier to see - perfect for beginners learning the ropes.
When it comes to material, acrylic and cotton yarns are top picks. Acrylic is soft, budget-friendly, and easy to find, while cotton offers a firm, clean finish that emphasizes details. It’s best to steer clear of fuzzy or textured yarns since they can obscure your stitches and make fixing errors more challenging.
Stick to light or medium-toned yarn colors - darker shades tend to hide stitches, making your work harder to follow. With the right yarn in hand, you’ll be all set to craft your first charming amigurumi creation!
How can I securely attach the parts of my amigurumi toys?
To keep your amigurumi pieces securely attached, begin by finishing each piece with an invisible fasten-off. This technique provides a sturdy base for sewing. Next, align the pieces where they need to be connected and use pins to hold them in place. This step helps prevent any movement while you work.
Thread a yarn needle with the tail from one of the pieces, and sew them together using small, even stitches. Carefully work around the entire edge, keeping the tension firm to avoid leaving any gaps. Once the sewing is complete, secure the yarn tail by weaving it through nearby stitches. Trim any excess yarn and tuck the end neatly inside the toy.
To finish, gently pull on the attached parts to check the seams. If anything feels loose, go over that section again to reinforce it. These steps will ensure your amigurumi creations are both durable and polished!
Why is the magic ring technique important in amigurumi?
The magic ring plays a key role in amigurumi, as it creates a tightly closed center that eliminates any gaps at the start of your project. This not only keeps the stuffing securely in place but also gives your toy a clean, polished finish.
Since many amigurumi patterns begin with a magic ring, it’s an important technique for beginners to learn. Once you get the hang of it, you’ll notice how much easier it becomes to create smooth and seamless crocheted designs.