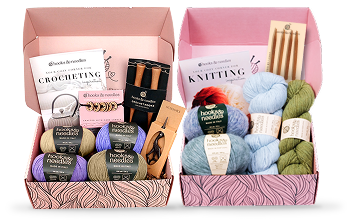
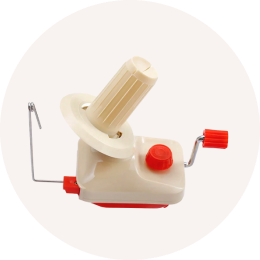
Starting a new crochet or knitting project can feel overwhelming, especially if you're unsure where to begin. From choosing the wrong yarn to skipping key finishing steps, beginners often face challenges that can derail their progress. This guide highlights five common mistakes and explains how Hooks & Needles resources make it easier to avoid them. Whether it’s picking the right materials, understanding patterns, or maintaining tension, these tips ensure your projects turn out just right. Let’s dive in and set you up for success!
Mistake 1: Picking the Wrong Yarn for Your Project
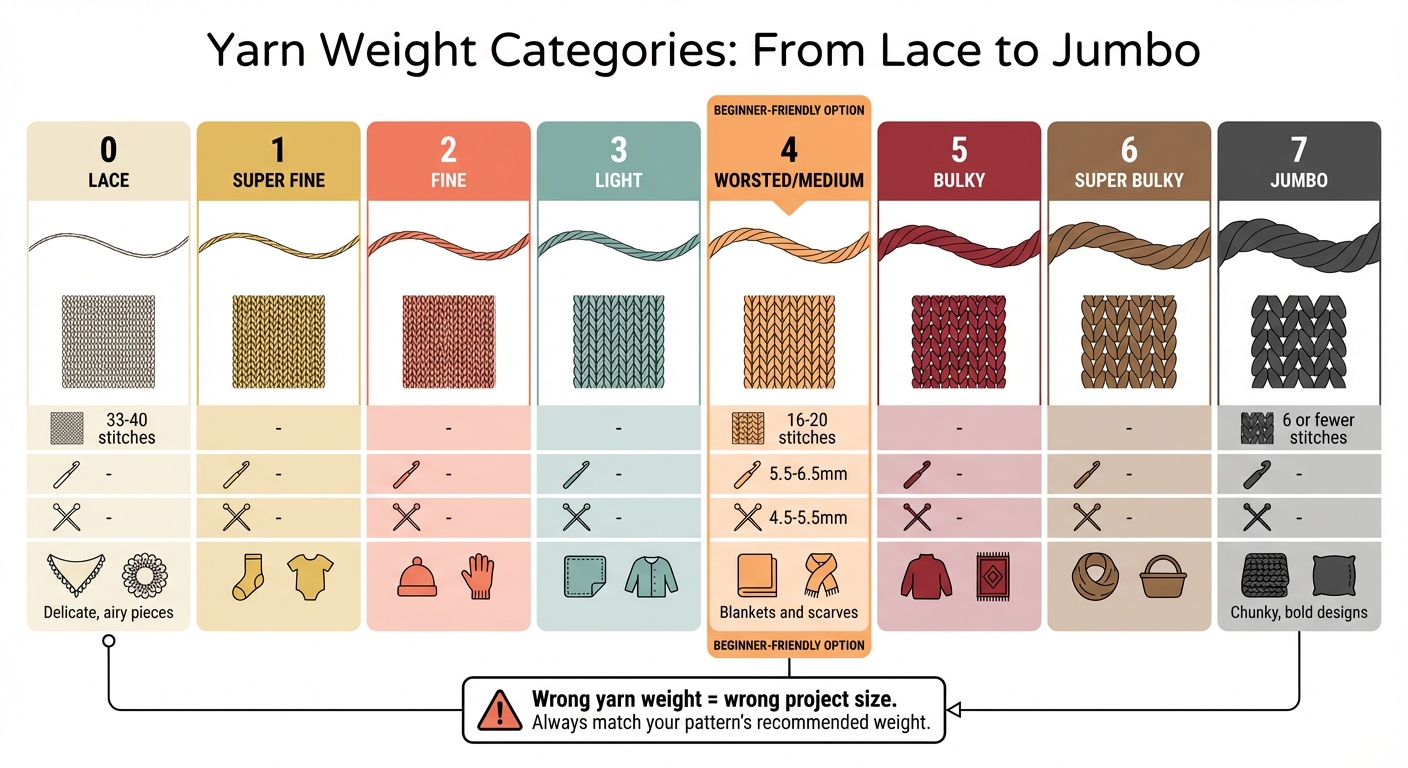
Yarn Weight Categories Guide: Gauge and Best Uses for Crochet and Knitting
It's easy to get drawn in by a yarn's color or price tag, especially if you're just starting out. But making choices based on looks or discounts alone can lead to projects that don’t turn out as planned.
Why Your Yarn Choice Matters
The weight of the yarn - essentially how thick the strand is - plays a big role in determining how your project will look and feel. Yarn weights range from 0 (lace) to 7 (jumbo), and each category produces a very different result. For instance, lace weight yarn (Category 0) typically knits or crochets into 33–40 stitches per 4 inches, creating delicate, airy pieces. On the other hand, jumbo yarn (Category 7) forms only 6 stitches or fewer in the same space, making it ideal for chunky, bold designs. Using the wrong weight - like a bulkier yarn instead of a worsted weight - can turn your project into an oversized, unmanageable mess.
Fiber content also matters. Animal fibers, like wool, add warmth and stretch, while cotton gives crisp stitch definition. Acrylic, on the other hand, is known for its durability and low-maintenance care. Beyond weight and fiber, gauge - the number of stitches and rows per inch - is critical for ensuring your project fits as intended. Other factors like yardage, care instructions, and dye lot consistency also play a role in achieving a polished result.
By understanding these elements, you can make smarter yarn choices and set yourself up for success.
How Hooks & Needles Helps
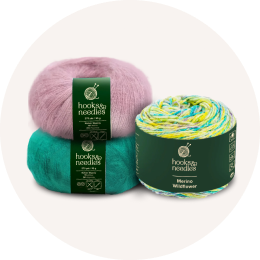
To help you avoid these common mistakes, Hooks & Needles provides tools and resources to guide your yarn selection. Their Yarn Weights Guide explains the range of weights from 0 to 7, along with their typical gauges and best uses. For example, worsted weight yarn (Category 4), which produces 16–20 stitches per 4 inches, is a great choice for blankets and scarves.
If you need to substitute yarn, the Yarn Substitution Guide offers a simple three-step process: match the gauge first, then check the yardage, and finally consider the fiber’s behavior to ensure your project’s drape and fit stay intact. And if you’re dealing with an unlabeled skein, the WPI Identification Guide can help you determine its weight category using just a ruler and some quick measurements.
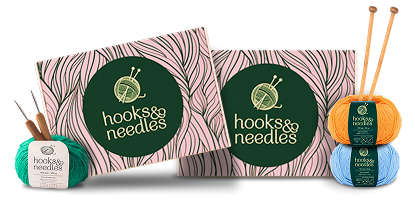
Every yarn in the Hooks & Needles collection comes clearly labeled with its weight category, recommended hook or needle size, and care instructions. This makes it easy to shop confidently and choose the right yarn for your skill level and project. Check out their full range at hooksneedles.com/collections to find yarns tailored to your needs.
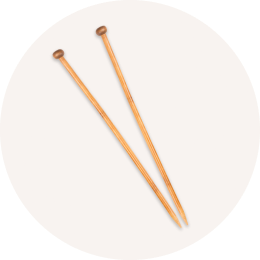
Mistake 2: Using the Wrong Hook or Needle Size
Choosing the wrong hook or needle size can throw your entire project off course. The diameter of the tool’s shaft determines the size of each stitch, meaning even a slight mismatch can alter the texture, drape, or overall size of your fabric. This can be especially discouraging for beginners who might be puzzled when their project looks nothing like the pattern.
How Hook and Needle Sizes Impact Gauge
The connection between tool size and gauge is simple: smaller hooks and needles create tighter, denser stitches, while larger ones make looser, more open fabric. If your hook is too small, the result will be stiff fabric with minimal drape. On the other hand, a hook that's too large will produce loose stitches, poor definition, and unwanted gaps.
For a worsted weight yarn (Category 4), the typical recommendation is a 5.5–6.5mm crochet hook or a 4.5–5.5mm knitting needle. However, personal tension plays a role: tight stitchers may need larger tools, while loose stitchers might require smaller ones. Creating a gauge swatch is the best way to confirm you’re using the right size.
How Hooks & Needles Makes It Easier
Hooks & Needles takes the guesswork out of selecting the right tools. Their size charts match yarn weights with ideal hook and needle sizes, and every yarn label in their collection includes a recommended tool size to help you start confidently. For beginners, their kits come with the correct hook or needle for the project, eliminating any uncertainty.
If your tools aren’t labeled or you’re substituting yarn, their guides are a handy resource. For example, if your gauge swatch has too many stitches, switch to a larger tool; if there are too few, go smaller. Explore their full range of hooks, needles, and project kits at hooksneedles.com/collections to find tools that suit your yarn and stitching style. This ensures your tools and tension align, setting you up for success with every project.
Mistake 3: Misreading or Skipping Pattern Instructions
Missing even a small detail in a pattern can throw your entire project off course. It might lead to uneven pieces, incorrect stitch counts, or hours spent unraveling your hard work.
Common Pattern-Reading Errors
One of the biggest mistakes crafters make is diving in without reading through the pattern first. Important details are often tucked into sections like Notes or saved for the end, such as assembly instructions. Skipping this initial read can mean missing key techniques or steps critical to the project.
Another common issue is confusion over terminology. For example, a "double crochet" (dc) in a UK pattern translates to a "single crochet" (sc) in a US pattern. The same abbreviation can produce completely different stitches depending on the pattern's origin, which can lead to unexpected - and often frustrating - results.
Even punctuation can cause trouble. Asterisks (*) indicate repeated sequences, square brackets [ ] show the total number of stitches in a row, and parentheses ( ) present size variations, such as "Sc in next 5 (6, 7) sts." When working on a pattern with multiple sizes, it’s easy to lose track of which number applies to your chosen size. This can result in uneven edges or incorrect dimensions.
Understanding these common pitfalls is the first step toward smoother crafting.
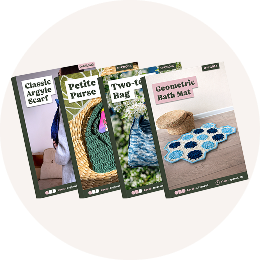
Hooks & Needles Pattern Solutions
Hooks & Needles designs patterns with simplicity and clarity in mind, helping you avoid these common errors. Each pattern includes an abbreviations key and a detailed Notes section, which highlight any special techniques upfront. Instructions are broken into manageable parts, such as "Start", "Main Body", and "Finishing", making it easier to follow along without feeling overwhelmed.
Their patterns also use consistent formatting: asterisks for repeats, square brackets for stitch counts, and clear indicators for size variations. Many patterns include helpful visual aids, like stitch charts and schematics, to show finished measurements and guide you visually.
For added convenience, the kits available at hooksneedles.com/collections/kits pair these user-friendly patterns with all the materials you’ll need. This way, you can focus on the joy of crafting instead of deciphering abbreviations. A good tip before you begin: highlight your size throughout the pattern and mark off rows with a pencil as you complete them. It’s a simple way to stay organized and on track.
sbb-itb-f7119e8
Mistake 4: Inconsistent Tension and Uneven Stitches
Maintaining consistent tension is key to creating smooth, even stitches. If you grip your hook or needle too tightly, the fabric can become stiff and rigid. On the other hand, a grip that's too loose can lead to uneven rows, holes, or curling edges. These issues often arise from how you position your hands and control the yarn as it moves through your fingers.
Why Tension Is Important
Tension plays a major role in shaping your project. It's what turns a series of stitches into a polished, well-made piece. From the flow of a shawl to the fit of a sweater, your grip directly impacts the final product. Even taking frequent breaks can throw off your tension, resulting in a blanket that starts with perfect rows and suddenly shifts to a noticeably different gauge.
Hooks & Needles Tension Tutorials
Once you've chosen the right tools, learning to manage tension is the next step toward achieving professional results.
Hooks & Needles provides in-depth tutorials covering hand positioning and yarn control techniques. These guides show you how to guide the yarn with your non-dominant hand for a steady flow. A tighter grip with your fingers creates smaller, more compact stitches, while a looser grip results in more open and flexible fabric.
Before diving into a project, their tutorials recommend making a 6-inch square tension swatch using the same yarn and tools you'll be working with. To check your tension, count the stitches across a 4-inch section in the middle of the swatch, avoiding the edges for accuracy. If your stitch count is higher than your pattern calls for, switch to a larger hook or needle. If it's lower, use a smaller size. Hooks & Needles kits pair beginner-friendly patterns with carefully selected tools, taking the guesswork out of this process. They also suggest laying your project flat every few rows to spot any changes in stitch size, especially if you've taken a break.
Mistake 5: Skipping Basic Skills and Finishing Steps
Once you've nailed down yarn selection, tools, and pattern reading, it's important not to overlook the fundamentals and finishing touches that bring your project together. Many beginners, eager to see the final product, rush through or entirely skip these steps. However, just like choosing the right yarn and tools lays the groundwork, paying attention to basic techniques ensures your project looks polished. Skipping these steps often leads to loose ends, uneven edges, or mismatched stitches - issues that can make even the most creative designs look incomplete.
Common Basic and Finishing Errors
Mistakes are most likely to occur at the very start or end of a project. For example, beginners often create a foundation chain that's too tight, causing their work to pucker. Forgetting to count stitches at the end of each row is another common error, leading to accidental increases or decreases and resulting in slanted or uneven edges. When it comes to finishing, skipping crucial steps like securing loose ends, blocking, or learning basic seaming techniques - like the mattress stitch - can leave a project looking far from professional.
A key part of crafting is mastering the details of each stitch. Recognizing the "V" shape at the top of stitches and understanding when to work under both loops or just the front or back loop has a big impact on your project's texture and structure. These small details make a noticeable difference in the final result.
Hooks & Needles Beginner Basics
Hooks & Needles offers beginner-friendly tutorials to help you avoid these pitfalls and build a solid foundation. Their guides cover everything from how to hold your hook - whether you prefer the pencil grip or knife grip - to creating your first slip knot and foundation chain. If your foundation chain feels too tight, they suggest starting with a hook one or two sizes larger, then switching to the recommended size for the rest of your work.
For finishing touches, Hooks & Needles provides clear, step-by-step instructions. They teach you how to weave in loose ends securely by threading them back along stitches for 2–3 inches to ensure they stay put. Their blocking guides explain both wet blocking (dampening and laying flat) and steam blocking, depending on your yarn's fiber type. Additionally, tutorials on seaming techniques, like the mattress stitch for invisible joins or slip stitches for assembling afghan squares, help you achieve a clean, professional finish. By following their guidance, you can take your projects from "almost done" to truly polished.
How to Use Hooks & Needles Guides as Your Learning Path
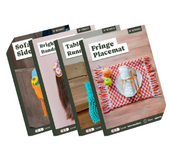
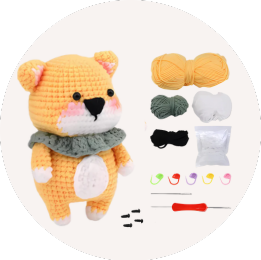
Hooks & Needles provides a step-by-step learning path that takes you from mastering your first slip knot to adding professional finishing touches. These beginner-friendly tutorials are designed to help you avoid common mistakes while building your skills. To get started, choose a beginner kit with medium-weight, light-colored yarn - this makes your stitches easier to see. Each kit includes the right hook size, a clear pattern, and essentials like scissors and a tapestry needle, so you can skip the guesswork and focus on learning.
Once you have your kit, dive into foundational tutorials. Start by learning how to hold your hook - experiment with different grips to find what feels comfortable. Then, practice making a slip knot and a foundation chain. If your foundation chain feels too tight, the guides suggest using a hook one or two sizes larger for the first row, then switching back to the recommended size. This small adjustment can prevent puckering and make it much easier to work into the second row.
As you advance, the tutorials stress the importance of creating a gauge swatch before starting any sized project. A 4- to 6-inch swatch helps you check your tension. If your stitch count doesn’t match the pattern, adjust your hook size accordingly. This step builds on earlier lessons about maintaining consistent tension. Another key habit taught in the guides is counting your stitches at the end of every row, which helps you avoid unintentional increases or decreases that can lead to uneven edges.
When you’re ready to finish your project, the tutorials guide you through securing your work by fastening off, weaving in the ends for 2–3 inches, and blocking your fabric to achieve a polished look. By following this structured path - starting with the right materials, mastering the basics, checking your gauge, and finishing properly - you’ll gain confidence and sidestep the common challenges covered in earlier sections.
Feeling ready to begin? Check out the Hooks & Needles subscription box for monthly deliveries of coordinated yarn, exclusive patterns, and detailed tutorials. Or, explore the crochet and knitting kits to find the perfect project to kick off your learning journey.
FAQs
How can I choose the right yarn weight for my project?
Choosing the right yarn weight can make all the difference in how your project turns out. Start by thinking about what you want to create. Are you going for something light and airy, like a lace shawl, or thick and warm, like a chunky blanket? Yarn weights range from Lace (#0) to Super Bulky (#6), and each serves a specific purpose. For instance, Lace is perfect for delicate doilies, while Worsted (#4) is a great choice for hats and blankets.
Take a moment to check the yarn label for its weight category and the recommended hook or needle size. For example, Worsted yarn typically works well with 5.5–6.5 mm hooks or 4.5–5.5 mm needles. Once you’ve picked your yarn, it’s a good idea to make a swatch - a 4-inch square is standard - to check your gauge. Matching your gauge to the pattern ensures your project turns out as intended. If your swatch feels too tight or too loose, simply adjust your hook or needle size until it’s just right.
Ready to get started? Browse the yarn options and beginner-friendly guides available at Hooks & Needles to find everything you need. With the right yarn and tools, you’ll be all set to dive into your next crochet or knitting project!
What should I do if my gauge swatch doesn’t match the pattern’s measurements?
If your gauge swatch doesn’t match the pattern - whether it’s too big or too small - don’t stress. It’s a simple adjustment to make before diving into your project.
Start by double-checking that you’re using the exact yarn and stitch pattern specified in the instructions. Measure your swatch carefully, focusing on the stitches and rows within a 4-inch square. Be sure to measure from the center of the swatch, avoiding the edges for the most accurate count. If your stitch count is off, switching your hook size can solve the problem: a larger hook will result in fewer stitches per inch, while a smaller hook will increase the stitch count.
For projects where size is especially important, like garments, it’s a good idea to lightly block your swatch after washing to get an accurate measurement. Once your gauge matches the pattern, jot down the hook size that worked so you can stick with it throughout the project. Need more guidance on choosing the right yarn or hook? Check out our detailed guides to keep you on track!
What are some tips for improving my pattern-reading skills in crochet or knitting?
Improving how you read patterns can make your crafting projects smoother and more enjoyable. Start by reading through the entire pattern before you pick up your tools. Highlight or note any unfamiliar terms or abbreviations, like ch (chain), sc (single crochet), k (knit), or p (purl). This helps you prepare for any techniques you might need to practice in advance. Breaking the pattern into smaller, manageable sections - such as focusing on one row or round at a time - can also help you stay organized and avoid feeling overwhelmed.
If the pattern includes a chart, begin by reviewing the legend. Match each symbol to its corresponding stitch definition and follow the chart row by row. Use tools like sticky notes or a tally to keep track of your progress. For extra guidance, Hooks & Needles offers step-by-step tutorials and printable charts that can walk you through even the trickiest parts of a pattern.
Consider jotting down notes directly on the pattern or in a separate notebook. Simple reminders like “increase here” or “check gauge: 20 sts = 4 in” can keep you on track. Make it a habit to double-check your stitch or row counts after completing each section - this way, you can catch mistakes early and save yourself from reworking later. With consistent practice and the right resources, you'll soon feel confident and skilled at reading patterns!