Crochet patterns that look complex can often be much simpler than they appear. With just basic stitches like single crochet (sc), double crochet (dc), and half double crochet (hdc), you can create stunning textures and designs. This guide highlights five patterns that are beginner-friendly yet deliver visually impressive results. From the woven basketweave blanket to the elegant shell stitch scarf, these projects show how simple techniques can transform into polished creations. Whether you’re crafting a cozy throw or a decorative pillow, these designs prove that crochet doesn’t have to be intimidating.
Let’s dive into each pattern and see how you can bring them to life with minimal effort.
What Makes a Pattern Look Advanced?
Creating crochet patterns that look intricate often comes down to a few clever tricks. When you see a project that makes you think, "I could never do that", it usually boils down to three standout features: textured stitches, colorwork, and dimensional designs. Here's the secret: these impressive effects are often built on the same basic stitches you're already familiar with.
Let’s start with textured stitches, which are masters of illusion in crochet. Take the basketweave pattern as an example. Its deep, woven look might seem like the work of a seasoned pro, but it’s simply a matter of alternating front and back post double crochets. These are just variations of the double crochet stitch you probably already know. By working around the post of previous stitches, you create raised and recessed areas that mimic the look of woven fabric.
Other textured stitches, like bobbles or puff stitches, work in a similar way. They create raised, decorative elements by working multiple double crochets into the same stitch and then joining them at the top. Shell stitches, on the other hand, form elegant, scalloped shapes by placing several double crochets into a single stitch or space. These techniques might look intricate but rely on straightforward stitch combinations.
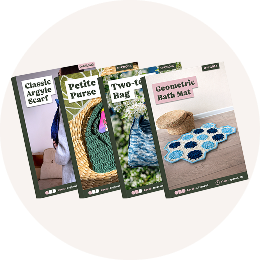
Next up is colorwork, which adds a whole new dimension to your projects. For example, the Classic Argyle scarf from Hooks & Needles achieves its intricate appearance through simple color changes. The stitches themselves are basic - single crochet or double crochet - but the strategic switching of yarn colors creates the illusion of complexity. The beauty of colorwork lies in its visual impact, not in technical difficulty.
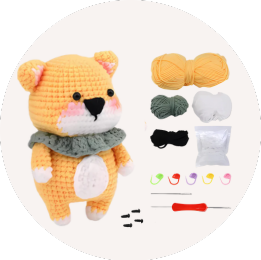
Finally, dimensional designs take things to the next level by adding depth and structure. Patterns with raised motifs or three-dimensional elements, like the Baby Lamb Stuffie, might seem daunting at first glance. However, these effects are often achieved with familiar techniques. Popcorn stitches, for instance, create rounded, raised shapes by repeating yarn overs and pull-throughs. It’s all about arranging basic stitches in creative ways to build layers and textures.
What makes these patterns approachable is clear, confidence-boosting instructions. As Hooks & Needles customer Linda K. put it:
"The patterns actually work - no more half-finished projects!"
This highlights an important truth: impressive-looking crochet doesn’t have to be out of reach. It’s often just a matter of arranging simple stitches thoughtfully.
The most commonly used stitches for these advanced-looking designs are single crochet (sc), double crochet (dc), and half double crochet (hdc). By changing their placement, grouping them into clusters, or working around posts instead of through loops, these basic stitches can transform into textures and designs that will leave others marveling, "How did you make that?"
Basic Tools and Materials
Creating stunning crochet patterns doesn’t require a mountain of supplies - just a few key tools and quality materials. With the right basics, you'll be ready to dive into beginner-friendly projects with confidence.
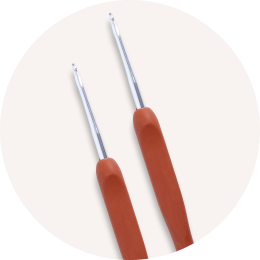
Your crochet hook is the most essential tool in your kit. Understanding U.S. sizing is crucial for following patterns smoothly. For most projects, a size H/8 (5.0 mm) hook pairs perfectly with worsted weight yarn. If you’re looking for a versatile option, the 9 Pcs Blue Crochet Hook Set with Soft Handle from Hooks & Needles ($16.97) provides ergonomic comfort, making it easier to crochet for longer periods. For those tackling multiple projects or intricate designs, the 11-in-1 Rechargeable LED Crochet Hook set ($31.97) adds convenience with built-in lighting for better visibility.
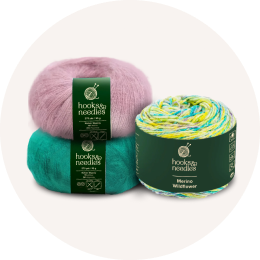
Choosing the right yarn is equally important for achieving a polished look. For beginners, worsted weight (medium/4) yarn is ideal - it offers excellent stitch definition and is forgiving of small mistakes. Hooks & Needles’ premium yarns elevate your projects further. The Alpine Cotton ($12.97) works beautifully for home décor items like table runners and pillow covers, while the Merino Wildflower Yarn ($12.97) is perfect for soft, cozy scarves and blankets. As one customer, Sarah M., shared:
"Finally found yarn that actually feels as soft as it looks online!"
For most projects, you’ll need between 800 to 1,200 yards of yarn. A single skein of worsted weight yarn typically contains 200 to 250 yards, meaning you’ll want 4 to 6 skeins for larger pieces like blankets or 2 to 3 skeins for smaller items like scarves or pillow covers.
A few essential accessories can make your crochet experience much smoother. Sharp craft scissors are a must for clean cuts, while tapestry needles with large eyes and blunt tips make weaving in ends and seaming pieces simple. Locking stitch markers are especially helpful for keeping track of pattern repeats and stitch placements in textured designs like basketweave or shell stitches.
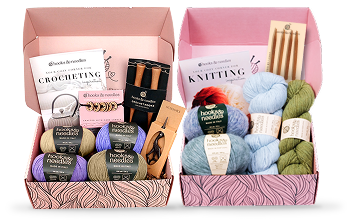
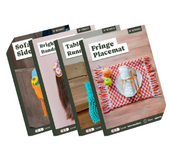
If you’re just starting out, the Complete Crochet & Knitting Kits from Hooks & Needles are a great option. These kits include high-quality European yarns, exclusive patterns, and professional-grade tools - all curated to remove the guesswork and set you up for success.
Here’s a quick shopping list for a textured blanket project:
- 1,200 yards (about 16 ounces) of worsted-weight yarn
- One size H/8 (5.0 mm) crochet hook
- Sharp scissors
- 2 to 4 locking stitch markers
- One large-eye tapestry needle
This setup will cost around $40 to $60, depending on your yarn choice. While the upfront cost might seem like an investment, premium materials ensure your finished work looks polished and professional.
High-quality tools and materials not only make the process more enjoyable but also enhance the final result. Premium yarns, in particular, bring out the texture in patterns like bobbles or shell stitches, making them stand out beautifully. With these essentials in hand, you’ll be ready to start your first project: the Basketweave Textured Blanket.
1. Basketweave Textured Blanket
The basketweave textured blanket offers a stunning three-dimensional look that appears intricate but is surprisingly simple to create. It’s a design that blends elegance with accessibility, making it a favorite among crocheters.
Skill Level Required
This pattern is perfect for those who are comfortable with the basics of crochet. If you can double crochet and follow a simple repeat, you’re ready to give it a go. The technique relies on front and back post double crochets (FPdc and BPdc), where you work around the vertical post of the stitch from the previous row instead of into the top. These stitches are easy to pick up, even for beginners, and add a unique twist to the standard double crochet. With just a bit of practice, you'll be able to master the rhythm of this pattern.
Visual Complexity
What makes the basketweave stitch so captivating is its woven appearance. By alternating groups of FPdc and BPdc stitches, the pattern forms blocks that seem to weave over and under each other. This creates a textured surface where light and shadow interact, giving the design a dynamic, almost sculpted look. Depending on how the blanket catches the light, the texture can appear to shift, adding another layer of visual interest. It’s a simple yet rewarding way to explore how texture and light can transform a project.
Practical Applications
This blanket isn’t just beautiful - it’s also functional. Its thick, textured fabric makes it ideal for chilly evenings, whether you’re snuggling on the couch or layering up in bed. It works wonderfully as a baby blanket, a throw for the living room, or even a thoughtful housewarming gift. The design’s neutral and versatile aesthetic pairs well with both contemporary and classic décor, offering a timeless appeal.
Time to Complete
The time needed for this project depends on the size of the blanket and your crochet speed. A baby blanket might take around 12 to 18 hours, while a throw-sized blanket could require 20 to 40 hours. Larger afghans may take up to 50 hours. If you’re looking to speed things up, consider using bulky yarn, though worsted weight yarn paired with a 5.0 mm hook will give you a beautifully defined texture.
The pattern repeat is simple: 8 stitches by 8 rows. To begin, create a foundation chain in multiples of 8, then add 4 extra chains. For example, a baby blanket might start with 84 chains, while a throw could begin with 164 chains. The repetitive nature of the design makes it both soothing and meditative, allowing you to settle into a steady pace while watching the woven texture take shape. Up next, we’ll dive into another pattern that balances ease with visual appeal.
2. Classic Granny Square Throw
The classic granny square throw embodies a timeless appeal, blending simplicity with striking design. This pattern is perfect for creating blankets that look intricate yet are surprisingly easy to make. Each square combines clusters and contrasting colors, resulting in a stunning accent piece that can brighten any room.
Skill Level Required
If you've mastered the basics - chain, single crochet, and double crochet - this pattern is a great next step. Once you get the hang of the sequence involving chain spaces and double crochet clusters, the process becomes almost second nature. Each square begins with a magic ring and expands outward through rounds of three double crochets separated by chain spaces.
Visual Appeal
What makes granny square throws so captivating is their interplay of colors and geometric precision. The openwork design adds depth, filtering light to create soft shadows. When the squares are joined, they form a mosaic-like pattern that turns simple stitches into a striking tapestry, giving the impression of advanced craftsmanship.
Time Commitment
The time needed to complete a granny square throw depends on its size and your speed. For a 50″ x 60″ throw, you’ll need about 48 squares. Each square typically takes 30 to 45 minutes to finish, adding up to roughly 24–36 hours of crocheting. Allow an additional 4–6 hours for joining the squares and adding borders. Using medium weight (worsted/Category 4) yarn with a size H-8 (5.0 mm) crochet hook - a common combination in the U.S. - ensures consistent gauge and smooth progress. To achieve a polished look, block your squares before joining them. Also, weaving in ends as you go can save time and simplify the finishing process. Up next, discover a scarf pattern that offers similar charm with minimal effort.
3. Shell Stitch Scarf
The shell stitch scarf might look intricate, but it’s surprisingly beginner-friendly. This pattern takes simple crochet techniques and transforms them into a sophisticated piece. By combining double crochets with chain spaces, it creates elegant fan-shaped clusters with scalloped edges, giving the scarf a textured, delicate finish.
Skill Level Required
This scarf is perfect for beginners. It uses basic stitches like the chain, single crochet, and double crochet. The repetitive pattern is easy to pick up, so even those new to crochet can create something that looks impressive without needing advanced skills.
Visual Appeal
What makes the shell stitch stand out is its beautiful texture and the way it plays with open spaces. The overlapping fan shapes create a flowing, arch-like design that adds depth and movement to the fabric. If you use variegated yarn or contrasting solid colors, the pattern becomes even more eye-catching. Whether you go for a soft ombré or a bold combo like cream and navy, this stitch brings a dynamic look to the scarf while keeping it versatile.
Practical Uses
The shell stitch scarf isn’t just stylish - it’s a great confidence booster for new crocheters. Its scalloped edges give it a polished look, but there’s still room for personalization. You can adjust the scarf’s length and width by tweaking the starting chain or adding rows. For extra flair, try adding fringe, tassels, or small decorative buttons to make it your own.
Time and Cost
Using medium-weight yarn and a size H-8 (5 mm) hook, this project generally takes 8 to 12 hours to complete. The total cost ranges from $8 to $20, making it an affordable and rewarding project. Ready to take your crochet skills further? The next pattern builds on this with dimensional stitches for even more texture.
sbb-itb-f7119e8
4. Bobble Accent Pillow Cover
The bobble accent pillow cover offers a striking three-dimensional texture by using the bobble stitch. This stitch combines multiple double crochets into a raised element that stands out against the flat background. The result is a design that looks intricate but is actually achieved with a simple, repetitive pattern.
Skill Level Required
If you're comfortable with single and double crochet stitches, you're already well on your way to mastering the bobble stitch. The main focus is learning how to work several double crochets together in the same stitch to create the signature raised texture. Even beginners can pick up this technique after a bit of practice, making it an approachable project. Much like basketweave or shell stitch patterns, the bobble stitch turns basic techniques into eye-catching designs, staying true to Hooks & Needles' goal of making beautiful projects accessible to all skill levels.
Visual Complexity
The raised bobbles create an engaging contrast with the flat background, delivering a bold, textured look. You can amplify this effect by experimenting with contrasting colors or arranging the bobbles in geometric patterns or custom motifs. These personal touches can make your pillow cover stand out and feel uniquely yours.
Practical Applications
This pillow cover isn’t just about looks - it’s functional too. It works perfectly as a decorative throw pillow, adding texture and personality to any space, whether you prefer modern, minimalist décor or a cozy, boho vibe. Plus, if you use acrylic or cotton yarn, the cover will be removable and washable, making it a practical choice for everyday use, even in busy households.
Time to Complete
Creating a 16" x 16" pillow with worsted weight yarn usually takes around 6 to 10 hours, depending on factors like your familiarity with the bobble stitch, the density of your pattern, and the complexity of the assembly. You’ll need 2 to 3 skeins of worsted weight yarn (about 400 to 600 yards total) and a size H-8 (5.0 mm) hook. Material costs can range from $6 to $30, depending on the yarn you choose. With a manageable time commitment, this project is perfect for a weekend and delivers impressive results without taking over your schedule. Up next, discover another pattern that blends intricate textures with practical design.
5. Moss Stitch Table Runner
The moss stitch table runner blends simplicity with a touch of elegance, offering a woven look through basic crochet techniques. Often called the linen stitch, this pattern alternates single crochet stitches and chain spaces, creating a grid-like texture. The result is a project that looks intricate but is surprisingly straightforward to create.
Skill Level Required
If you're comfortable with single crochet and chain stitches, you're ready to dive into the moss stitch. By alternating these basic techniques, the pattern forms its signature textured design. Its repetitive nature helps you find a steady rhythm, making it an ideal choice for beginners who want to refine their tension while producing something that looks polished. This project is a great way to transform basic skills into a striking finished piece.
Visual Complexity
The moss stitch offers a clean, woven aesthetic that adds depth and texture to your work. The interplay of single crochets and chain spaces creates a subtle grid pattern, giving the table runner a refined appearance. Solid-colored yarns or those with light variegation work especially well, allowing the texture to take center stage and enhancing the overall design.
Practical Applications
A moss stitch table runner is as functional as it is decorative. It protects surfaces while elevating the look of dining tables, coffee tables, or sideboards. Its adaptable design complements a variety of home styles, from cozy farmhouse vibes to sleek modern minimalism. You can easily adjust the size to fit your table and choose colors that match your décor or seasonal themes. The moss stitch produces a sturdy fabric, making it a reliable choice for everyday use. Cotton yarn is particularly well-suited for this project, as it’s durable, machine washable, and perfect for busy households. This table runner not only adds a personal touch to your home but also builds confidence in your crochet skills.
Time to Complete
For a standard 12" × 48" table runner, you’ll need about 6 to 10 hours using worsted weight yarn and a size H-8 (5.0 mm) hook. The exact time depends on your crochet speed and familiarity with the stitch. Plan on using 3 to 4 skeins of worsted weight yarn, which equals roughly 500 to 700 yards. If you want to speed things up, opt for thicker yarn and a larger hook. Just make sure to maintain even tension throughout to achieve a smooth, professional finish that highlights the moss stitch’s beautiful texture.
Tips for Success with Impressive-Looking Patterns
Creating patterns that look advanced yet achievable is all about mastering a few essential techniques. These tips will help you elevate your projects, giving them a polished, professional finish.
Understand U.S. Pattern Abbreviations to start off on the right foot. American crochet patterns use specific shorthand that might differ from international standards. Common abbreviations include ch (chain), sc (single crochet), dc (double crochet), hdc (half double crochet), sl st (slip stitch), fpdc (front post double crochet), bpdc (back post double crochet), and tr (treble crochet). These are the building blocks for textured stitches like basketweave or shell patterns. Always check the pattern's abbreviation list before diving in, as designers sometimes include unique techniques.
Check your gauge to ensure your project turns out as intended. A test swatch using the recommended yarn and hook size will help you measure stitches and rows per inch. If your stitches are too tight, switch to a larger hook; if they’re too loose, go smaller. This step is especially important for items like blankets or garments where size and fit matter, but even decorative pieces benefit from accurate gauge to achieve the right drape and shape.
Stick to recommended yarn weights and hook sizes for the best results. Using the suggested materials ensures proper stitch definition and texture. Substituting yarn or hooks can change how the fabric looks and feels, which might take away from the detailed, advanced appearance you’re aiming for.
If you want to skip the guesswork, Hooks & Needles' curated kits are a great option. They include matching yarn, hooks, and clear instructions, so you can focus on perfecting your technique without worrying about material compatibility.
Wash and block your project properly for a polished finish. For acrylic or cotton yarns, use a gentle machine wash with cold or lukewarm water (no hotter than 104°F). Wool requires hand washing in water around 80°F to prevent felting. After washing, lay your piece flat on a clean towel, shape it to the pattern's dimensions, and let it air dry at room temperature (68–72°F). Blocking smooths out stitches, enhances texture, and helps your project hold its shape.
Maintaining consistent tension is another key to achieving a professional finish. A steady grip and a comfortable yarn position will help you work smoothly without frequent adjustments. Stitch markers can also be a lifesaver, especially for keeping track of pattern repeats or complex sections, helping you avoid mistakes that might disrupt the overall look.
Finally, read the entire pattern before you begin. This step ensures you’re prepared with all the necessary materials and gives you a clear understanding of the project’s construction. Knowing what’s ahead will help you tackle special techniques and stay organized, allowing you to turn basic stitches into stunning, professional-looking designs.
Conclusion
These five beginner-friendly patterns - basketweave blankets, granny square throws, shell stitch scarves, bobble pillow covers, and moss stitch table runners - prove that even basic stitches can create designs that look intricate and polished. With thoughtful application, mastering the fundamentals can lead to truly impressive results.
Using the right tools and high-quality materials plays a key role in achieving a polished finish. Good materials not only make the process more enjoyable but also help ensure your stitches are even and professional-looking.
Many crafters have shared how having access to clear instructions and quality supplies has transformed their experience. As Jessica L. shared:
"I went from buying yarn I never used to completing 12 beautiful projects this year. The difference? Having everything I need in one place."
The foundation of every standout design lies in mastering the basics. These patterns show that consistency and attention to detail can elevate simple stitches into stunning projects. With regular practice, checking your gauge, and using finishing techniques like blocking, your work can achieve a professional look that will leave others thinking you've been crocheting for years.
Ready to take the next step? Check out our curated crochet kits. They include premium yarns, exclusive patterns, and professional tools to help you bring your creative vision to life. Designed with beginners in mind, these kits make advanced-looking projects both approachable and achievable.
FAQs
How can beginners keep their tension consistent when working on crochet patterns that look advanced?
Maintaining steady tension is essential for creating crochet projects that look neat and well-crafted, even when working on intricate designs. Begin by finding a way to hold your yarn and hook that feels natural and allows for smooth, even movement. It’s a good idea to practice this grip with basic stitches before diving into more detailed patterns.
Focus on your hand movements, ensuring the yarn flows with light, consistent pressure. If your stitches seem too tight or too loose, experiment with adjusting your grip or switching to a different hook size to see what feels right. With regular practice, you’ll build muscle memory and gain better control over your tension. Take your time, be patient, and most importantly, enjoy the journey!
What’s the best way to pick the right yarn and hook size for crochet patterns that look intricate but are easy to make?
Choosing the right yarn and hook size plays a big role in how your crochet project turns out. Start by looking at the pattern instructions - they usually list the recommended yarn weight and hook size. If the design has intricate details, lightweight or medium-weight yarns (like DK or worsted) are great options. These yarns strike a good balance between showing off the details and being easy to work with. On the other hand, bulky yarns might hide the finer elements of your work.
When it comes to hooks, follow the size suggested on the yarn label, but feel free to tweak it based on your needs. Using a slightly larger hook can create looser, more flexible stitches, which is helpful if you're just starting out. A smaller hook, however, will give you tighter, more defined stitches - perfect for detailed designs. To make sure everything comes together as planned, crochet a small swatch first. This helps you check how the yarn, hook, and your personal tension work together for the pattern.
How can I block crochet projects to make beginner-friendly patterns look more polished and professional?
Blocking is a straightforward step that can elevate the look of your crochet projects, giving them a polished and professional touch. To block your piece, begin by either gently washing it or lightly dampening it with water. Once damp, lay it flat on a blocking mat or a clean towel, carefully shaping it to match the desired dimensions. Secure the edges with rust-proof pins and allow the piece to air dry completely before removing the pins. If your project uses natural fibers, steam blocking is another great option - hold a steam iron just above the fabric (without touching it) and let the steam relax the stitches into place.
Pro Tip: Always review the care instructions for your yarn to ensure the blocking method you choose is safe for the fibers.