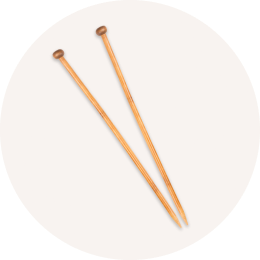
Crochet beginners often start with simple stitches that form the basis of all projects. This guide introduces ten must-learn stitches, from the chain stitch to the granny stitch, each with clear steps, uses, and tips to build confidence. Whether you're crafting blankets, scarves, or decorative pieces, mastering these stitches will set you up for success.
Chain Stitch (CH)
The chain stitch is the starting point for nearly all crochet projects. It's simple and helps develop control over your yarn and hook. Use it as a foundation or for decorative touches in lacework.
How to do it:
- Make a slip knot on your hook.
- Yarn over and pull through the loop.
- Repeat to create a chain of desired length.
Slip Stitch (SL ST)
This stitch is essential for joining rounds and finishing edges. It's compact and doesn’t add height, making it perfect for seamless transitions.
How to do it:
- Insert your hook into the stitch.
- Yarn over and pull through the stitch and loop on your hook.
Single Crochet (SC)
Single crochet offers a dense, sturdy fabric, ideal for amigurumi, dishcloths, and pot holders. It's a beginner-friendly stitch that creates short, compact rows.
How to do it:
- Insert your hook into the stitch.
- Yarn over and pull up a loop (2 loops on hook).
- Yarn over again and pull through both loops.
Half Double Crochet (HDC)
This stitch is taller than single crochet but denser than double crochet. It’s great for baby blankets, hats, and scarves.
How to do it:
- Yarn over, insert your hook into the stitch, and pull up a loop (3 loops on hook).
- Yarn over and pull through all three loops.
Double Crochet (DC)
Double crochet creates taller, airy rows, making it a go-to for afghans, shawls, and garments.
How to do it:
- Yarn over, insert your hook into the stitch, and pull up a loop (3 loops on hook).
- Yarn over, pull through two loops, yarn over again, and pull through the last two loops.
Treble Crochet (TR)
This stitch adds height and is perfect for light, flowing fabrics like summer tops and shawls.
How to do it:
- Yarn over twice, insert your hook, and pull up a loop (4 loops on hook).
- Yarn over, pull through two loops, repeat until one loop remains.
Triple Crochet (TRC)
The tallest of the basic stitches, triple crochet is ideal for airy shawls and decorative panels.
How to do it:
- Yarn over twice, insert your hook, and pull up a loop (4 loops on hook).
- Yarn over, pull through two loops three times.
Moss Stitch
This stitch alternates single crochet and chain stitches, creating a woven texture. It's reversible and works well for blankets and scarves.
How to do it:
- Single crochet into the fourth chain from the hook.
- Chain one, skip a stitch, and single crochet into the next.
- Repeat across the row, turning at the end.
Shell Stitch
Shell stitch uses multiple double crochets in one stitch to create a scalloped design. It's perfect for borders and decorative blankets.
How to do it:
- Work five double crochets into one stitch.
- Skip two stitches, and single crochet into the next.
- Repeat to form shells.
Granny Stitch
Granny stitch forms clusters of double crochets separated by chains, often used in granny squares for blankets and more.
How to do it:
- Start with a chain ring.
- Work clusters of three double crochets into chain spaces.
- Chain two between clusters and repeat.
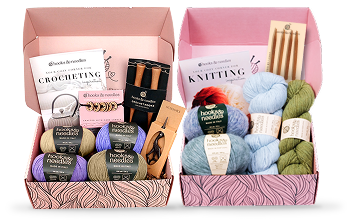
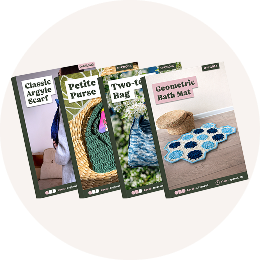
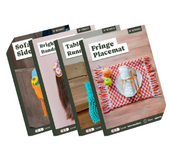
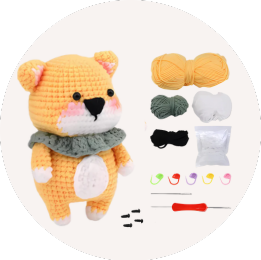
Each stitch offers unique textures and uses, helping you create everything from functional items to decorative pieces. Ready to start? Check out our crochet kits for step-by-step guidance and materials tailored for beginners.
1. Chain Stitch (CH)
The chain stitch is where every crochet journey begins. It’s the building block for nearly all crochet projects, much like learning the alphabet is essential for reading. Without this foundational skill, tackling patterns or creating complex stitches becomes a challenge. Every crochet project starts with a chain, making it an essential technique to master.
Difficulty Level
The chain stitch is perfect for beginners because it’s simple and easy to pick up. Practicing this stitch helps you develop control over your yarn, master the movement of the hook, and manage tension - skills that are crucial for all crochet work. Its straightforward nature also makes it a confidence booster before moving on to more advanced techniques.
Height and Density
Chain stitches are narrow and flat, shaping the width of your project but adding little thickness. The tension you maintain will determine whether your starting edge looks loose or tight.
Primary Uses
The chain stitch serves several purposes in crochet. It’s the starting point for most patterns, creates spaces in lace and mesh designs, and can even be used for decorative edges or closures.
Step-by-Step Instructions
Getting your chain stitches consistent from the beginning is key. Here’s how to do it:
- Start with a slip knot on your hook.
- Hold the hook in your dominant hand and guide the yarn with your other hand.
- Yarn over by wrapping the working yarn from back to front over the hook.
- Pull the yarn through the loop already on your hook - this completes one chain stitch.
- Repeat these steps for as many chains as needed.
Keep your tension even to ensure a uniform chain. To count your stitches, look for the "V" shapes along the top of the chain, but remember - the loop on your hook doesn’t count as a stitch. Practicing with light-colored yarn and a comfortable hook size can help you see your work clearly and improve faster. Once you’ve mastered this, you’ll be ready to tackle more intricate stitches and patterns, like those found in our crochet and knitting kits. This simple skill is your gateway to countless crochet creations.
sbb-itb-f7119e8
2. Slip Stitch (SL ST)
The slip stitch is a must-have in your crochet toolkit, especially after getting comfortable with the chain stitch. Think of it as the stitch that holds everything together, seamlessly connecting pieces without adding extra height or bulk.
Difficulty Level
If you're new to crochet, the slip stitch is one of the easiest techniques to pick up. It builds on the same yarn and hook movements you've already learned, which makes it a great confidence booster. Once you’ve got this down, you’ll find it much easier to move on to more complex, fabric-building stitches.
Height and Density
The slip stitch is the shortest of all crochet stitches. It creates a tight, compact join without adding any height, making it ideal for smooth, seamless transitions and tidy edges.
Primary Uses
The slip stitch comes in handy for a variety of tasks. It’s commonly used to join rounds in circular projects like hats, amigurumi, or granny squares. It’s also perfect for moving your yarn across stitches without adding height, helping you position your hook exactly where you need it for the next section. Additionally, it’s a go-to for creating clean seams when joining pieces and for finishing edges with a polished, professional look. These applications make it a key stepping stone for learning more advanced techniques.
How to Make a Slip Stitch
Ready to try it out? Here’s a step-by-step guide to help you master the slip stitch:
- Step 1: Insert your hook into the desired stitch or space.
- Step 2: Wrap the yarn over your hook.
- Step 3: Pull the yarn through both the stitch and the loop on your hook in one smooth motion.
You’ll end up with just one loop left on your hook, and that’s it - you’ve completed a slip stitch!
When working slip stitches into a foundation chain, aim to insert your hook under two loops for a secure result. Keep your tension relaxed; beginners often pull too tightly, which can make the fabric stiff and hard to work with. If this happens, try using a slightly larger hook or consciously loosen your grip.
To double-check your work, count the loops on your hook before pulling the yarn through - you should have two loops at that point. Remember, the slip stitch is all about joining, not building fabric height. Once you’ve got this stitch down, you’ll be ready to explore more advanced stitches, many of which are featured in our crochet and knitting kits designed to help you grow your skills.
3. Single Crochet Stitch (SC)
Once you've got the hang of the slip stitch, it's time to step up to the single crochet stitch. This stitch is a cornerstone of crochet, forming the base for countless patterns and techniques. Its simplicity and versatility make it a must-learn for anyone picking up a hook.
Difficulty Level
The single crochet stitch is a natural next step for beginners who have mastered chain and slip stitches. It's straightforward and beginner-friendly, involving just a few easy motions. What sets it apart is its ability to create fabric with height and structure, making it an essential skill as you progress.
Height and Density
Among all the basic stitches, single crochet produces the shortest and most compact fabric, typically about 0.25–0.3 inches tall. This creates a dense, sturdy texture that holds its shape well and offers excellent coverage. Its tight weave results in less stretch, making it perfect for projects where durability and structure are key.
Primary Applications
Single crochet is ideal for projects that need a firm, close-knit texture. Here are some popular uses:
- Amigurumi toys: The tight weave keeps stuffing securely inside.
- Everyday items: Great for dishcloths, potholders, and washcloths that need to handle wear and tear.
- Baby blankets: Provides a warm, cozy, and dense fabric.
- Winter accessories: Perfect for hats and scarves that block out the wind.
- Structured pieces: Works well for baskets, bags, and other items that need to hold their shape.
Step-by-Step Instructions
Ready to try it? Follow these steps to create single crochet stitches, starting with a foundation chain:
- Insert your hook into the second chain from the hook (skip the first chain closest to the hook).
- Yarn over from back to front.
- Pull the yarn through the chain stitch. You should now have two loops on the hook.
- Yarn over again and pull through both loops on the hook in one smooth motion.
Continue this process along your foundation chain, working one single crochet into each chain. When you reach the end of the row, chain one and turn your work to begin the next row.
For the following rows, insert your hook under both loops of the "V" shape at the top of each stitch from the previous row. This technique gives the fabric its classic single crochet texture. Keep your tension consistent but not too tight - tight stitches can make it tricky to insert your hook for the next row.
The single crochet stitch is featured in many of our crochet and knitting kits, giving you the chance to practice while creating beautiful, functional projects. Once you've mastered this stitch, you'll be ready to explore taller, more intricate stitches.
4. Half Double Crochet Stitch (HDC)
The half double crochet stitch sits neatly between single crochet and double crochet, offering a mix of height and density. It creates a fabric that's taller than single crochet but more compact than double crochet, making it perfect for projects that need both structure and softness.
Difficulty Level
If you're comfortable with chain, slip stitch, and single crochet, half double crochet is a natural next step. It builds on the basics with just one additional step. According to a 2024 survey by the Crochet Guild of America, more than 70% of beginners mastered HDC within their first month, making it an approachable and rewarding technique for new crocheters.
Height and Density
The half double crochet stitch produces a medium-height fabric with excellent coverage. It works up faster than single crochet while maintaining a soft, dense texture. This balance makes it a great choice for beginners, as it’s forgiving and easy to manage.
Primary Applications
Half double crochet is a go-to stitch for a variety of projects. Its moderate height and density make it ideal for blankets, providing warmth and coverage without adding unnecessary weight. It's also a favorite for modern, chunky blankets and wearable items like scarves or hats, offering both texture and coziness.
For example, in February 2025, our HDC beanie tutorial attracted over 25,000 views in its first month. Many users shared their success stories about completing their first wearable project using this stitch. They loved how the medium height of HDC helped the project come together quickly while creating a snug, structured fabric - perfect for headwear. Now, let’s break down how to achieve this versatile stitch with clear, easy-to-follow steps.
Step-by-Step Instructions
The half double crochet stitch is simple to learn, adding just one extra step to single crochet. Start with a foundation chain and follow these instructions:
- Yarn over before inserting your hook into the third chain from the hook (the first two chains act as your turning chain).
- Insert your hook into the chain stitch, then yarn over again and pull up a loop, leaving three loops on your hook.
- Yarn over once more and pull through all three loops in one motion.
Work one half double crochet into each chain across your foundation. When you reach the end of the row, chain two and turn your work to start the next row. For subsequent rows, insert your hook under both loops of the "V" shape at the top of each stitch from the previous row.
For consistent results, focus on maintaining even tension across all three loops on your hook. A medium-weight yarn paired with a 5.0–5.5 mm (H–I) hook is a great choice for practicing, as it provides a good balance of comfort and stitch definition.
The half double crochet stitch is a staple in many of our crochet and knitting kits. It’s a fantastic way to create warm, balanced textures while honing your skills.
5. Double Crochet Stitch (DC)
The double crochet stitch represents an exciting milestone in your crochet journey. Known for its versatility, this stitch creates a lovely, open fabric that works up quickly while still holding its structure. It’s a great way to transition from the compact stitches you’ve already mastered to more advanced techniques.
Difficulty Level
If you’re familiar with chain, slip, single, and half double crochet stitches, you’re ready to tackle the double crochet. The main difference is adding an extra yarn over at the start, which gives the stitch its characteristic height.
Most beginners find the rhythm of this stitch easy to pick up. With a bit of practice, creating consistent double crochet stitches becomes second nature. Plus, seeing your project grow quickly can be incredibly rewarding and motivating.
Height and Density
Double crochet stitches create a taller, more open fabric compared to single or half double crochet. The result is a light and flexible texture, perfect for projects that need a bit of drape or movement. Despite its airy quality, the fabric still provides good coverage and structure, making it an excellent choice for both functional and decorative pieces.
This stitch’s breathable quality makes it ideal for layering garments or projects that benefit from airflow. At the same time, its height allows you to cover more ground in less time, making it a favorite for larger projects.
Primary Applications
Double crochet is a go-to stitch for projects where you want speed without sacrificing quality. It’s perfect for afghans and throw blankets since it balances quick progress with cozy coverage. Lightweight scarves, summer tops, and shawls also benefit from the drape and flow this stitch provides.
Many crocheters also use double crochet for practical items like dishcloths and washcloths. The fabric is sturdy enough for everyday use while still quick to make. Its open texture lends itself beautifully to lacy patterns and decorative designs, offering endless creative possibilities.
Step-by-Step Instructions
Double crochet involves a few more steps than half double crochet, but the process is straightforward. Here’s how to do it:
- Start with a foundation chain, skipping the first three chains (these count as your first double crochet).
- Yarn over, then insert your hook into the fourth chain.
- Yarn over again and pull up a loop. You should now have three loops on your hook.
- Yarn over once more and pull through the first two loops, leaving two loops on your hook.
- Yarn over one final time and pull through the last two loops. You’ve completed your first double crochet!
Continue working one double crochet into each chain across the row. At the end of the row, chain three and turn your work. These three chains will count as your first double crochet for the next row. Skip the first stitch and work your next double crochet into the second stitch.
For the best results, use a 5.5 mm (I) hook with worsted weight yarn. Pay attention to your tension during each yarn over and pull to ensure even, professional-looking stitches.
The double crochet stitch is featured in many of our crochet and knitting kits. Its balance of speed and versatility makes it ideal for beginner projects that help you build confidence while creating something beautiful.
6. Treble Crochet Stitch (TR)
The treble crochet stitch is perfect for creating fabrics that are light and airy. It builds on the double crochet by adding an extra yarn over, giving it more height and an open texture. This stitch is ideal for projects that require a flowing, lightweight feel, making it a versatile addition to your crochet skills.
Difficulty Level
If you've already mastered the double crochet, you're well on your way to handling the treble crochet. The key difference is the extra yarn over and pull-through step, which can be tricky at first. Beginners often find that maintaining a relaxed grip on the yarn and hook helps keep the tension manageable, making it easier to work through the multiple loops. With a bit of practice, you'll see how this stitch can add height and texture to your projects.
Height and Density
When using worsted weight yarn with a 5.5 mm (I-9) hook, treble crochet stitches create rows that are roughly 0.75 to 1 inch tall. This height contributes to the stitch's open, loose fabric, which is perfect for projects requiring drape and flexibility. While it won't offer the same structural density as shorter stitches, its breathable nature makes it ideal for lightweight designs.
Primary Applications
The treble crochet stitch is a go-to choice for projects that need a light, flowing quality. It works beautifully for summer scarves and shawls, offering a graceful drape that moves effortlessly. It's also a favorite for mesh bags, where the open texture is both stylish and functional. Many crocheters use it for decorative edgings and borders, as its height adds a dramatic touch. Additionally, this stitch is often featured in openwork patterns and motifs like granny squares. For larger items such as lightweight blankets or throws, the treble crochet helps you cover more ground quickly while keeping the piece breathable and perfect for layering in warmer weather.
Step-by-Step Instructions
The treble crochet follows a similar process to the double crochet, with a few added steps. Here's how to do it:
- Wrap the yarn twice around your hook, creating three loops.
- Insert your hook into the next stitch as directed by your pattern.
- Yarn over and pull up a loop. You’ll now have four loops on your hook.
- Yarn over and pull through the first two loops. This leaves three loops on your hook.
- Yarn over again and pull through the next two loops. Two loops remain.
- Yarn over one last time and pull through the final two loops. You’ve completed your treble crochet, with one loop left on your hook.
When working in rows, start each new row by chaining four (this counts as your first treble crochet), then turn your work. Skip the first stitch and begin your next treble crochet in the following stitch. At the end of the row, don’t forget to work the last treble crochet into the top of the turning chain from the previous row.
The treble crochet stitch is featured in several of our crochet and knitting kits, especially those designed for elegant, flowing creations. Its height and open texture make it a must-learn stitch for expanding your crochet skills and tackling more intricate designs.
7. Triple Crochet Stitch (TRC)
The triple crochet stitch is the tallest among the basic crochet stitches, creating a light and airy fabric. This makes it perfect for projects that require a flowing, delicate touch. It builds on the treble crochet technique, adding extra height and openness to your work.
Difficulty Level
Once you’ve mastered double and treble crochet, the triple crochet stitch becomes a natural next step. It’s a bit more advanced, as it requires careful handling of yarn overs to maintain even tension. Counting each yarn over and loop is key to achieving a smooth and consistent stitch.
Height and Density
Using worsted weight yarn and a 5.5 mm (I-9) hook, triple crochet stitches create rows nearly twice as tall as double crochet. The resulting fabric has a lacy, open structure that’s visually striking but less dense. This makes it better suited for decorative projects rather than those needing durability or structure.
Primary Applications
Triple crochet is a go-to choice for crafting summer shawls, lightweight wraps, and decorative borders. Its airy nature lends elegance to lacy scarves, while its height adds a unique texture to openwork blankets, throws, and even some granny square designs. It’s also a favorite for adding intricate details to edgings and borders.
Step-by-Step Instructions
Here’s how to create a triple crochet stitch with precision:
- Yarn over twice, so your hook has three loops.
- Insert the hook into the stitch you’re working on.
- Yarn over and pull up a loop, giving you four loops on the hook.
- Yarn over and pull through the first two loops. Yarn over again and pull through the next two loops, leaving two loops on the hook.
- Finish the stitch by yarning over one last time and pulling through the remaining two loops.
For rows, start each new row with a chain of five stitches. This turning chain counts as your first triple crochet. Turn your work, skip the first stitch, and begin the next triple crochet in the following stitch. At the end of the row, work the last triple crochet into the top of the turning chain from the previous row to keep your stitch count consistent.
You’ll find the triple crochet stitch featured in several patterns from our crochet and knitting kits. These patterns are designed to highlight its airy texture and elegant drape, making it a favorite for lightweight, decorative projects.
8. Moss Stitch
The moss stitch, sometimes called the linen stitch or granite stitch, creates a beautiful woven texture by alternating single crochet stitches and chain stitches. This technique results in a flat, grid-like fabric. One of its standout features is its reversible design - both sides look the same. This makes it a fantastic choice for projects like scarves, blankets, or anything where both sides will be visible. Like the single and slip stitches discussed earlier, the moss stitch provides a solid foundation for your crochet projects.
Difficulty Level
The moss stitch is perfect for beginners. It only requires two basic techniques: chain stitches and single crochet stitches. If you’ve already mastered these, you’re ready to give the moss stitch a try. It’s also a great way to practice maintaining even tension, a skill that will come in handy for more advanced crochet techniques down the road.
Unlike stitches that involve complicated counting or tricky maneuvers, the moss stitch follows a simple, repetitive pattern. This makes it easy to learn while still delivering impressive results.
Height and Density
When worked with worsted weight yarn and a 5.0 mm (H-8) hook, the moss stitch produces a medium-density fabric. It’s more open and flexible than single crochet but denser than lace stitches. The height of the stitch is slightly taller than single crochet rows, thanks to the alternating chain stitches, but it’s still shorter than double crochet rows.
This balance in density creates a fabric that’s breathable and has a nice drape. The staggered structure of the stitch also helps prevent curling, a common issue with some basic stitches. The resulting texture feels substantial but not overly heavy, making it a great option for projects that need both warmth and breathability.
Primary Applications
The moss stitch is ideal for projects where its texture can take center stage. It works wonderfully for scarves, dishcloths, baby blankets, and home décor items like placemats and pillow covers. Its reversible quality makes it a favorite for shawls and wraps, and its flat structure lends itself well to these types of designs.
This stitch is also a popular choice for temperature blankets and color-blocked projects because it showcases color changes beautifully. The clean lines and minimal gaps make it a great option for garments where a polished, professional appearance is desired.
Step-by-Step Instructions
To master the moss stitch, start with an even number of chain stitches for your foundation row. This ensures the pattern will work correctly.
First Row
- Single crochet into the fourth chain from your hook.
- Chain one, skip the next chain, and single crochet into the chain after that.
- Repeat this pattern - chain one, skip one, single crochet - until you reach the end of the row.
- Turn your work and chain two to begin the next row.
Second Row
- Work single crochets into the chain spaces from the previous row.
- Chain two (this counts as your first chain-one space).
- Single crochet into the next chain-one space, chain one, and repeat this pattern across the row.
- Finish with a single crochet in the last chain-one space.
- Turn your work and repeat the second row until your project reaches the desired length.
For best results, maintain even tension to create a flat, woven fabric. If you have trouble keeping track of your stitches, use stitch markers to mark the first and last chain spaces. Counting your stitches at the end of each row can also help ensure consistency.
The moss stitch is featured in several patterns from our crochet and knitting kits. Its versatile texture and beginner-friendly nature make it an excellent choice for building your skills while creating beautiful, functional pieces.
9. Shell Stitch
The shell stitch, often referred to as the fan stitch, creates a beautiful scalloped design that adds an elegant, decorative touch to your projects. This stitch is achieved by working multiple double crochet stitches - typically five - into a single stitch or space. The result is a fan-like shape reminiscent of a seashell, giving the fabric a lacy, textured look that reflects light in a stunning way.
What makes the shell stitch stand out is its ability to turn simple yarn into something that looks detailed and polished. Its open, airy design not only adds visual appeal but also ensures a natural drape, making it ideal for projects that need both beauty and practicality. Unlike some textured stitches that can feel heavy or rigid, the shell stitch strikes a balance by offering both flexibility and substantial texture.
Difficulty Level
The shell stitch is a great choice for beginners who have already mastered basic techniques like chaining and double crochet. It’s considered easy to intermediate, making it approachable without being overly challenging. Its repetitive pattern helps build confidence while producing impressive results that encourage continued practice.
Most beginners find success with the shell stitch after getting comfortable with double crochet. The key lies in understanding the rhythm of the pattern - once you know where to place each shell and how to count stitches, it becomes second nature. This stitch is a natural progression for those ready to move beyond simple rows of single or double crochet.
By building on familiar steps from the double crochet, the shell stitch introduces a decorative layer to your skillset.
Height and Density
When using worsted weight yarn and a size H-8 (5.0 mm) hook, the shell stitch produces a medium-height fabric with a lacy, open texture. The height comes from the double crochet stitches that form each shell, making it taller than single crochet rows but comparable to standard double crochet work.
The fabric is lighter than solid stitches due to the spaces between the shells, giving it breathability and excellent drape. This combination of structure and airiness makes it ideal for projects that need to flow naturally, while the shells themselves add visual weight and texture for a balanced look.
The shell stitch offers a unique mix of lightness and structure, perfect for versatile designs.
Primary Applications
The shell stitch’s open, scalloped texture works well in a variety of projects. It’s a popular choice for baby blankets, as the soft edges and delicate design are perfect for creating cozy, yet lightweight items. It’s equally suited for shawls and wraps, where its natural drape adds a touch of sophistication.
Scarves and cowls benefit from the stitch’s balance of warmth and breathability, offering coverage without feeling too heavy. For home décor, consider using the shell stitch in table runners, pillow covers, or as decorative borders for towels and linens. It also makes a lovely edging for simpler projects, such as blankets or garments, giving them a polished, professional finish.
Step-by-Step Instructions
To get started, create a foundation chain that is a multiple of six, plus one extra chain for proper alignment.
Foundation and First Row
- Begin with a double crochet in the fourth chain from the hook.
- Skip the next two chains, then work five double crochets into the following chain to form a shell.
- Skip two chains again, and make a single double crochet in the next chain.
- Continue this pattern across the row: skip two chains, create a shell with five double crochets, skip two chains, and make a single double crochet. End the row with a double crochet in the final chain.
Subsequent Rows
- Chain three and turn your work (this chain-three acts as the first double crochet of the new row).
- Work five double crochets into the center stitch of each shell from the previous row.
- Between each shell, make a single double crochet into the single double crochet from the row below.
- Repeat this pattern across the row, finishing with a double crochet in the top of the turning chain.
To keep your rows even, ensure you’re correctly identifying the center of each shell. Beginners may find stitch markers helpful for tracking shell placement until the pattern becomes second nature. Count your shells at the end of each row to avoid adding or skipping stitches.
The shell stitch is featured in several of our crochet and knitting kits, making it an excellent choice for creating stunning projects while honing your crochet skills. Its beauty and simplicity make it a favorite among crafters of all levels.
10. Granny Stitch
The granny stitch is a classic crochet technique that beginners often fall in love with. Most commonly used in creating granny squares, this stitch forms clusters of double crochet stitches separated by chain spaces. The result is an open, geometric pattern that’s versatile and practical. Traditional granny squares start at the center and grow outward in rounds, offering endless opportunities for texture and color combinations.
One of the best things about the granny stitch is how forgiving it is. Its open design naturally hides small tension inconsistencies, making it a great choice for new crocheters. Each square is like a mini-project that can be completed quickly, offering a sense of accomplishment and motivation to keep going. Plus, the modular nature of granny squares lets you experiment with colors and create stunning designs by arranging the squares in various ways.
This stitch builds on the basic crochet techniques you may already know, opening up a world of creative possibilities.
Difficulty Level
The granny stitch is perfect for beginners. If you’re familiar with chaining, double crochet, and slip stitches, you’re ready to try it. It’s a natural next step after mastering the double crochet stitch, as it doesn’t involve complicated techniques. The repetitive nature of the pattern helps reinforce muscle memory while allowing you to create something both functional and beautiful.
Granny squares are especially beginner-friendly because each square is small and self-contained. If one doesn’t turn out quite right, you can simply make another without affecting the rest of your project. This makes it an ideal stitch for learning, as it builds confidence through quick and visible progress.
Height and Density
When you use worsted weight yarn with a size H-8 (5.0 mm) hook, the granny stitch creates a medium-height fabric that’s breathable and has a lovely drape. The chain spaces between the clusters give the fabric an open, airy texture, making it lighter than other solid crochet stitches.
The resulting fabric strikes a balance - it’s neither too dense nor too loose. The chain spaces add flexibility and stretch, making granny square projects comfortable to use and easy to maintain. This combination of structure and openness ensures the fabric lays flat while maintaining its shape over time.
Primary Applications
The granny stitch is a standout choice for projects that take advantage of its modular design and decorative charm. Traditional granny square afghans remain a favorite because they allow for creative color combinations and are easy to construct piece by piece. Each square can be made individually, making it a great option for portable projects or crafting during short breaks.
But it doesn’t stop at blankets. Granny squares are ideal for accessories and home décor items. They can be turned into tote bags, scarves, pillow covers, pot holders, and even garments like vests or cardigans. The ability to join squares in various configurations opens up endless design opportunities, from simple geometric layouts to intricate color patterns.
Step-by-Step Instructions
Here’s how to get started with the granny stitch:
Starting the Center Ring
- Begin with a slip knot and chain 4. Join the ends with a slip stitch to form a ring. This will be the center opening of your square.
- Chain 3 (this counts as your first double crochet), then work 2 more double crochets into the ring.
Building the First Round
- After the first cluster of 3 double crochets, chain 2 to create a corner space.
- Work another cluster of 3 double crochets into the ring, followed by another chain 2. Repeat this two more times, so you have four clusters of 3 double crochets, each separated by chain-2 spaces.
- Join with a slip stitch to the top of your starting chain-3 to complete the round.
Adding Subsequent Rounds
- Slip stitch into the first chain-2 corner space. Chain 3 (counting as your first double crochet), then work 2 more double crochets, chain 2, and 3 more double crochets into the same corner space. This forms a corner with two clusters.
- Chain 1, then move to the next corner space and repeat the corner pattern. Continue around, working corners in each chain-2 space and chain-1 spaces between corners.
As you work, keep your tension even and make sure to crochet into the correct spaces. At the end of each round, count your clusters to ensure accuracy. Each corner should have two clusters of 3 double crochets with a chain-2 space between them.
The granny stitch is featured in several of our crochet and knitting kits, making it an excellent choice for anyone looking to create beautiful and functional projects while building their crochet skills. Its versatility ensures it will remain a go-to stitch throughout your crochet journey.
Stitch Comparison Chart
This chart provides a quick overview of stitch details, making it easier to choose the right one for your project. It compares difficulty, height, density, and common uses, so you can find the perfect match for your design needs.
| Stitch Name | Difficulty Level | Height per Row | Fabric Density | Ideal Projects |
|---|---|---|---|---|
| Chain Stitch (CH) | Very Easy | Shortest | N/A (foundation) | Starting rows, lacework details |
| Slip Stitch (SL ST) | Very Easy | Shortest | Densest | Joining rounds, finishing edges, seaming pieces |
| Single Crochet (SC) | Easy | 1/4 inch | Dense | Amigurumi, dishcloths, sturdy bags, pot holders |
| Half Double Crochet (HDC) | Easy | 3/8 inch | Dense to Medium | Baby blankets, winter hats, thick scarves |
| Double Crochet (DC) | Easy | 1/2 inch | Medium | Afghan blankets, shawls, garments |
| Treble Crochet (TR) | Moderate | 5/8 inch | Open | Lacy wraps, summer tops, decorative panels |
| Triple Crochet (TRC) | Moderate | 3/4 inch | Most Open | Airy shawls, curtain panels, openwork designs |
| Moss Stitch | Easy | 1/4 inch | Dense | Washcloths, textured scarves, cozy blankets |
| Shell Stitch | Moderate | 1/2 inch | Open | Decorative borders, baby blankets, elegant shawls |
| Granny Stitch | Moderate | 1/2 inch | Open | Granny squares, modular blankets, vintage-style projects |
Dense stitches like Single Crochet (SC) and Slip Stitch (SL ST) produce tight, durable fabrics that are great for warmth and structure. On the other hand, open stitches such as Treble Crochet (TR) and Shell Stitch are perfect for airy, decorative items.
Quick Tips for Beginners:
- Start with Chain Stitch, Slip Stitch, and Single Crochet to build your confidence and master basic techniques.
- Move on to Half Double Crochet and Double Crochet for projects that require a bit more texture and speed.
- For sturdy, warm items, stick to Single Crochet or Half Double Crochet.
- For flowing, decorative designs, try Double Crochet or Shell Stitch.
Note: Measurements are based on worsted weight yarn and a 5.0 mm hook.
Ready to put these stitches to work? Check out our crochet and knitting kits for guided projects that transform these techniques into beautiful, functional creations.
Conclusion
Learning these ten crochet stitches opens the door to countless creative projects. Starting with the simple chain stitch and moving through to decorative techniques like the shell and granny stitches, each one adds a new layer to your skillset. These stitches not only help you craft beautiful items but also connect you to a thriving community of creators who find joy in handmade artistry. Gaining confidence with these techniques sets the stage for tackling more intricate designs down the road.
What makes these stitches so exciting is their adaptability. Whether you prefer the solid, durable texture of single crochet for practical pieces like bags or dishcloths, or the light, airy feel of treble crochet for shawls and wraps, you now have the tools to bring your ideas to life.
Take your time as you practice - crochet is about the journey, not the finish line. Focus on mastering one stitch at a time, and work on maintaining steady tension as you go. Keeping a journal of your progress, using the MM/DD/YYYY format, can help you track improvements and celebrate milestones as your technique becomes more polished. The step-by-step guidance offered in each section ensures you’ll feel more confident with every project you complete.
Now that you’ve honed these essential stitches, it’s time to put them into action. With the right tools, every stitch becomes an opportunity to create something special. Our crochet and knitting kits include everything you need to turn these foundational skills into finished pieces. As Linda K. shared:
"The patterns actually work - no more half-finished projects!"
With these ten stitches in your repertoire and the resources to guide you, you’re ready to take your crochet journey to the next level. Each project is a chance to learn, grow, and create something truly meaningful.
FAQs
What are some common mistakes beginners make with crochet stitches, and how can they avoid them?
Beginners often face a few hiccups when learning crochet stitches, but with some practice and focus, these can be smoothed out quickly.
One common challenge is inconsistent tension, which can leave your work looking uneven. To tackle this, experiment with holding your yarn and hook in a way that feels natural while keeping a steady tension. Sticking with the same type of yarn and hook size during practice sessions can also help you develop a more uniform technique.
Another frequent mistake is accidentally losing or adding stitches, which can throw off your project’s shape. To avoid this, make it a habit to count your stitches at the end of each row or round. If you're working on a more intricate pattern, stitch markers can be a lifesaver for keeping track of your progress.
Lastly, many beginners find it tricky to select the right yarn and hook size. Starting with a medium-weight yarn and a 5.0mm (H-8) crochet hook is a smart choice. These tools are easy to work with and make it simpler to see and manage your stitches as you learn. With patience and regular practice, you'll be well on your way to mastering crochet!
What’s the best way to choose the right yarn and hook size for learning beginner crochet stitches?
When you're just starting out, a medium-weight yarn, such as worsted weight, is a great choice. It's easy to work with and ideal for beginners. Match it with the hook size suggested on the yarn label - usually a 5mm (H-8) crochet hook for this type of yarn. Opting for high-quality yarn made from natural fibers can make a big difference. It not only feels better to work with but also helps you see your stitches more clearly as you practice. Make sure your hook and yarn are a good match to keep your learning experience smooth and frustration-free.
Can I combine multiple basic crochet stitches in one project? What are some beginner-friendly examples?
Yes, you can combine different basic crochet stitches in one project! Mixing stitches brings texture and variety, giving your work a more dynamic and personalized look. For instance, pairing single crochet with double crochet can create striped patterns, while shell stitches mixed with half-double crochet add depth and dimension.
Beginner projects like scarves, dishcloths, or blankets are great for trying out stitch combinations. Need inspiration? Visit Hooks & Needles for step-by-step tutorials and creative ideas to kick off your next project!