Struggling to finish knitting or crocheting projects? You're not alone. Many crafters face stalled progress due to lost motivation, complex patterns, or disorganized spaces. But completing every project is possible with the right strategies.
Here’s the key: focus on small, clear goals, maintain an organized workspace, and use tools to track progress. By breaking projects into manageable steps, staying consistent, and mastering finishing techniques, you can turn unfinished items into completed ones.
Quick Tips to Finish Projects:
- Set SMART goals: Be specific and time-bound (e.g., “Finish 10 rows this week”).
- Break it down: Tackle one section or task at a time.
- Organize materials: Use project bags and a dedicated workspace.
- Track progress: Use journals, apps, or visual tools to stay motivated.
- Master finishing touches: Blocking, weaving in ends, and proper seaming elevate results.
With these steps, you’ll not only complete projects but also enjoy the process more. Ready to clear that pile of unfinished work? Let’s dive in.
how I keep myself motivated to work on knitting projects (8 simple tips!)
Why Knitting and Crocheting Projects Go Unfinished
Understanding why projects often stall can help break the cycle of leaving them incomplete. Many crafters face similar hurdles, and spotting these patterns is the first step toward finding solutions to finish what you’ve started.
Common Problems That Stop Progress
One big challenge is losing momentum halfway through. The excitement you feel at the start often fades during the repetitive middle stages of a project, making it harder to stay motivated.
Another issue is feeling overwhelmed by complexity. Advanced techniques or confusing instructions can quickly become intimidating, leading to frustration and, eventually, abandonment.
Using the wrong materials can also derail a project. Struggling with splitting yarn, awkward needles, or hooks that don’t feel right can turn crafting into a chore instead of a joy.
A lack of a dedicated workspace is another barrier. Constantly setting up and breaking down your workspace wastes time and can leave your supplies in disarray, making it harder to dive back in.
Seasonal mismatches can sap motivation, too. Starting a bulky sweater in the middle of summer or beginning a holiday gift too late can make the project feel out of sync with the moment.
Lastly, errors in patterns or unclear instructions can bring progress to a grinding halt. Troubleshooting mistakes or deciphering confusing terminology can take the fun out of crafting and leave your project stuck in limbo.
These challenges don’t just slow you down - they come with real consequences.
The Cost of Unfinished Projects
Unfinished projects aren’t just frustrating; they can also be costly. For starters, the financial investment in high-quality yarn and materials can feel wasted when a project never gets completed.
There’s also the mental clutter to consider. Seeing unfinished projects reminds you of setbacks and can dampen the excitement of starting something new.
Missed opportunities for gifting are another downside. If you don’t finish a handmade item in time, you may end up scrambling for a less personal, store-bought alternative.
Skill development suffers as well. Finishing projects is essential for mastering techniques like blocking, seaming, and edging. Without completing these steps, your growth as a crafter can stall.
Unfinished projects can also create storage headaches. Half-done items and unused materials can pile up, leaving your space cluttered and making it harder to stay organized.
Finally, there’s the impact on self-confidence. Each abandoned project might make you second-guess your ability to tackle challenging patterns, potentially leading you to stick with smaller, simpler projects instead of pushing your boundaries.
Recognizing these patterns is the first step toward addressing them and finding ways to keep your projects on track.
Setting Realistic Project Goals
Completing projects successfully starts with setting clear and achievable goals. When your objectives are well-defined, even the most daunting tasks can become manageable.
The secret lies in crafting goals that are specific and measurable. For instance, instead of saying, "I want to finish this blanket", set a more precise goal like, "I want to complete 10 squares by February 28th." This gives you a clear target and makes it easier to track your progress.
Using the SMART goal framework can be especially helpful for knitting and crocheting projects. Instead of a vague goal like "work on a project", define exactly what you aim to achieve: "finish the garter stitch shawl I started in June by February 28". Once you’ve set a clear goal, you can break it into smaller, actionable steps.
Breaking Large Projects into Small Steps
Big projects can feel intimidating, but breaking them into smaller, manageable steps can make all the difference. Tackling one piece at a time keeps you moving steadily toward your ultimate goal.
Start by listing the major components of your project. For example, if you're making a sweater, your list might include the back panel, front panels, sleeves, and final assembly. For a project like crafting 30 hats, you could break it down into steps such as buying materials, setting a weekly production goal, and planning the donation timeline.
Assign realistic deadlines to each step. For instance, if you’re working on a baby blanket, you might aim to complete five rows each day or finish one section per week. These smaller, achievable deadlines prevent overwhelm and help you maintain steady progress.
Take into account the complexity of each task when setting your timeline. A complicated lace pattern will naturally require more time than a simple stockinette stitch, so adjust your expectations accordingly. This way, you can avoid unnecessary frustration and keep your momentum going.
Once you’ve outlined your steps, using a visual tracking system can help you stay focused and motivated.
Using Visual Tools to Track Progress
Visual tools are fantastic for keeping your energy up and your goals in sight. Seeing your progress displayed clearly can be a powerful motivator, especially during moments when your enthusiasm dips.
Start by creating a physical or digital list of your goals. Keep this list visible in your workspace to serve as a constant reminder of what you’re working toward.
Tools like checklists and spreadsheets are simple yet effective for tracking progress. Platforms such as Microsoft Excel, LibreOffice Calc, or Google Docs can help you monitor your daily or weekly milestones. Marking off completed tasks can give you a quick sense of accomplishment.
For those who prefer digital solutions, apps like Evernote or Notion offer robust tracking options. Features such as Kanban boards let you move tasks from "To Do" to "In Progress" and finally to "Completed". These tools are especially helpful if you’re managing multiple projects at once.
A craft journal is another great option. Use it to document your journey, noting details like the pattern source, yarn type, needle or hook size, modifications, and completion dates. Adding swatches or photos can create a visual timeline of your progress.
Don’t forget to celebrate your achievements, whether big or small. Treat yourself to something special - like new yarn - after completing a major section, or reward yourself with the excitement of starting a fun new project after finishing a particularly challenging one. These moments of celebration can reinforce positive habits and keep your motivation high.
Finally, review your goals regularly to ensure they’re still realistic and aligned with your priorities. If you’re consistently missing deadlines, consider revising your timeline instead of abandoning the project altogether. Adjusting as you go can help you stay on track and focused on what matters most.
Organizing Your Materials and Workspace
An organized workspace can be the difference between projects that move forward and those that stall. When your supplies are easy to find and your space is designed for productivity, you’ll spend more time creating and less time searching for what you need.
A thoughtful setup isn’t just about saving time - it’s about making your crafting experience more enjoyable. The goal isn’t perfection but creating a system that works with your natural habits. By organizing your materials and workspace with intention, you’ll make the creative process smoother and more rewarding.
Creating a Dedicated Workspace
Carve out a specific spot for your crafting, even if it’s just a small, well-lit corner. You don’t need an entire room - portable setups can work just as well for keeping you focused and productive.
Choose a well-lit area, ideally near a window. Good lighting is essential, especially for detailed work like stitching with darker yarns. Poor lighting can strain your eyes and make crafting less enjoyable. Pair this with a comfortable chair that offers proper back support so you can work for longer periods without discomfort.
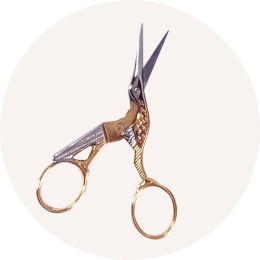
Keep your essential tools - scissors, stitch markers, measuring tape, and row counters - within arm’s reach. A small caddy or organizer ensures these items are always in the same place, saving you from mid-project searches.
Temperature matters too. A comfortable environment helps maintain steady hand movements, which is especially important for intricate work. And don’t forget about your personal preferences - some crafters thrive with background noise, while others need complete silence to focus on complex patterns.
Finally, make your space inviting. Add a touch of personality with a small plant, display your finished projects, or keep a warm cup of tea nearby. When your workspace feels welcoming, you’ll naturally want to spend more time there, making steady progress on your projects.
Storage Solutions for Project Organization
Good storage isn’t just about tidiness - it’s about keeping your projects on track. When everything has a place, you can pick up where you left off without wasting time figuring out what comes next.
Project bags are a game-changer. Use clear zippered bags or drawstring pouches to keep each project’s yarn, pattern, and tools together. Label each bag with the project name and your progress. This simple habit eliminates the frustration of trying to remember your last steps.
For broader organization, label storage containers clearly. Whether you use a label maker or masking tape, knowing what’s inside at a glance makes it easier to access and use your materials.
Separate active projects from general supplies. Keep yarns and tools for your current projects in easy-to-reach spots, while storing your larger collection elsewhere. This helps you stay focused on finishing what you’ve started instead of getting distracted by new ideas.
Stackable clear bins are perfect for yarn and tools. Tall, narrow containers can hold knitting needles and crochet hooks upright, making it simple to grab the size you need.
Set up a finishing station with scissors, tapestry needles, mats, T-pins, and measuring tools. Having these supplies ready ensures you can complete projects without unnecessary delays.
Track your stash digitally. Snap photos of your yarn collection and store them in a folder on your phone, along with notes about yardage and dye lots. This helps you avoid accidental duplicates and plan projects around what you already own.
Lastly, rotate seasonal projects. Store summer cotton projects during the winter months and bring out wool projects when it gets cold. This keeps your workspace clutter-free and focused on what’s most relevant to the season.
sbb-itb-f7119e8
Tools and Techniques to Stay Motivated
Once your workspace is organized, the next step is finding tools and routines that help you stay motivated. Let’s face it - motivation can ebb and flow, and relying on sheer willpower isn’t always enough. That’s where having the right systems comes in. When you can clearly track your progress and make crafting a part of your daily life, completing projects feels much more attainable.
The key is to choose tracking methods and tools that suit your personal style. The simpler and more enjoyable they are to use, the more likely you’ll stick with them.
Progress-Tracking Tools That Keep You Going
Tracking your progress visually can transform your work from something abstract into a series of tangible achievements. Seeing how far you’ve come can make it easier to push through tough spots and stay focused on the finish line.
There are plenty of ways to do this. A project journal or a digital app works well, but even something as simple as a paper grid can be incredibly effective. For instance, you can create a grid where each square represents a milestone - whether it’s finishing a set number of rows, completing a pattern repeat, or stitching 2 inches of fabric. As you fill in each square, you’ll get a quick and satisfying sense of accomplishment.
Another great idea? Take regular measurements and photos of your progress. A weekly photo from the same angle can be a surprisingly powerful motivator. On days when you’re feeling stuck, flipping through those pictures can remind you of how much you’ve already achieved.
While tracking progress is essential, building strong habits is what keeps the momentum going over the long haul.
Building Habits That Help You Finish
Good habits can keep your project moving forward, even on days when motivation feels like it’s in short supply. When crafting becomes part of your regular routine, you’re more likely to stay consistent, no matter how busy life gets or how uninspired you might feel.
Start by setting a daily minimum goal. Even dedicating just 10 minutes a day can make a difference. The idea isn’t to make huge strides every single day but to create a steady rhythm that keeps your project advancing. Treat your crafting time like any other important appointment - block it off on your calendar and stick to it. Many people find mornings work best since distractions are fewer and energy levels are higher.
If your enthusiasm starts to dip, take a moment to reconnect with why you started the project in the first place. Was it to create a heartfelt gift? To learn a new skill? Or simply to enjoy the creative process? Recalling your original motivation can help reignite your commitment.
Breaking your project into smaller, manageable goals can also make a big difference. For example, focus on completing one section or pattern repeat at a time. Celebrate these little victories - whether it’s with a favorite treat or a quick break - to keep your spirits high and your momentum strong.
And if you start feeling frustrated, don’t be afraid to tweak your project. Sometimes, small adjustments - like switching tools, trying out new colors, or simplifying the pattern - can remove obstacles and make the process enjoyable again. These changes can help you stay aligned with your original vision while keeping you on track to finish.
Finally, find ways to weave crafting into your everyday life. Pair it with other activities, like watching your favorite show or squeezing in a few stitches during a break. This makes it easier to stay consistent without feeling like you’re carving out extra time.
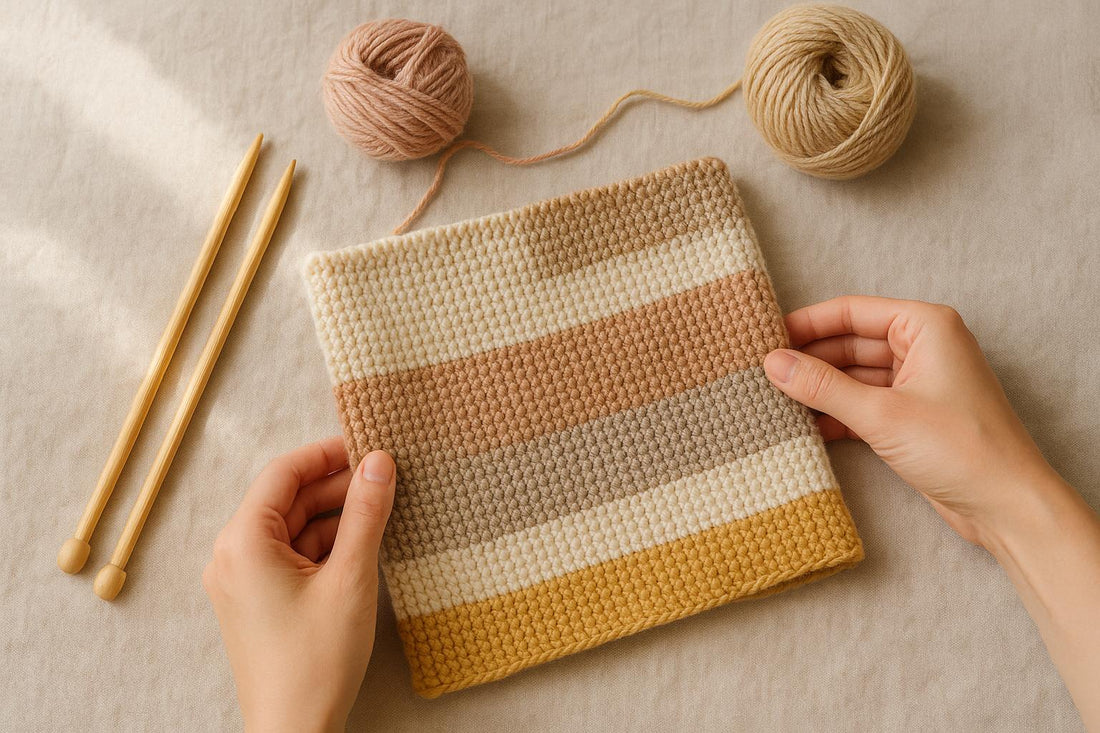
Finishing Techniques for Professional Results
Once you've set up an efficient workspace and cultivated steady crafting habits, it's time to focus on the final touches. These finishing techniques are the secret to taking your projects from good to exceptional. While they might not be as thrilling as the main stitching, they’re what give your work that polished, professional edge.
Finishing techniques do more than just make your projects look great - they also improve their durability. Properly finishing seams, securing loose ends, and shaping your fabric ensures your creations can handle regular use and washing without falling apart.
Key Finishing Steps for Knitting and Crocheting
Blocking is a game-changer. This process involves lightly wetting your piece and shaping it to the correct dimensions as it dries. Blocking smooths out stitches, enhances drape, and ensures your project meets its intended size and shape. This step is especially important for lace patterns and garments, where proper shaping transforms the final look.
To block, pin your damp piece to blocking mats, gently stretching it to match the pattern’s measurements. The result? Uniform stitches and improved texture that elevate the overall appearance.
Weaving in ends is crucial for a clean finish and long-lasting results. For crochet projects, thread the yarn tail onto a tapestry needle and weave it through the fabric about three times over 1.5–2 inches. Make sure to pass through the stitches themselves, not just over or under them. Pull gently to secure the end, then trim any excess yarn.
Seaming is the step that brings multi-piece projects together. The technique you use will depend on the stitch pattern and whether you’re joining vertical or horizontal edges. For knitting, the mattress stitch creates nearly invisible seams, while the whip stitch is a reliable choice for many crochet projects. Take your time with seaming - rushing this step can undermine all your hard work.
Adding embellishments like buttons, zippers, or pom-poms requires precision. These details should be carefully positioned and securely attached.
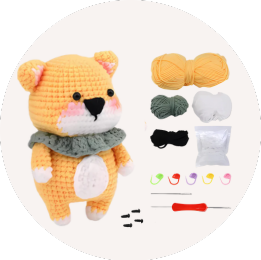
For amigurumi projects, finishing involves a special technique to close the top neatly. After completing the final round, leave a long yarn tail and thread it onto a tapestry needle. Weave the yarn through the front loop of each stitch in the last round, then pull gently to cinch the opening shut. To smooth out any bumps, insert the needle through the center of the bump and pull it out the opposite side. Then, weave in the remaining yarn tail to secure it.
By focusing on these techniques, you’ll ensure every project ends with a polished, professional touch.
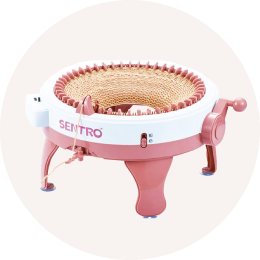
Choosing the Right Tools for Professional Finishing
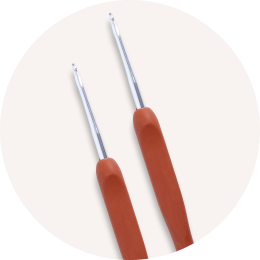
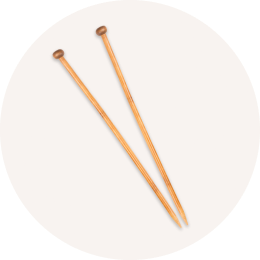
Mastering these finishing steps is easier with the right tools. A tapestry needle is a must-have - it simplifies threading with its large eye and prevents yarn splitting thanks to its blunt tip. Use it for weaving in ends, seaming, and other finishing tasks .
Blocking mats and pins are essential for achieving precise results when blocking. They provide a stable surface for pinning and gently stretching your project to the correct shape as it dries.
Even if you're knitting, keep a crochet hook nearby. It’s handy for pulling yarn ends through tight spaces when weaving them in.
Investing time and effort into these finishing techniques ensures your projects not only look polished but also stand up to wear and tear. These final touches, though they require patience, are what truly set completed projects apart.
How Hooks & Needles Resources Support Project Completion
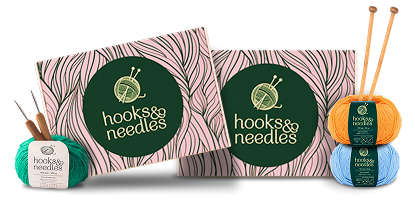
The right tools and materials can turn unfinished projects into completed masterpieces. Hooks & Needles lays the groundwork for success by offering high-quality supplies and digital tools tailored to help crafters see their projects through to completion. This support perfectly complements your organized workspace and goal-setting strategies.
Gone are the frustrations of mismatched or inadequate materials when you have access to premium supplies and thoughtfully curated subscription boxes. Beyond just the physical tools, organizational resources and a supportive community make sticking with your projects much easier.
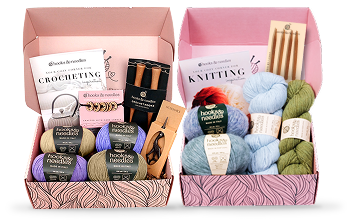
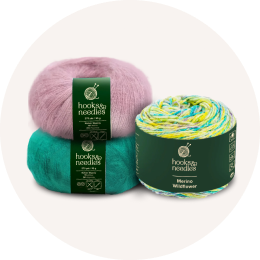
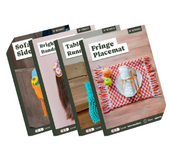
Premium Yarns and Complete Kits
Using quality materials can eliminate many of the hurdles that derail crafting projects. For instance, European yarns provide consistent tension and color, helping you avoid the frustration of dye lot variations or yarn that changes texture midway through your project. This consistency keeps your enthusiasm intact - nothing derails motivation like discovering your yarn isn’t cooperating.
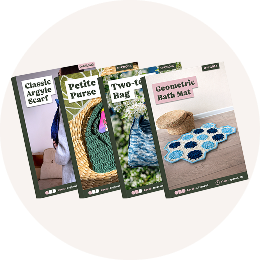
Subscription boxes simplify material planning by delivering everything you need for a specific project. Each curated kit includes the exact amount of yarn, along with the tools and notions required, so you won’t hit a roadblock weeks later when you realize you’re missing something crucial.
These boxes also strike the perfect balance between variety and focus. Instead of feeling overwhelmed by endless options at the yarn store, you receive projects tailored to your skill level and interests. This curated approach reduces decision fatigue, helping you build the habit of finishing what you start. And the high-quality materials align seamlessly with the planning tips we’ve discussed earlier.
Additionally, exclusive patterns are designed with clear, thoroughly tested instructions, ensuring a smoother crafting experience. When you don’t have to waste time deciphering confusing directions, you can focus on the joy of creating and make steady progress.
Community Support and Digital Resources
Staying organized and motivated is much easier with the right digital tools. Hooks & Needles offers a Digital Yarn Inventory Tracker for $8.97, a game-changer for keeping tabs on your stash. It prevents the all-too-common mistake of buying duplicate yarns or forgetting what you already have. As one crafter, Kimberly C., shared:
"I am really excited to use this yarn tracker. I keep forgetting what I have and how much. I hope that this will help with that."
Starting in October 2025, these digital tools will be included as free bonuses (each valued at $8.97) with a monthly craft box subscription, making professional-level organization accessible to everyone. This blend of physical supplies and digital resources creates a complete system for staying on track.
Educational tools like the ebook "How To Read Crochet Patterns: From 0 to Hero" provide the knowledge needed to tackle challenging projects with confidence. By mastering pattern instructions, you’re far less likely to abandon a project due to confusion or lack of technique.
Finally, the supportive crafting community offers encouragement and practical advice when you encounter obstacles. Whether you need troubleshooting help or simply a motivational boost, connecting with experienced crafters can turn potential roadblocks into manageable challenges.
With this all-encompassing support system - premium materials, digital tools, and a strong community - you’ll find it easier than ever to finish your projects and enjoy the process along the way.
Conclusion: From Starting Projects to Finishing Them
Completing a project isn’t just about skill - it’s about having the right approach. With thoughtful planning, quality tools, and a clear strategy, you can turn challenges into accomplishments.
Breaking projects into smaller, achievable steps using SMART goals provides a clear path forward. Even large undertakings, like crafting a blanket or sweater, feel more manageable when tackled one section at a time.
Having a dedicated workspace and keeping your materials organized can save you time and keep your momentum steady. Setting realistic daily goals - like finishing a certain number of rows - helps you make consistent progress without unnecessary stress.
Tracking your progress, whether through a journal or a digital tool, keeps you accountable and helps you avoid setbacks. These small habits build a reliable system that makes the crafting process smoother and more enjoyable.
Hooks & Needles offers tools to simplify every stage of your project. With premium European yarns, curated kits, and educational resources, we help eliminate the common frustrations that can arise. Our materials ensure consistency, while our guides and tutorials support you as you grow your skills.
Remember, practice turns effort into success. Every completed project boosts your confidence. Start with something small, apply these strategies, and watch your unfinished projects transform into completed creations.
It’s not about perfection - it’s about persistence and having the right tools by your side. Your next finished project is just around the corner.
FAQs
What’s the best way to break a large knitting or crocheting project into smaller, manageable steps?
Tackling a big knitting or crocheting project can feel daunting, but breaking it into smaller, manageable steps makes it much easier to handle. Start by defining your ultimate goal and then split it into specific, actionable tasks. For instance, kick things off by gathering all your materials, tidying up your workspace, and creating a timeline for each phase of the project.
Celebrate the small victories - whether it’s finishing a section or nailing a tricky new stitch. These little milestones can keep your energy and motivation up. Staying organized is key, too. Tools like project journals or checklists can help you monitor your progress and stay on track until you’ve completed your masterpiece.
What are the best tools to help me stay on track with my knitting or crocheting projects?
Staying organized with your crafting projects is much simpler when you have the right tools in your corner. Project journals are perfect for tracking your progress, capturing creative ideas, and noting down the materials you’ll need. If you prefer a more systematic approach, checklists can help you divide your project into smaller, actionable steps, making sure every detail is accounted for. Both tools can keep you focused and inspired from start to finish!
How can I set up a crafting space at home if I don’t have much room?
Even if you're short on space, you can still carve out a cozy and practical crafting area. Start by claiming a small corner or surface, like a desk or table, as your dedicated workspace. To save floor space, go vertical with storage solutions like wall-mounted shelves or pegboards to keep your supplies neatly organized. Consider space-saving furniture - think folding desks or storage ottomans that double as seating and storage. Use labeled bins or baskets to keep your materials tidy and easy to access. With a bit of ingenuity, you can turn even the tiniest area into your perfect crafting nook!