Quick Summary
This article explains common reasons why crochet edges become wavy and offers clear, practical solutions for a wavy crochet edges fix. Ideal for crafters seeking smooth, professional-looking borders.
One of the most common frustrations in crochet is achieving perfectly straight edges. Wavy or uneven borders can make even the most carefully crafted project look unfinished or unprofessional. This issue often arises from tension inconsistencies, stitch count errors, or pattern misunderstandings. Addressing these issues with clarity can help you crochet with confidence and reach satisfying, polished results.
Understanding why your edges are wavy is the first step toward fixing the problem. Instead of guessing, it’s important to analyze your technique and materials carefully. This article will help you identify the root causes of wavy edges and provide practical fixes, so you can improve your skills and enjoy smoother finishes on all your projects.
Whether you are working on a blanket, scarf, or garment, a neat edge enhances the overall appearance and functionality of your piece. We will also share some preventative tips and explain key crochet terms to ensure your understanding is both thorough and accessible.
Why Are Your Crochet Edges Wavy?
A wavy edge in crochet usually indicates tension issues, stitch count inconsistencies, or technique errors. Tension refers to how tightly or loosely you pull your yarn while crocheting. If your tension varies from one side to the other, the fabric will not lie flat and edges will ripple or wave. This is a very common reason for uneven edges, especially when a crafter is still developing consistency in their hand movements.
Another cause is stitch count errors. Missing or adding stitches in rows can cause fabric to bunch or stretch, creating waves along the edges. This often happens when a stitch is accidentally skipped or extra stitches are added at the beginning or end of a row. Careful counting and marking stitches can help prevent this problem.
Lastly, beginner crochet mistakes like inconsistent turning chain heights or incorrect edge stitches can contribute to wavy edges. For example, using too many or too few turning chains can distort the shape, as these chains create the height needed for the next row’s stitches. Recognizing these pitfalls early on makes a significant difference in your finished project’s appearance.
Common mistakes + fixes
One frequent mistake is using inconsistent tension across rows. To fix this, try practicing even hand movements and relaxing your grip. You can also switch to a hook size that better matches your yarn and personal tension.
Another typical error is incorrect stitch count. Always count your stitches at the end of each row and use stitch markers to mark the first and last stitch. This helps maintain consistency and avoid accidental increases or decreases.
Turning chains that don’t match the stitch height cause edge waves as well. For example, a double crochet stitch generally needs three turning chains. Adjust your turning chain count according to the stitch used and maintain this consistently throughout your work.
Pro tip: Use slip stitch edges for stability
Adding a slip stitch edge around your project after finishing can provide a neat border and add stability to wavy edges. Slip stitches create a firm, flat edge that helps prevent curling or rippling. This finishing technique is especially useful for projects like blankets or scarves where edge consistency matters.
Step-by-Step Wavy Crochet Edges Fix
To fix wavy crochet edges, begin with checking your tension. Crochet a small swatch and observe if the edges lie flat. Adjust your hand tension or try a different hook size until you achieve a smooth edge. This swatch test is a valuable tool to identify tension issues before starting your main project.
Next, ensure your stitch count is accurate. Count your stitches at the end of each row and use stitch markers at the edges to help maintain the correct number. If you find extra or missing stitches, unravel to the previous row and redo it carefully. This can save time in the long run and prevent frustration.
Lastly, pay close attention to your turning chains. Use the recommended number of chains to match the stitch height and consistently apply this across rows. If your pattern calls for single crochet, use one turning chain; for double crochet, use three. Consistency here prevents edge waves caused by uneven row heights.
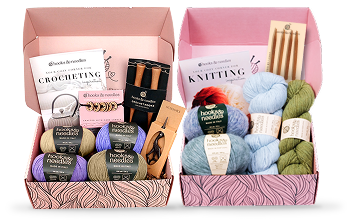
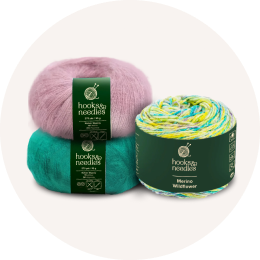
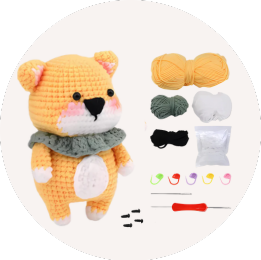
We'd love to craft with you.
Your crafting journey starts here. Get premium materials, exclusive designs, and video tutorials. Join a welcoming community and receive free patterns with your first order.
Cancel anytime, no commitment.

Understanding Crochet Tension Issues
Crochet tension is the consistent control of yarn flow through your fingers and hook. It affects fabric density, stitch size, and ultimately the shape of your piece. Uneven tension can cause your fabric to ripple or stretch, leading to wavy edges that detract from the final look.
To develop balanced tension, it helps to observe your hand position and the way yarn feeds through your fingers. Relax your grip slightly and practice with swatches to find a comfortable tension level. Remember, tension varies by project and yarn type, so adjusting your approach per project is common.
Using different hook sizes with the same yarn can also influence tension. If your edges are consistently wavy, experiment with a slightly larger or smaller hook to see if it improves edge flatness. Maintaining consistent tension across the entire row and between rows is key to avoiding wavy edges.
Beginner Crochet Mistakes That Affect Edges
Many beginner crochet mistakes cause uneven edges, but identifying these early can save you time and frustration. Missing or adding stitches in rows is a common issue that disrupts the fabric’s shape. Always count stitches and use markers to stay on track.
Another frequent mistake is not matching the turning chain to the stitch height. This can cause edges to bunch or stretch. Understanding that the turning chain acts as the first stitch of the new row helps you choose the correct chain count.
Lastly, inconsistent stitch placement on edges, such as skipping edge stitches or inserting the hook incorrectly, can cause waves. Focus on placing stitches precisely in the top loops or designated spaces as per the pattern instructions to maintain a straight edge.
Key Crochet Terms Defined
Tension: The tightness or looseness with which yarn is worked through stitches, affecting fabric size and shape.
Turning Chain: Chains made at the beginning of a row to bring the yarn up to the height of the next stitch, ensuring proper row alignment.
Slip Stitch: A stitch used to join or move yarn without adding height, often used for edging or finishing.
Single Crochet: A basic crochet stitch that creates a dense, tight fabric.
Stitch Count: The total number of stitches in a row, crucial for maintaining consistent shape and size.
Closing Thoughts
Wavy crochet edges are a common challenge, but with careful attention to tension, stitch count, and turning chains, they can be effectively managed and corrected. Taking the time to understand your technique and practicing with intention leads to smoother, more professional results.
Remember that consistency is the foundation of neat edges. Don’t hesitate to unravel and redo rows if needed — this patience will pay off in your finished project. Developing these skills builds confidence and allows your creativity to shine with every stitch.
At Hooks & Needles, we’re here to guide you through your crafting journey with clear instructions and supportive resources. Exploring our video tutorials and pattern support can further enhance your skills and provide inspiration for your next project.
FAQ
What causes wavy edges in crochet projects?
Wavy edges are usually caused by inconsistent tension, incorrect stitch counts, or improper turning chain height. These factors create uneven fabric shaping leading to waves.
How can I fix my wavy crochet edges?
Fix wavy edges by maintaining even tension, counting stitches carefully, and using the correct number of turning chains for each row. Practicing and adjusting hook size may also help.
What is the role of turning chains in preventing wavy edges?
Turning chains create the necessary height for new rows and keep edges aligned. Using too few or too many chains distorts row height and causes uneven edges.
Can changing my crochet hook size improve edge smoothness?
Yes, using a hook size that complements your yarn and tension can help produce more even stitches and reduce waviness along edges.
Are there finishing techniques to fix wavy edges?
Adding a slip stitch border can stabilize edges and create a neat finish, helping to reduce waviness after the main project is complete.