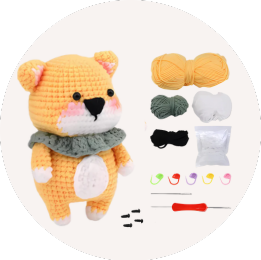
We're going to make some cute tiny bunnies, one with straight ears and another with floppy ears. These are perfect as keychains or as little gifts for kids and adults.
This project involves basic types of stitches and repetitive patterns, so it's super ideal for beginner crocheters and anyone who likes to spend their free time making a quick craft).
If you're ready, grab your yarn and hook, and let's get started! If you interested in similar project, check out our Hooks & Needles Subscription Box.
Difficulty:
• Beginner (includes small details)
Skills Needed:
• Single crochet stitch
• Slip stitch
• Magic ring
• Crocheting in spiral
• Increasing
• Decreasing
• Finishing and joining pieces
Size:
• 8 cm (3 1/8") from head to toe, 12 cm (4 3/4") including straight ears, when crocheted with double knit (DK) weight yarn and a 2,50 mm hook.
Materials:
• Yarn.
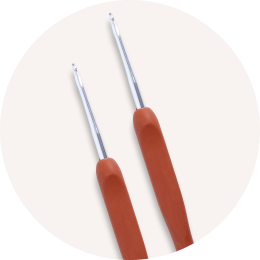
• 2,50 - 3,00 mm crochet hook (US size 2/C - 3/D)
• Polyester fiberfill, wool, or wadding for stuffing
• 8 mm (1/3") safety eyes or buttons, beads, or felt
• Cotton embroidery floss
• Yarn needle
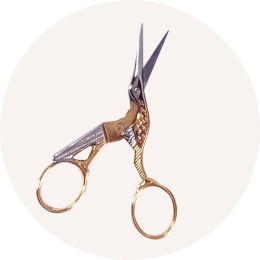
• Scissors
• Stitch marker
Crochet Terms and Abbreviations:
• mr, sc n = magic ring - crochet n (number) single crochet stitches into the adjustable loop
• sc = single crochet stitch (double crochet stitch in UK and Australia)
• sc n = crochet n single crochet stitches, one in each stitch
• SI st = slip stitch
• inc = increase - crochet two single crochet stitches in the same stitch
• dec = decrease - crochet two stitches together using the invisible decrease method
• (sc 4, inc) x n = repeat the pattern between parentheses n times
• [36] = number of stitches in a round after finishing the round
Notes:
• Work in a continuous spiral, do not join rounds or turn your work (unless instructe pattern).
• Use a stitch marker or a piece of yarn to mark the end or the beginning of a round up after completing each round.
• All stitches are worked into both loops (unless instructed otherwise in the pattern.
Patterns and Instructions
Head
1: mr, sc 6 = [6]
2: inc × 6 = [12]
3: (sc, inc) x 6 = [18]
4: (inc, sc 2) x 6 = [24]
5: (sc 5, inc) × 4 = [28]
6: sc 2, inc, (sc 6, inc) x 3, sc 4 = [32]
7-11: sc in each stitch = [321
12: sc 2, dec, (sc 6, dec) x 3, sc 4 = [28
13: (sc 5, dec) × 4 = [24]
Attach safety eyes between rounds 10 and 11, leaving 8 stitches (count 7 holes) between them.

Start stuffing the head. Keep adding a bit of fiberfill after every few rounds, stuffing the head firmly.
14: (dec, sc 2) x 6 = [18]
15: (sc, dec) x 6 = [12]
Sl st in the next stitch. Cut the yarn, leaving a long yarn tail for sewing, and fasten off. Stuff the head firmly. Embroider the nose.

Tip: Sew the ears to the head, embroider the nose, and add any embellishments before you sew the head to the body—this way you can fasten all yarn tails securely with a knot under the head.

Straight Ears
1: mr, sc 6 = [6]
2: (inc, sc) x 3 = [9]
3: (sc 2, inc) x 3 = [12]v
4-6: sc in each stitch = [12] 7: (dec, sc 4) x 2 = [10]
8: sc in each stitch = 10
9: (dec, sc 3) x 2 = [8]
10: sc in each stitch = [8]
11: (dec, sc 2) × 2 = [6]
Sl st in the next stitch. Cut the yarn, leaving a long yarn tail for sewing, and fasten off.
Do not stuff the ears. Flatten the ears and sew them to the head, placing them just below round 3.

Floppy Ears
1: mr, sc 6 = [6]
2: inc x 6 = [12]
3: (sc, inc) x 6 = [18]
4: (sc 3, inc, sc 4, inc) x 2 = [22] 5: sc in each stitch = [22]
6: (dec, sc 9) x 2 = [20]
7: sc in each stitch = [20]
8: (dec, sc 8) x 2 = [18]
9: sc in each stitch = [18]
10: (dec, sc 7) x 2 = [16]
11: sc in each stitch = [16]
12: (dec, sc 6) × 2 = [14]
13: sc in each stitch = [14]
14: (dec, sc 5) × 2 =[12]
15: sc, flatten the ear and sc through both layers
Cut the yarn, leaving a long yarn tail for sewing, and fasten it off. Sew the ears to the head, placing them just below round 6.

Body
1: mr, sc 6 = [6]
2: inc x 6 = [12]
3: (sc, inc) x 6 = [18]
4-9: sc in each stitch = [18]
10: (sc, dec) × 6 = [12]
Sl st in the next stitch. Fasten off and hide the yarn tail. Stuff the body firmly. Sew the head to the body. Add a bit more stuffing before closing the seam.

Arms and Legs
1: mr, sc 6 = [6]
2: (inc, sc) x 3 = [9]
3-4: sc in each stitch = [9]
Sl st in the next stitch. Cut the yarn, leaving a long yarn tail for sewing, and fasten it off. Stuff the arms and legs firmly.

Sew the arms to the sides of the body, placing them one row below the head, and the legs just above round 2 and a bit more towards the front of the body.
Finish sewing and hide all yarn tails. And you’re done!
