Understanding crochet patterns can feel tricky at first, but it’s easier than you think. This guide breaks down everything from abbreviations to diagrams, helping you follow instructions with confidence. Whether you’re working on a simple scarf or a detailed sweater, learning how to read patterns opens up endless possibilities. Let’s dive into the essentials and make pattern reading stress-free.
What Are Crochet Patterns?
Crochet patterns are like recipes for yarn projects. They include materials, stitch instructions, and often a difficulty level. Most patterns use abbreviations like sc (single crochet) and dc (double crochet) to save space. For example, “sc in next 3 sc, ch 1” means single crochet three times and chain once. Learning these terms makes patterns easier to follow.
Patterns also come in two formats: written instructions and diagrams. Written patterns explain steps in text, while diagrams use symbols to show stitch placement. Both formats are helpful, and many crafters use them together.
Key Abbreviations and Symbols
Here’s a quick cheat sheet for common abbreviations:
- ch: Chain
- sc: Single crochet
- dc: Double crochet
- sl st: Slip stitch
- tr: Treble crochet
Punctuation also guides your work. For example:
- Comma (,): Means “then.” Example: “Ch 2, dc in next st.”
- Asterisk (*): Marks repeats. Example: “Ch 1, sc in next st, repeat from *.”
- Parentheses (): Indicate a sequence to repeat. Example: “(sc, ch 1) 3 times.”
Diagrams use symbols like circles for chains and Xs for single crochet. These visuals show how stitches connect, making them useful for complex designs.
Materials and Preparation
Before starting, check the materials section. It lists yarn type, hook size, and finished dimensions. Some patterns also specify whether they use US or UK terminology - important since terms differ between the two. For example, a US double crochet equals a UK treble crochet.
Gather everything you need, including yarn, hooks, scissors, and stitch markers. Staying organized prevents interruptions and mistakes.
Tracking Progress
Tools like row counters and stitch markers can help you stay on track. Count stitches at the end of each row to ensure accuracy. For patterns with multiple sizes, highlight your size’s instructions to avoid confusion. If you lose your place, these tools make it easier to pick up where you left off.
Ready to Start?
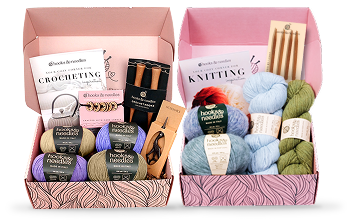
Mastering crochet patterns takes practice, but each project builds your skills. For extra support, explore Hooks & Needles kits. These include yarn, hooks, and step-by-step instructions tailored for all skill levels. With the right tools and guidance, you’ll finish projects you’re proud of. Let’s get crocheting!
Crochet Pattern Basics
What Crochet Patterns Are
Think of a crochet pattern as a recipe for crafting. It lays out the materials, techniques, and stitch combinations needed to transform yarn into a finished piece. Whether you're creating a straightforward granny square or tackling a detailed sweater with multiple parts, the pattern serves as your guide.
A typical crochet pattern includes the title, difficulty level, and a list of required materials like yarn, hook size, and additional tools. It also specifies the finished dimensions, so you know what size to expect, and indicates whether it uses US or UK crochet terminology. Copyright details protect the designer's work, followed by the step-by-step instructions to bring the project to life.
One important note: patterns assume you know how to make a slip knot. Familiarity with this basic structure helps you approach any pattern with confidence and understand what lies ahead before you even pick up your hook.
Why Patterns Use Abbreviations and Symbols
Crochet patterns often rely on abbreviations and symbols to keep instructions concise. Writing out every stitch name in full would make patterns unnecessarily long and harder to follow. For example, "sc" means single crochet, while "dc" stands for double crochet. A line like "sc in next 3 sc, ch 1, (sc in next dc, ch 4, sc in next dc) 4 times" communicates the steps in a fraction of the space compared to fully written instructions.
This shorthand also ensures consistency across patterns, making it easier for crocheters worldwide to follow the same set of instructions. Once you learn that "ch" means chain or "sl st" means slip stitch, you can tackle patterns from various designers without having to relearn the basics. The Craft Yarn Council has established guidelines that many designers follow, ensuring a standardized approach across the community.
Symbols in crochet diagrams work similarly. Each stitch is represented by a visual symbol, showing not only the type of stitch but also its placement. This system is especially helpful for crossing language barriers - a crocheter in Japan and one in Texas can both understand the same diagram, even if they speak different languages. By combining clarity and efficiency, this system makes patterns more accessible to a global audience.
Written vs. Diagram Formats
Written patterns use text and abbreviations to guide you step by step, making them ideal for projects where sequential instructions are key. Diagrams, on the other hand, use symbols and charts to visually map out stitch placement and sequence, which can be especially helpful for visual learners. Many patterns offer both formats to accommodate different preferences.
Neither format is inherently better - it all depends on your learning style and the project at hand. Some crafters find written instructions easier to follow because they can track their progress line by line. Others prefer diagrams for their ability to show how the finished piece will look and how the stitches connect. As you gain experience, you might find yourself using both formats together for added clarity, depending on the project.
With these fundamentals in mind, you're ready to dive deeper into interpreting written instructions.
sbb-itb-f7119e8
How to Read Written Pattern Instructions
Crochet patterns are like a secret code, using a shorthand language that guides you step by step. Once you understand the basics, these patterns become much easier to follow. Let’s break down the key abbreviations and punctuation you’ll encounter.
Common Crochet Abbreviations
Learning the standard abbreviations is the first step to reading patterns with ease.
The abbreviation ch (chain) lays the groundwork for your project by creating the base loops. From there, sc (single crochet) makes a short, tight stitch, while dc (double crochet) gives a taller, looser result. For even more height, there’s tr (treble crochet). To join rounds or move yarn without adding height, you’ll use sl st (slip stitch).
| Abbreviation | Full Term | Basic Description |
|---|---|---|
| ch | Chain | Foundation stitch |
| sc | Single Crochet | Short, tight stitch |
| dc | Double Crochet | Taller, looser stitch |
| tr | Treble Crochet | Even taller stitch |
| sl st | Slip Stitch | Joins rounds or moves yarn without height |
For example, if a pattern says, "sc in 2nd ch from hook and in each rem ch", it’s telling you to work a single crochet into the second chain from your hook and then continue in each remaining chain. Here, rem means "remaining." Once you’re comfortable with these abbreviations, even complex patterns will feel more approachable.
How Punctuation Guides Your Work
Punctuation in crochet patterns acts like road signs, helping you navigate repeats, groupings, and pauses. Decoding these marks turns seemingly complicated instructions into manageable steps.
- Comma: Works as a natural pause, meaning "then." For instance, "Ch 2, dc in next st" means chain two stitches, then double crochet in the next stitch.
- Asterisk (*): Highlights sections to repeat. For example, "Ch 1, skip next st, dc in next st" is one unit. "Repeat from * across" means to repeat this unit until the row ends.
- Parentheses (): Show how many times to repeat a sequence. "(Dc, ch 1) 3 times" means double crochet, chain one, and repeat that combination two more times.
- Brackets []: Used for larger repeats, often combined with asterisks. "[Dc, ch 1] across row" means repeat the bracketed section across the row.
- Semicolon (;): Separates rows or distinct sets of instructions. For example, "Row 1: sc across; Row 2: ch 1, turn" divides the instructions for two separate rows.
| Punctuation Mark | Function | Example |
|---|---|---|
| Comma | Pause between steps; read as "then" | Ch 2, dc in next st |
| Asterisk (*) | Marks a sequence to repeat | Ch 1, skip next st, dc in next st |
| Parentheses () | Indicates repetition count | (dc, ch 1) 3 times |
| Brackets [] | Enclose larger repeats | [Dc, ch 1] across row |
| Semicolon (;) | Divides rows or instruction sets | Row 1: sc across; Row 2: ch 1, turn |
By understanding punctuation, you can confidently follow even the most detailed instructions.
Materials and Special Notes Sections
Before starting any project, carefully read the materials and special notes section. This part of the pattern ensures you have everything you need and helps avoid mid-project surprises.
The materials section specifies the yarn type and weight, such as worsted or fingering weight, which influences the texture and drape of your finished piece. It also lists the hook size, usually in both millimeters and US sizes (e.g., 5.0mm/H-8). Using the correct size is essential to match the pattern’s intended results. The total yardage tells you how much yarn to buy - if a pattern requires 800 yards and you only have 600, you risk running out.
Patterns also clarify the crochet terminology used. Most US patterns follow US terminology, but this differs from UK terminology. For example, a US double crochet equals a UK treble crochet. Knowing which system the pattern uses avoids confusion.
Details like finished dimensions (e.g., "12 inches × 14 inches") provide an idea of the project’s scale. Special notes often include gauge information, which specifies how many stitches and rows should fit within a certain measurement, typically 4 inches. If your gauge doesn’t match, you may need to adjust your hook size to ensure the final piece turns out as intended.
Starting with a slip knot and an accurate foundation chain sets the tone for your project. Understanding these sections equips you to handle intricate patterns with confidence and precision.
How to Read Crochet Diagrams and Charts
Crochet diagrams provide a visual guide for your project, showing exactly where each stitch goes and how they connect. Unlike written patterns that rely on abbreviations, diagrams use symbols to create a clear picture of the finished design. Once you get the hang of it, diagrams can be especially helpful for intricate stitch patterns or circular projects.
Standard Crochet Symbols
Every stitch in crochet has a specific symbol, designed to represent its shape and height. Learning these symbols transforms the diagram’s abstract marks into clear, step-by-step instructions.
- A chain stitch is shown as a small oval or circle, reflecting its simple loop structure.
- The single crochet symbol looks like a small X or cross, representing its short height.
- For double crochet, you’ll see a vertical line crossed by a horizontal bar, forming a T shape.
- The treble crochet symbol is similar but taller, with two horizontal bars.
- A slip stitch is marked as a small dot or filled circle, representing its minimal height.
Here’s a quick reference table for these symbols:
| Symbol Shape | Stitch Type | Visual Description |
|---|---|---|
| Small oval or circle | Chain (ch) | Simple loop |
| X or small cross | Single Crochet (sc) | Short, compact |
| T shape | Double Crochet (dc) | Medium height |
| Line with two bars | Treble Crochet (tr) | Tall stitch |
| Small dot or circle | Slip Stitch (sl st) | Minimal height |
The taller the stitch, the taller the symbol, which allows you to visualize the texture and drape of your project before you begin. Most patterns include a key or legend to explain the symbols, typically located at the start or end of the diagram.
Following Rows and Rounds
Knowing where to start and how to follow the flow of a diagram is crucial for a smooth crocheting experience. Diagrams use visual cues to guide you through the pattern.
For row-based projects like scarves or blankets, odd-numbered rows (1, 3, 5) are read from right to left, while even-numbered rows (2, 4, 6) are read from left to right. This mirrors the back-and-forth motion of turning your work at the end of each row. The foundation chain is at the bottom of the diagram, and you build upward row by row.
In round projects like hats, doilies, or granny squares, the diagrams are circular or spiral-shaped, starting at the center. You work counterclockwise, moving outward with each round. Round numbers are usually placed near the starting point, and arrows or other indicators show the direction of your stitches. The circular layout of these diagrams matches the actual shape of your project as it grows.
Turning chains are shown at the start of each row or round as a vertical stack of chain symbols. These chains provide the height needed for the next row and help keep your edges straight. The diagram will indicate how many chains to make and whether they count as a stitch in the pattern.
With rows and rounds clearly mapped out, you can focus on how the stitches connect.
How Stitches Connect in Diagrams
Crochet diagrams also illustrate how stitches interact, showing where they merge, diverge, or create texture. The placement of symbols gives you a clear understanding of how to position your hook and build your stitches.
- When symbols are stacked directly on top of each other, it means you’ll work one stitch into each stitch from the previous row, creating a vertical alignment.
- If multiple symbols branch out from a single point, you’ll work several stitches into the same stitch or space below. This creates shapes like fans or shells, adding width to your project.
- When symbols converge at the top, it indicates a decrease, where multiple stitches are worked together to narrow the fabric.
Blank spaces or gaps in the diagram often represent open areas in your work, created by chain stitches. These gaps show where lace or decorative openings will appear. Horizontally spaced symbols indicate skipped stitches, which can add texture or create intentional holes.
Repeating sections are marked with brackets or asterisks, just like in written patterns. The diagram shows one full repeat, which you’ll continue across the row or around the round as needed. This visual repetition makes it easier to memorize the pattern, speeding up your progress.
Many crocheters find it helpful to use diagrams alongside written instructions. While the written pattern provides detailed guidance for materials and techniques, the diagram offers a clear overview of stitch placement and connections. For patterns with multiple sizes, diagrams may use different line styles or weights to differentiate between sizes. Marking your chosen size with a highlighter before starting can help you avoid confusion as you work.
Working with Multiple Sizes and Variations
Crochet patterns often include instructions for multiple sizes, making it possible to create projects tailored to different body types or dimensions. However, this added flexibility can also make patterns more complex. Mastering how to manage size variations ensures you follow the correct instructions throughout the project, avoiding mix-ups that could throw off your results. With the right approach, you can handle size variations smoothly and achieve consistent outcomes.
Reading Size Options
Patterns usually indicate size instructions using parentheses or brackets. The first number corresponds to the smallest size, with larger sizes listed in order. For instance, a pattern might say, "Chain 20 (24, 28, 32)", where 20 stitches are for small, 24 for medium, 28 for large, and 32 for extra-large.
This format is used throughout a pattern, from the foundation chain to stitch counts at the end of rows. For example, "Work 14 (18, 22) double crochet stitches" means you’ll work 14 stitches for small, 18 for medium, and 22 for large. Always check the materials section to confirm which size applies to you.
Some patterns simplify this by writing out each size's instructions separately, row by row. While this takes up more space, it eliminates confusion by letting you focus solely on your size. Others combine both methods, using parentheses for size-specific details while keeping shared instructions in regular text.
The materials section is especially important when working with multiple sizes. Yarn quantities, hook sizes, and other supplies often vary. For example, a small size might need 500 yards of yarn, while a large size requires 800 yards. Ensuring you have the right materials from the start prevents running out mid-project or overbuying.
Marking Your Size Instructions
One of the easiest ways to stay on track is by marking your size in the pattern before you start crocheting. This step helps prevent the common error of accidentally switching stitch counts between sizes, which can ruin the project's dimensions.
Use a highlighter or circle the numbers for your size throughout the pattern. A bright color that stands out against the text works best, creating a visual guide you can follow without constantly double-checking.
Another option is to create a simplified version of the pattern that includes only your size's instructions. Rewrite the pattern row by row in a notebook or word processor, removing all other size variations. Although this takes extra time upfront, it makes crocheting much easier since you’ll have a clear, personalized guide to follow.
Establishing a clear marking system from the beginning helps you avoid costly mistakes. Once your size is marked, your focus can shift to accurately tracking stitch counts.
Tracking Stitch Counts for Different Sizes
Accurate stitch counts are essential for working with multiple sizes. Each size has specific stitch counts that must be maintained to ensure the pattern works as intended. For example, if a small size starts with 20 stitches and a medium starts with 24, the extra stitches account for the additional width.
Count your stitches at the end of every row to confirm accuracy. After completing the foundation chain or first row, count your stitches carefully, excluding the loop on the hook and the slip knot. Make sure your count matches the pattern's requirement for your size before moving on.
Creating a stitch count chart can be helpful. Write down the expected stitch count for each row alongside its row number on a notecard or piece of paper. Check off each row as you complete it. If your count doesn’t match, you’ll know where to look for mistakes before moving forward.
Using tools like digital row counters can also make tracking easier. These devices allow you to record rows and stitches, giving you a quick reference if you need to pause and come back to your work later.
Keep your marked pattern, stitch count chart, and row counter within reach in your workspace. Before starting, compare your body measurements to the pattern’s finished dimensions to ensure you’ve chosen the correct size. Some crocheters also take photos at key points to compare their work against the pattern’s specifications, ensuring they stay on track.
If you realize you’ve been working the wrong size, the best solution depends on how far along you are. If you’ve only completed a few rows, it’s worth unraveling and starting over with the correct size to ensure the final product fits as intended. Careful tracking and consistent checks can save time and materials, helping you avoid the frustration of completing a project only to find it doesn’t fit.
Tips for Reading Patterns Successfully
Reading crochet patterns may seem daunting at first, but with a little preparation and some smart habits, you can turn it into an enjoyable and seamless process. These tips will help you avoid common pitfalls, stay accurate, and make the most of your creative projects.
Read the Full Pattern First
Before you pick up your hook, take time to read through the entire pattern. This gives you a clear overview of the project, including its structure, materials, and any special techniques you’ll need. It’s like studying a map before starting a road trip - it helps you plan the journey and avoid surprises along the way.
Pay close attention to the first section of the pattern. This is where you’ll find key details like the yarn type, hook size, finished dimensions, and whether the pattern uses US or UK crochet terms. Keep in mind that crochet terminology differs between these systems. For instance, a US single crochet is the same as a UK double crochet. Knowing which system the pattern follows is crucial to avoid working the wrong stitches.
Reading ahead also helps you prepare for any unique instructions or techniques. For example, the pattern might require you to work in rounds instead of rows or finish one section before starting another. By understanding these steps upfront, you can save time and avoid the frustration of having to undo your work. While beginners should stick closely to the written instructions to build their skills, experienced crocheters can often spot areas where they can add their own creative touches after reviewing the pattern.
Once you’ve read through the pattern, it’s time to gather your tools and materials.
Prepare Your Materials and Tools
Having everything ready before you start is a simple way to keep your project running smoothly. The materials section of the pattern lists everything you’ll need - yarn, the correct hook size, scissors, a yarn needle for weaving in ends, and any extras like buttons or stitch markers. Double-check that you have enough yarn and the right tools to match the pattern’s specifications.
An organized workspace can make a big difference. Keep all your supplies within easy reach to avoid interruptions and stay focused. This not only saves time but also reduces errors caused by distractions.
For added convenience, consider using kits like those from Hooks & Needles. These kits include carefully selected yarns, exclusive patterns, and professional tools, all in one package. They take the guesswork out of preparation, so you can jump straight into your project. Linda B., a satisfied customer, shared her experience:
After years of half-finished projects, I finally found patterns that actually work and yarn that doesn't fight me.
Once you’re set up, maintaining your momentum is all about tracking your progress.
Keep Track of Your Progress
Staying organized as you work is key to avoiding mistakes and keeping your project on track. Tools like digital row counters and stitch markers can make this much easier than relying on memory alone.
A digital row counter helps you keep track of where you are in the pattern, especially for larger projects where losing your place can be a costly mistake. Hooks & Needles offers a Digital Row Counter for $9.97, which is a handy tool to have if you need to pause and pick up your work later.
Stitch markers are another invaluable tool. Use them to mark specific points in your project, such as the start of a round, a decrease, or a color change. They’re particularly useful when working in rounds, where it’s easy to lose track of the beginning and end of each round.
For additional accuracy, write down your row and stitch counts directly on the pattern or a separate chart. Note the expected stitch count for each row and check off rows as you complete them. If your count doesn’t match, you’ll know exactly where to look for errors before moving forward. This is especially helpful when working on patterns with multiple sizes, as you can track adjustments and ensure you’re following the correct instructions.
Don’t forget to count your stitches at the end of every row. A common mistake for beginners is working into the first chain of a foundation chain instead of the second, which throws off the stitch count. Another error is counting the turning chain as a stitch in subsequent rows. Remember, turning chains are there for height, not for stitch counts - especially in single crochet.
Keep your marked pattern, stitch count chart, and tools close by in your workspace. Before you begin, compare your measurements to the pattern’s finished dimensions to confirm you’ve chosen the right size. These small but effective habits can turn the challenge of reading patterns into an enjoyable and rewarding part of your crochet journey.
Learn More at Hooks & Needles
Now that you’ve got the basics of reading crochet patterns down, it’s time to put those skills to good use. At Hooks & Needles, you’ll find everything you need to keep growing - printable guides, video tutorials, subscription boxes, and kits. These resources are designed to make your crochet journey smoother and more rewarding.
Printable Guides and Video Tutorials
Having clear, easy-to-follow references can make learning to read crochet patterns much simpler. Hooks & Needles offers expertly crafted printable PDFs that you can keep by your side as you work. These guides break down abbreviations, punctuation, and symbols with visuals and examples, making even complex instructions feel approachable.
What makes these guides stand out is their practical layout. They’re designed to reinforce your learning while also serving as quick reference tools. Whether you’re deciphering a tricky abbreviation or checking a symbol, these resources allow you to find what you need without frustration. By combining clear explanations with visual aids, these guides turn pattern reading into a straightforward process.
Hooks & Needles Subscription Box
If you’re looking for a steady stream of projects and learning opportunities, the Hooks & Needles Subscription Box is a game-changer. For $34.97 a month (with a value of over $120), you’ll receive a curated selection of premium yarns, exclusive patterns, professional tools, and fun extras - all delivered right to your door.
Each box is tailored to help you grow your skills. You’ll get yarn in various weights and colors, along with patterns that gradually increase in difficulty. The included tutorials are designed to guide you through that month’s project, offering step-by-step support for both the pattern and techniques involved. This personalized approach makes learning manageable and ensures you’re set up for success.
With a 4.8 out of 5 rating and over 225,000 boxes shipped, this subscription has helped many crafters turn unfinished projects into completed works of art. Jessica L. shared her story:
I went from buying yarn I never used to completing 12 beautiful projects this year. The difference? Having everything I need in one place.
The subscription takes the guesswork out of choosing yarn and patterns, pairing materials and instructions perfectly for your skill level. Plus, there’s no long-term commitment - you can enjoy it month-to-month.
Crochet Kits and Supplies
As you get more comfortable with reading patterns, Hooks & Needles’ all-in-one kits are a great way to practice. These kits include everything you need: the right amount of yarn, properly sized hooks, and clear instructions to guide you through the project from start to finish.
By eliminating common obstacles - like mismatched yarn and hooks or hard-to-follow patterns - these kits make it easier for beginners to succeed. They’re designed to help you build confidence and complete projects you’ll be proud of.
In addition to kits, Hooks & Needles offers a wide range of premium supplies, including yarns, crochet hooks, knitting needles, and accessories. You can also browse digital patterns, which are clearly labeled by difficulty level and estimated completion time, so you can pick projects that fit your current skills.
For more complex patterns, tools like the Digital Row Counter (available for $9.97) can help you stay on track. Having the right tools and materials at your fingertips allows you to focus on honing your skills instead of worrying about equipment issues.
Conclusion
Getting comfortable with reading crochet patterns takes time and practice. Over time, abbreviations, punctuation, and symbols become second nature, especially when you start with simpler projects and gradually move on to more challenging techniques.
Even seasoned crocheters can encounter unfamiliar abbreviations from time to time. Being prepared is key. Gather your materials, read the entire pattern before diving in, and keep track of your progress to catch any mistakes early.
Once you’ve mastered pattern reading, a world of creativity opens up - from cozy scarves to intricate garments. Hooks & Needles offers patterns for all skill levels, allowing you to progress at your own pace.
To make your crochet journey even smoother, Hooks & Needles provides plenty of helpful resources. From printable guides and video tutorials to subscription options, these tools can turn moments of frustration into confidence-building experiences.
Linda K. shares her experience:
The patterns actually work - no more half-finished projects!
With clear instructions, the right materials, and steady practice, you can turn confusion into completed creations. Reading crochet patterns is a skill that grows stronger with every project, building both your abilities and your confidence.
Ready to put your skills to the test? Check out the crochet and knitting kits at Hooks & Needles. They have everything you need to start your next project with ease and confidence.
FAQs
Should I follow written instructions or diagrams when working on a crochet pattern?
Choosing between written instructions and diagrams often comes down to what feels most natural to you and your level of experience. Written instructions provide detailed, step-by-step guidance, making them a great starting point for beginners. Diagrams, with their use of symbols to represent stitches visually, are often preferred by seasoned crocheters or those who find visual learning more intuitive.
If you're just starting out, written patterns can help you build confidence as you learn the basics. Once you're comfortable and familiar with stitch symbols, diagrams can be a time-saver and simplify even the most intricate patterns. To support your journey, HooksNeedles.com offers a variety of resources, including explainer videos and printable guides, to help you master both approaches and find the one that suits you best!
How can I make sure I follow crochet patterns with multiple size options accurately?
When working on crochet patterns that offer multiple size options, staying organized is key to avoiding mix-ups. Here’s how to keep everything clear and manageable:
- Mark your size: Before diving in, take a moment to highlight or underline the instructions for your selected size. This simple step helps you stay on track and minimizes the risk of accidentally following the wrong size directions.
- Rely on stitch markers: Stitch markers can be lifesavers! Use them to pinpoint crucial points in your work, such as rows, repeats, or sections with size-specific adjustments. They’re especially handy for patterns with shaping or intricate designs.
- Check measurements carefully: Most patterns include size charts or measurements in inches. Compare these with your own to confirm you’re following the right set of instructions for your project.
By staying organized and using tools like stitch markers, you’ll feel more confident tackling patterns with size variations. For even more guidance, head over to HooksNeedles.com for tutorials and detailed crochet resources!
What’s the best way to understand crochet pattern abbreviations and symbols?
Deciphering crochet patterns might seem daunting at first, but it’s easier than you think! Hooks & Needles offers step-by-step explainer videos and clear, printable guides that translate common abbreviations and symbols into straightforward language. These tools are crafted to help you gain confidence and tackle patterns like an expert, whether you’re just starting out or aiming to sharpen your skills.
Dive into practical tips, handy tricks, and useful tools that make reading patterns effortless, adding more joy to your crocheting journey!