Looking to challenge your crafting skills? This guide features 10 intermediate patterns designed to help you level up. From textured blankets to elegant cardigans, these projects introduce techniques like cables, lace, colorwork, and mosaic crochet. Each pattern includes tips on yarn selection, customization, and finishing touches to ensure a polished result. Here’s a quick overview of what you’ll find:
- Textured Chevron Blanket: Modern puff stitches for cozy throws.
- Lacy Shell Shawl: Delicate lacework with shell patterns.
- Mosaic Motif Throw: Geometric two-tone designs.
- Cabled Pillow Cover: Classic cables for home décor.
- Multi-Stitch Infinity Scarf: A blend of textures in a loop design.
- Structured Tote Bag: Durable and stylish for daily use.
- Bobble Stitch Baby Blanket: Raised bobbles for nursery charm.
- Openwork Cardigan: Lace-inspired elegance with shaping techniques.
- Motif-Based Table Runner: Granny squares joined seamlessly.
- Gradient Fade Wrap: Smooth color transitions for a striking effect.
These patterns are perfect for refining your skills while creating functional and stylish pieces. With clear instructions and helpful tips, you’ll confidently tackle advanced stitches and techniques.
50 crochet project ideas for INTERMEDIATE to ADVANCED with free patterns (not beginner friendly)
Tips for Intermediate Crafters
When working with more intricate stitches, opt for solid or semi-solid yarns to let the texture shine. Variegated yarns, while beautiful, can sometimes overshadow detailed patterns. For lace projects, choose yarns that emphasize stitch definition - blends with wool and a hint of silk or alpaca are excellent choices, as they provide both structure and an elegant drape.
Always swatch using the actual pattern stitch, not just basic stitches. This gives you a better sense of how the design will look. Be sure to block your swatch the same way you plan to block the finished piece - this step is key for accurate results.
Invest in ergonomic tools, like the crochet hooks and knitting needle sets from Hooks & Needles, to reduce hand fatigue during extended crafting sessions. Comfort makes a big difference when tackling complex projects.
Refine your chart-reading skills by starting with simpler colorwork charts. Once you're comfortable, move on to more detailed lace or cable diagrams. A magnetic board can be a lifesaver for keeping track of rows and ensuring you don’t lose your place.
Pay attention to tension. For colorwork, aim for consistent tension to avoid puckering, while lace often benefits from a slightly looser grip to achieve a delicate, open look.
Stay organized throughout your projects. Use stitch markers to keep track of pattern repeats and maintain a project notebook to jot down modifications, yarn usage, and any notes for future reference.
Blocking is essential for a polished finish, but the method matters. For wool cables, steam blocking works wonders, while wet blocking brings out the best in cotton lace. Invest in quality blocking mats and T-pins to make the process easier and more effective.
Finally, plan ahead when combining techniques. Schedule color changes to avoid clashing with increases or decreases, and practice cables and lace separately before attempting to merge them in one project. These strategies will help you confidently tackle the exciting patterns ahead.
1. Textured Chevron Blanket
The textured chevron blanket takes the timeless zig-zag pattern and adds depth with dimensional puff stitches, creating a blanket that's both visually appealing and wonderfully soft to the touch. This design puts a modern spin on the classic chevron, making it a perfect choice for those looking to combine style with comfort.
Key Techniques or Stitches Featured
This pattern brings together puff stitches and single crochet to form the signature chevron waves. Puff stitches, which involve pulling loops together into one stitch, add texture, while chain-1 spaces help define the peaks and valleys of the chevron pattern.
The chevron shape is maintained through a specific increase-and-decrease formula, ensuring that each row builds seamlessly on the last.
Suggested Yarn Type and Amount
For this project, worsted weight yarn is ideal, as it provides excellent stitch definition, making the puff stitches stand out beautifully. To create a throw-sized blanket (about 50″ x 60″), check your gauge carefully to determine the exact yardage needed - this will vary depending on your tension and yarn choice.
Solid or semi-solid colors work best to highlight the intricate texture of the chevron design.
Estimated Finished Size
This pattern offers flexibility with eight standard size options, ranging from baby blankets to king-sized throws. For reference:
- Throw-sized blanket: ~50″ x 60″
- Baby blanket: ~36″ x 40″
You can also adjust the width using the provided foundation formula, making it easy to customize the blanket to your desired size.
Customization and Troubleshooting Tips
To customize the width, follow this foundation chain formula: multiples of 31 + 29 + 1. This ensures that the chevron peaks and valleys align perfectly, no matter the dimensions.
Maintaining consistent tension is key to achieving a polished look. As A Crocheted Simplicity advises:
"Be mindful when working the ch-1's to keep them the same width as the single crochet and puff stitches. When working the ch-1's, it's easy to begin tightening them as you go. This will cause your blanket to cinch inward."
Start with the hook size recommended for your yarn and adjust as needed, depending on whether you prefer a more relaxed or structured fabric.
If substituting yarn, make a test swatch first to ensure it works well with the puff stitch technique. This will save time and frustration later on.
Finish your blanket with a simple single crochet border that complements the chevron edges. You can add extra rounds to achieve your desired border width. Once complete, block the blanket to smooth out any uneven tension and give it a polished, professional finish.
Next, dive into a design that builds on these techniques for an even more intricate project.
2. Lacy Shell Shawl
The lacy shell shawl offers a blend of sophistication and simplicity, making it a perfect choice for intermediate crafters looking to try their hand at delicate lacework. Its signature shell pattern gives the shawl a graceful drape, making it versatile enough for both special occasions and everyday outfits.
Key Techniques or Stitches Featured
This design focuses on the two-row lacy shell stitch. The first row sets the foundation with chain (ch) and single crochet (sc) stitches, while the second row creates the shell pattern by working five double crochet (dc) stitches into the same stitch.
Suggested Yarn Type and Yardage
To achieve the shawl's light and airy look, use a super fine number 1 or 2 (Light Fingering weight) yarn. You'll need about 918 yards, which is often available in a single skein.
Estimated Finished Size
When completed, the shawl measures 30 inches in length (from the center of the wingspan to the tip) and 75 inches in width. These dimensions can be adjusted to suit your personal preferences.
Customization and Troubleshooting Tips
Make the shawl uniquely yours by customizing its size or experimenting with different yarns. To ensure success, refer to the provided resources, including clear photos of the initial rows, step-by-step video tutorials for both right- and left-handed crafters, and a detailed progression chart. These tools will guide you through each stage of the project with ease.
3. Mosaic Motif Throw
The mosaic motif throw blends geometric designs with a striking two-color technique. By pairing solid and variegated yarns in repeating patterns, this style creates eye-catching textures and effects. It's a fantastic choice for intermediate crafters looking to dive deeper into colorwork.
Key Techniques or Stitches Featured
Mosaic crochet relies on a combination of single crochet (sc) and chain (ch) stitches to form its iconic geometric patterns. Working with two colors per row, you'll carry the unused yarn behind your work, which adds depth to the design. Along the way, you'll refine your skills in managing color changes, carrying yarn, and joining motifs. The pattern typically starts with a foundation chain that matches the motif repeat, ensuring a perfectly aligned design.
Customization and Troubleshooting Tips
One of the best things about mosaic patterns is how easy they are to customize. To adjust the size, simply modify the initial chain count for width or add extra rows for length. Experiment with colors - try two solids for a classic look or pair a solid with a variegated yarn for added dimension. Keep the tension loose on the unused yarn to avoid puckering, and join motifs using a whip or slip stitch for a smooth, lightweight finish. These techniques will help you create a polished and perfectly aligned throw that’s uniquely yours.
4. Cabled Pillow Cover
The cabled pillow cover brings a touch of sophistication to home décor by incorporating classic cable knitting techniques. This project takes simple knit and purl stitches and transforms them into beautifully textured cables, making it an excellent choice for intermediate knitters looking to elevate their skills. Plus, the straightforward assembly ensures a polished final product.
Key Techniques or Stitches Featured
This pattern focuses on cable knitting, where knit (k) and purl (p) stitches are crossed with the help of a cable needle to create those iconic twisted designs. You'll also need to read cable charts to follow the pattern repeats accurately. Once the knitting is complete, basic sewing skills will help you assemble the pieces into a finished pillow cover. Mastering these techniques opens the door to experimenting with more advanced designs in the future.
Customization and Tips
This project is incredibly adaptable. You can easily tweak the size or switch up the cable pattern to match your personal style or home décor needs. Let your creativity shine!
5. Multi-Stitch Infinity Scarf
If you're ready to take your skills up a notch, this infinity scarf pattern offers the perfect challenge. It's a continuous loop design that blends various stitch techniques, creating a rich texture and a visually interesting project. The result? A stylish and versatile scarf that's both fun to make and practical to wear.
Key Techniques and Stitches
This pattern is all about experimenting with different stitches and mastering smooth transitions between them. To keep everything on track, stitch markers will be your best friend - they help you mark transitions and ensure the design stays balanced. When choosing your yarn, go for something that brings out the details of the stitches, as this will make the textures pop.
Yarn Suggestions and Tips
Opt for a mid-weight yarn that highlights stitch definition and supports the intricate textures of the pattern. A good yarn choice not only enhances the look of your scarf but also ensures it's soft and comfortable when worn. Think about how the yarn feels against your skin and how well it complements the stitches.
Finishing Touches and Personalization
Once you've picked the perfect yarn, it's time to bring the design to life. The finished scarf is designed to wrap snugly around the neck, offering warmth and style. Take the time to test each stitch section to maintain a consistent gauge, and don't be afraid to add your own flair. Playing with complementary yarn colors can give the scarf a personalized touch that matches your style.
6. Structured Tote Bag
A structured tote bag blends practicality with a touch of elegance. This project is ideal for intermediate crocheters looking to refine their skills with firmer construction techniques while crafting something useful for everyday life. Thanks to its structured design, this bag maintains its shape perfectly - whether you're using it to carry groceries, craft supplies, or everyday essentials.
Key Techniques or Stitches Featured
This bag relies on single crochet and half double crochet stitches, worked in tight, consistent rows to achieve its structured form. Maintaining even tension throughout is essential to ensure the bag holds its shape. You'll also use foundation chains and slip stitch seaming to create clean edges and attach handles securely.
To achieve a polished, seamless appearance, the sides are worked in continuous rounds. This eliminates visible seam lines and gives the tote a smooth, professional finish. Be sure to keep an accurate stitch count when working in the round to avoid uneven edges.
Suggested Yarn Type and Yardage
For this project, opt for worsted weight cotton yarn. Cotton is durable, provides the necessary structure, and is machine washable - perfect for a bag that will face regular use. You'll need about 800–900 yards of your main color, plus 200 yards for contrasting handles or trim.
Choose yarns with strong stitch definition to highlight the bag's structured design and give it a polished look. Cotton yarn also ensures easy maintenance, making it a practical choice for everyday wear and tear.
Estimated Finished Size
When completed, the tote measures approximately 14 inches wide, 12 inches tall, and 4 inches deep, with handles adding an additional 8 inches in height. The size is versatile - spacious enough to carry your daily essentials without being cumbersome to crochet or use.
Customization or Troubleshooting Tips
Consistency in your gauge is key to achieving a sturdy, well-shaped bag. If you'd like to adjust the size, you can modify the width in increments of 6 stitches or add extra rounds to increase depth. Use stitch markers to position handles evenly and count stitches carefully to ensure balance. You can also adjust the handle length to suit your preference when attaching them.
sbb-itb-f7119e8
7. Bobble Stitch Baby Blanket
Looking to challenge your skills with a project that’s as practical as it is eye-catching? The bobble stitch baby blanket strikes the perfect balance between softness for a baby’s delicate skin and a textured design that’s fun to create. With its raised bobble details and elegant finish, this blanket is a standout piece for any nursery. Plus, it’s a great opportunity to refine your stitch techniques while crafting something both beautiful and functional.
Key Techniques or Stitches Featured
The highlight of this pattern is the Double Crochet 5 Together (DC5tog) Bobble, which forms the signature raised bumps. To create a DC5tog, you’ll:
- Yarn over, insert the hook into the stitch, and pull up a loop.
- Yarn over again and pull through 2 loops.
- Repeat this process four more times in the same stitch until you have 6 loops on your hook.
- Finally, yarn over and pull through all the loops, keeping the last pull snug to ensure a neat bobble.
The base of the blanket is crafted with Herringbone Half Double Crochet (HHDC), which provides a subtle woven texture that complements the bobbles. For a polished edge, use Front and Back Post Double Crochet (FPDC & BPDC) to create a ribbed border. These techniques work together to give the blanket its unique structure and finish.
Keep in mind that the bobbles are crafted on the "wrong" side of the fabric so they puff out on the "right" side. To enhance the effect, follow each bobble with a single crochet stitch. The spacing between the bobble rows can be adjusted to suit your preference: closer rows create a denser texture, while wider spacing makes each bobble more distinct.
Suggested Yarn Type and Yardage
For this project, a baby-safe acrylic yarn is an excellent choice. It’s soft, durable, and easy to care for - perfect for baby items. A 100% acrylic yarn in 5 oz skeins with 362 yards each works well. You’ll need:
- 4 skeins of White for the main color.
- 1 skein each of Soft Red, Soft Peach, Aqua, and Navy for subtle color accents.
Acrylic yarn is machine washable and hypoallergenic, making it ideal for everyday use. Alternatively, cotton blends can be used for a breathable, natural fiber option that’s also easy to maintain.
Estimated Finished Size
The finished blanket typically measures 36 inches by 42 inches, a versatile size for swaddling, tummy time, or as a decorative piece in the nursery. While your gauge and hook size may slightly alter the dimensions, this size is perfect for most baby needs without making the project too overwhelming.
Customization or Troubleshooting Tips
Want to adjust the size? Make sure your starting chain is a multiple of 7, then add 8 extra stitches to keep the pattern intact. If you’d like to speed up the process, try using a hook one size larger, but check that your fabric remains firm and doesn’t become too loose.
It’s always a good idea to create a small swatch before diving in. This allows you to check your stitch tension and ensure the pattern looks just right. Once the blanket is complete, block it by laying it flat on a foam board, pinning the corners, misting it lightly with water, and letting it dry overnight. This step will help straighten the edges and even out the stitches for a polished finish.
If your bobbles aren’t popping as much as you’d like, make sure the final pull-through is snug but not too tight. You can also experiment with the spacing between bobble rows to achieve either a subtle or bold texture, depending on your preference.
8. Openwork Cardigan
Elevate your knitting game with an openwork cardigan that blends lace-inspired elegance with timeless style. This piece not only enhances your wardrobe but also challenges your skills, offering a chance to refine shaping techniques while creating a practical and stylish garment. Below, you'll find all the essential details to guide you through this rewarding project.
Key Techniques or Stitches Featured
The cardigan's design relies on a few key techniques that bring out its intricate details:
- Yarn overs paired with decreases: Use k2tog for right-leaning decreases and SSK for left-leaning decreases to create decorative holes that form the lace pattern.
- Short rows and wrap-and-turn: These techniques ensure smooth shoulder shaping and a gracefully curved neckline.
- M1L and M1R increases: Perfect for shaping the body panels, adding structure without disrupting the flow of the lace.
For the button band, you'll need to pick up stitches along the front edges, working at a ratio of 3 stitches for every 4 rows. This ensures a flat, even band without puckering. Maintaining consistent tension while working the openwork sections is crucial to achieving a balanced, polished look.
Suggested Yarn Type and Yardage
Selecting the right yarn is key to highlighting the cardigan’s delicate structure. A DK weight cotton blend or lightweight wool is ideal, offering both drape and stitch definition. Each 3.5 oz skein typically provides about 231 yards. For a medium size (38-inch bust), plan on using 6–7 skeins for the main body, with an extra skein if you’d like to add length.
- Mercerized cotton: Provides crisp stitch definition, making the lacework stand out.
- Superwash wool blends: Offer flexibility with tension variations and ensure the drape needed for a flattering fit.
Estimated Finished Size
The cardigan is designed to fit a range of bust measurements from 32 to 50 inches, with a finished length of 24–26 inches. The ¾-length sleeves measure 16–18 inches. For the best fit, aim for a garment that’s 2–4 inches smaller than your actual bust measurement.
Customization or Troubleshooting Tips
Getting the gauge right is essential for this project. Knit and block a generous swatch before starting to ensure accuracy. If you need to adjust the sleeve length, do so in 2-inch increments to avoid disrupting the lace pattern.
Blocking is the secret to bringing out the beauty of the openwork. Use blocking wires or pins to fully open up the lace sections. Start by soaking the pieces in cool water with a gentle wool wash, then pin them to the desired measurements on blocking mats.
If you drop a stitch, don’t panic! Use a crochet hook to pick it back up, following the yarn overs as your guide. With patience and attention to detail, this cardigan will not only refine your intermediate knitting skills but also become a stylish addition to your wardrobe.
9. Motif-Based Table Runner
Elevate your dining table with a motif-based table runner that brings together individual granny squares into a beautifully unified design. This project combines the precision of crafting individual squares with the rewarding process of joining them into a seamless piece. The geometric patterns add visual intrigue while keeping a clean, polished look that works well with any style of décor.
Key Techniques or Stitches Included
This table runner builds on basic crochet skills while introducing some exciting stitch variations. The foundation lies in granny square variations, enhanced with cluster stitches and popcorn stitches to add rich texture to each motif. To achieve a delicate, lacy effect, chain spaces are used for openwork details.
The method for joining the squares is just as important as the motifs themselves. The join-as-you-go technique connects the motifs during the final round, saving you the hassle of sewing them together later. This not only creates smooth transitions between squares but also ensures consistent tension throughout the runner.
For added depth and vibrancy, experiment with color changes within each motif. Carry your yarn neatly along the side when switching colors, and use invisible joins for a polished look. These techniques are key to achieving a professional finish and highlight the yarn’s characteristics beautifully.
Recommended Yarn and Yardage
For this project, a worsted weight cotton or cotton blend yarn is ideal. Cotton provides the structure needed to keep the runner flat while being easy to maintain. A single 3.5 oz skein typically offers 190-200 yards, and for a 60-inch runner made up of 15 motifs, you'll need about 1,200-1,400 yards in total.
If you want to enhance the details of the motifs, mercerized cotton is a great choice. It offers excellent stitch definition and a subtle shine. Alternatively, a cotton-bamboo blend adds a touch of softness. For a monochromatic look, plan on 4-5 skeins. If you prefer a two-tone design, 2-3 skeins of each color will suffice.
Estimated Finished Size
Each motif measures approximately 6 inches square when blocked. A standard table runner of 15 motifs, arranged in a 3×5 layout, will measure about 18×30 inches - perfect for smaller tables or console tables. For longer dining tables, you can extend the project to include 21 motifs (3×7 layout) for a 42-inch length or 27 motifs (3×9 layout) for a 54-inch runner.
The width stays consistent at 18 inches, offering ample coverage without overwhelming the table. Adding border rounds can increase the dimensions by 1-2 inches in both length and width, depending on your preference.
Tips for Customization and Troubleshooting
Maintaining consistent gauge across all motifs is crucial for a polished finish. Before diving into the full project, create a test motif to ensure it matches the desired size. If the motifs vary in size, adjust your hook size rather than altering your tension mid-project.
When working with multiple colors, weave in your ends as you go to reduce bulk at the joining points and keep the openwork sections neat.
For the best results, block each motif individually before joining. Pin each square to a 6×6-inch size on a blocking mat, ensuring the corners are sharp and the edges are straight. If you're using natural fibers, a light steaming works well; for synthetic blends, try the spray-and-pin method.
If a square turns out slightly smaller than the others, gently stretch it during blocking rather than redoing it entirely. This project not only sharpens your skills in motif joining but also allows you to experiment with textured designs, creating a functional and stylish centerpiece for your table.
10. Gradient Fade Wrap
Add a touch of artistry to your projects with a wrap that transitions beautifully through shades of a single color family, creating a smooth and eye-catching gradient effect. This design invites you to experiment with blending colors seamlessly for a polished look.
Choose yarns that naturally flow from one shade to the next. Take your time to test different stitch patterns, ensuring the transitions are as smooth as possible. Adding a light finishing touch can help soften any abrupt changes and give the wrap a refined appearance.
Let your creativity shine through with every stitch and every row.
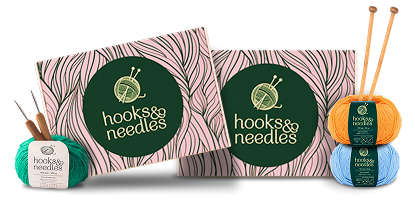
Yarn and Tool Recommendations from Hooks & Needles
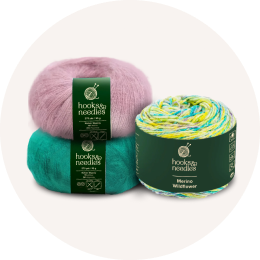
Hooks & Needles has everything you need to bring your intermediate crafting projects to life with precision. They offer premium European yarns and professional-grade tools tailored specifically for those ready to tackle more advanced patterns.
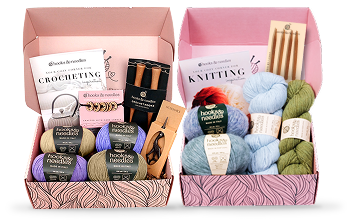
If you're looking for an all-in-one solution, check out their subscription boxes priced at $33.97 each. These thoughtfully curated kits include hand-selected European yarns, exclusive patterns, and high-quality tools. Each box caters to various skill levels, with at least one pattern specifically designed for intermediate crafters. Plus, they don’t just stop at materials - they include essential tools and tutorials to guide you through your projects.
"I went from buying yarn I never used to completing 12 beautiful projects this year. The difference? Having everything I need in one place." – Jessica L.
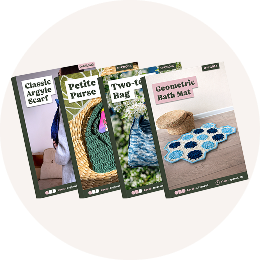
The included pattern booklets come with QR codes linking to video tutorials, making it easy to learn new techniques as you go. With a stellar 4.8/5 rating and over 225,000 boxes shipped, these kits have simplified crafting for countless enthusiasts.
In addition to the subscription boxes, Hooks & Needles also provides professional tools designed to boost both your comfort and efficiency while you work.
For a limited time, you can get 20% off your first subscription box. Shipping is $9.97, so it’s a great opportunity to try these kits and elevate your crafting game!
Care and Finishing Tips for Intermediate Projects
The finishing touches can make all the difference in how your project turns out. To keep your work looking its best, always check the care instructions on your yarn manufacturer's label. These labels provide essential details about washing and handling methods for different fibers like wool, cotton, and acrylic.
Proper care ensures your project maintains its texture, shape, and durability over time. By following these instructions, you'll give your intermediate project a polished, professional appearance that truly stands out.
Conclusion
Intermediate patterns are an exciting next step for crafters looking to push their skills beyond the basics. These ten projects highlight how textured stitches, colorwork, and structural techniques can transform simple yarn into polished, standout creations.
With techniques like intricate cables and delicate openwork, intermediate crafting builds on your foundational knowledge while introducing new challenges. And with so many patterns to explore, there’s no shortage of opportunities to grow and refine your abilities.
The beauty of these patterns lies in their flexibility. They allow you to create everything from detailed garments and stunning accessories to elegant home decor. Imagine crafting a mosaic-patterned throw to brighten your living space or a sturdy, stylish tote bag perfect for everyday use. By choosing quality materials and focusing on details like blocking and seaming, your handmade pieces can achieve a finish that rivals store-bought items. With the right yarn from Hooks & Needles and a bit of care, your projects can look like they came straight from a boutique.
Take on these patterns with confidence. Each new technique mastered brings you closer to crafting the refined, professional-quality pieces you’ve always admired. These designs are the perfect way to showcase your growing skills and keep your creative journey moving forward.
FAQs
What challenges might intermediate crafters face with these patterns, and how can they tackle them?
Intermediate crafters might encounter some hurdles with these patterns, like managing intricate stitch combinations, navigating advanced colorwork, or perfecting precise shaping. These elements often demand a sharp eye for detail and a good dose of patience.
To make things easier, try breaking the pattern into smaller, more manageable sections. If you come across techniques that are new to you, practice them on a small swatch before diving into the full project. Investing in good-quality tools and yarn can also make a big difference, offering better stitch clarity and easier handling. And don’t forget - enjoying the process is just as rewarding as completing the project!
What are the best tips for making my intricate knitting or crocheting projects look polished and professional?
To achieve a polished and professional look for your knitting or crocheting projects, start with top-notch materials. Opt for premium yarns and dependable tools that align with your chosen pattern. Carefully read through the instructions beforehand to ensure you’re clear on each step. Pay extra attention to details like tension and finishing techniques, as they can significantly impact the final outcome. Once your project is complete, consider blocking it to smooth out stitches and elevate its overall appearance.
What makes the Hooks & Needles subscription boxes great for intermediate crafters?
Hooks & Needles subscription boxes are a great option for intermediate crafters, offering a blend of convenience, quality materials, and creative inspiration. Each month, you'll receive a carefully selected box filled with premium yarn, essential tools, and easy-to-follow patterns designed to help you create beautiful projects while refining your skills.
The patterns cater to different skill levels, providing just the right amount of challenge to keep things interesting and help you improve. On top of that, the boxes often include exclusive items and surprise goodies, adding extra value. Subscribers also appreciate the flexibility to skip a month or cancel anytime, making it easy to fit the service into your lifestyle.