Gauge is the secret to creating crochet projects that fit perfectly and use the right amount of yarn. It measures how many stitches and rows fit into a 4" × 4" square of fabric. Skipping this step can lead to sweaters that don’t fit or running out of yarn mid-project. By learning how to check and adjust your gauge, you can ensure your projects turn out just as the pattern intended. Here’s what you need to know to get it right.
What is Crochet Gauge?
Gauge refers to the number of stitches and rows in a 4" × 4" square. Patterns include gauge instructions to help you match the designer’s measurements. For example, if a pattern says, "16 stitches and 10 rows equal 4 inches in single crochet", this tells you the tension and stitch size needed for the project to come out correctly. If your gauge is off, the dimensions of your project will be too.
Why Gauge Is Important
- Fit: For garments like sweaters or hats, matching gauge ensures the right size. Even a small difference can make a piece too tight or too loose.
- Yarn Usage: A looser gauge uses more yarn, while a tighter gauge uses less. This matters for large projects where running out of yarn can be frustrating.
- Appearance: Gauge affects the texture and drape of the fabric. Matching the pattern’s gauge ensures your project looks as intended.
Factors That Affect Gauge
- Stitch Type: Tighter stitches like single crochet create more stitches per inch, while looser stitches like double crochet have fewer.
- Yarn Weight and Fiber: Thicker yarns create fewer stitches per inch, while thinner yarns create more. Fiber types (e.g., cotton vs. wool) also affect gauge.
- Hook Size: Larger hooks make looser stitches, while smaller hooks create tighter ones.
- Personal Tension: How tightly or loosely you hold the yarn and hook impacts the size of your stitches.
How to Check Your Gauge
- Make a Swatch: Crochet a 6" × 6" square using the yarn, hook, and stitch type specified in the pattern. This size allows you to measure the center without edge distortions.
- Let It Rest: Lay the swatch flat and let it settle to ensure accurate measurements.
- Measure: Use a measuring tape to count how many stitches and rows fit into a 4" × 4" section in the center of your swatch.
- Adjust if Needed: If your gauge is too loose, switch to a smaller hook. If it’s too tight, try a larger hook. Repeat the process until your swatch matches the pattern.
When Gauge Matters Most
Gauge is critical for fitted garments like sweaters, hats, and socks. For flexible projects like blankets or scarves, you can be less exact, though checking gauge helps with yarn planning.
Substituting Yarn
When swapping yarns, match the weight and check the label for gauge recommendations. Always make a swatch to test the new yarn, as different fibers and brands behave differently. Adjust your hook size as needed.
Tools for Better Gauge
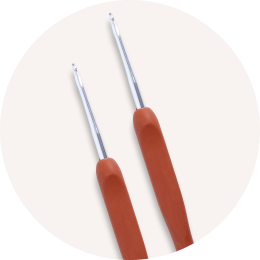
- 9 Pcs Blue Crochet Hook Set with Soft Handle ($16.97): Includes multiple sizes for easy adjustments.
- LED Crochet Hooks: 11-in-1 Rechargeable ($31.97): Perfect for detailed work and low-light conditions.
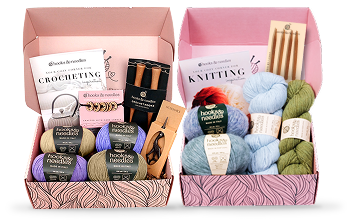
- Hooks & Needles Subscription Box ($34.97/month): Includes yarn, patterns, and tools designed to make gauge easier.
Final Thoughts
Gauge may seem like an extra step, but it’s the key to successful crochet projects. Ready to start? Explore our Subscription Box or Complete Kits for tools and patterns that make every stitch count.
sbb-itb-f7119e8
What Gauge Is and Why It Matters
Gauge refers to the number of stitches and rows that fit into a 4" × 4" square of crochet fabric. It’s a key detail in every crochet pattern. When a pattern states something like "16 stitches and 10 rows equal 4 inches", it’s the designer's guide for achieving the correct size and proportions.
Matching your gauge to the pattern is essential if you want your finished piece to have the right dimensions. For example, if a sweater pattern specifies 100 stitches across the back at a given gauge, those stitches determine the intended width. Even small discrepancies - like one extra or missing stitch in 4 inches - can add up, leading to a significant size difference in the final piece.
Gauge also impacts how much yarn you’ll need. A tighter gauge, where you have more stitches in 4 inches, means smaller stitches and less yarn usage. On the other hand, a looser gauge creates larger stitches, requiring more yarn. This becomes especially important for larger projects, where small variations can quickly add up.
Your personal tension plays a big role in gauge. Even if two crocheters use the same yarn and hook, their gauge can differ because of subtle variations in how they form stitches and handle the yarn. That’s why checking your gauge before starting a project is so important.
Skipping this step can lead to frustrating results. Your garment might not fit properly, you could run out of yarn mid-project, or the fabric’s texture and drape might not look as the designer intended. Matching gauge ensures your piece turns out as planned, both in size and appearance.
Most patterns use a standard gauge measurement of 4" × 4", but some international patterns may use 10 cm × 10 cm (roughly 3.9" × 3.9"). Regardless of the system, the goal is the same: match the designer’s stitch and row count within that square to ensure your project comes together perfectly.
Next, we’ll dive into what affects your gauge and how you can adjust your technique to get it just right.
4 Factors That Change Your Gauge
Understanding what influences your gauge allows you to make precise adjustments and achieve the intended results in your projects. Four key elements determine how many stitches and rows fit into that 4" × 4" square. Knowing how each factor works helps you adjust with confidence. Let’s break down these elements to help you fine-tune your gauge.
Stitch Type
The type of stitch you use directly affects the density and texture of your fabric, which in turn impacts your gauge. For instance, single crochet creates a tightly packed structure with more stitches per inch, while half double crochet is slightly more open, and double crochet produces a looser, airier fabric with fewer stitches per inch.
Patterns always specify the stitch type to use when measuring gauge. For example, you might see a note like, "10 stitches and 10 rows equal 4 inches in single crochet." If you measure your gauge using a different stitch type, your results will be inaccurate, even if you’re using the correct yarn and hook size. A swatch in double crochet will always have fewer stitches per inch compared to single crochet, regardless of other factors.
Choose your stitch type based on the structure you want. Tighter stitches are ideal for sturdy items like bags or amigurumi, while looser stitches work beautifully for garments and shawls that need a bit of drape.
Yarn Weight and Fiber
Yarn weight plays a major role in determining your gauge. Thicker yarns create larger stitches and fewer stitches per inch, while thinner yarns result in smaller, denser stitches. Bulky yarns, on the other hand, produce much larger stitches, even with the same number of wraps around your hook.
The fiber content of the yarn also affects how it behaves. For example, cotton yarn is less elastic than wool, which can influence stitch size and fabric drape. Acrylic yarns stretch differently compared to natural fibers like alpaca. These characteristics impact the look and feel of your finished project, even if you match the stitch count perfectly.
Yarn labels typically provide recommended hook sizes and gauge information, which serve as a helpful starting point. However, when substituting yarns, you’ll need to match not only the weight but also compare the gauge details on the labels. A worsted weight cotton may not behave the same as a worsted weight wool, even with the same hook.
Hook Size and Material
Hook size is one of the easiest factors to adjust when working on your gauge. Larger hooks create looser stitches with fewer stitches per inch, while smaller hooks produce tighter stitches with more stitches per inch. If your gauge is too loose, switch to a smaller hook. If it’s too tight, go up a hook size. Even a single size difference can significantly alter your measurements.
The material of the hook can also subtly affect your gauge. Bamboo hooks create more friction than aluminum ones, which can influence your tension. Some crocheters find bamboo hooks help maintain consistent tension because the yarn grips slightly, while others prefer the smooth glide of metal hooks for faster stitching. Switching hook materials mid-project can affect your gauge, so it’s best to stick with one type throughout.
Your Personal Tension
Personal tension is perhaps the most unpredictable factor in determining gauge. It’s influenced by how you hold the yarn and hook, and it varies from person to person. Even if two crocheters use the same yarn, hook, and pattern, their finished projects may differ in size due to variations in their tension.
Your tension controls "The Golden Loop", the loop closest to the hook during the last step of a stitch. The tightness or looseness of this loop determines the height of your rows and the size of your stitches. Some crocheters naturally work with tight tension, creating dense, smaller stitches, while others have a more relaxed grip that results in looser, more open fabric.
This is why checking your gauge before starting a project is essential - it captures your tension with the specific materials you’re using at that moment.
How to Make and Measure a Gauge Swatch
Understanding gauge is essential, and creating a swatch is the first step to ensuring your project turns out just right. Though it might feel like an extra task, taking a few minutes to make and measure a swatch can save you hours of frustration later. The process is simple: crochet a test square, let it settle, and measure the center carefully. This step is especially important for wearables, where an accurate fit is key.
Making Your Swatch
Start by crocheting a 6" × 6" square using the yarn and hook size recommended in your pattern. This size provides enough space to measure the center without interference from edge stitches, which can often be tighter or looser than the rest.
Follow the stitch pattern outlined in your instructions. For example, if the pattern uses single crochet, your swatch should be entirely single crochet. If it calls for double crochet or a more intricate pattern like clusters or shells, replicate that exact stitch. Matching the stitch type ensures your swatch reflects the true gauge.
Once your swatch is complete, lay it flat on a surface without stretching it. Let it rest for a few minutes in its natural state. This is particularly important for yarns like wool or other natural fibers, which may relax or expand slightly after being worked. Your tension plays a big role here, so always measure the swatch after it has settled.
For smaller projects like hats, you can use a newborn-size hat as your swatch instead of a square. This approach is practical and reduces waste, while still offering enough surface area to measure your gauge accurately.
After your swatch has rested, it’s time to measure and confirm your gauge.
Measuring Your Gauge
To measure your swatch, place a measuring tape in the center of the square. Count how many complete stitches fit horizontally across 4" and how many rows fit vertically over the same span. Measuring the center avoids any distortion caused by edge stitches.
Make sure your swatch lies flat and unstretched during measurement. Pulling or stretching can skew your stitch and row counts, leading to inaccurate results that could affect your entire project. By keeping the swatch in its natural state, you’ll get a true sense of how the fabric will behave.
Take your time counting stitches and rows. If you’re uncertain, recount to double-check your numbers. The stitch gauge tells you how many stitches fit across 4" and determines the width of your project. Row gauge, which measures how many rows fit in 4", affects the length or height. Both are equally important - if your row gauge is off, even a perfectly measured width won’t save a garment from being too short or too long.
Tools You Need
To measure your swatch, you’ll need a measuring tape marked in inches and stitch markers to outline a 4" square for counting. A specialized gauge tool with a 4" × 4" cutout can also be helpful, as it isolates the area you need to measure and eliminates the chance of including edge stitches.
Hooks & Needles offers a range of tools to support accurate gauge measurement:
- 9 Pcs Blue Crochet Hook Set with Soft Handle ($16.97): Includes multiple hook sizes with comfortable grips to help maintain consistent tension.
- LED Crochet Hooks: 11-in-1 Rechargeable ($31.97): Perfect for working in low light, these hooks illuminate your stitches and come in various sizes.
- Digital Row Counter ($9.97): Tracks rows effortlessly, ensuring you crochet enough to reach the 6" × 6" size.
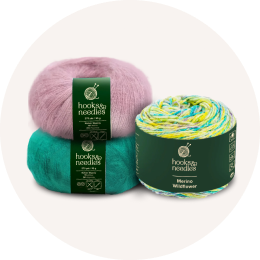
When choosing yarn for your swatch, stick to the exact yarn specified in your pattern. Hooks & Needles offers high-quality options like Bamboo Touch Yarn ($12.97), Merino Wildflower Yarn ($12.97), and Alpine Cotton ($12.97), all ideal for gauge swatching.
It’s also helpful to keep a notebook handy to jot down your measurements. Record details like stitch count, row count, hook size, and yarn type. This creates a useful reference for future projects and helps if you need to adjust hook sizes or compare yarn substitutions.
How to Match Your Gauge to a Pattern
Once you've measured your gauge swatch, it's time to compare your results to the pattern's requirements. This step is essential to ensure your project fits correctly, uses the right amount of yarn, and has the intended look.
Why Matching Gauge Matters
Getting the gauge right is key to achieving the correct size and shape for your project. Patterns are designed around a specific gauge, meaning the number of stitches and rows is calculated based on the designer's tension. For example, if a pattern calls for 80 chains for the front of a sweater, it assumes you're working at the same tension as the designer.
If your gauge is off, the fit of your project will be affected. A sweater meant for a 38-inch bust could end up too small or too large, depending on whether your stitches are tighter or looser than required. Matching the gauge ensures the garment will fit as intended.
Gauge also impacts how much yarn you'll need. Tighter stitches use more yarn because more stitches fit into each inch, while looser stitches use less. This is especially important for larger projects like blankets or sweaters, where running out of yarn mid-project can be a major frustration.
Finally, gauge affects the overall texture and drape of your finished piece. Designers choose a specific gauge to achieve a particular look and feel - whether that's a firm, structured fabric or something softer and more fluid. Matching the gauge ensures your project will have the same qualities.
Fixing Gauge Problems
Your swatch measurements are the starting point for making adjustments. If your gauge doesn't match the pattern, follow these steps to correct it.
First, compare your swatch to the gauge listed in the pattern. You'll usually find this information at the beginning of the pattern, such as "10 stitches and 10 rows equal 4 inches in single crochet." Write down your swatch's stitch and row counts and compare them to the pattern's numbers.
If your gauge is too loose (fewer stitches and rows in 4 inches), try using a smaller hook to tighten your stitches. If your gauge is too tight (more stitches and rows in 4 inches), switch to a larger hook to loosen your work. Adjust one hook size at a time - for instance, if the pattern calls for a 5mm hook and your gauge is too loose, try a 4.5mm hook. After each adjustment, make a new swatch and remeasure it. While this process might feel tedious, it's far better than completing an entire project only to find it doesn't fit.
Row gauge is just as important as stitch gauge. If your stitch gauge matches but your row gauge is off, you may need to refine your technique or adjust your hook size further. The way you finish each stitch can affect the height of your rows, so consistency is key.
If changing hook sizes doesn't solve the issue, double-check that you're using the correct yarn weight specified in the pattern.
Investing in quality tools can make this process easier. For example, the 9 Pcs Blue Crochet Hook Set with Soft Handle ($16.97) includes multiple hook sizes, perfect for testing different options. If you prefer ergonomic tools, the LED Crochet Hooks: 11-in-1 Rechargeable ($31.97) offer various sizes and even illuminate your work, making it easier to see each stitch clearly.
Keep track of your adjustments in a notebook or journal. Record details like the yarn name and weight, hook size, stitch pattern, stitch count per 4 inches, row count per 4 inches, and the date. Over time, this reference can help you identify patterns in your tension, such as whether you work looser with certain yarns or hooks. This insight is especially helpful when starting new projects or substituting yarns.
In some cases, you might not be able to match the pattern's gauge despite your best efforts. If this happens, you can recalculate the pattern to fit your gauge. This involves adjusting stitch counts and shaping, which can be challenging. For most crocheters - especially beginners - it's best to focus on finding the right combination of hook and yarn before attempting more advanced modifications.
When Gauge Matters Most (and When It Doesn't)
Knowing when to focus on gauge and when you can be more flexible can save you time and frustration, letting you enjoy your projects without unnecessary stress.
Projects That Need Exact Gauge
For fitted garments and wearable items, matching the gauge is crucial. These projects - like sweaters, cardigans, hats, and socks - depend on precise sizing for comfort and functionality. Every pattern is designed with specific gauge calculations, ensuring the finished piece fits as intended. If your gauge doesn’t align with the pattern, the results can be disappointing.
Take a sweater pattern, for example, that calls for a gauge of 10 stitches and 10 rows equaling 4 inches in single crochet. If your gauge is looser - say, 9 stitches and 9 rows per 4 inches - the finished sweater could turn out much larger than expected. This issue doesn’t just affect the width; it can also throw off armhole depth, sleeve length, and neckline fit. While blocking might help slightly, it won’t fix significant sizing issues. Often, correcting these mistakes means unraveling and starting over, which is why taking the time to check your gauge upfront is so important.
Even for smaller items like hats, ensuring the correct gauge is essential for a proper fit. A hat that’s too loose or tight can be uncomfortable, and adjusting it after completion is rarely straightforward.
Projects With Flexible Gauge
Not every project requires such precision. For items like blankets, scarves, shawls, dishcloths, and decorative pieces, gauge is more forgiving. A blanket that ends up a bit larger or smaller than planned still serves its purpose, and scarves or shawls can vary in size without losing their functionality or charm.
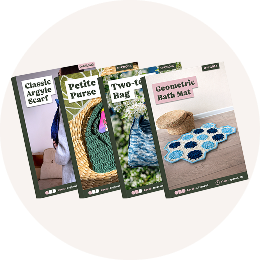
Hooks & Needles offers patterns where gauge flexibility gives you room to experiment. For instance, the Granny Square Tote and Classic Argyle Scarf work beautifully even if your stitch or row count per inch varies slightly. Similarly, accessories like the Petit Purse and Cleo Clutch retain their appeal even if their dimensions deviate from the original pattern.
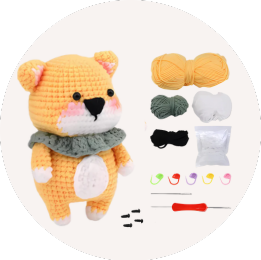
For amigurumi and stuffed animals, such as the Baby Lamb Stuffie, gauge affects size but isn’t as critical. The main concern is fabric density - ensuring the stitches are tight enough to keep the stuffing hidden. A looser gauge will create a larger, softer toy, while a tighter gauge results in a smaller, firmer one. Following the recommended hook size and yarn weight usually achieves the desired texture, but there’s no need to stress over exact gauge matching.
Even with flexible-gauge projects, checking your gauge can help with yarn planning. Knowing your tension allows you to estimate how much yarn you’ll need and predict the final dimensions more accurately. Row gauge, in particular, is helpful for projects with specific row repeats or when you’re working within limited yarn supplies.
Patterns often provide clues about how strict you need to be with gauge. Detailed schematics with specific measurements for width, length, and other dimensions indicate that gauge is critical. On the other hand, instructions like “work until desired length” suggest more flexibility. Reading the pattern’s introduction and gauge section carefully will clarify what’s required.
If you notice a gauge mismatch mid-project, the solution depends on the type of project. For fitted garments, a significant mismatch - more than one stitch or row difference in 4 inches - usually means you’ll need to unravel and adjust your hook size. For minor differences (0.5 stitches or less), you can often continue but should monitor the dimensions carefully. For flexible projects like blankets or scarves, you can proceed without worry, though the final size may differ slightly from the original plan.
To help you achieve the right gauge, tools like the 9 Pcs Blue Crochet Hook Set with Soft Handle or the LED Crochet Hooks: 11-in-1 Rechargeable make adjustments easier and more precise. These tools can enhance your experience, whether you’re working on a detailed garment or a relaxed, flexible project.
Using Gauge to Substitute Yarn
Choosing the right yarn for a project can sometimes feel like a puzzle. Maybe the pattern calls for a yarn that's no longer available, exceeds your budget, or isn't quite what you had in mind. Or perhaps you’ve been eyeing a beautiful yarn from your stash that wasn’t designed for this particular pattern. The good news? With a solid understanding of gauge, you can swap yarns successfully without compromising your project.
Matching Yarn Weight and Gauge
The first step in substituting yarn is to match the weight. Yarn weight - like fingering, sport, worsted, or bulky - determines its thickness and directly affects the gauge. For example, if your pattern specifies worsted weight yarn, stick to another worsted weight option. Substituting with a lighter sport weight yarn will create an entirely different gauge, and simply changing your hook size may not fix the issue.
Check the gauge and hook size on the substitute yarn’s label and compare them to the pattern’s requirements. For instance, if the pattern lists "13 stitches and 10 rows = 4 inches in half double crochet", and your chosen yarn label shows "14 stitches and 18 rows", you’re in the right range - but you’ll still need to test it.
Pay close attention to the stitch type. If the yarn label gives a gauge for single crochet, but the pattern uses half double crochet, you’ll need to account for this difference when making your swatch. Fiber content also matters - acrylic, wool, cotton, and blends all behave differently. Cotton, for example, is heavier and less elastic than wool, which can affect both the drape and the fit of your finished piece.
When comparing yarn labels, ensure the recommended hook sizes are similar. If the original yarn suggests a size G/6 (4mm) hook and the substitute recommends a size I/9 (5.5mm) hook, they may not be interchangeable without significant adjustments. Also, consider yardage: a pattern requiring five skeins of 220 yards each means you’ll need 1,100 yards total. If your substitute yarn comes in 180-yard skeins, plan on purchasing at least seven skeins to have enough. Keep in mind that gauge differences can also impact how much yarn you’ll use - looser stitches typically consume more yarn, while tighter ones may use less.
Once you’ve chosen a substitute yarn, it’s time to test it with a swatch.
Testing Substitute Yarn
Testing your substitute yarn is essential, even if it looks perfect on paper. Differences in fiber blends, brands, and even dye lots can affect how the yarn behaves. Taking the time to create a proper gauge swatch can save you from the disappointment of finishing a project only to find the sizing is way off.
Start with the hook size recommended in your pattern, not the one listed on the yarn label. Crochet a swatch that’s at least 6 inches square, using the same stitch pattern specified in the gauge instructions. Follow any special notes, such as "worked in the round" or "after blocking", as these details can impact your measurements.
Measure your swatch from the center and compare it to the pattern’s required gauge. If your stitches are too loose (fewer stitches and rows than required), switch to a smaller hook. If they’re too tight (more stitches and rows), try a larger hook. You may need to experiment with several hook sizes before finding the right match. Keep notes on the hooks you’ve tried and the resulting gauges for future reference.
For projects where precision is key, such as fitted garments, washing and blocking your swatch is a must - especially if the substitute yarn has a different fiber content. Some fibers stretch or shrink after washing, which can significantly alter your gauge. Wash your swatch as per the substitute yarn’s care instructions, let it dry completely, and measure again. This step helps you predict how your finished project will behave after its first wash.
Even experienced crocheters should swatch when substituting yarn, as personal tension can vary with different materials. What worked perfectly with one yarn might not translate to another.
To make gauge testing easier, consider tools like the 9 Pcs Blue Crochet Hook Set with Soft Handle ($16.97). This set includes multiple hook sizes, allowing you to test different gauges comfortably. For detailed work, the LED Crochet Hooks: 11-in-1 Rechargeable ($31.97) are a great option. These hooks light up your stitches, making it easier to count accurately and spot inconsistencies in your swatch.
Once your swatch matches the pattern’s gauge, you’re ready to dive into your project. Keep your swatch handy as a reference and periodically check your measurements to ensure you’re staying on track. With careful testing and attention to detail, substituting yarn can open up endless opportunities to personalize your projects while still achieving the desired results.
Hooks & Needles Tools and Patterns for Better Gauge
Getting the right gauge doesn’t have to feel like a never-ending battle or require multiple trips to the craft store. With the right tools and kits, the process becomes much simpler. At Hooks & Needles, we’ve carefully curated supplies to take the guesswork out of crafting, so you can focus on what you love - creating.
Monthly Subscription Box
The Hooks & Needles Subscription Box ($34.97/month) is designed to make your crafting journey easier and more enjoyable. Each box is packed with hand-selected European yarns, exclusive patterns, high-quality tools, and step-by-step tutorials - all working together seamlessly. The patterns, yarn, and hooks are pre-matched to achieve the correct gauge, so there’s no need to second-guess your materials.
This subscription is perfect for building your skills over time. It starts with beginner-friendly projects that allow for flexible gauge and gradually introduces more advanced designs where precision is key, such as fitted garments. Each box delivers over $120 in value and even includes surprise gifts to enhance your crafting experience. It’s like having a personal coach and a treasure trove of supplies delivered to your door every month.
Complete Crochet Kits
If you prefer tackling projects one at a time, our Complete Crochet & Knitting Kits are the perfect solution. These kits come with everything you need to achieve accurate gauge from the start. Each kit includes a high-quality hook in the recommended size, the right amount of yarn, a detailed pattern with gauge instructions, and all the necessary tools.
By using pre-matched materials, these kits eliminate common gauge-related mistakes, allowing you to focus on your technique. This is especially important for projects like fitted garments, where precision directly affects the final result. Even beginners can achieve polished, professional-looking pieces thanks to the thoughtfully designed kits. With tools and materials that work in harmony, you’ll feel confident tackling any project.
Quality Hooks and Yarns
The tools you choose play a huge role in maintaining consistent gauge. At Hooks & Needles, we offer a range of professional-grade hooks to support your crafting needs. The 9 Pcs Blue Crochet Hook Set with Soft Handle ($16.97) includes multiple sizes, making it easy to experiment with different gauges. The ergonomic design helps reduce hand fatigue, ensuring consistent tension throughout your project. For added precision, our LED Crochet Hooks improve visibility, making stitch counting a breeze.
Our yarn selection is just as carefully curated. From aluminum and bamboo hooks to natural fiber yarns like cotton and alpaca, every option is chosen with precision in mind. The yarns come in various weights, from fingering to bulky, and include clear labels with recommended hook sizes. This attention to detail ensures you can match components easily and achieve consistent results. Whether you’re working with the soft drape of Italian cotton or the cozy warmth of Portuguese wool, these materials are designed to help you meet your gauge goals effortlessly.
Ready to simplify your crafting process? Check out our Subscription Box and Complete Kits to take the stress out of achieving the perfect gauge. With these tools at your fingertips, you’ll be set up for success with every stitch.
FAQs
How do I know if my crochet tension is affecting my gauge, and how can I fix it?
Your crochet tension has a big impact on achieving the correct gauge for a pattern. To see if your tension is on track, start by making a swatch. Use the same hook size and yarn listed in your pattern, then measure the number of stitches and rows per inch. Compare these numbers to the pattern's gauge.
If your stitches are tighter than the pattern (more stitches per inch), try a larger hook. If they’re looser (fewer stitches per inch), switch to a smaller hook. Keeping your tension steady as you crochet can also make a difference. For extra help, check out the gauge tips specific to your pattern at HooksNeedles.com - this can ensure your project comes out exactly as planned!
How can I substitute yarn while keeping the gauge consistent with the pattern?
When swapping out yarn for a project, it’s crucial to match both the weight and fiber content of the original yarn as closely as you can. Start by checking the yarn label for key details like the weight category (e.g., worsted or bulky) and the recommended hook size. These details will point you toward a comparable alternative.
To keep your project on track, always create a gauge swatch before diving in. Use the hook size suggested in the pattern, and if your stitches turn out too tight or loose, adjust the hook size accordingly. This step is essential to ensure your finished piece aligns with the intended dimensions and fit of the pattern.
Need extra help? Visit HooksNeedles.com for pattern-specific gauge guides and expert tips on finding the best yarn substitutions for your project.
Why is it important to make a gauge swatch before crocheting garments, and how can it help avoid sizing or yarn issues?
Making a gauge swatch is a crucial step when crocheting garments. It ensures your finished piece will match the intended size. Since everyone’s tension varies, creating a swatch allows you to check if your stitches align with the pattern’s measurements. Skipping this step could result in a garment that’s too tight, too loose, or simply doesn’t fit as expected.
A gauge swatch also helps you figure out how much yarn you’ll need. If your stitches are tighter or looser than the pattern specifies, you might run out of yarn or end up with too much leftover. Spending a few extra minutes on this step can save you time and frustration down the line!