Quick Summary
Starting amigurumi can feel like facing a tangled ball of yarn—too many unfamiliar stitches and techniques. By the end, you’ll know exactly how to create smooth magic rings, work in the round confidently, and stuff your soft toys just right for lasting shape and charm. If you’ve ever wondered how to make amigurumi without getting stuck on the basics, this is the post for you.
If you’re here, chances are you’ve seen those adorable crochet soft toys online or in stores and wondered how to make amigurumi yourself. The idea of creating little creatures stitch by stitch is exciting, but the learning curve—especially with starting techniques like the magic ring or working in rounds—can be daunting. It’s easy to get tangled up in confusion about where to begin, how to keep your stitches even, or how to make your toy hold its shape once it’s finished.
Confidence in amigurumi comes from mastering a few foundational skills. Knowing how to start with a tight magic ring, how to maintain consistent tension while crocheting in rounds, and how to stuff and finish your soft toys properly can make all the difference between giving up or falling in love with this craft. You’re not alone in feeling stuck at the beginning, but the good news is these skills are absolutely learnable, and they unlock a whole world of creative possibilities.
By breaking down these core steps and explaining common mistakes, you can quickly build a reliable toolkit that sets you up for success with every amigurumi project. Whether you’re aiming to make gifts, decorate your home, or start a new hobby, understanding these basics will give you the clarity and confidence you need to keep stitching happily.
How to Make Amigurumi: Starting with the Magic Ring
The magic ring is a must-know for amigurumi for beginners because it creates a tight, adjustable starting circle that prevents holes in your soft toy’s base. Unlike chaining a few stitches and joining to form a loop, the magic ring lets you pull the center tight, which keeps your toy looking neat and professional from the very first stitch. This technique is essential for starting projects worked in the round, which is almost all amigurumi.
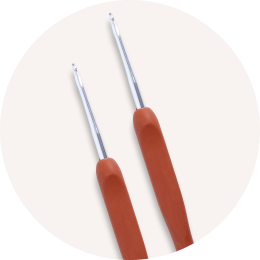
To make a magic ring, wrap your yarn around your fingers to form a loop, then crochet the first few stitches into the loop itself before pulling the tail yarn to close it tightly. It can feel fiddly at first, but with practice, it becomes second nature. A good resource that complements this is our crochet hook size guide, which helps you pick the right hook for your yarn, improving your tension and stitch consistency.
Common mistakes + fixes: New crocheters often leave the magic ring too loose, creating gaps in the center. The fix is to pull the yarn tail firmly after stitching into the ring. Also, watch that you don’t twist the loop before crocheting into it, as that will affect your stitch count and shape.
Working in the Round: Keeping Your Stitches Even
Amigurumi is almost always made by crocheting in rounds rather than rows, which means you work continuously in a spiral or joined rounds. Maintaining even tension and stitch counts in this process is key to shaping your toy correctly. Uneven tension can make your piece lumpy or misshapen, and losing or adding stitches unintentionally will change the pattern’s shape.
Using a stitch marker to mark the start of each round helps you keep track of where you are and avoid accidental increases or decreases. Many beginners struggle with counting rounds, so it’s worth investing in a reliable stitch marker or even a simple piece of contrasting yarn to keep track. This small tool makes a big difference in finishing projects that look smooth and well-formed.
Common mistakes + fixes: Skipping stitch markers or forgetting to count rounds often leads to uneven shapes. Fix this by marking your rounds consistently and counting stitches at the end of each round. Adjust tension by practicing with different yarn weights; our post on the best yarn types for amigurumi can guide your yarn choice for easier control.
Stuffing and Finishing: Shaping Your Crochet Soft Toy
Stuffing is where your amigurumi comes to life. Too little stuffing and your toy will look floppy; too much and the stitches stretch, revealing gaps. The key is to use soft polyester fiberfill and stuff gradually, shaping the toy as you go. Firmly packed stuffing gives your toy structure without distorting the stitches, so take your time adding small amounts and pushing it into corners with a blunt tool like a pencil or chopstick.
Safety eyes are a popular choice for finishing amigurumi, especially for toys meant for display rather than babies. They add character and make your toy look professionally made. When using safety eyes, place them before stuffing and closing the opening. If your amigurumi is for children under three, consider embroidered eyes for safety.
Common mistakes + fixes: Overstuffing can cause your stitches to stretch, while understuffing leaves your toy floppy. Fix this by stuffing little by little and adjusting as you crochet the final rounds closed. For safety eyes, ensure they are firmly attached and consider eye placement carefully before securing.
Pro Tip: Gauge and Tension Matter More Than You Think
Many newcomers overlook gauge and tension, but these are crucial for amigurumi. Gauge refers to how many stitches and rows fit within a specific measurement. If your stitches are too loose, your toy will be floppy or show stuffing. Too tight, and you risk hand strain or a stiff, hard-looking toy. Adjust your hook size or yarn weight to get a comfortable tension that matches your pattern's gauge.
Experimenting with different yarns and hook sizes can help you find your ideal balance. For detailed help, check out our best yarn types for amigurumi post, which pairs yarn weights with hook sizes for the best results. This will save you frustration and improve your finished toy’s look and feel.
Ready to make your next project this good?
Mrs. Quilty delivers a complete quilting project to your door every month — pre-coordinated fabric, tools, pattern, and video guidance included. Over 65,000 quilters have started their journey here. Box 1 is designed for exactly where you are right now.
Use LEARN20 for 20% off your first box

Common Mistakes New Amigurumi Makers Make
One of the most frequent errors is inconsistent stitch tension. This can cause your soft toy to look uneven or have gaps where stuffing peeks through. The best fix is practice combined with choosing the right yarn and hook combo. Our crochet hook size guide is a handy tool for this.
Another common problem is losing track of stitch counts during rounds. This leads to toys that grow or shrink unexpectedly. Using stitch markers and counting regularly prevents this, saving you from undoing hours of work. Finally, stuffing mistakes—too much or too little—can ruin your toy’s shape. Add stuffing gradually and shape as you go for the best results.
Amigurumi Starter Guide: Essential Tools and Supplies
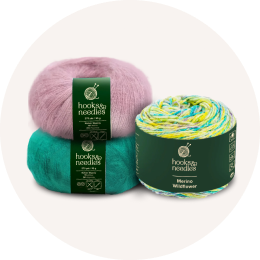
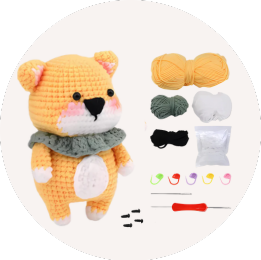
Besides yarn and hooks, you’ll want a few essentials to make your amigurumi journey smoother. A good set of stitch markers, a yarn needle for weaving in ends, stuffing material, and safety eyes or embroidery thread for facial features are must-haves. Choosing quality yarn designed for amigurumi helps maintain shape and durability; check out our recommendations on the best yarn types for amigurumi for ideal options.
Start with worsted weight yarn and a hook size that matches the yarn label to find a comfortable tension. As you improve, you can experiment with thinner yarns and smaller hooks for more detailed toys. But always remember: comfort and consistency are more important than speed or complexity at this stage.
Closing Thoughts
Getting started with amigurumi doesn’t have to feel overwhelming. By focusing on mastering the magic ring, working consistently in the round, and stuffing your toys just right, you lay a foundation for many satisfying projects ahead. Remember, every expert was once a beginner who struggled with these same steps.
Take your time, use the right tools, and don’t hesitate to revisit tutorials or guides when needed. Your confidence will grow with every stitch, and soon you’ll be creating charming crochet soft toys that delight friends and family. If you want to explore more yarn types or need a ready-to-go project, Hooks & Needles has you covered with carefully curated supplies and patterns designed to help you succeed.
Keep stitching, stay curious, and enjoy the process—amigurumi is a craft that rewards patience and creativity, one stitch at a time.
FAQ
What is the magic ring and why is it important in amigurumi?
The magic ring is a crochet technique that creates a tight, adjustable loop to start projects worked in the round. It’s important because it prevents holes at the start of your amigurumi, giving your toy a neat and professional look.
How do I keep my stitches even when working in the round?
Use a stitch marker to mark the beginning of each round and count your stitches regularly. Maintaining consistent tension by choosing the right hook size and yarn weight also helps keep your stitches uniform.
What type of stuffing should I use for amigurumi soft toys?
Polyester fiberfill is the most common stuffing because it’s soft, lightweight, and easy to shape. Stuff your toy gradually and firmly, avoiding overstuffing to keep the stitches from stretching.
Are safety eyes necessary for all amigurumi projects?
Safety eyes add a professional finish and are great for toys not intended for small children. For babies or toddlers, embroidered eyes are safer because they eliminate choking hazards.
Where can I find beginner-friendly amigurumi patterns and supplies?
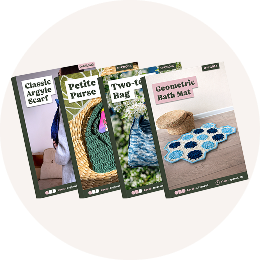
Hooks & Needles offers beginner-friendly patterns, yarn, hooks, and tools through our subscription box and online shop, providing everything you need to start your first amigurumi project with confidence.