Quick Summary
If you’ve ever stared at your knitting needles wondering how to start, you’re not alone. Casting on is the first step that can feel tricky, but by the end of this post, you’ll know two of the easiest beginner cast on methods—including the long tail and thumb cast on—that set you up with the perfect edge and tension. This is exactly what you need if you want to move confidently from your first stitch to your first row of knitting.
Why Casting On Properly Matters More Than You Think
Starting your knitting project with the right cast on method sets the tone for the entire piece. If your edge is too tight or uneven, your fabric won't stretch or lay correctly, leading to frustration even before you get to your first row. That tightness, or uneven tension, can make it difficult to knit the first stitches or to add new rows smoothly. Learning how to cast on knitting with good tension is the foundation of every successful project, whether you’re making a scarf, hat, or blanket.
Many beginners struggle because they jump into knitting without understanding the nuances of casting on. It’s not just about putting stitches on needles; it’s about creating a flexible, stable edge that supports your work. By focusing on two beginner cast on methods—the long tail and the thumb cast on—you’ll gain control over your tension, stitch count, and overall project shape. This clarity helps you finish projects with confidence and fewer mistakes.
Long Tail Cast On: The Go-To Method for Beginners
The long tail cast on is the most popular method for beginners because it creates a neat, stretchy edge that works well for most knitting projects. It uses a tail of yarn that’s about three times the length of your cast on stitches plus a little extra for safety. This might feel a bit tricky at first, but once you get the hang of estimating the length, it becomes second nature. The long tail cast on lets you add stitches quickly and gives your edge a balanced tension that’s neither too tight nor too loose.
To do the long tail cast on, you’ll start by making a slip knot and placing it on your needle. Then, using your thumb and index finger to hold the yarn tails, you create loops by passing the needle under and over the yarn strands in a specific pattern. This creates your foundation row of stitches. While it sounds complicated, watching a video or following a clear long tail cast on tutorial can really help you visualize each step. Remember, your tension here affects the entire project, so keep your fingers relaxed but controlled.
If you want more guidance on getting started with knitting beyond casting on, check out our detailed how to learn to knit post for clear next steps.
Thumb Cast On: A Simple Alternative for Slow, Mindful Stitching
If the long tail cast on feels overwhelming, the thumb cast on is a fantastic alternative. This method is slower but gives you more control and is often easier to learn because it’s less about measuring yarn length and more about creating stitches one at a time with your thumb acting as a makeshift hook. It’s sometimes called the “single cast on” or “thumb loop cast on” and is particularly useful if you want to knit without a long tail or if you’re working on a small project and want a softer edge.
To thumb cast on, you wrap the yarn around your thumb, use your index finger to guide the yarn, and then pull that loop onto your needle. Each stitch is created individually, which can feel meditative and helps you really tune into your tension. The thumb cast on edge is slightly less stretchy than the long tail, so it works well for projects where you want a firmer border. Beginners often appreciate how the method simplifies counting and stitch formation without worrying about tail length.
For a step-by-step walk-through, look for a long tail cast on tutorial that also compares the thumb method so you can decide which fits your style and project best.
Tension Tips for Casting On Knitting
Tension is the secret ingredient for a good cast on. If your stitches are too tight, you won’t be able to knit into the edge easily, and your fabric will bunch up. Too loose, and the edge will look sloppy and uneven. The goal is a gentle, balanced tension where stitches glide smoothly on the needle but don’t slip off.
One way to test your tension is to cast on a few stitches and then try knitting a row. If it’s hard to insert your needle or your stitches look squished, loosen your grip on the yarn. If your stitches look loose and floppy, tighten your hold slightly. Over time, your fingers will learn the right pressure. Also, remember that different yarn weights and needle sizes affect tension, so it’s helpful to practice with the yarn and needles you plan to use for your project.
If you want to understand tension and gauge better, our Hooks & Needles skill path covers these concepts in ways that connect directly with your knitting progress.
Common Mistakes + Fixes When Learning to Cast On
One of the most frequent mistakes is casting on too tightly. This makes knitting the first row a struggle and can cause your project to warp. To fix this, consciously relax your fingers and try holding the yarn a little looser. Another common problem is miscounting stitches, especially when using the long tail cast on if you don’t measure the tail length properly. A practical fix is to cast on fewer stitches than you need, then add more if necessary, or use stitch markers to count as you go.
Sometimes beginners confuse the thumb cast on with the long tail method, leading to inconsistent stitch size. The solution is to practice each method separately until you feel comfortable with their rhythm and yarn handling. Also, if your stitches slide off the needle easily, your cast on might be too loose—try tightening your loops just a bit. These small adjustments make a big difference in the look and feel of your work.
Pro Tip: Use Smooth Yarn and Needles for Easier Casting On
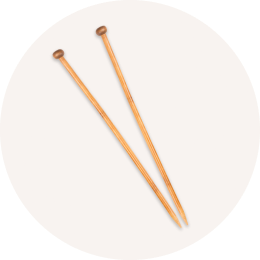
Choosing yarn and needles that glide smoothly can ease the casting on process enormously. A smooth, medium-weight yarn (like a worsted weight) paired with bamboo or wooden needles gives you gentle grip without snagging, which helps control tension better. Avoid super slippery yarns or very stiff fibers until you’re comfortable with your cast on technique. This small adjustment reduces frustration and improves stitch consistency right from the start.
Ready to make your next project this good?
Mrs. Quilty delivers a complete quilting project to your door every month — pre-coordinated fabric, tools, pattern, and video guidance included. Over 65,000 quilters have started their journey here. Box 1 is designed for exactly where you are right now.
Use LEARN20 for 20% off your first box

Getting Comfortable Beyond the Cast On
Once you've nailed how to cast on knitting, the next step is mastering the knit stitch and building your confidence row by row. Keep practicing your tension and stitch formation, and don’t hesitate to rewind and redo your cast on if the edge feels off. It’s part of learning and getting comfortable with your hands, yarn, and needles working together. Remember, every expert knitter started exactly where you are now—with a first cast on that wasn’t perfect but got better with practice.
Whether you choose the long tail or thumb cast on, your foundation will improve your knitting experience. As you continue, you’ll find that understanding tension and stitch consistency is the key to beautiful, wearable projects. If you want a curated learning path that guides you from casting on through your first finished item, check out how Hooks & Needles supports knitters just like you.
Closing Thoughts
Casting on is the essential first step in knitting, and learning the easiest methods—long tail and thumb cast on—gives you control, confidence, and a solid foundation. Paying attention to tension as you cast on ensures your project starts strong and stays on track as you knit. Avoid the common pitfalls of too-tight edges or uneven stitches by practicing deliberately and choosing tools that help you.
Every knitter’s journey begins here, and with patience and the right techniques, casting on becomes a satisfying, even enjoyable part of your process. The clarity you gain from mastering these beginner cast on methods will make your knitting projects smoother, more reliable, and ultimately more fun to finish.
If you’re ready to keep growing your skills with guided projects and supportive tools, Hooks & Needles offers exactly what you need to turn your yarn and needles into beautiful handmade pieces.
FAQ
What is the easiest way for a beginner to cast on knitting?
The long tail cast on is generally the easiest method for beginners because it creates a neat, stretchy edge and uses a simple hand positioning technique that quickly becomes intuitive.
How do I know if my cast on tension is correct?
Your cast on tension is correct if stitches slide smoothly on the needle without slipping off and if you can easily knit into the edge without squeezing or struggling.
Can I use different cast on methods for different projects?
Yes. The long tail cast on is great for stretchy, flexible edges, while the thumb cast on offers a firmer edge. Choose the method based on the yarn, project type, and desired edge look.
How much yarn do I need for the long tail cast on?
A good rule of thumb is to leave a tail about three times the width of your cast on stitches. It’s better to have extra yarn than too little to avoid running out mid-cast on.
Where can I find video tutorials on how to cast on knitting?
Hooks & Needles offers video guidance with its subscription box, and many free tutorials are available online. Look for beginner cast on methods and long tail cast on tutorials to see the techniques in action.