Quick Summary
You spotted a dropped stitch and now the fabric is sitting there like it knows you are nervous. The good news is that you can fix dropped stitch knitting with a crochet hook, a calm hand, and a simple method that keeps the mistake from turning into a bigger run. If you have ever frozen mid-project because one loop slipped off the needle, this is for you.
You do not need to unravel the whole project just because one stitch slipped off the needle. That is the part most knitters want to hear first, especially when the mistake shows up in the middle of a row and the fabric starts stretching in a way that makes everything feel worse than it is. A dropped stitch is usually local damage, not a total disaster. Once you know how to spot the live loop, pick up the right strand, and rebuild the stitch column, the panic drops fast. The trick is to move slowly enough to see what is happening without tugging the yarn into a bigger mess.
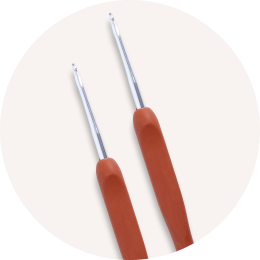
This is also where a crochet hook earns its place in a knitting bag. A hook makes it easier to catch the loose loop and lift it back up through the rows one rung at a time, which is why this method is often the cleanest dropped stitch repair for stockinette, garter, and many simple stitch patterns. I am going to keep the explanation plain: what a dropped stitch is, how to fix it, what not to do, and when a mistake is too tangled to save neatly. If you have been searching for a knitting mistakes fix that does not involve starting over, you are in the right place.
What a dropped stitch actually is
A dropped stitch is exactly what it sounds like: one live loop slips off the needle and starts unraveling downward through the rows below it. In smooth fabrics like stockinette, you will often see a little vertical ladder where the yarn has opened up between stitches. That ladder is not the problem by itself; it is the trail that helps you put the stitch back where it belongs. The important thing is to find the live loop before it runs too far or gets twisted into the surrounding stitches. If you have ever noticed a hole or a loose strand and wondered whether the whole row was ruined, this is usually the moment where a small repair is still possible.
When knitters say “fix dropped stitch knitting,” they usually mean restoring that one stitch so the row structure looks normal again. The repair does not require fancy tools, only a crochet hook that is close in size to your knitting needles or slightly smaller. That size matters because a hook that is too large can stretch the loop and leave a visible bump. A hook that is too tiny can make the yarn hard to catch. If you are still building your toolkit, it helps to understand the basics of how to cast on knitting too, because the same idea applies: you are working with live loops, and tension matters more than force.
What you need before you touch the fabric
You do not need a whole repair kit. A crochet hook, a flat surface, and decent light are enough for most dropped stitch repair jobs. If the yarn is fuzzy, dark, or splitty, a small pointy-tip crochet hook can make the difference between a clean catch and a frustrating chase. It also helps to pause before pulling on anything. Tugging the fabric can tighten the ladder and make the live loop harder to identify. If the stitch is in a colorwork section, lace, or anything with increases and decreases nearby, take a breath and look at the surrounding structure first. The safest fix starts with understanding the shape of the row, not with grabbing the loose yarn immediately.
How to fix dropped stitch knitting with a crochet hook
Start by locating the live loop that slipped off the needle. Usually it sits below the row you are working on, and you will see one or more loose horizontal strands above it. Those strands are the rungs of the ladder. Insert the crochet hook into the live loop from front to back, then catch the lowest rung and pull it through the loop. That recreates the first stitch above the dropped spot. Keep going one rung at a time until you reach the top row. This is the cleanest way to fix dropped stitch knitting because you are rebuilding the stitch in the same direction it originally traveled, instead of twisting it into a shape that does not belong.
If you are repairing stockinette, the motion is usually straightforward: catch the rung, pull it through, and repeat. If you are repairing garter stitch, you may need to pay attention to whether the row should sit knit-side or purl-side facing you. The stitch itself is still the same live loop, but the texture changes how the repaired column should look. That is why many knitters keep a crochet hook nearby even if they do not crochet much. It is one of the simplest knitting mistakes fix tools you can own. If you want more context on the tools themselves, our post on knitting crochet tools beginners should keep nearby explains why a hook, stitch markers, and needle sizes all matter when you are troubleshooting fabric.
How to tell if the stitch is twisted
A repaired stitch should sit neatly on the needle with the front leg and back leg in the correct position. If it looks crossed or tight, you may have twisted the loop while lifting it. Twisted stitches can show up as a little bump or a column that leans the wrong way. The fix is usually simple: slip the stitch off and remount it with the correct orientation before knitting on. This is one of those small details that keeps a repair from becoming obvious later. The goal is not just to get the stitch back on the needle, but to restore it so it blends into the fabric.
When you are unsure, compare the repaired column with the stitches beside it. The texture should match, and the tension should feel similar, not tight like a knot and not loose like a loop waiting to slip again. If the yarn has already run several rows down, you may need to rebuild each rung carefully instead of trying to yank the loop upward all at once. That slower approach sounds fussy, but it prevents laddering from spreading. It is also the difference between a repair that disappears into the fabric and one that keeps catching your eye every time you pick up the project.
Common mistakes and the fixes that actually help
The most common mistake is pulling the loose stitch upward before you identify the ladder rungs. That usually tightens the yarn and makes the repair harder, not easier. Another common problem is using the wrong tool and stretching the loop with a hook that is too large. If the stitch feels floppy after the repair, it may have been overextended. In that case, gently redistribute the tension by tugging the neighboring stitches rather than yanking the repaired one. A third mistake is ignoring the surrounding fabric. If the dropped stitch happened near a decrease, yarn over, or edge stitch, the repair may need a little extra attention because the structure around it is not plain stockinette.
The fix is to slow down and work from the bottom of the ladder upward. If the stitch has dropped more than a few rows, secure the live loop with a locking stitch marker or a spare needle while you inspect the area. That keeps the yarn from slipping farther while you figure out the pattern. If the fabric is curling or the hole looks large, do not assume the repair failed. Many holes tighten up after the surrounding stitches are relaxed and the repaired column is seated properly. The real skill here is not speed. It is recognizing which part of the fabric needs to move and which part needs to stay still.
Pro tip
If you catch a dropped stitch early, place the live loop on a spare needle or a safety pin before you do anything else. That one small move buys you time and prevents the stitch from running farther while you search for the right rung. It is especially useful in dim light, while traveling, or when you are repairing a project made with slippery yarn. You do not need to finish the fix immediately; you just need to keep the stitch from escaping again. That habit alone saves a lot of half-finished rows.
Ready to make your next project this good?
Mrs. Quilty delivers a complete quilting project to your door every month — pre-coordinated fabric, tools, pattern, and video guidance included. Over 65,000 quilters have started their journey here. Box 1 is designed for exactly where you are right now.
Use LEARN20 for 20% off your first box

What to do after the stitch is back in place
Once the stitch is repaired, knit the next stitch carefully and check the tension around the fix. That first stitch after a repair can feel awkward because your hands are still remembering the mistake, but the fabric usually settles once you work a few more stitches. If the repaired column looks slightly loose, you can gently snug the working yarn while keeping the rest of the row relaxed. Do not overcorrect. A repair that is too tight can pull the surrounding fabric inward and make the column stand out more than the original dropped stitch did.
If the hole remains visible, inspect whether you actually restored the correct rung order. In a simple dropped stitch repair, each rung should sit in the same sequence it unraveled. If one was skipped, the column may look distorted even though the live loop is back on the needle. This is where patience pays off. The fabric usually tells you what happened if you look closely enough. A clean repair is not about hiding evidence at all costs; it is about restoring structure so the project can keep going without a weak spot.
Closing Thoughts
A dropped stitch feels dramatic in the moment because it interrupts the rhythm of knitting, but it is usually one of the most fixable mistakes you will face. Once you know how to identify the live loop, rebuild the ladder with a crochet hook, and check the stitch orientation, the whole problem becomes much less mysterious. That matters because confidence in knitting often comes from repair skills as much as from casting on neatly or knitting an even row. The more calmly you handle mistakes, the less likely they are to derail a project.
If this kind of clear, practical help is what you want from your yarn time, keep leaning into tools and patterns that make the process easier to trust. Hooks & Needles is here for that kind of steady support: modern patterns, clear instructions, and the kind of guidance that helps you finish what you start. When a project goes sideways, you do not need drama. You need a method that works and a little reassurance that you are not the first person to fix a stitch this way.
FAQ
Can I fix a dropped stitch without a crochet hook?
Yes, but it is harder to control. A knitting needle, spare dpn, or even a tapestry needle can work in a pinch, though a crochet hook is usually the cleanest tool for the job.
How many rows can a dropped stitch run before it is too late?
There is no exact limit. Even stitches dropped several rows down can often be repaired if the yarn has not tangled or split, though the repair takes more care as the ladder gets longer.
Why does my repaired stitch look loose?
It is usually caused by using a hook that is too large, pulling the loop too hard, or not matching the surrounding tension. Gently adjust the neighboring stitches and recheck the stitch orientation.
Does this method work on every knit stitch pattern?
It works best on simple stitch patterns like stockinette and garter. More complex textures, cables, or lace may need a little extra pattern reading before you rebuild the dropped stitch.
Should I rip back instead of repairing the stitch?
Rip back only if the stitch is badly twisted, the yarn is damaged, or the surrounding pattern is too complex to reconstruct cleanly. For most single dropped stitches, a crochet hook repair is faster and less disruptive.