Quick Summary
If your new yarn keeps showing up as a lump, a gap, or a loose tail, the problem is usually the join method, not your project. By the end here, you’ll know which join works best for crochet, knitting, and color changes, plus how to avoid the bulky spots that make a finished piece look homemade in the wrong way. If you want clean joins without guessing every time you run out of yarn, this is for you.
You can have beautiful stitches, even tension, and the right yarn weight, and still end up staring at a clumsy join that ruins the look. That is frustrating because the join is usually the last thing you want to think about when you are finally in a good rhythm. The good news is that a clean yarn join is less about magic and more about choosing the right method for the fabric you are making. Some joins disappear best inside stitches, some are stronger for colorwork, and some are simply easier when you are working quickly and do not want to stop and fuss.
What matters most is matching the join to the project instead of treating every yarn change the same way. A blanket, a scarf, a sweater sleeve, and a striped dishcloth do not need the same approach. That is why a method like the Russian join can be brilliant in some situations and awkward in others, while a simple overlap may be perfect for a dense crochet fabric. If you have ever wondered why one join looks neat in one project and obvious in another, the answer is usually in the structure of the fabric itself.
There is also a practical side to this. A good join should hold up under wear, washing, and movement, not just look tidy on the day you finish. That means thinking about yarn fiber, stitch pattern, and where the join lands in the row or round. If you have been trying to hide every tail after the fact, it may help to start with a cleaner join at the moment you change yarn. For a deeper yarn selection refresher, the Yarn label guide can help you understand weight, fiber, and twist before you begin.
Join yarn seamlessly by choosing the right method first
The phrase join yarn seamlessly sounds like one perfect trick, but in practice it means using the join that suits your project best. In crochet, the easiest invisible joins often happen by working the new yarn into the next stitch with a tail held along the edge or inside the stitch path. In knitting, a neat join may come from overlapping ends, weaving later, or using a felted join if the fiber allows it. The key idea is that the join should disappear into the fabric, not fight against it.
If you are making a solid-color blanket or scarf, the cleanest option is often a simple overlap worked with care. If you are changing colors in stripes, you may want the join to happen at the edge of the row so the transition looks intentional. If you are working in the round, the join can be tucked where the seam line already lives. That is why project type matters so much. A join that looks invisible in a dense single crochet fabric may stand out in loose lace or stockinette, where every little shift is easier to see.
It helps to think in terms of visibility, strength, and speed. The most invisible method is not always the strongest, and the fastest method is not always the neatest. Most of the time, you are balancing all three. If your fabric has a lot of texture, a slightly bulkier join may vanish better than a delicate one. If your project is worn often, strength matters more than cleverness. Once you start judging the join by the project instead of by habit, the result usually looks more polished right away.
How the Russian join fits into that decision
The Russian join is popular because it creates a secure connection without a knot, and it can be very tidy in smooth yarns. The method works by threading each yarn end back into itself so the two strands lock together. That makes it a strong choice for projects where you want fewer tails to weave in later. It is especially useful when you are changing yarn in a place where a knot would feel bulky or where the back of the work matters almost as much as the front.
That said, the Russian join is not the answer for every yarn. Very thick yarns can create a stiff spot, and fuzzy yarns may hide the join but also make it harder to thread the fibers cleanly. Slippery fibers can work beautifully if the join is done carefully, but they may also slide apart if the yarn is too smooth or too short. In other words, this method is excellent when the yarn structure cooperates. It is not the one to force on every project just because it sounds neat.
A useful rule is to use the Russian join when you want a strong, low-profile join in a yarn that can be threaded back through itself without splitting or bulk. If that sounds too fiddly for the project you are holding, there is no prize for insisting on it. Sometimes a simpler join gives you a better finish, especially when the stitch pattern already hides the color change or tail. Clean results come from matching method to material, not from proving you can do the hardest version every time.
Choose the best join for crochet, knitting, and color changes
For crochet, the best join often depends on whether you are working in rows or rounds. In rows, a new yarn can be introduced at the edge with the tail held along the row so the first few stitches anchor it neatly. In rounds, the join can be hidden at the back of the work or worked into the first stitch of the round, depending on the pattern. If you are making stripes, changing yarn colors crochet is usually cleaner when the switch happens on the last yarn-over of the previous stitch, because that keeps the color break crisp instead of muddy.
Knitting gives you a different set of choices. A spit splice works only for certain animal fibers, so it is not a universal answer, but it can be beautifully invisible when it applies. A simple overlap and knit-through-the-back method can work well in garter or stockinette if the tails are secured later. For ribbing or edges that stretch, you want a join that moves with the fabric rather than one that creates a hard ridge. That is why the same join can look fine in a scarf and awkward in a cuff. The fabric tells you what it can hide.
For color changes, the join should support the design rather than compete with it. If the project is striped, the transition can be part of the look, so a visible but tidy change is acceptable. If the fabric is meant to look solid, you will want the join to disappear into the stitch structure. This is also where gauge and tension matter more than people expect. A tight join in a loose fabric can distort the row, while a loose join in a dense fabric can leave a gap. The stitch pattern, yarn thickness, and tension all need to agree.
Common mistakes and the fixes that actually help
The biggest mistake is pulling the join too tight. When that happens, the fabric puckers, the stitch line tilts, and the join becomes more obvious than the tail ever would have been. The fix is simple but easy to ignore: leave the yarn relaxed while you work the first few stitches, then smooth the fabric flat before deciding whether the join is secure. Another common problem is joining too close to a visible edge or corner, where the extra thickness has nowhere to hide. If that keeps happening, move the join to a less exposed spot in the fabric.
Another issue is using the wrong join for the yarn fiber. Smooth cotton, wool, acrylic, and blends behave differently, and a method that depends on friction will not work the same way on every strand. If your join keeps slipping, do not assume your hands are the problem. Check whether the yarn is too slick, too fuzzy, or too short to hold the method cleanly. The fix may be as simple as choosing a longer tail, changing where the join lands, or switching to a method that relies on stitch structure instead of yarn friction alone.
A final mistake is weaving tails in too early or too aggressively. If you lock everything down before you have checked the fabric from both sides, you can trap a twist or create a lump that shows later. The better habit is to inspect the join before trimming anything, then weave in ends in the direction that follows the stitch path. If your edges are curling or your fabric is stretching oddly, the issue may not be the join at all. It may be a tension problem, and the wavy crochet edges fix can help you sort out whether the fabric is being pulled out of shape.
Ready to make your next project this good?
Mrs. Quilty delivers a complete quilting project to your door every month — pre-coordinated fabric, tools, pattern, and video guidance included. Over 65,000 quilters have started their journey here. Box 1 is designed for exactly where you are right now.
Use LEARN20 for 20% off your first box

Pro tip for cleaner joins every time
If you want a join that disappears more reliably, stop treating the last stitch before the change like an afterthought. That stitch is where the fabric either stays smooth or gets interrupted. In crochet, leave enough slack to keep the stitch shape natural, then tighten only after the new yarn is anchored. In knitting, make sure the first stitch with the new yarn is formed with the same tension as the stitches around it, not with a nervous extra tug. Small tension changes at the join are often what make the eye go straight to the spot you meant to hide.
It also helps to test the method on a swatch before committing to the full project, especially if you are using a new fiber or a stitch pattern with a lot of drape. A swatch tells you whether the join blends in, distorts the fabric, or creates a ridge. That is not wasted time; it is a shortcut to a better finish. You are not trying to prove you can join yarn in the abstract. You are trying to make the finished piece look intentional, comfortable, and well made.
Once you get used to thinking this way, yarn changes stop feeling like a disruption. They become part of the construction, just like turning a heel or shaping a neckline. That shift matters because it takes the stress out of finishing. Instead of hoping the join will hide itself, you choose a method that already fits the fabric. That is the difference between crossing your fingers and knowing what you are doing.
Closing Thoughts
The cleanest way to join yarn seamlessly is not to chase one perfect trick. It is to match the join to the project, the fiber, and the fabric structure you are making. A Russian join can be excellent in the right yarn, a simple overlap can be the right answer in dense crochet, and a color change can look intentional when it is placed where the stitch pattern already supports it. Once you stop expecting every join to behave the same way, the whole process gets easier.
If your joins have been showing, bulking up, or pulling your stitches out of shape, you are probably not doing anything wrong. You just need a method that fits the job. Keep an eye on tension, choose the join based on visibility and strength, and test when the yarn or stitch pattern is unfamiliar. That is the kind of practical habit that makes your finished work look calmer and more polished.
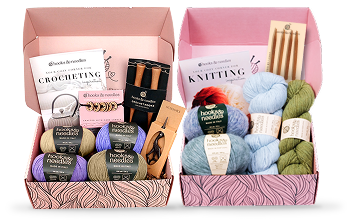
If you like projects that come with clear instructions, smart yarn choices, and a little less guesswork, Hooks & Needles is built for that kind of making. You do not need more noise; you need the right next step.
FAQ
What is the easiest way to join yarn without a knot?
The easiest method is usually the one that fits your fabric best: a simple overlap for dense crochet, a Russian join for smooth yarns, or a neat color change worked into the stitch structure.
Is the Russian join good for every yarn?
No. It works well in many smooth or medium-weight yarns, but very fuzzy, very thick, or very slippery yarns may not hold the join as neatly.
How do I make changing yarn colors crochet look cleaner?
Change colors at the end of a stitch, keep the tension even, and place the join where the pattern hides it best, such as a row edge or less visible side.
Why does my yarn join look bulky?
Bulky joins usually come from too much overlap, too much tightening, or choosing a method that does not suit the yarn weight or stitch pattern.
Should I weave in tails if I use a seamless join?
Sometimes yes. Even a neat join may need a little extra securing, especially in wear-heavy projects, but you often need less weaving than with a standard knot-and-tail method.