Flat and seamed is the easier method, and it is also the one that keeps a crisp rectangle. We knitted the same sleeve three ways in the same DK wool at the same gauge, and only the seamed version measured the same width at the top, middle and base after blocking. The in-the-round version bowed outward by 7 mm at the spine, and the folded version bowed at the base instead.
That does not make the other two wrong. It means the seam is doing structural work that a lot of patterns quietly rely on, and once you know where that work happens you can decide when to skip it. By the end of this you will know which construction suits your book, your yarn and your patience for sewing up, and where each one fails.
The Test: Same Yarn, Same Gauge, Three Constructions
All three sleeves used the same 100% wool DK yarn on 4 mm needles, at a blocked gauge of 22 stitches and 30 rows to 10 cm in stockinette. Gauge is the number of stitches and rows in a measured square — get it wrong and every dimension below shifts with it. Same skein, same knitter, same wet block over a towel.
The book was an ordinary paperback: 198 mm tall, 129 mm wide, 24 mm across the spine. That gives a finished sleeve target of 140 mm wide and 210 mm tall when laid flat, which allows roughly 11 mm of ease across the width for the spine to sit in without straining the fabric.
Each finished sleeve was measured flat in three places — across the opening, across the midpoint, and across the base.
- Flat seamed: two rectangles, 140 mm each, seamed on three sides with mattress stitch.
- In the round: 62 stitches cast on and joined, worked as a tube, base grafted closed.
- Folded: one rectangle 420 mm long, folded in half, seamed up both sides only.
Why the Flat Seamed Knit Book Sleeve Held Its Shape
A mattress stitch seam is a stiff vertical column of yarn running the full height of the sleeve, and that column resists the fabric's natural urge to curl and spread. Measured across the opening, midpoint and base, the seamed sample came in at 140, 140 and 141 mm. That 1 mm is measurement noise, not a bow.
The second thing the seam does is fix the fold line. There is no fold — there are two edges joined, so the side of the sleeve is a defined line rather than a crease that blocking has to persuade into place.
What goes wrong here
Nearly every seamed sleeve that comes out crooked fails in one of three ways, and all three are fixable before you sew a single stitch.
- Pulling the seam too tight. Mattress stitch should match row gauge, not exceed it. A seam pulled 10% shorter than the piece makes one side 20 mm shorter than the other and the opening tilts.
- Sewing into inconsistent columns. Pick up the bar between the first and second stitch every time. Drift into the second column on one side and the front panel sits offset from the back.
- Ragged selvedges. Slip the first stitch of every row purlwise. It halves the number of edge loops and gives the needle an obvious path.
Where the In-the-Round Version Bows at the Spine
The in-the-round sample measured 140 mm at the opening, 147 mm at the midpoint and 144 mm at the base. That 7 mm of extra width sits exactly where the book's spine sits, and it reads as a soft pillow shape rather than a sleeve. Pinning it flat and wet blocking brought it to 142 mm; two days of use put it back to 146 mm.
A tube has no reason to be flat. You are asking a cylinder to hold two creases that nothing in the fabric supports, and wool has enough memory to argue with you. Stockinette worked in the round is also all knit stitches, so there is no purl row anywhere to anchor a fold.
Does purling the two fold columns fix the bow?
Largely, yes. Working a single purl stitch up each side edge creates a deliberate fold line and cut the bow in our sample from 7 mm to about 2 mm. The trade-off is a visible ridge running down both sides, which some people like and some find looks unfinished.
What goes wrong here
Laddering is the other complaint, and it is a needle problem rather than a tension problem. Where you swap from one double-pointed needle to the next, the gap between stitches widens into a visible vertical line right down the sleeve. Working the first two stitches of each needle firmly, or moving the changeover point every few rounds, closes it. If joining in the round is where you usually come unstuck, our walkthrough of knitting in the round without tangling your needles covers the join and the ladders together.
The second mistake is arithmetic. Casting on 62 stitches for a 140 mm flat width assumes the tube flattens perfectly, and it does not — plan a seamless knit book cover 4 to 6 stitches narrower than the flat maths suggests.
The Folded Construction: One Rectangle, Two Seams
Folding moves the problem to the base. You knit one long rectangle, fold it in half, and seam the two sides — no base seam, no grafting, and half the sewing of the flat seamed version. Our folded sample measured 140 mm at the opening, 140 mm at the midpoint and 145 mm at the base, where the unsupported fold spread out.
For a paperback that 5 mm barely registers, because the base is the part that sits against a bag. For a knitted book pouch you plan to stand on a shelf, it shows.

From the Hooks & Needles shop
Freedom Phone Pouch Knitting Pattern
Same fold-and-seam construction at a smaller scale, which makes it a quick way to test the method before committing 420 mm of knitting to a book sleeve.
The folded version has one real advantage over both others: the fabric runs continuously from front to back, so a stripe, a cable or a colourwork motif carries over the base without a break. If you are matching a pattern across the two faces, folding is the only construction that does it automatically.
What Changes the Answer: Yarn, Stitch and Book
Garter stitch narrows the gap between all three methods considerably. It lies flat by nature, has no curl to fight, and holds a crease far better than stockinette does — our reasoning for choosing garter over stockinette for a book sleeve goes into the fabric behaviour in detail. In garter, an in-the-round sleeve bows by 2 to 3 mm instead of 7 mm.
Fibre matters just as much. Superwash wool relaxes and grows; non-superwash wool holds a blocked shape; cotton holds nothing at all and will find its own line within a week whatever you do to it.
Book thickness is the last variable. Under about 30 mm of spine, a flat sleeve with ease works. Past 40 mm — most hardbacks — you want an actual gusset, and that is a different construction question rather than a seaming one. Working from a written knit book sleeve pattern with stated finished measurements saves a lot of guesswork here; if abbreviations are the sticking point, our guide to reading a knitting pattern without drowning in abbreviations unpacks the shorthand.
At the Edges: Chunky Yarn, Hardbacks and Bag Wear
Chunky yarn flips the recommendation. A mattress stitch seam in aran or chunky adds 6 to 8 mm of bulk down each side, which on a 140 mm sleeve is genuinely uncomfortable to slide a book past. Above about 10 wpi, work a book sleeve in the round and live with the softer shape.
Hardbacks over 40 mm thick need a gusset panel, and a gusset is easiest to add to a flat seamed sleeve because you are already sewing. Knit a strip the width of the spine plus 6 mm and seam it between the two panels on three sides.
For a sleeve that lives in a tote bag, seams are an advantage rather than a compromise. The seam is the thickest, most abrasion-resistant part of the whole piece, and it sits exactly where the sleeve rubs against everything else in the bag.
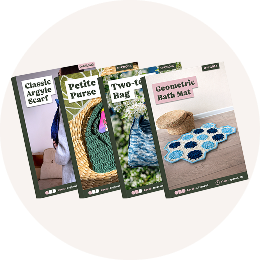
Small knitted pieces are the fastest way to test all of this without a big commitment — a bundle like  10 Knitting Patterns (Sent Via Email) gives you several seamed and seamless shapes to compare in a weekend each.
Ready to start a project you will actually finish?
Hooks & Needles delivers a complete yarn project to your door every month — coordinated yarn, the right hooks or needles, and a pattern written to be followed rather than decoded. Pause or cancel whenever you like.
Use LEARN20 for 20% off your first box

The Short Version
Seam it flat if you want a rectangle that stays a rectangle. Fold it if you want continuous pattern across the base and can accept 5 mm of spread down there. Work it in the round if your yarn is chunky, your stitch is garter, or you would genuinely rather never sew a seam again.
What to remember
- Flat seamed measured 140/140/141 mm; in the round measured 140/147/144 mm on identical yarn and gauge.
- The bow in a tube appears at the midpoint, exactly where the book spine sits.
- A purl stitch up each side of an in-the-round sleeve cuts the bow from 7 mm to roughly 2 mm.
- Cast on 4 to 6 stitches fewer in the round than flat maths suggests, because tubes do not flatten perfectly.
- Match mattress stitch to row gauge — a seam pulled 10% short tilts the whole opening.
- Garter and non-superwash wool forgive seamless construction; cotton does not.
FAQ
How many stitches do I cast on for a standard paperback sleeve?
At 22 stitches to 10 cm in DK, a 140 mm flat panel is 31 stitches, so 62 for a front and back pair worked flat. For a tube, cast on 56 to 58 rather than 62 — the fold at each side eats width that flat maths does not account for.
Do I have to block a knitted book sleeve?
Yes, and measure your gauge after blocking rather than before, because wool typically relaxes 3 to 5% when wet. Pin the finished sleeve to its target dimensions on a towel, let it dry fully, and only then judge whether it fits your book.
Can I convert an in-the-round pattern to flat and seamed?
You can. Split the round count in half, add one stitch to each side of both panels for the seam allowance, and alternate knit and purl rows to keep producing stockinette. Row counts stay the same; only the stitch count and the direction of work change.