Short answer
- A petal curls back because its outer edge holds more stitches than its centre line — short rows and paired edge increases create that difference, not wire.
- Mercerised cotton in a 4-ply weight, worked one or two hook sizes below the label, takes a crease and keeps it; acrylic springs flat again within days.
- A line of surface slip stitches up the middle of a finished petal shortens the midline and forces the edges to roll backwards.
- After a month on a sunny kitchen windowsill, uncoated floral wire had worked through two petal edges and left rust freckles on cream cotton. The stiffened petals held their angle with no marking.
Open almost any crochet lily pattern and you hit the same instruction around row six: cut a length of 26-gauge floral wire, thread it through the back loops of the petal edge, twist the ends and hide them in the base. The wire, you are told, is what makes the petal arch backwards the way a real lily does. Without it you get six flat cotton tongues and a sad bouquet.
That is not what is happening. Wire does not create a curve — it only holds a shape the fabric was already willing to make, and it holds it badly, because the ends migrate and untreated wire rusts against damp cotton. Get the stitch count right along the petal edge and the recurve builds itself. You will still want wire somewhere, but not in the petals.
Wire Is Not What Makes a Petal Recurve
A petal arches backwards for the same reason a ruffle ruffles: the outer edge is physically longer than the line running down the middle. Crochet a flat oval with even rows and you get a flat oval. No amount of wire changes that — bend it and the fabric fights back, then slowly straightens over a week or two while the wire ends work their way toward the surface.
Build the length difference into the stitches instead and the petal has nowhere to go but backwards. There are three ways to do it, and a good lily uses two of them together.
- Short rows near the tip — extra rows worked only across the outer stitches, so the tip end grows taller than the base.
- Paired increases on the edging round — two single crochet in each of the last few stitches along both sides of the tip, which frills the rim outward.
- A shortened midline — a row of surface slip stitches down the centre, pulled snug, which drags the middle in while the edges stay long.
The most common mistake here is spreading increases evenly along both sides of every row. That gives you a wider petal, not a curling one. All the extra fabric has to be concentrated in the last third, near the tip, or the petal just gets fatter and stays flat.
Wire never shapes a petal — it only remembers a shape you already crocheted, and it forgets it slowly and rustily.
Short Rows Do the Work Wire Gets Credit For
A short row is a row you deliberately do not finish. You work partway across, turn, and come back, which means the section you keep working stacks up taller than the stitches you left alone. In crochet this is simple — you turn, chain one, and carry on. Knitters need a wrap-and-turn or German short row to close the gap; crocheters do not, because the fabric is already interlocking.
A single petal to test the shaping
Work this one petal before you commit to six. It is a shaping test, not a full bouquet pattern, and it takes about ten minutes in 4-ply cotton with a 2.5 mm hook.
- Ch 14. Row 1: sc in 2nd ch from hook and in each ch across — 13 sts. Turn.
- Rows 2–3: ch 1, sc across. Turn.
- Row 4 (short row): ch 1, sc in first 9 sts, turn — leave 4 unworked.
- Row 5: ch 1, sc in 9 sts. Turn.
- Row 6 (short row): ch 1, sc in first 5 sts, turn.
- Row 7: ch 1, sc in 5 sts. Fasten off after the edging round below.
- Edging: sc all around the petal, working 2 sc in each of the last 4 sts approaching the tip on both sides. Sl st to join.
Lay it down and it should already lift at the tip. Now the part that surprises people: with a smaller hook, work a line of surface slip stitches from the base of the petal up to the tip along the centre, keeping the yarn slightly tighter than feels comfortable. That single line shortens the midline by a few millimetres and the petal snaps into a recurve you can see across the room.
Two things go wrong at this stage. Turning chains worked too loosely leave a visible ladder where each short row stops, so keep them tight and, if a gap still shows, work the first sc of the return row into the same stitch you turned in. If the numbers in step 4 read as ambiguous to you, that is worth fixing generally — reading crochet instructions without second-guessing what a row is asking makes short-row shaping far less nerve-racking.
Mercerised Cotton Holds a Curve Acrylic Never Will
Fibre choice decides whether your shaping survives the first week. Mercerised cotton has been treated under tension with caustic soda, which straightens the fibres and leaves them smooth, strong and almost inelastic. Inelastic is the point — it takes a crease and stays creased. Acrylic is heat-set flat during manufacture and it wants to go back there, which is why acrylic lilies relax into pancakes.
Wool has genuine memory but the wrong kind. It springs, blooms and softens, so a wool petal holds a gentle arch and then relaxes into a droop as the fibres relax. Save it for leaves.
Gauge matters more than hook size
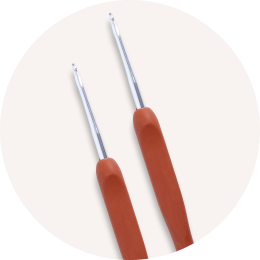
Gauge — the number of stitches and rows you get across a measured square — is what makes the fabric stiff enough to keep its shape. Drop one or two hook sizes below the yarn label's suggestion until the fabric feels like card rather than cloth. If your gauge stays loose even with the smaller hook, the culprit may be the tool rather than your hands, and how a hook's throat shape changes your gauge explains why two hooks stamped the same size behave differently.
Go too far the other way and the whole petal curls into a taco instead of arching at the tip. If that happens, your stitches are fine — you have simply added edge increases on top of a fabric already too dense to lie open. Remove the second round of paired increases and work the surface slip-stitch line more gently.
Building a Crochet Lily Bouquet Without Wire in the Petals
Stems are a separate problem and this is where honesty matters: a crochet flower bouquet that stands upright in a vase does need something rigid inside the stem. The difference is that stem wire is fully enclosed, never touches a petal edge, and never has to bend repeatedly. Crochet a snug tube of sc over a bamboo skewer or a paper-wrapped stem, or slide a chenille stem inside a chain-and-sc cord.
Density is what stops a stem kinking at the join, the same structural logic behind crocheting a floor pouf that holds its shape — the fabric has to be tight enough to resist rather than drape.

From the Hooks & Needles shop
Small Bouquet of Crochet flowers
If you want to see how finished stems, leaves and flower heads sit together before committing to six lilies of your own, this small bouquet gives you a worked example to handle and copy.
Joining petals so they stay put
Sew, do not glue. Glue soaks into cotton, dries hard and shiny, and locks the petal base at whatever angle it happened to be in — usually the wrong one. Thread a tapestry needle with the same cotton and stitch each petal base to the stem tip individually, checking the angle as you go.
Three lilies at staggered heights reads as a bouquet. Six reads as a shop display. Add two or three plain leaves and stop there.
A Crochet Calla Lily Needs the Opposite Shaping
The calla is one petal, not six, and it curls in the other direction. The spathe wraps into a cone at the base and only the top third flares backwards, so spreading increases along the whole edge gives you a wavy funnel that looks like a bad tulip.
Work the spathe as a wide teardrop and confine every increase to the final four or five rows of the long outer edge. Roll the base into its cone before you sew, hold it with a few whip stitches on the underside, and let the flared lip find its own angle. A crochet calla lily wants blocking over something round — a rolled tea towel or a wine bottle neck — rather than the flat pinning you would use for a leaf.
Wire vs Stiffened Cotton After a Month on the Windowsill
Six lilies went onto a south-facing kitchen windowsill in identical cream mercerised cotton — three with 26-gauge uncoated floral wire threaded through the petal edging, three shaped with short rows and painted with diluted PVA. Same room, same light, same steam from the kettle twice a day.
The wired petals held their angle perfectly and failed in other ways. By week two, wire ends had worked through the edging on two petals and caught on a tea towel. By week four, faint rust freckles had bled into the cotton around those exit points, which does not come out.
The stiffened petals kept their recurve for the full month with no marking and no snagging. They lost a little crispness by week three in the steamiest corner and firmed up again when they dried. The one genuine drawback: a stiffened petal cannot be reshaped once it has set, so block it before you paint it, not after.
Longevity is the real argument for skipping wire, and it is the same argument for making cotton flowers at all — like this  Crochet Sunflower Bouquet: Blooms That Never Wilt, they should still look right next spring.
Ready to start a project you will actually finish?
Hooks & Needles delivers a complete yarn project to your door every month — coordinated yarn, the right hooks or needles, and a pattern written to be followed rather than decoded. Pause or cancel whenever you like.
Use LEARN20 for 20% off your first box

Before You Start
Make one petal, not six. Ten minutes of testing tells you whether your cotton and your tension produce a curve at all, and it is far easier to adjust the increase count on a single petal than to unpick a finished flower.
Buy the stiffener before you start the bouquet. Half-finished lilies waiting three days for a delivery is how projects end up in a bag under the sofa, and this is a genuinely quick make once the shaping is settled — a good entry point if you are looking at crochet flowers for beginners rather than a full garment.
What to remember
- Concentrate every increase in the top third of the petal — even increases make it wider, not curved.
- Add a surface slip-stitch line up the petal centre and pull it slightly tight; it is the fastest way to force a recurve.
- Choose mercerised cotton and drop one or two hook sizes until the fabric feels like card.
- Keep wire inside enclosed stems only, and block each petal fully before you paint on any stiffener.
FAQ
My petals still flop even with the short rows. What did I miss?
Almost always gauge or fibre. Squeeze the petal: if it feels like fabric rather than card, go down a hook size and rework one petal to compare. If you are using acrylic or a soft cotton blend, no amount of shaping will hold, because both fibres are engineered to return to flat.
Do I have to use stiffener at all?
Not if you work small and tight. A lily made in size 10 crochet thread on a 1.5 mm hook is stiff enough on its own, because the stitch density does the job. At 4-ply weight and above, the petal is heavy enough that stiffener is what keeps the tip from sagging over a few weeks.
Can I wash them, or is the shape gone for good?
You can hand wash them in cool water, which will dissolve most of the stiffener. Press the water out in a towel, reshape each petal over something rounded, let it dry fully, then repaint with diluted PVA. The shaping stitches are permanent, so the curve comes back; only the stiffness needs redoing.
Does any of this transfer to a knitted lily?
The principle does, the execution does not. Knitted short rows need a wrap-and-turn or a German short row to avoid a hole, and knitted fabric is stretchier, so you need a much tighter gauge to hold a curve. A surface slip-stitch line is a crochet technique, though you can achieve something similar in knitting with a line of tight duplicate stitch.