Short answer
- Work the first petal round into the back loops only of the final centre round — this leaves the front loops free as a second, separate anchor.
- Add a second petal round into those free front loops, staggered between the first petals, so the bloom builds a dome instead of a disc.
- A full-size head needs an internal stem core: 18 or 20 gauge floral wire folded double inside a crocheted tube, not stuffing.
- Sew the head onto the wire loop at the top of the stem, not onto the surface stitches, or the join becomes a hinge within a day.
Nearly every sunflower pattern tells you to work the petal round into the back loops only of the last round of the centre, and nearly everyone does it without asking why. That instruction is not about texture. It is doing two jobs at once: it tilts the petals forward off the face of the disc, and it leaves the front loops of that round completely untouched and available as a second attachment point later.
Once you see that, the flat-sunflower problem solves itself. A single round of petals worked into whole stitches has nowhere to go but sideways, which is why so many finished blooms look like a coaster with fringe. Layer a second round into the loops you deliberately left free, offset it, and the flower gains depth without a single extra shaping stitch — then the only thing left to fix is the stem underneath it.
What That Second Petal Round Is Actually Doing
Back loop only (BLO) means inserting your hook under just the rear strand of the V on top of each stitch. The front strand stays free, sitting on the surface of the disc like a spare ridge of loops. When you build a petal on the back loop, the base of that petal is anchored behind the plane of the disc, so the petal naturally angles away from you rather than lying against it.
That free front loop is the whole trick. It is a complete, usable round of stitch tops sitting one layer forward of your first petal round, and you can work a second set of petals directly into it.
Offset them. Place each back petal between two front petals rather than behind one, so the second layer fills the gaps instead of hiding. The two rounds now push against each other, and the bloom lifts into a shallow dome because the petals physically cannot occupy the same plane.
A crochet sunflower reads as real the moment its petals stop agreeing on which plane they live in.
Skip the second round and the flower does not collapse — it just stays flat, and no amount of blocking or steaming will change that, because there is nothing structurally holding the petals forward. The same principle drives the way crochet lily petals hold their curl without wire: shape comes from where the stitches are anchored, not from what you force them into afterwards.
How Petal Shape Controls Lift, Not Just Outline
Petal length comes from stitch height, and stitch height determines how far the petal can cantilever before gravity wins. A petal built as chain 2, half double, two doubles, half double, slip stitch has a tall middle and short ends, which makes it flex at the tip and stay rigid at the base — exactly what you want for a sunflower.
The tension mistake that flattens everything
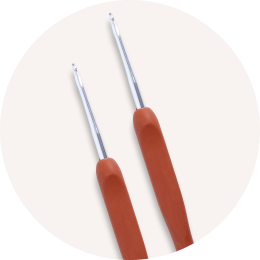
Loose petals droop no matter how many rounds you layer. Sunflower petals work best a half hook size down from the yarn band recommendation, because you want stiff fabric with no gaps for light to pass through. Worsted weight cotton at a 4.0 mm hook instead of a 4.5 mm makes a visible difference in how the petal holds its angle.
The second common error is turning at the end of each petal. Do not. Work each petal out and back in one continuous pass, then slip stitch into the next base stitch — turning introduces a fold line that makes the petal hinge instead of curve.
Should the back petal round be a different colour?
A shade or two darker on the back layer creates depth the eye reads as shadow, which is why it works so well on sunflowers. If you only have one gold, keep both rounds identical and let the offset do the work — the layering still shows. Avoid a lighter back layer; it flattens the effect completely.
If double crochet is the stitch you are least sure of, this short demonstration shows the yarn over and the three-loop pull-through at the speed you actually need to see it.
DOUBLE CROCHET FOR COMPLETE BEGINNERS
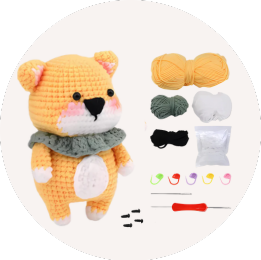
Cotton behaves better than acrylic here, and a matched kit removes the guesswork entirely — the  Sunflower Crochet Kit pairs the yarn and hook size to the petal structure rather than leaving you to test it.
Why the Head Outweighs Everything Below It
A finished sunflower head is heavier than beginners expect. The centre disc is usually a stuffed or double-layered circle in brown, ringed by two petal rounds in cotton — that is a lot of fabric concentrated at the top of a thin tube, and it behaves like a weight on the end of a lever.
The failure is never the stem breaking. It is the joint bending. Every gram in the head multiplies across the length of the stem, so a 30 cm stem applies far more bending force at the join than a 15 cm one, even though nothing about the head changed.
This is also the point where the magic ring at the centre of the disc matters. A loose ring gapes under the weight of the surrounding fabric, and the whole face of the flower puckers; the fixes in this walkthrough of common magic ring mistakes and how to correct them apply directly.
Want the yarn, the pattern and the guidance in one box?
Each Hooks & Needles box arrives with the yarn, the tools and an exclusive pattern already matched to each other, plus instructions that do not skip the step you are stuck on. Nothing to source, nothing to substitute.
Use LEARN20 for 20% off your first box

Building a Stem That Holds a Sunflower Crochet Bouquet Upright
Crochet the stem as a tube first, then insert the core — do not try to work around the wire. A tube of six single crochet worked in a continuous spiral in green cotton gives you a narrow, firm channel roughly 8 mm across, which is exactly the diameter that reads as a stem and fits doubled 18 gauge wire.
Fold the wire in half before inserting it. The fold becomes a rounded loop at the top, which you sew the head to, and it removes the sharp cut end that would otherwise work its way through the fabric over a few months. Leave 2 cm of the folded loop standing proud of the tube.
| What matters | 18–20 gauge floral wire | Pipe cleaner | Wooden skewer |
|---|---|---|---|
| Holds a full-size head | Yes, doubled | Only for small blooms | Yes |
| Can be posed or curved | Yes, holds the bend | Yes, but springs back | No |
| Risk of poking through | Low once folded | None | High at the cut end |
| Fits a 6 st tube | Yes | Yes | Tight, distorts stitches |
Skipping the core produces a stem that looks right flat on a table and folds in half the moment it stands in a vase. There is no in-between stage where it partly works.
Joining the Head Without Creating a Hinge
Sew through the wire loop, not around the stem's top round. Thread your yarn needle through the fabric at the back of the flower head, pass it through the wire loop itself, and back out — repeat six or eight times around, so the head is mechanically attached to the core rather than to the crochet covering it.
Anchor at four compass points before filling in. Stitching all in one spot creates a pivot, and the head will nod forward within a week even with a wired stem underneath it.
Leaves go on last, sewn to the stem 5 to 8 cm below the head. Give each leaf its own short length of wire if you want it to hold a lift; a flat sewn-on leaf will simply hang.
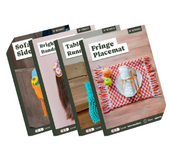
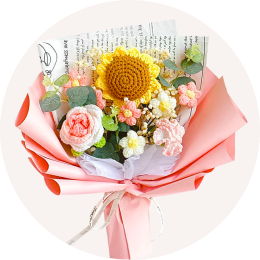
For a finished reference of how depth and stem support read together in a full arrangement, the  Crochet Sunflower Bouquet: Blooms That Never Wilt shows what the layered head looks like once it is standing at its full height.
Where To Go From Here
Make one sunflower before committing to a bunch. Work the two petal rounds, wire the stem, join it properly, then stand it in a jar overnight and look at it the next morning — that single test tells you whether your tension and your wire gauge are right, and it costs one evening.
Three stems is the smallest number that looks deliberate in a vase. Vary the stem lengths by 4 to 5 cm so the heads sit at different heights, which is the same logic as the offset petals applied at bouquet scale. A  Small Bouquet of Crochet flowers is a good scale to start at if a full arrangement feels like a lot.
If you are building toward a gift rather than a shelf piece, the decisions about bunch size and presentation are covered in this breakdown of how to choose between a full bunch, a posy or a single stem.
FAQ
Can I get away with one round of petals?
Yes, for a small flower under about 6 cm across — a single round holds its own shape at that size. On a full-size bloom it will lie flat, because there is nothing anchored behind the petals to push them forward. If you only want one round, work it into the back loops and keep the flower small.
Do I really need floral wire, or will stuffing do?
Stuffing resists compression, not bending, so a stuffed stem still folds under a heavy head. For a flower lying on a table or pinned to a bag, stuffing is fine. For anything standing in a vase, the wire is doing the only job that matters.
Is this a knitting technique too?
The wired stem transfers directly — a knitted i-cord takes a folded wire core exactly the same way. The two-round offset petal method does not, because it relies on back loop only crochet leaving a free front loop, which has no direct knitting equivalent. Knitted sunflowers usually layer separate petal pieces sewn on instead.
Can I skip blocking the petals?
Yes, if your tension is firm and you used cotton. Blocking helps a curled or uneven petal edge settle, but it will not create lift that the construction did not build in. Steam lightly and never press, or you will flatten the dome you just worked to create.