Short answer
- Three tools carry almost every first project: one hook in the size printed on your yarn band, a blunt yarn needle, and sharp scissors.
- The eleven other hooks in the case are not spares — each one belongs to a different yarn weight you have not used yet.
- Stitch markers stay in the packet until you work in the round. The day you start amigurumi they become the most-used item you own.
- The gauge square and tape measure are the only pieces that stop a hat coming out two sizes too big, so learn them before you make anything that has to fit.
Open the zip case and look at it honestly. There is a hook-shaped dent in the foam where your 5mm lives, a pair of scissors that have been used, a yarn needle rolling loose in the bottom — and then twenty-odd pieces still sitting in their factory positions, plastic film intact on the little grey squares. The row counter has never been clicked. The stitch markers are in the sealed bag they arrived in.
Nothing has gone wrong. A starter kit is not a list of things you need on day one; it is a list of things you might need across the first two years, sold in one box because that is cheaper than selling them separately. Work backwards through the untouched pieces and each one tells you which project it was waiting for.
Most of That Case Is for the Project After This One
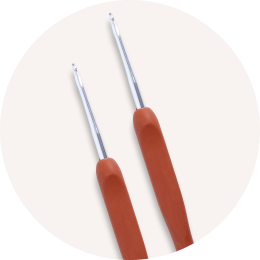
Twelve hooks look like generosity, and they are, but they are not twelve chances to get the same job right. Hook size is matched to yarn thickness, not to preference. A 2.25mm hook exists for sock and thread work. A 5mm exists for worsted-weight yarn, which is what nearly every beginner project uses. You have been reaching for one hook because you have been using one yarn.
Yarn bands carry a recommended hook size and a weight category number from 0 (lace) to 7 (jumbo). Match the band, and the pile of unused hooks suddenly makes sense — they are your future chunky blanket, your future baby cardigan, your future cotton dishcloth.
To confirm this is what is happening, pull out the yarn band from your current project and read the hook symbol. If it says 5mm or H-8 and that is the hook wearing a groove in the foam, the rest of the set is not surplus. It is inventory. If you are unsure how a pattern's stated hook relates to your yarn, the walkthrough on choosing crochet hook size for any project covers the decision properly.
This is also why a set like the  29-Piece Crocheting Kit: Perfect for Beginners earns its place over time rather than in week one — you are buying the range, not the count.
The Crochet Stuff You Actually Reach For Every Session
Three items do the work. One hook in the right size, one yarn needle, one pair of small sharp scissors. Everything else in the case supports a specific situation that has not arrived yet.
A yarn needle — sometimes called a tapestry needle or darning needle — has a blunt tip and an eye wide enough to thread worsted yarn. You use it for weaving in ends, which means threading the tail of your yarn back through several stitches so it cannot unravel. Every project ends with this step, so the needle gets used every single time.
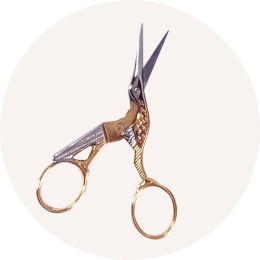
Scissors matter more than they sound. Snapping acrylic yarn leaves a frayed, stretched end that will not thread and will not sit flat once woven in.
Rule this out in one session: crochet for an hour and note what you physically pick up. If it is those three things, your kit is not wrong and neither are you.
Here is a one-minute demonstration of a double crochet worked at normal speed, so you can see exactly how the hook, the yarn tension and the yarn over relate to each other.
DOUBLE CROCHET FOR COMPLETE BEGINNERS
The Stitch Markers Are Waiting for You to Work in the Round
Flat crochet does not need markers. You turn at the end of every row, the edge is visible, and you can count what you did. Working in the round changes that overnight, because most crochet in the round spirals continuously with no seam line to show where one round ended and the next began.
A stitch marker is a small clip you place in the first stitch of a round. When you come back around to it, that round is finished. Without one, you lose or gain a stitch per round and the piece slowly warps.
Can I just use a scrap of contrasting yarn instead?
Yes, and plenty of experienced crocheters do — loop a short length of contrasting yarn through the stitch and drag it up as you go. Clip markers are faster to move and will not felt into the fabric, but a scrap works perfectly well while you decide whether you like working in the round.
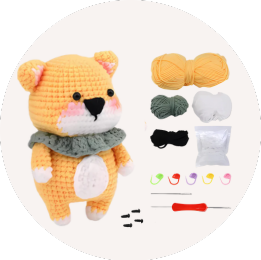
Amigurumi is where this becomes non-negotiable. A crocheted toy is dozens of rounds of single crochet with shaping increases and decreases at specific counts, and one miscounted round shows up as a lopsided head. A pattern like the  Baby Lamb Stuffie Crochet Pattern will have you moving a marker on every round.
Confirm it this way: look at your finished pieces. If they are all rectangles worked flat, the markers were never going to come out. Open the packet the day you start your first round.
Want the yarn, the pattern and the guidance in one box?
Each Hooks & Needles box arrives with the yarn, the tools and an exclusive pattern already matched to each other, plus instructions that do not skip the step you are stuck on. Nothing to source, nothing to substitute.
Use LEARN20 for 20% off your first box

The Gauge Square Is the Piece You Will Regret Ignoring
That small plastic square with a window cut out of it measures gauge — the number of stitches and rows that fit into a 10cm (4in) section of your fabric. Pattern designers write every instruction assuming you match their gauge. If yours is off by even one stitch per 10cm, a 100-stitch project finishes several centimetres away from the stated size.
Scarves and blankets forgive this. Hats, mittens, socks and garments do not.
What goes wrong here: the classic mistake is skipping the swatch on a first hat because it feels like a delay before the real project. Two evenings later the hat fits a watermelon. The second mistake is measuring a swatch while it is still stretched across your hand — always lay it flat and unstretched on a table before you count.
- Crochet a square. Use the hook, yarn and stitch the pattern specifies, and make it at least 15cm across so you can measure the middle rather than the edges.
- Lay it flat. Do not pin, stretch or hold it. Fabric under tension lies to you.
- Count across 10cm. Count stitches horizontally and rows vertically, including half stitches.
- Change hook, not tension. Too many stitches means go up a hook size; too few means go down. Trying to consciously crochet looser rarely holds for a whole project.
Gauge also shifts with yarn thickness, which is why substituting a yarn changes everything downstream — the rundown of what yarn weight categories actually mean is worth reading before your first sized project. To rule this cause in or out, check whether anything you have made needed to fit a body. If not, the gauge square was never going to come out.
Five Pieces That Genuinely Pad the Count
Everything above eventually gets used. These five often do not, and knowing which is which is the difference between a useful kit and a drawer of plastic.
- The row counter. Most crocheters count rows from the fabric itself, or tally on paper. The clicker gets forgotten mid-row and then lies to you.
- Duplicate tiny hooks. Some kits pack several sizes under 2.5mm. Thread crochet is a specialist pursuit and most people never take it up.
- Plastic yarn needles. The eye is often too small for worsted yarn and the tip too flexible to push through tight stitches. A metal one costs very little and works.
- Hook grips. Silicone sleeves that slide off mid-stitch and change the hook's balance. Useful for some hands, ignored by most.
- The starter yarn. Kits pad value with thin, splitty acrylic in a dark colour, which is the hardest possible thing to learn on.
What goes wrong here: shoppers compare kits by piece count, and manufacturers respond by adding cheap pieces. A 60-piece kit is not twice as useful as a 30-piece one; it usually has thirty more stitch markers. The breakdown of what belongs in an all-in-one crochet kit is a better shopping filter than a number on a box.
Confirm this one by weight of use, not opinion. Anything still sealed after five finished projects is padding for you specifically, whatever the label promised.
The Fix: Buy for the Project, Not for the Piece Count
Start from what you want to make and work backwards to the tools. A worsted-weight scarf needs a 5mm hook, a yarn needle and scissors. A pair of amigurumi animals adds stitch markers, stuffing and a smaller hook to keep the fabric tight enough that stuffing does not show through.
One good hook beats a set of twelve mediocre ones. If you crochet for more than an hour at a stretch, put the money into a single ergonomic hook in the size you actually use — a comfortable grip does more for your hands and your tension than any other purchase at this stage.
Then stop treating the untouched pieces as clutter. They are staged supplies, and they only need to be somewhere you can find them in a year, which is what something like a  Collapsible Storage Crate (10" x 7") for Knitting / Crocheting Supplies is for.
Keep the three working tools within arm's reach of where you sit. Everything else can live in the crate until a pattern asks for it.
Closing Thoughts
An untouched kit is not evidence that you bought badly or that you are behind. It is evidence that you have made flat things with worsted yarn, which is exactly what a first month of crochet should look like.
The honest list stays short for a long time: a hook, a yarn needle, scissors. Markers arrive with your first round. The gauge square arrives with your first hat. The remaining hooks arrive one at a time, each with the yarn that needed it.
Buy the project first and let the tools follow it. That order keeps your case light and your finished pile growing.
FAQ
I finished a hat without checking gauge and it is too big. Can I save it?
If it is only slightly loose, a row of single crochet worked snugly around the brim will pull it in and often that is enough. If it is more than a couple of centimetres out, frog it — unravel it back — and remake it with a hook one size smaller. The yarn is undamaged and you will work faster the second time because you already know the pattern.
My amigurumi is lopsided because I lost count of the rounds. Do I have to start again?
Not necessarily. Count where the increases actually landed, and if the error is in the last few rounds, pull back just those and rework them with a stitch marker in place. If the shaping went wrong near the beginning, restarting that piece is quicker than trying to compensate later — and the other finished pieces are still usable.
I used the cheap kit yarn for a whole blanket and the fabric feels stiff and splitty. Is it fixable?
Wash and block it first. Soak it, squeeze out the water without wringing, then lay it flat to dry pinned to shape — acrylic softens noticeably and the stitches even out. It will never behave like a good wool or cotton, but a blocked blanket is a real blanket, and the next one will be better because you now know what to buy.